


Still downloading templates?
There’s an easier way. Try a free AI Agent in ClickUp that actually does the work for you—set up in minutes, save hours every week.
Sorry, there were no results found for “”
Sorry, there were no results found for “”
Sorry, there were no results found for “”

If your workspace runs on Microsoft Excel, it’s convenient to collect data using a form in Excel. For example, you won’t need to pull data from other sources and align it manually in rows and columns. Everything is already organized.
You can then use built-in Excel functions to analyze form data, perform calculations, or generate reports, alongside other functions like filtering, sorting, or conditional formatting to keep your data actionable.
Not sure how to create a form in Excel? Here’s a quick step-by-step guide to help you do this quickly and efficiently.
We’ll also go over its limitations and suggest an alternative tool to create forms easily.
An Excel form is Microsoft Excel’s built-in data entry dialog that lets you add one record at a time through labeled fields. Those fields automatically pull from your worksheet’s column headers, so submissions land neatly in rows without manual alignment. It’s a lightweight way to standardize inputs inside an existing workbook—especially for quick, structured data capture.
An Excel form is a data collection tool from Microsoft Excel. It’s basically a dialog box containing fields for a single record.
In each record, you can enter up to 32 fields, and your Excel worksheet column headers become the form field names.
Upgrade from Excel and create advanced forms with intelligent automation and data-capturing features with ClickUp’s Form Template.
People use Excel forms to make quick data entries in the right fields without scrolling up and down the whole worksheet. No more entering data into an Excel spreadsheet row after row after row after row…
An Excel data entry form lets you:
Sounds quite helpful. So let’s learn how to create an Excel form.
Excel lets you build a simple data-entry form using a table + the hidden Form tool, with optional validation and sharing for quick collection.
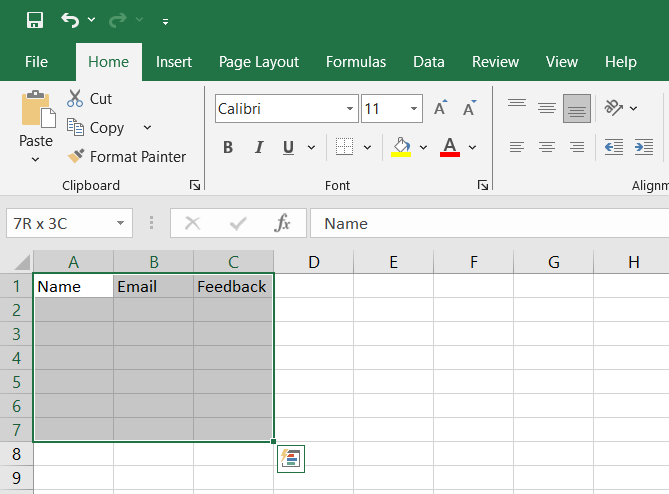
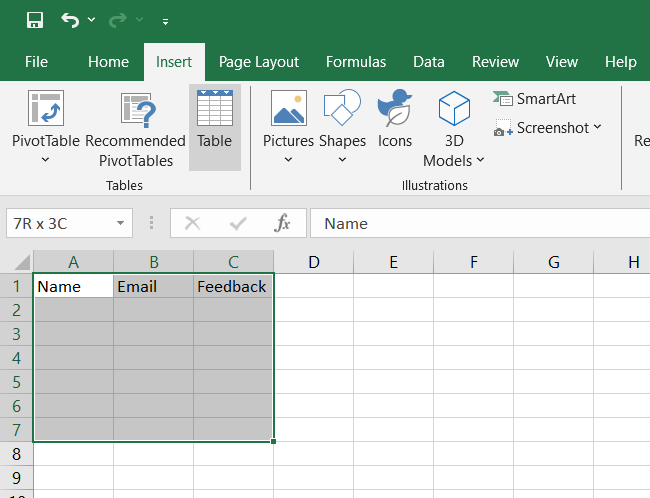
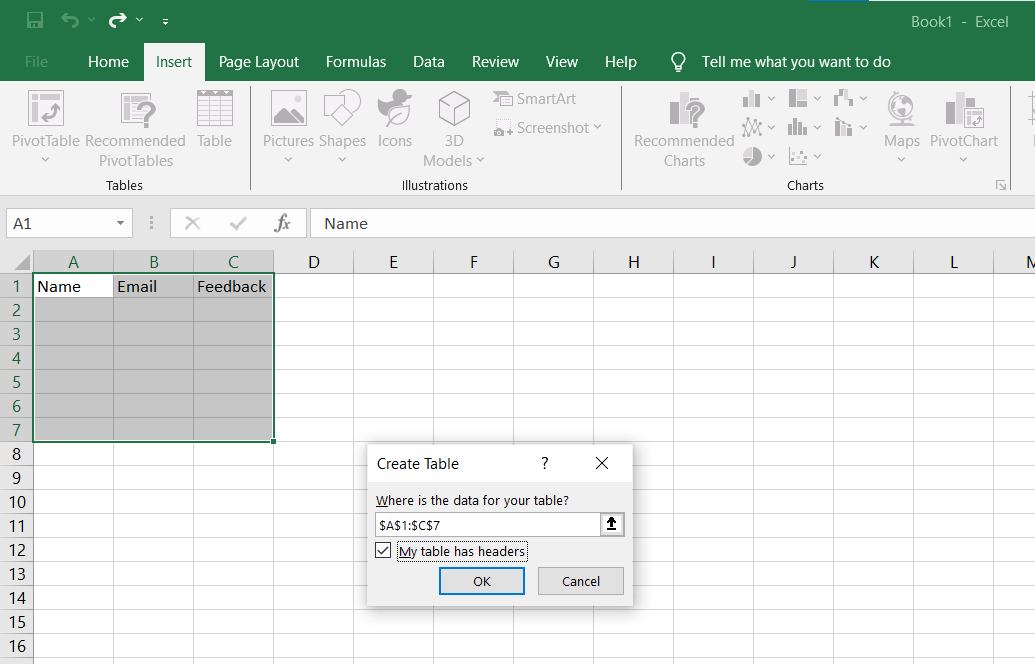
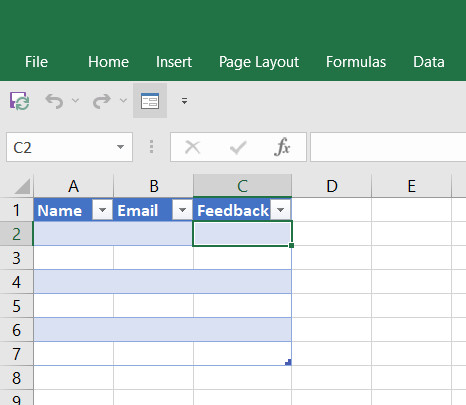
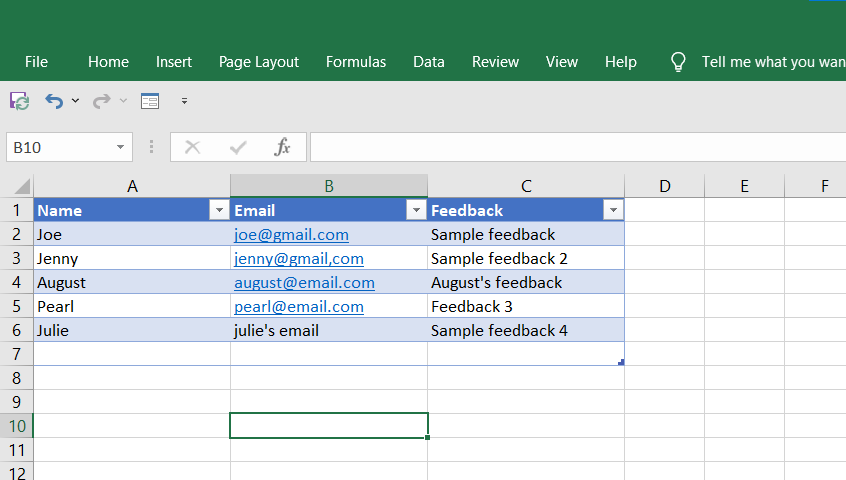
Step 1: Create a table → Add headers (Name, Email, etc.) → Insert → Table → check My table has headers → OK.
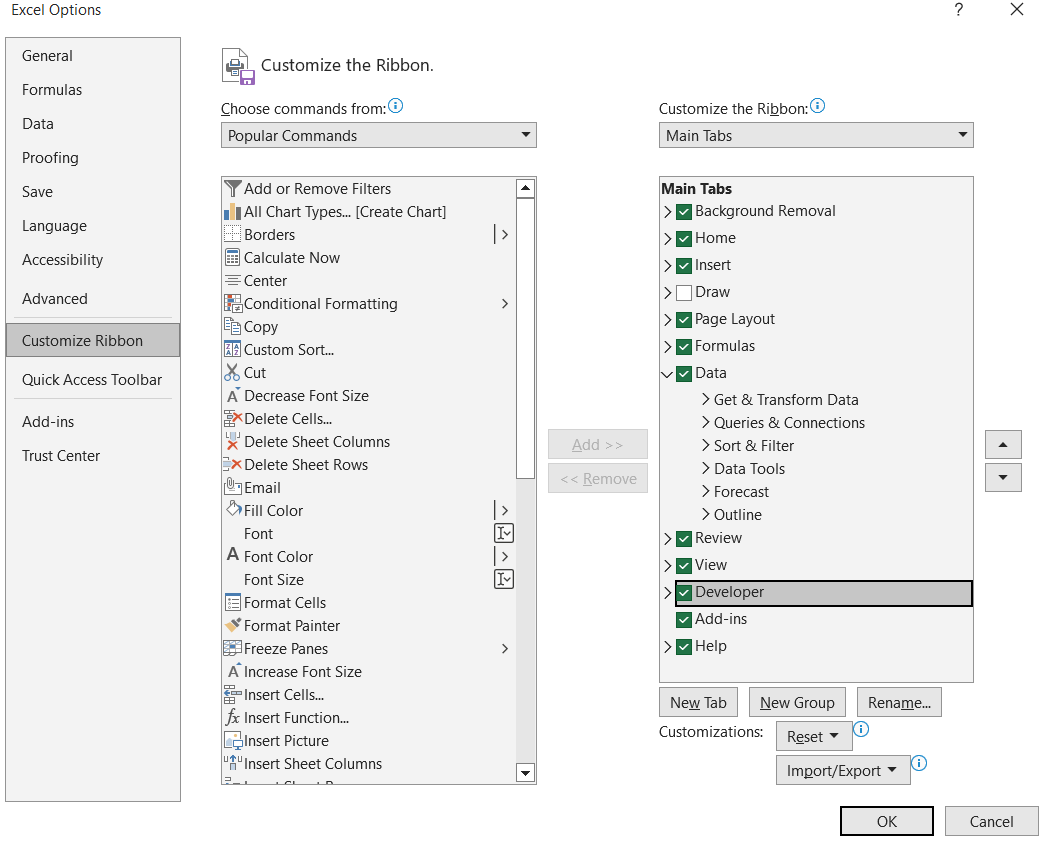
Step 2: Enable the Form button → Right-click ribbon → Customize Ribbon → All Commands → select Form → Add (or add to Quick Access Toolbar).
Step 3: Enter data in Form view → Click any table cell → click Form → fill fields → New to add each record → Close when done.
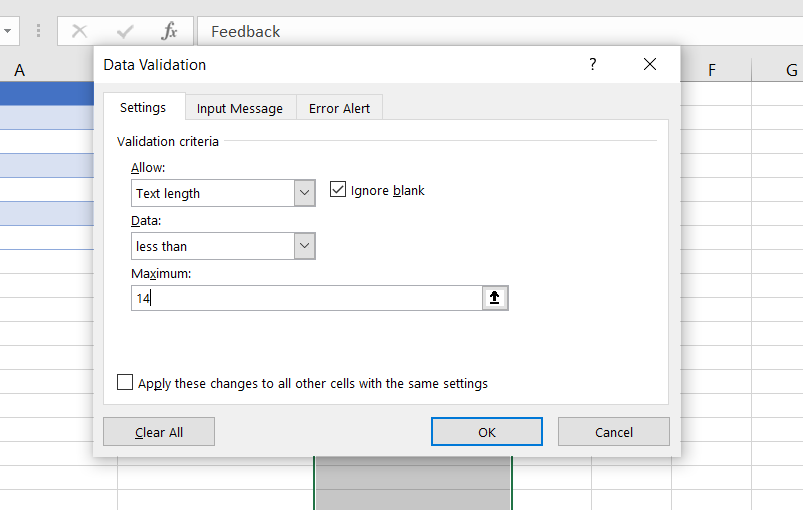
Step 4: Add Data Validation (optional) → Select target cells → Data → Data Validation → set rules (e.g., text length, list) → OK.
Step 5: Share for data collection → Use Share link/email, or send the file so others can fill rows via the form/table.
Follow this step-by-step guide to build your own Excel form using built-in features.
Before you start, set up your Excel worksheet column headers—these will become your form fields and help structure your data entry form accurately. After that, you need to:
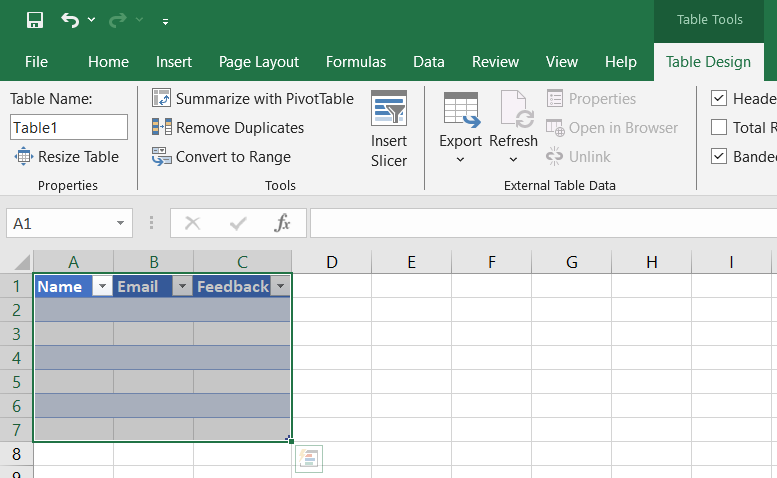
You’ve now structured your sheet for a basic data entry form. Adjust the column width as needed to accommodate expected responses.
✨ Fun Fact: Excel has been around since 1985. It originally launched for the Apple Macintosh before coming to Windows in 1987—making it older than many of the people using it today.
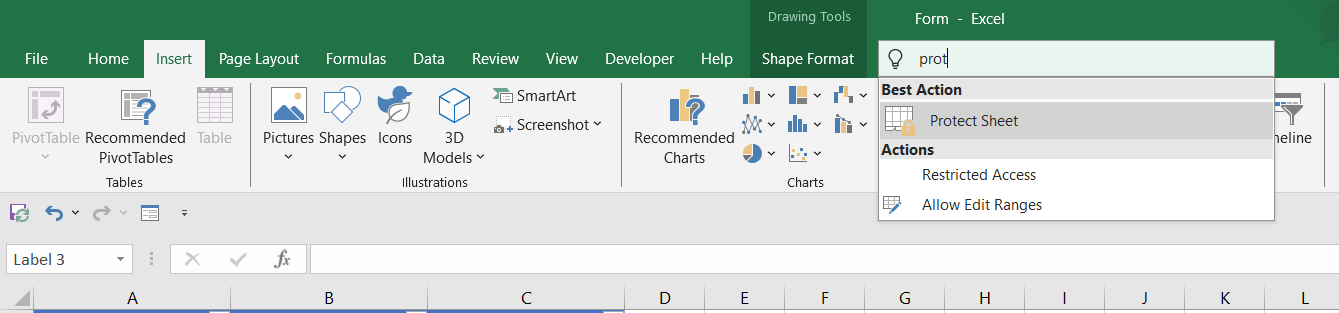
By default, Excel hides the form icon. To create a form, you need to manually enable it (this is a crucial step in the process):
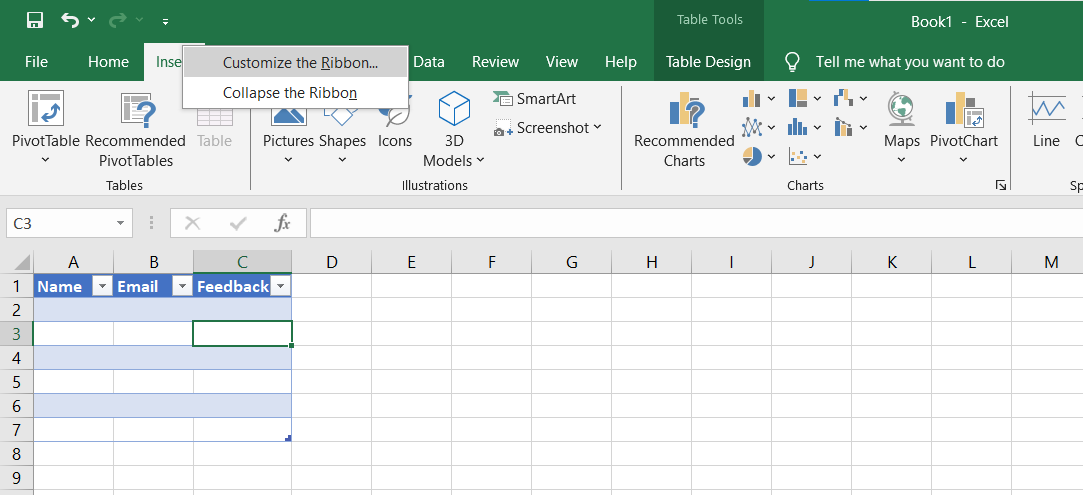
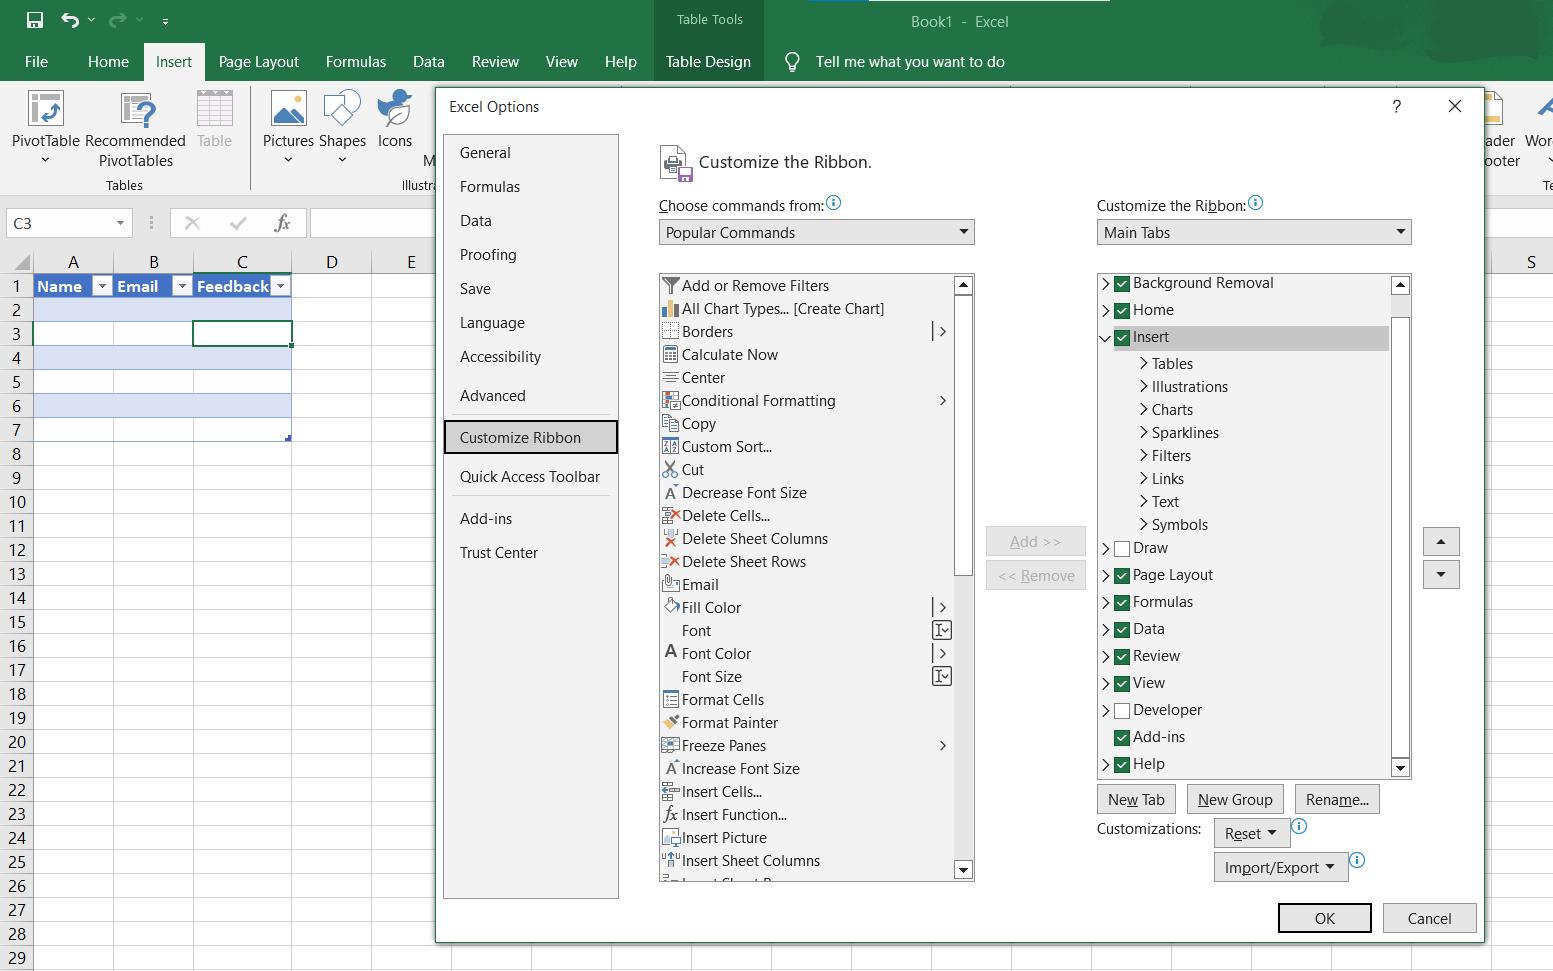
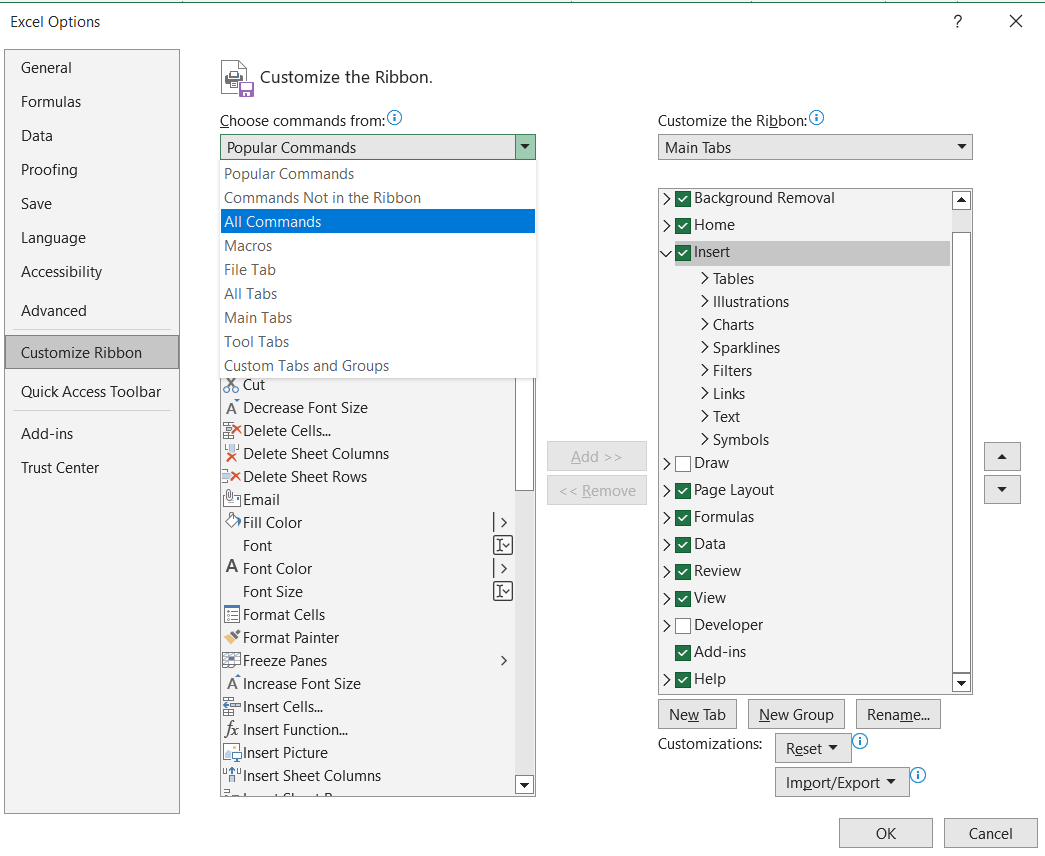

For easier access, add the Form button to the Quick Access Toolbar by selecting it under All Commands > click Add > hit Enter for your selected cells
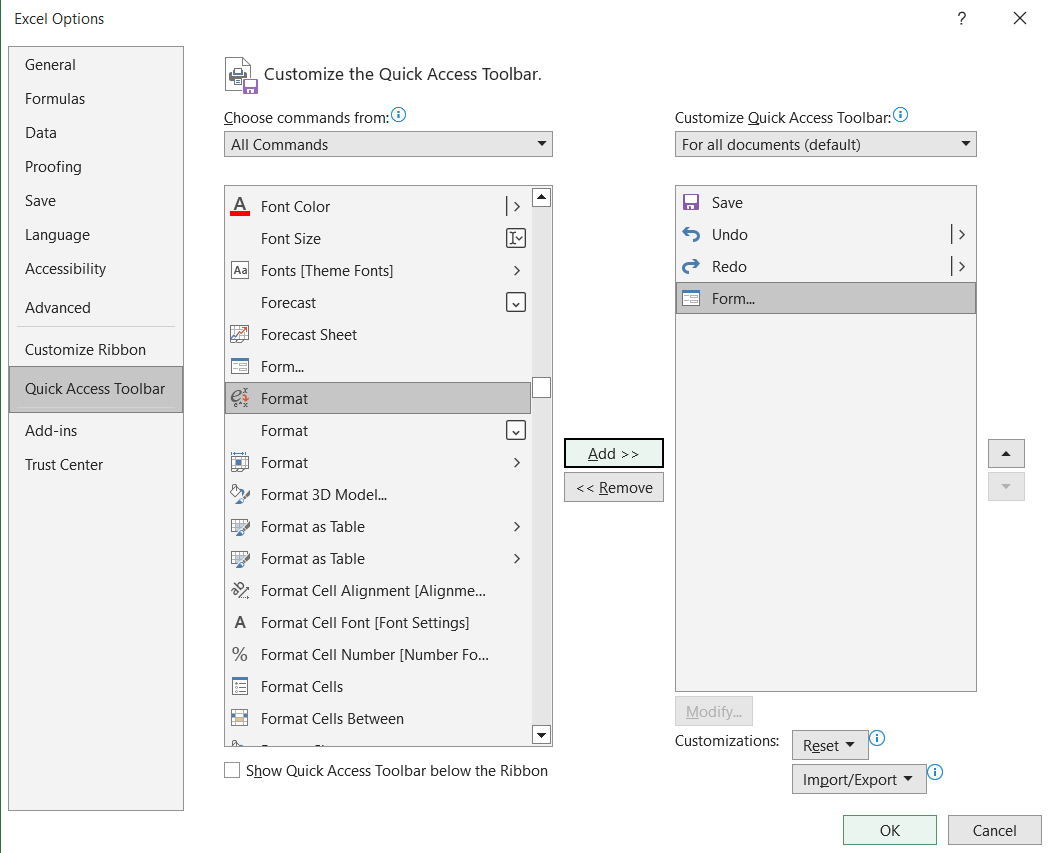
Now you’ll see the form icon in the top ribbon.
📖 Also Read: Free Feedback Form Templates—that utilize the criteria button for better data sorting
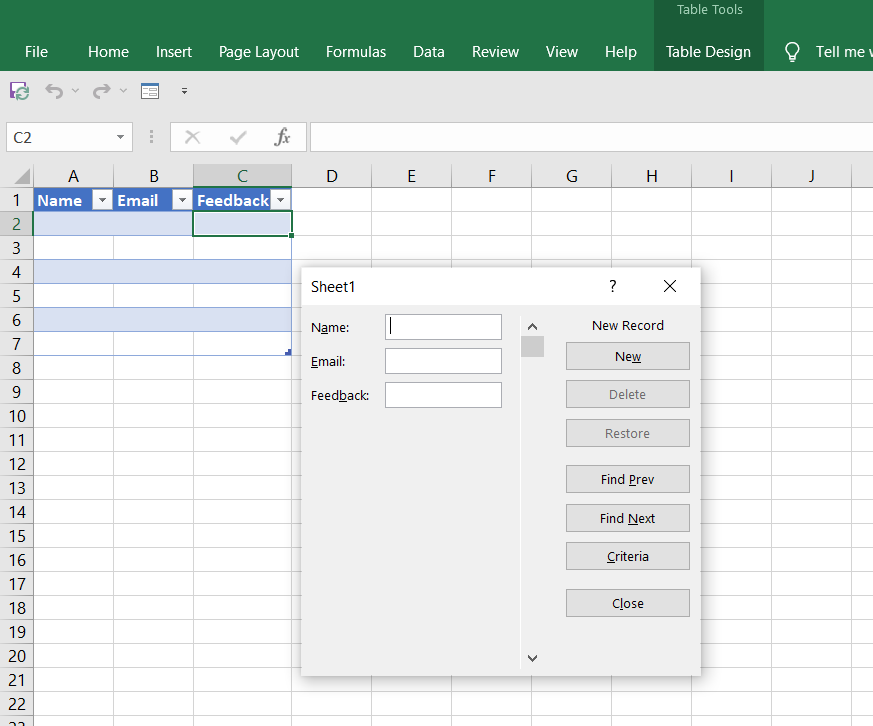
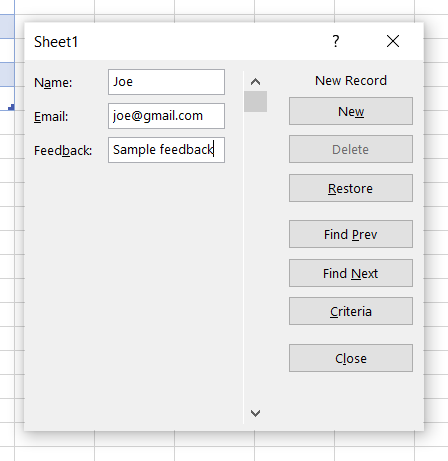
This user-friendly interface ensures faster and cleaner data entry.
💡 Pro Tip: Struggling to get honest employee feedback or track engagement trends? Employee Survey Software Tools for HR Teams breaks down the best tools to gather insights, boost satisfaction, and make data-driven culture decisions.
To avoid input errors and maintain clean data:

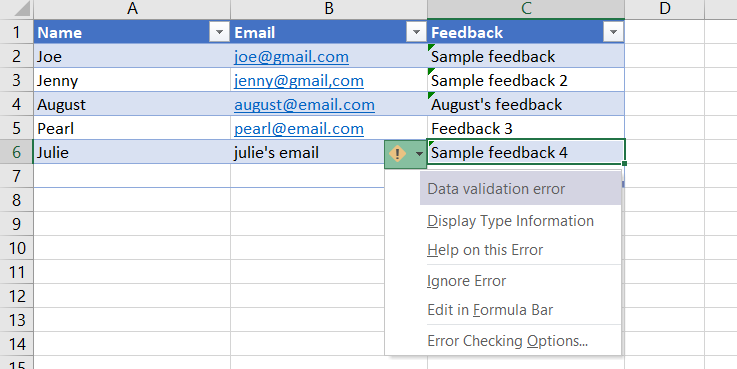
If a user enters invalid text, Excel will show an error message. This is particularly useful when collecting a large amount of feedback or requiring standardized inputs.
💡 Pro Tip: Want to grow faster in your role but not sure how to ask for feedback without it feeling awkward? How to Ask for Feedback and Reviews to Improve Your Skills shows you the right questions to ask, the best time to ask them, and the tools that make feedback feel like fuel.
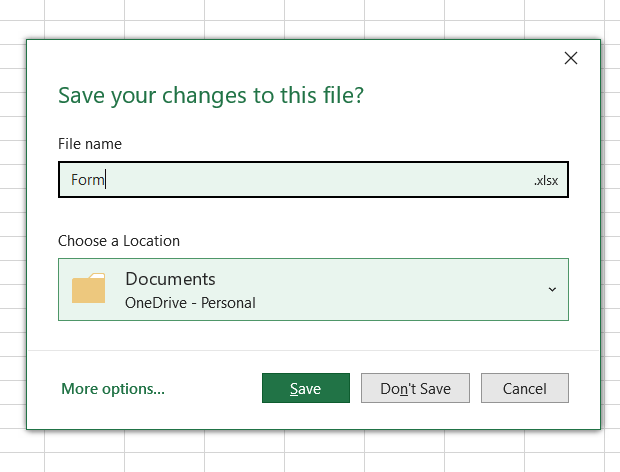
Once your Excel form is prepared:
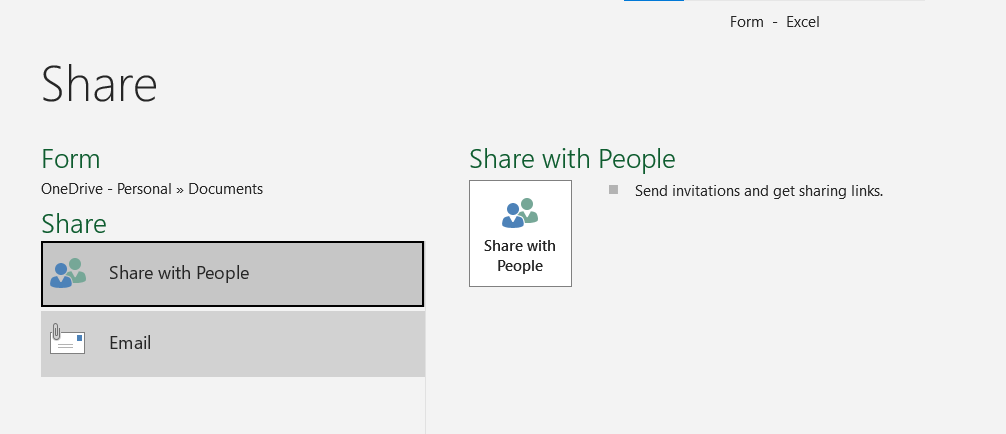
This method is efficient for quick data collection and helps you manage structured input inside your existing Excel workbook.
✨ Fun Fact: Formophobia (yes, it’s a thing) is a fear of filling out forms—often due to confusion, pressure, or bad design.
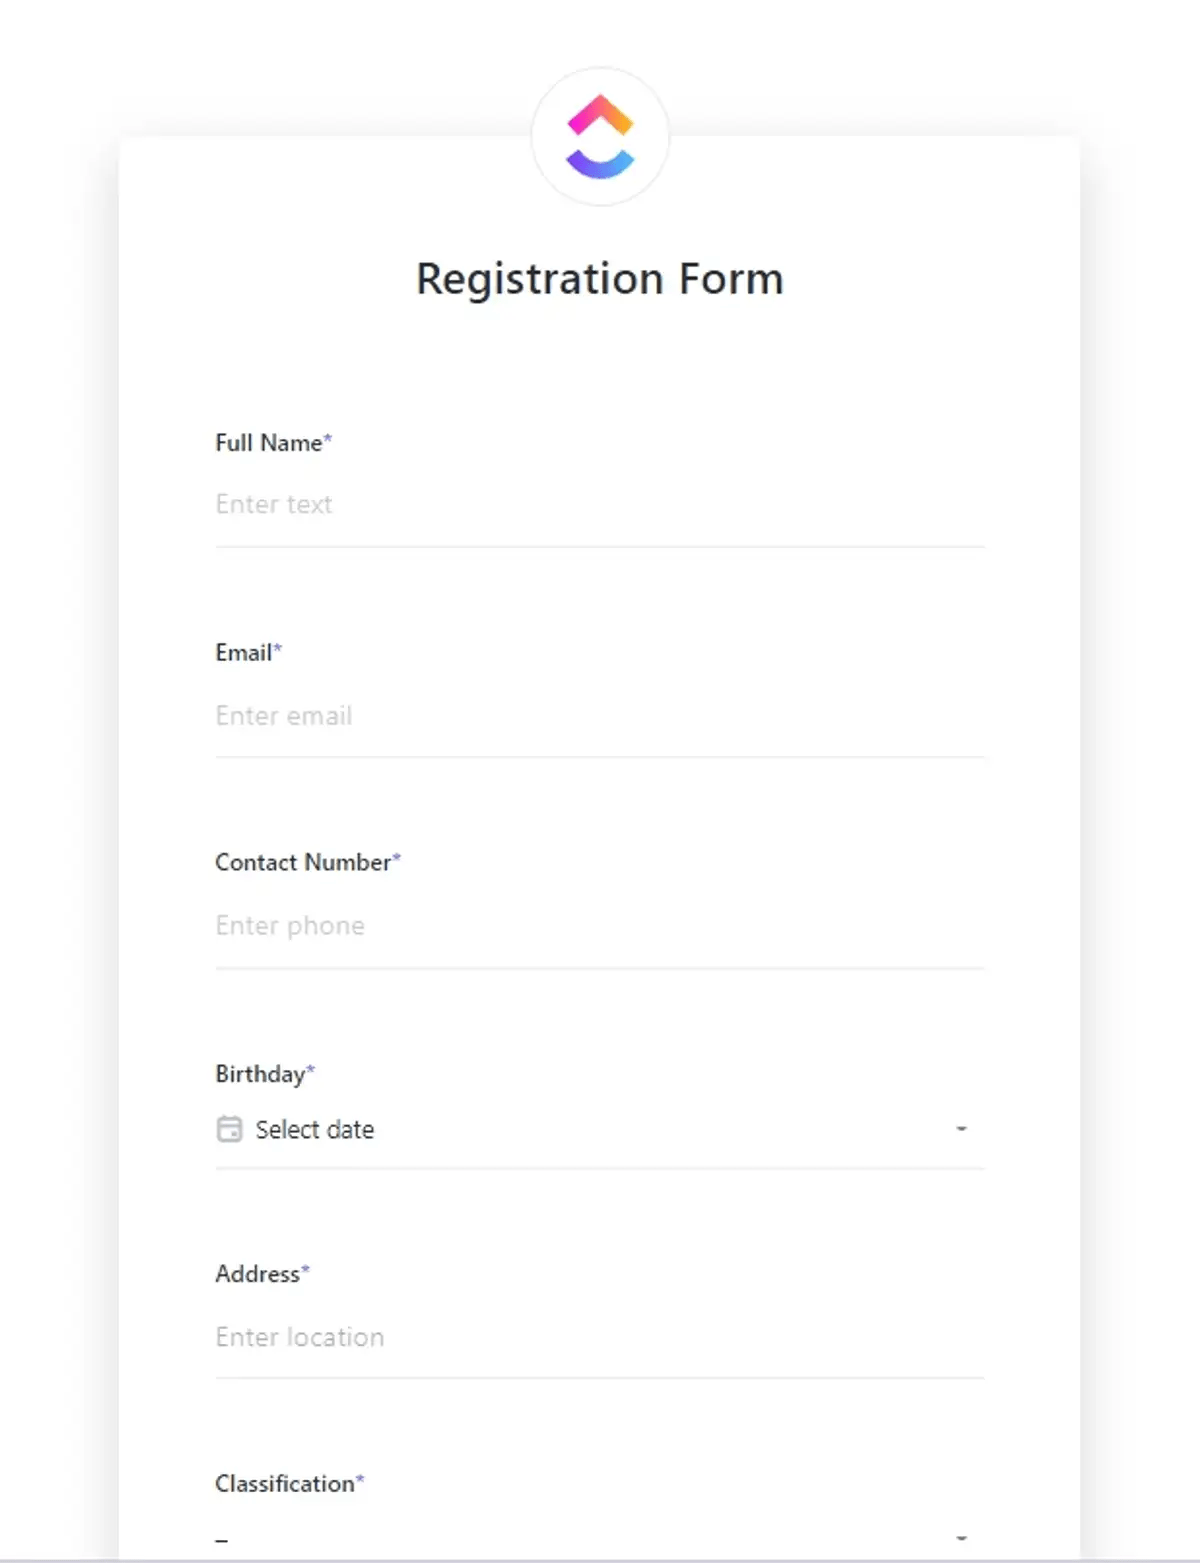
If you want to create custom forms with checkboxes, dropdown lists, or combo boxes:
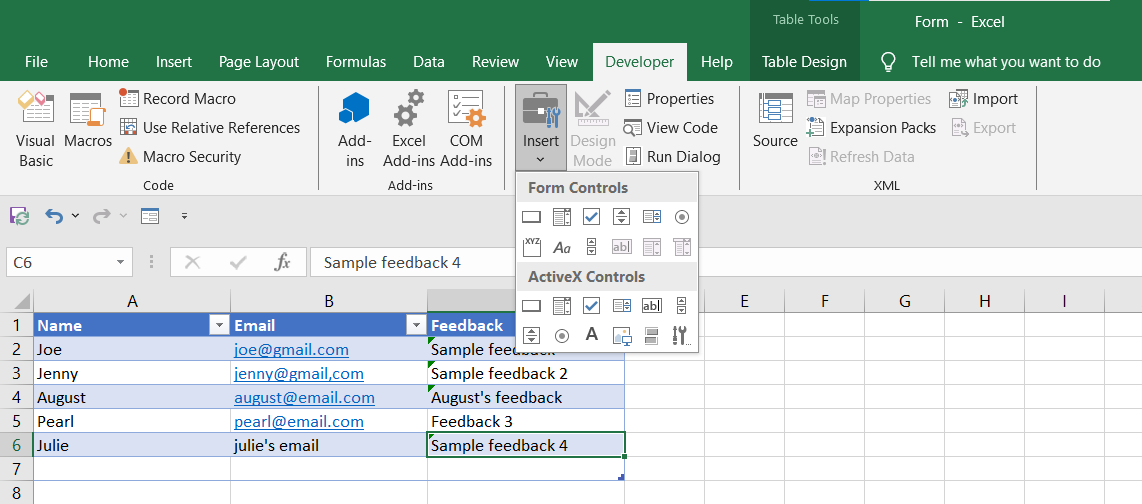
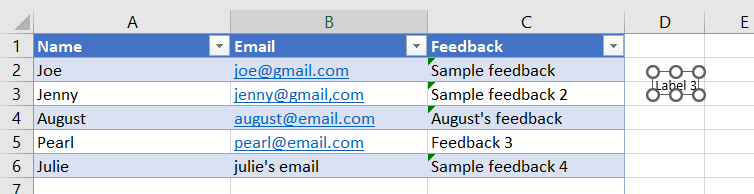
Unlike Excel’s default form option, this approach allows more customization, though it takes more setup time.
📮 ClickUp Insight: Teams that struggle with performance are 4x more likely to use 15 or more tools, while top-performing teams simplify their work with fewer than 9. But what if you didn’t need multiple platforms at all?
As the everything app for work, ClickUp unifies your tasks, docs, chat, calls, and wikis—plus AI-powered workflows—into one connected space. ClickUp is designed to assist every team in maintaining alignment, minimizing tool overload, and concentrating on tasks that truly make a difference.
While creating a form in Excel works well for simple data collection, it comes with a few limitations that can affect scalability and data accuracy.
Here are the Excel form drawbacks you need to be wary of:
🚩 Excel limits forms to 32 fields, making it unsuitable for detailed or multi-layered data collection across complex projects
🚩 It offers only basic data validation, which allows errors like incorrect formats or invalid entries to slip through—especially during manual entry
🚩 As it lacks real-time collaboration features, you can face overwrites, lost updates, or version confusion when multiple users edit the same file
🚩 It slows down performance when handling large amounts of form data, with row and column limits that hinder scalability
🚩 Since it requires custom scripts or manual steps for integration, automation and syncing with other systems is inefficient
Keeping these restrictions in mind, what Excel alternatives can you go for instead? Let’s find out.
📖 Also Read: Free Client Intake Form Templates in Word & ClickUp
ClickUp fixes Excel form limits (field caps, weak automation, and clunky collaboration) by turning every submission into trackable tasks, workflows, and real-time insights in one connected workspace. With drag-and-drop form building, templates, and automations that route and assign work instantly, teams collect cleaner data and act on it faster—without version-control mess or manual cleanup.
We’ve seen how to create a form in Excel. We’ve also seen how Excel form limitations—such as field caps, a lack of automation, and poor collaboration—can slow you down. In contrast, ClickUp offers a flexible, scalable solution that transforms how teams collect data, act on it, and collaborate.
Think of ClickUp as the CRM for collaboration—a central place where all your work, data, and communication stay connected. While Excel simply documents form inputs, ClickUp turns those inputs into trackable tasks, workflows, and real-time insights.
Here’s how ClickUp Forms solves the core problems Excel can’t:
Creating forms in ClickUp is refreshingly simple. With a drag-and-drop builder, anyone on your team can create custom forms with text fields, dropdown lists, priorities, and more—without any technical skills.

This form builder software removes barriers and gives every team the ability to gather input quickly, accurately, and consistently.
Looking for a visual guide on how to create your own ClickUp Forms? Check out this video:
In Excel, it’s easy for data entry errors to slip through due to limited validation. ClickUp Automations fixes that.

With this form automation software, you don’t just enter form data—you act on it immediately.
Inconsistent form formats are a problem you can’t escape when using Excel. Fields get misaligned, users skip required inputs, and every submission needs manual cleanup before it’s usable. Multiply that by 20+ responses, and suddenly your “simple form” becomes a full-time task.
With templates in ClickUp, those issues disappear.
Unlike Excel, where form data just sits in a sheet, ClickUp Tasks connects submissions to your workflow.
Need to follow up on a request? It’s already a task. Need to report progress? Dashboards, lists, and even goals tie submissions together.

The above feature practically makes everything from intake to execution seamless, allowing you to filter through tasks effortlessly.
The ClickUp experience also incorporates collaboration features. Instead of emailing Excel files back and forth or worrying about version control, you can:

With ClickUp integrating tasks, forms, documents, and dashboards, your team can efficiently avoid the need to switch between different tools.
ClickUp has so many more awesome features in store for you.
Create a ClickUp Form by adding a Form View (from the Views Bar, Sidebar, or Forms Hub), then build it using the drag-and-drop editor with fields like text, dropdowns, checkboxes, dates, and file uploads—plus titles, descriptions, and conditional logic. Next, set submission actions (auto-assign tasks, apply templates, redirect, customize button text), style it to match your brand, and share it via public link or embed (optionally adding reCAPTCHA to reduce spam).
Here’s how to create ClickUp forms quickly and easily:
You must first add a Form View. You can do this from the Views Bar, the Sidebar, or the Forms Hub.

You can also create a form by hovering over a Space or List in the Sidebar, selecting the plus icon or menu, and choosing Form. The process is just as simple from there.
💡 Pro Tip: If you’re only reacting to customer issues after they happen, you’re already behind—Best Customer Feedback Tools to Improve Customer Satisfaction helps you proactively gather insights, track sentiment, and turn feedback into loyalty-building actions.
ClickUp’s drag-and-drop form builder lets you add fields with zero technical experience. Choose from multiple field types, including:

You can customize each question with titles, descriptions, and conditional logic to guide the user based on their input. Add new questions by clicking the Add question button, or insert questions inline between existing ones.
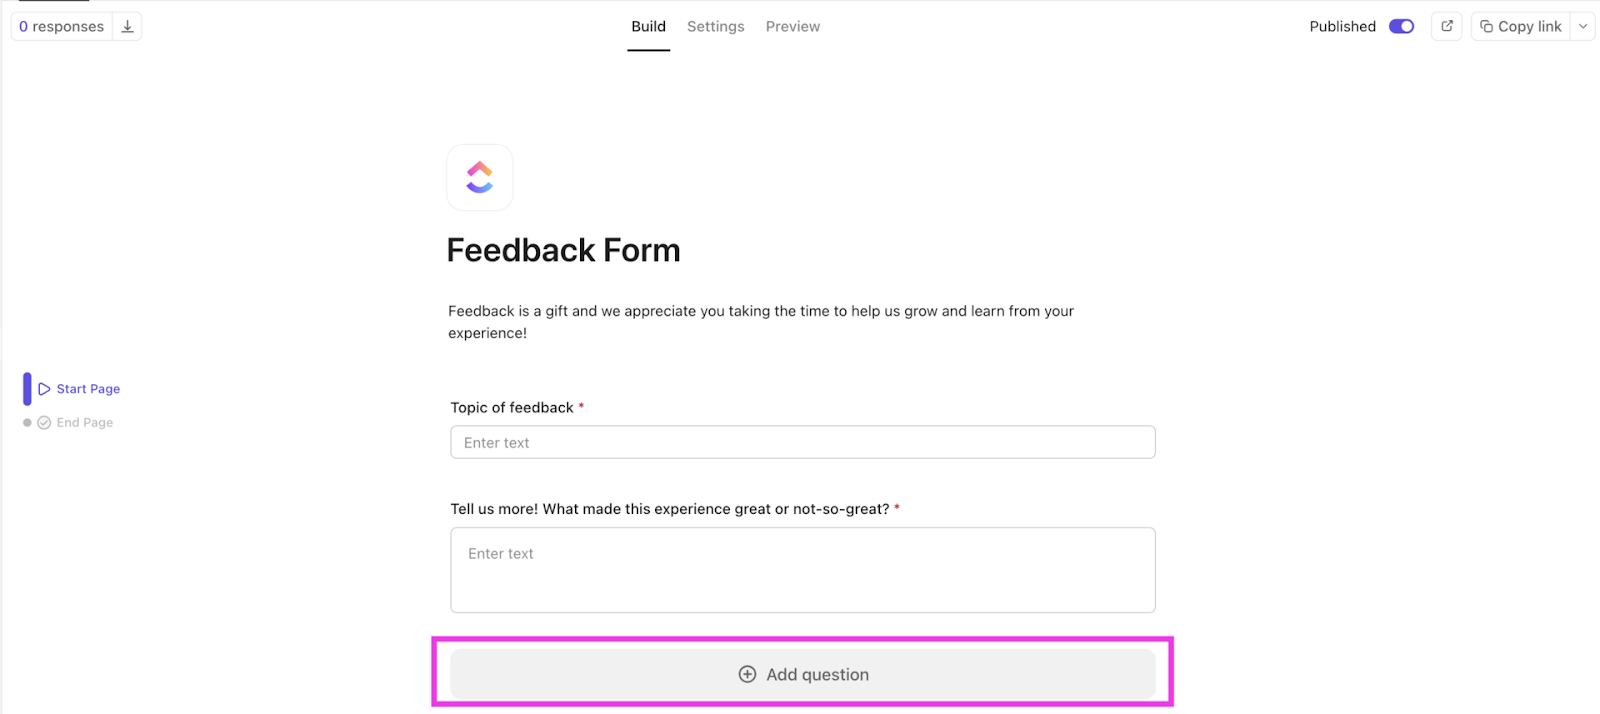
Want to make your form more informative? Add instructions and visuals using informational blocks to guide responses.
📖 Also Read: Best Form Builders with Conditional Logic
Once you’ve built your form, you can configure what happens when someone clicks submit. You can:

These options help eliminate bottlenecks and reduce the need for manual task creation or follow-up.
Are you manually sorting through scattered emails and contact details in Excel? That’s an easy way to miss important inquiries. ClickUp’s Contact Form Template centralizes all customer communication in one place. This way, you can collect, organize, and respond to inquiries faster without any data loss.
ClickUp lets you match your form to your brand identity. Choose between a single- or double-column layout, and customize:
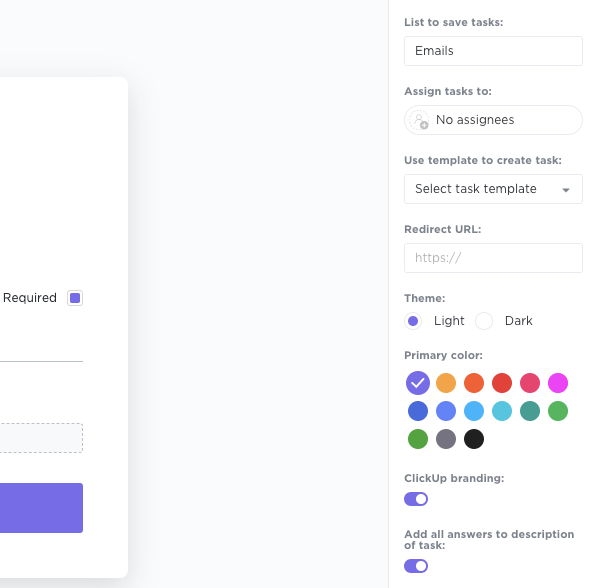
The above process ensures that your forms are not only functional but also visually aligned with your brand’s overall experience.
✨ Fun Fact: While only 40% of marketers utilize multi-step forms, those who do experience an 86% higher conversion rate compared to single-step forms.
Once your form is ready, you can share it using a public link or generate an embed code to place it directly on your website or internal portal.
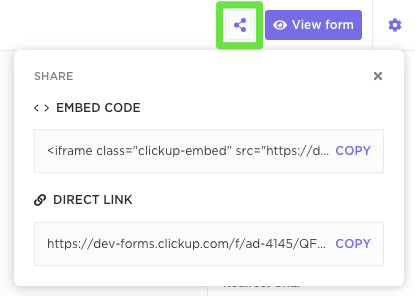
These options ensure accessibility for any stakeholder without requiring them to open an Excel file or edit a worksheet.
💡 Pro Tip: Enable reCAPTCHA to keep spam at bay and ensure clean form data from legitimate users.
Scattered feedback in Excel makes it hard to spot patterns. ClickUp’s Feedback Form Template solves that by turning every submission into a task you can assign, analyze, and follow up on instantly. It’s your fastest route to building a reliable, repeatable feedback loop that actually drives decisions.
📖 Also Read: An Educator’s Guide to ClickUp Forms
When forms are messy, data gets messy—and that’s a problem you can’t afford, especially with checkboxes or dropdown boxes. Excel forms, while useful in certain situations, are susceptible to inconsistent inputs.
In contrast, tight, structured forms are the backbone of clean, reliable data—and your team’s ability to move fast without second-guessing.
ClickUp excels in this area. From dynamic field types to automated workflows, it’s a masterclass in building forms that are both user-friendly and execution-ready. Every submission becomes a task, a trigger, and a next step—without leaving your workspace.
Perhaps this is why Lauren Makielski, Chief of Staff at Hawke Media, noted:
I tried ClickUp and fell in love with it. The platform has become a favorite part of my workday. I’m an unapologetic evangelist—I tell everybody about ClickUp.
Ready to build smarter forms faster? Sign up for ClickUp now and turn every response into real progress!

© 2026 ClickUp

There’s an easier way. Try a free AI Agent in ClickUp that actually does the work for you—set up in minutes, save hours every week.