


Still downloading templates?
There’s an easier way. Try a free AI Agent in ClickUp that actually does the work for you—set up in minutes, save hours every week.
Sorry, there were no results found for “”
Sorry, there were no results found for “”
Sorry, there were no results found for “”
When managing multiple tasks simultaneously, relying on a mental to-do list or jotting them down in an obscure notebook can be a recipe for disaster.
Before you know it, deadlines have come and gone, and the tasks sit there, forgotten until they become roadblocks for critical projects.
A more effective solution? The Getting Things Done (GTD) flowchart. It’s a visual chart for planning and tracking the tasks you’re supposed to complete.
Easy to implement, the GTD flowchart is increasingly used in workplaces by productivity enthusiasts, professionals, and individuals to increase efficiency.
Let’s walk you through the basics of the GTD method and then show you how to make one using ClickUp.
The Getting Things Done (GTD) method was designed by David Allen to help manage tasks, projects, and commitments more effectively. Its core principles include capturing all tasks and ideas in an external system, organizing them into actionable steps, and systematically working through them to reduce stress and improve focus.

Let’s look at the key principles of the GTD method that help you become a productivity superstar.
Collect all tasks, ideas, and commitments in an external system (e.g., notebook, app) rather than trying to keep them in your mind.
📚Example: Imagine you’re in a meeting and suddenly remember you need to schedule a dentist appointment. Instead of trying to remember it later, you quickly jot it down in a daily planner app.
Decide what each captured item means and what action you must take to finish the task.
📚Example: For a task, “finish project report,” you must clarify the next steps such as “research data” or “write draft.”. Use task management templates to standardize the steps for each process in the GTD method.
Put items where they belong. You can add tasks to your calendar, task list, or reference files to the project list.
📚Example: “Buy groceries” goes under the ‘errands list’ and ‘write project report’ goes under the “work projects” list. Use the free GTD templates to automate gathering, organizing, and prioritizing tasks while tracking the progress of each step.
Regularly review and update your lists to stay on top of your deadlines.
📚Example: At the end of each week, using a GTD app—review your to-do list, adjust deadlines, and check off completed tasks. This way, you can avoid cluttering your GTD flowchart.
Use your organized system to take action and complete tasks.
📚Example: Now that you’ve captured and organized your tasks, build an efficient GTD system to get things done. Follow the ‘next steps’ in the list to stay on track.
GTD processing helps you break down tasks into manageable next steps. This gives you a clear overview of your projects and allows you to prioritize tasks based on urgency and importance.
You can organize tasks into actionable categories such as to-do, upcoming, and completed. The GTD method helps you finish each task faster, as the next steps are laid out before you.
Categorize tasks based on their contribution to bigger objectives instead of focusing on individual tasks in isolation.
For instance, a simple task like “write a client email” can be part of a larger goal, such as “increase client retention by 10% this quarter.”
An important step in creating SMART professional goals is to visualize how each action ties into a broader goal.
When your tasks are captured and organized via the GTD process, you make better decisions about what to focus on next.
With fewer distractions and a well-structured system, your choices will be based on priorities, deadlines, and goals rather than gut feelings, leading to more effective outcomes.
One of the biggest benefits of the GTD process is that it gives you a better sense of control over your workload.
Research on the “Zeigarnik effect” shows that uncompleted tasks create mental tension and occupy our thoughts. By capturing these tasks externally, we can reduce this cognitive load.
The inbox serves as the initial collection point for all inputs in your life. This concept is based on David Allen’s principle of “capturing” the idea that your mind is for having ideas, not holding them.
The Inbox is designed to catch everything—tasks, ideas, commitments, or anything that has your attention. It can be physical (like a tray on your desk or a notebook) or digital (like an app or email folder). The goal is to make capturing as frictionless as possible. The easier it is to add items to your Inbox, the more likely you will use it consistently.
Then, identify your “Next Actions” to move a project forward.
Writing down the “next steps” clarifies what needs to be done, which also helps reduce procrastination and decision paralysis.
💡Pro Tip: Instead of vague to-dos like “Work on the report,” you should add specific actions like “Draft introduction paragraph for the quarterly report.”
The “Waiting For” list in the GTD system helps you manage dependencies—especially when you’re delegating work.
The list will include:
In the GTD system, a “project” is defined as any outcome requiring more than one action step. This could range from planning your weekly personal tasks to launching a new product at work.
It’s like having a map that shows all the places you need to go instead of just focusing on the next turn.
Each project on your list should have at least one clear next step. This way, you’re connecting your bigger goals to the small actions you can take now.
GTD system suggests a handy trick called “natural planning” for your projects. It’s pretty simple:
Capture your tasks and write anything and everything on your mind. Work stuff, personal errands, random ideas—it all goes in. You can use whatever works for you: notebook, app, voice memos.
Think of it like emptying your pockets at the end of the day. Get it all out there!
Clarifying is like sorting through that pile. Pick up each relevant task one by one and ask yourself: “Is it actionable?”
For every non-actionable item:
For actionable items:
Now, it’s time to put things where they belong. Each task goes into the right box, such as:
Find relevant tasks based on the following:
💡Pro Tip: For complex projects, create a workflow diagram to visualize your tasks and identify priorities at a glance.
While a simple notebook or note-taking app can help you get started, we recommend choosing a more robust (and dependable) system to build your GTD flowchart.
After all, isn’t the goal to be more organized and productive?
A project management tool like ClickUp has:
Here’s a step-by-step guide to creating a GTD flowchart within ClickUp.
First, you need a space to dump all your ideas and reference materials. You can start by creating a new ClickUp Doc titled “Inbox.” Here, you add all your tasks, projects, and ideas. Don’t worry about organizing yet; just get it all out there. You can also add reference material that you may need to finish your tasks—Docs support rich-text formatting, hyperlinks, multimedia, and more.
Once you’ve listed your tasks, start categorizing them into broad goals. ClickUp’s Goals feature allows you to define overarching objectives for each task, clarifying how each task fits into the bigger picture.

ClickUp’s Mind Maps feature is an excellent tool for visually grouping related tasks and setting priorities.

Create a new Mind Map, and start branching out tasks from your main categories (e.g., work, personal, projects). Under each category, you can drag and drop tasks from your inbox to visually represent their connection.
For example, under work, you can add ‘send email to Josh’ or ‘create a deck for the next meeting.’
As you map out your tasks, identify which tasks are urgent and which can be postponed.
With ClickUp, you can create a visual GTD flowchart to track the progress of your workflow. ClickUp’s Custom Fields allow you to add specific details like status, priority, or effort levels to each task. They let you use color coding to keep everything organized.
Go to your task view and create Custom Fields for recording task details, such as,”Status” (e.g., to-do, in progress, complete) or “Priority” (e.g., high, medium, low). Then, assign each task a status using distinctive colors.
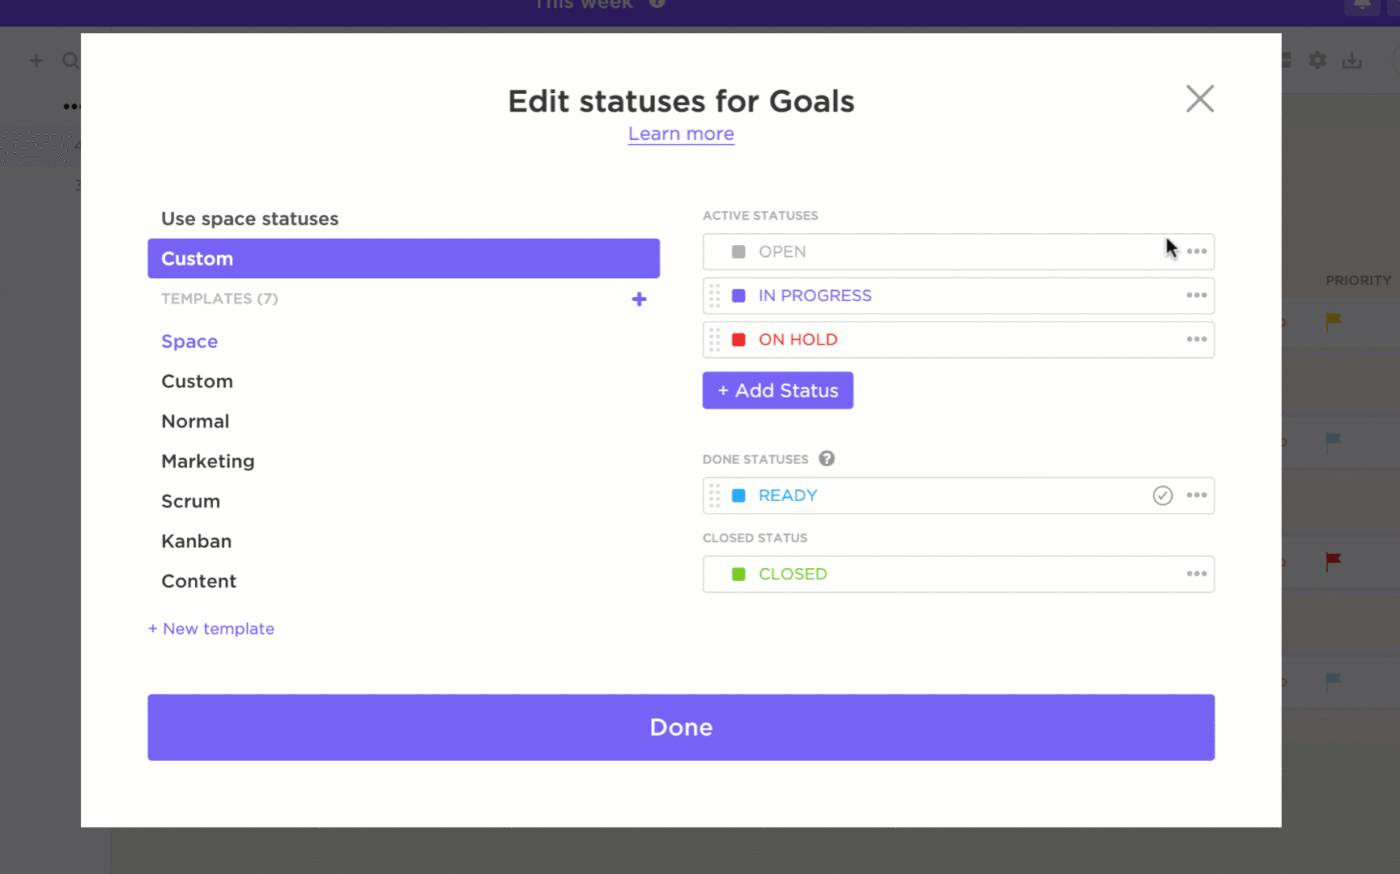
So, you’ll see it in green whenever a high-priority task is completed and red for a task that needs attention. This adds another layer of clarity to your GTD flow chart.
ClickUp’s Board View is a powerful Kanban-style tool for organizing tasks visually as they progress through different stages.
To start, create columns that match key GTD stages such as “Inbox” (where tasks initially land), “Next Actions” (tasks you plan to tackle next), “Waiting For” (tasks on hold), and “Completed” (for finished tasks).
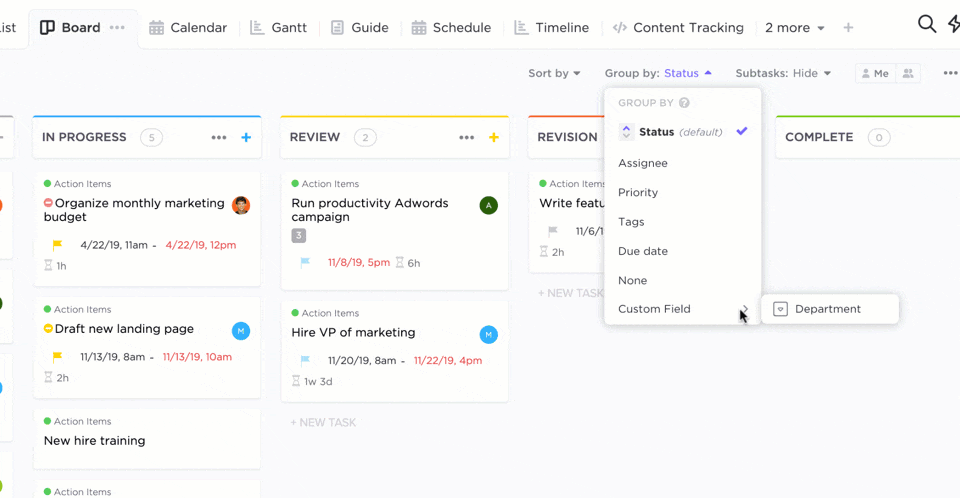
As you process each task, drag it from one column to the next, creating a dynamic GTD flowchart that mirrors your progress. This offers real-time visibility into what’s in progress, what’s waiting, and what’s done.
💡Pro Tip: You can personalize the Board View by adding extra stages like “Review” (for tasks that need further consideration) or “Someday” (for ideas or projects you want to return to later). Don’t forget to add a “Done” column to give yourself a sense of accomplishment when tasks are completed.
ClickUp lets you link individual tasks to specific projects, keeping everything connected and ensuring you have easy access to relevant details.
For each task, select the option to associate it with a specific project in your ClickUp Workspace. This ensures that all related tasks are visible in one place when you view a project.
Connecting tasks to projects lets you see their broader context, track overall project progress, and avoid redundancy or confusion.
The GTD process emphasizes the importance of due dates and reminders. ClickUp’s Automations allows you to automatically set deadlines, send reminders, and trigger other useful actions based on specific conditions—within your GTD workflow map.
Set up reminders for your Weekly Review. You can create rules like “When a task moves to ‘Next Actions,’ set a reminder for two days later” or “When a task is overdue, notify me.”
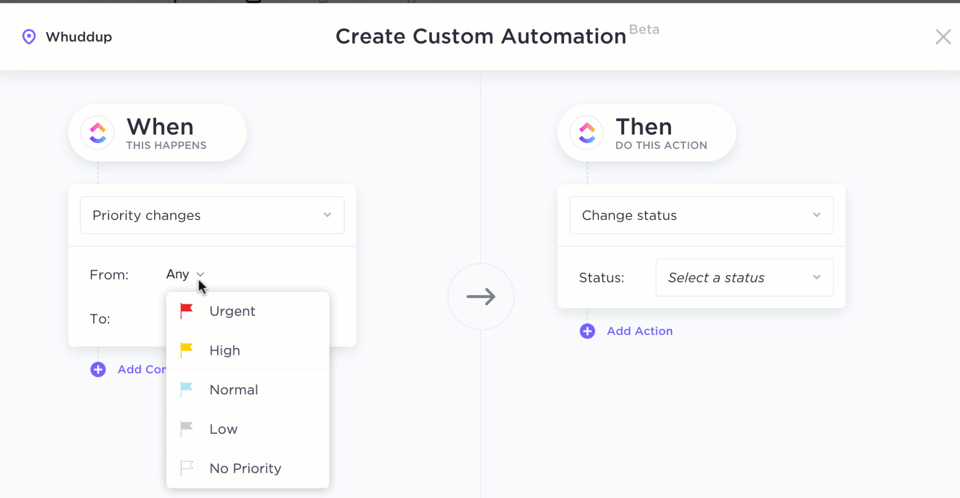
These automations will keep you on track without needing manual intervention. You can also create automations that set dependencies between tasks, ensuring you can’t start Task B until Task A is complete.
The GTD method advocates for regular reviews to stay organized and maintain momentum. Use Recurring Tasks in ClickUp to schedule regular check-ins and tweak your system as needed.
Set up a recurring task labeled “Weekly Review” or “Monthly Planning.” This will prompt you to review your progress, reprioritize tasks, and ensure everything is up to date.
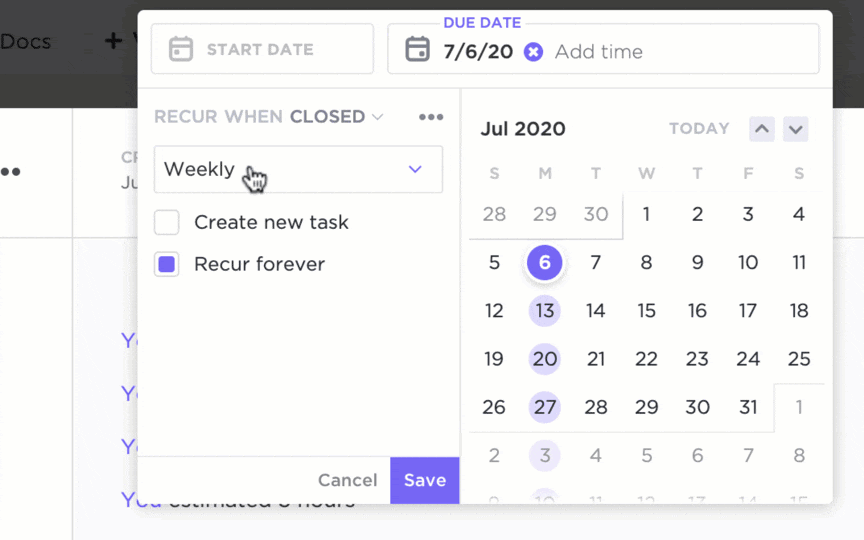
During these reviews, ensure tasks align with your goals and make adjustments where necessary—whether reassigning tasks, shifting deadlines, or updating priorities.
ClickUp’s Getting Things Done (Simple List) Template helps you manage bigger projects by breaking them into smaller associated tasks.
With pre-built views like Lists, Calendars, and Boards, track progress by visualizing your tasks in different stages of completion.
Customize task categories, set priority levels, and add due dates—making it easier to adapt the template to your GTD workflow.
As instructed by David Allen, organize each task into appropriate categories and give them context. Sort each task field into actionable and non-actionable items and lists, such as:
Some common challenges professionals can solve using the GTD workflow map:
Challenge: A startup founder wears multiple hats—product development, marketing, fundraising, and team management. She’s overwhelmed by tasks and struggling to stay focused and make progress on all fronts.
Overcoming the challenge using the GTD flowchart
Challenge: A graphic designer juggles multiple tasks, such as finishing clients’ projects, invoicing, skill development, and finding new clients. He struggles with procrastination and meeting deadlines.
Overcoming the challenge using the GTD flowchart
Now is the time to take control of what we can, with the right people, at the right time.
The GTD flowchart is a great solution to break complex projects into smaller, relevant tasks that your team members can tackle individually.
Productivity enthusiasts use the GTD workflow map to eliminate unnecessary or duplicate tasks and reclaim time for thinking and creativity.
ClickUp makes creating the GTD flowchart easier and more accessible. Start taking control of your time by signing up on ClickUp for free.

© 2026 ClickUp

There’s an easier way. Try a free AI Agent in ClickUp that actually does the work for you—set up in minutes, save hours every week.