How to Create a Checklist in Obsidian

Sorry, there were no results found for “”
Sorry, there were no results found for “”
Sorry, there were no results found for “”

Whenever things get hectic, someone’s bound to say, “You should make a list.”
And rightly so!
There are multiple ways to create checklists. You can use a simple notes application on your phone to quickly jot down tasks or organize your thoughts in a structured and interconnected manner using any of the dozens of checklist apps available.
One good example is Obsidian, a personal knowledge base and note-taking software. You can use Obsidian to create comprehensive checklists and get your work done faster.
If we’ve piqued your interest, read on to learn more about how to make a checklist in Obsidian and level up your task management skills.
Obsidian makes it easy to create checklists, so you can stay organized, track tasks, and manage projects without the hassle.
- [ ] to create a checkbox for any task.Frustrated with checklists that feel more chaotic than helpful? ClickUp’s Checklist Template makes staying organized easy, clear, and actually satisfying.
A checklist may seem like a relatively simple tool, but it has some benefits that can increase productivity.
Now, to better understand its applications, let’s explore how to make a checklist in Obsidian.
Obsidian is a note-taking app that helps users build a personal knowledge base with documents built using Markdown files. It is primarily designed to help users create internal links for notes and visualize the connections between them as a graph.
Let’s take a look at how to create a checklist in Obsidian:

There you have it—you can add checkboxes anywhere on a note in Obsidian using a simple keyboard shortcut. Instead of navigating menus and checking formatting options, quickly create a checklist in Obsidian’s markdown documents with an inline command.
Another way to create checklists on an Obsidian note is by using Markdown syntax in the platform’s editor and typing out your list items. Before we look at how to use it, let’s understand a bit about Markdown.
Markdown in this context refers to a plain text formatting syntax that allows you to write web documents in an easy-to-read plain text format, which is then converted into HTML.
Let’s look at the Markdown syntax you can use to create a checklist in Obsidian Notes:
1. Start your list of items with a hyphen (‘-’), followed by a space and then a pair of empty brackets.
E.g., you can type:
– [ ] this is a task
– [ ] this is another task
2. To mark tasks as complete, simply type any character between the brackets. If you want completed tasks to appear with a strikethrough line as well, always type an ‘x’ between the brackets:
E.g., you can fill in characters between brackets on your checklist items
– [x] this is a completed task
– [?] this is another completed task
While the Obsidian team builds and maintains an official set of ‘core’ plugins, the Obsidian developer network has created an extensive ecosystem that already boasts 1700+ plugins.
If the Obsidian platform does not natively support a feature, chances are there is a plugin for it. And if not, you can build one yourself! Let’s specifically look at plugins that can enhance the functionality of your checklists:
| ToDoist Text | Use the prescribed hotkeys combination to incorporate ToDoist checkboxes into your Obsidian notes |
| Tasks | Add basic task management to your checklists: Track due dates and done dates, set up recurring tasks, create a subset of checklist items, etc. |
| Checklist | Define tags for your pages, assign tags to tasks, group your tasks by page or tag, show tasks as completed, etc. |
| Reminder | Manage your to-do tasks with reminders |
| Overdue | Automatically mark tasks or items as [[Overdue]] if they are not checked off by their due date |
Read More: Daily Checklist Apps
Your Obsidian vault can quickly get cluttered as you create to-do checklists for your everyday tasks, team projects, and personal errands. To keep things sorted, with Obsidian, you can use tags and folders to organize your checklist and make it easily accessible.
Using tags
Tags are keywords that you can use to refer to and identify your checklists. You can define tags on Obsidian using the ‘#’ key. There are two options for tagging your checklists: plan your tags in advance or create them as needed. To apply a tag, either type it directly onto a note or select from a list of existing tags. Once tagged, your checklist will automatically be associated with that tag.
E.g., #todo/checklist
The above checklist now has the tag #todo/checklist.
Once you have defined a tag, you can assign it to any number of checklists. The true value of tags comes through when you can use them to search for your checklists using the Search plugin.
Using folders
You can organize your checklists into specific categories and topics and create corresponding folders or a default folder hierarchy in Obsidian.
To create a new checklist in a specific folder:
While Obsidian has powerful note-taking features, there are several cons to consider. Let’s look at some of the drawbacks of creating checklists in Obsidian:
While it does support checklists, Obsidian is a complex tool for learning, setting up, and navigating for most users looking to manage tasks on a daily basis.
More importantly, Obsidian lacks support for reminders and task progress tracking. This is a deal breaker for users and teams looking to use checklists in their projects. 🔴
With the above limitations, you may want to try creating a checklist using Excel and Google Sheets. But even these tools may not be able to provide you with a wholesome checklist experience.
This is where an all-in-one productivity and project management platform like ClickUp shines.
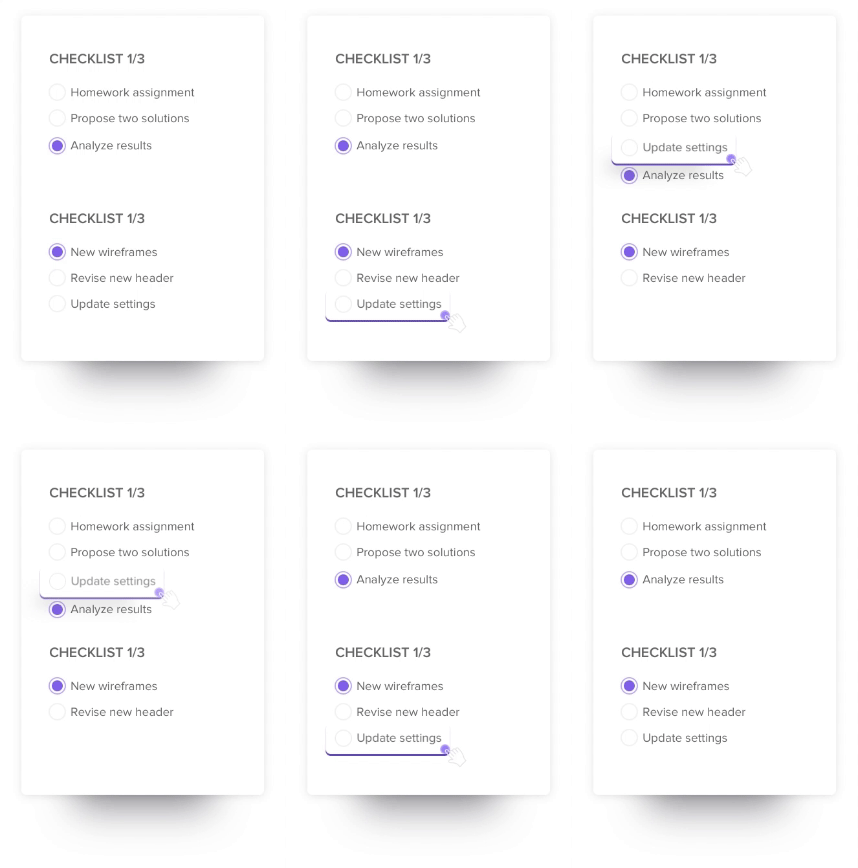
To start with, ClickUp Task Checklists is a nifty feature for organizing and managing your project to-dos and tasks. But what makes it stand out is its drag-and-drop functionality that allows you to reorder items on your checklist as you need.
You can also create nested checklists for complex tasks with two or more subtasks. This helps you track how much work has been completed at different levels.

In addition to creating checklists, ClickUp offers several task management templates to help teams deliver projects efficiently.
Here’s how to use ClickUp to improve productivity and streamline task management.
Create and assign tasks along with due dates using ClickUp Tasks. Add task descriptions and use custom fields to add more context to every task so your team members know what they’re working on.

Break down every task into multiple sub-tasks and mark their importance using priority levels. This will keep your work organized and help you systematically tackle critical tasks.
ClickUp also allows you to set task reminders so you are notified of upcoming deadlines and are always on track to complete your deliverables on time.
💡Pro Tip: Create a priority list to organize tasks and design a framework that aids decision-making. This will allow you to assess which tasks need immediate attention and which can wait.
Streamline task execution by enabling team members to easily access important information like project reports, scope, resources, and guidelines. Use ClickUp Docs to create a centralized repository for all this information.
Keep your information relevant and updated by inviting all interested stakeholders to collaborate on the document and add their insights. Further, you can format your information with in-built tables, styling options, and nested pages so that it is clear, concise, and logically organized.

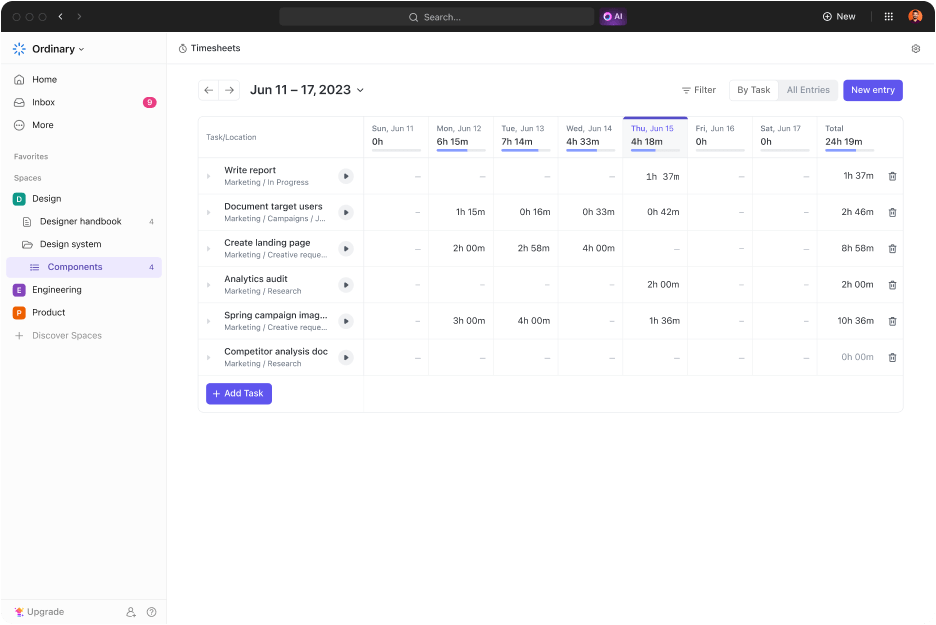
ClickUp Time Tracking can help you track your time spent on tasks. View detailed reports of your tracked time on timesheets to see which tasks are eating into your bandwidth and how they can be optimized.
Leverage these insights to promote accountability and make estimates to set realistic timeframes for your tasks and activities.

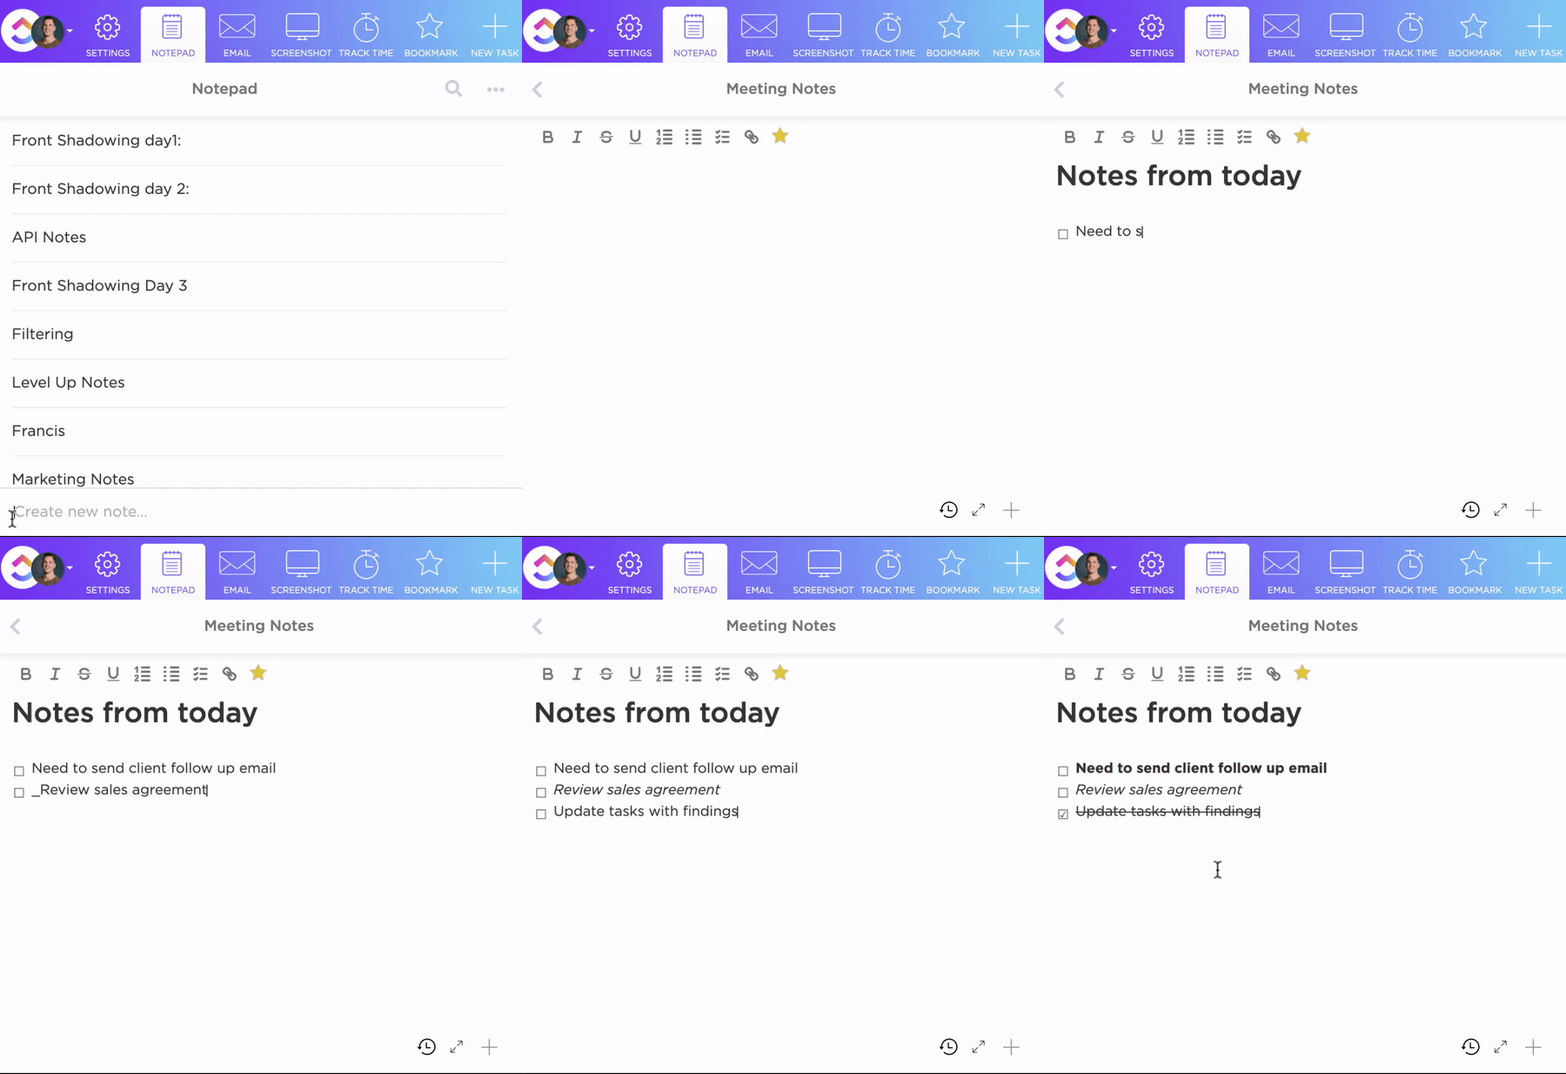
You can quickly access all your tasks, checklists, and notes by saving them into a single hub—the ClickUp Notepad. Capture detailed notes and project management checklists on the notepad for any process and convert them into trackable tasks.

For instance, say your team is tasked with launching a marketing campaign. Create a checklist — ‘Marketing Campaign X to outline all the steps team members need to complete to launch the campaign successfully’.
This includes:
Once you’ve outlined all the steps, you can assign each item on the checklist to the appropriate team member with priorities and due dates.
💈Bonus: Be sure to create checklists for recurring processes and save them as shareable templates using ClickUp Checklist Templates. This is super useful if you want to establish consistency for processes like content approvals, landing page creation, feature releases, and more.
And think about how much more you can get done when you don’t have to create a checklist from scratch every single time.

Read More: Free To-Do List Templates by ClickUp
Checklists on ClickUp make it easy to start organizing and managing your tasks. Here are some of the advantages of creating and managing checklists in ClickUp:
Let’s look at a step-by-step guide to creating a checklist in ClickUp.
Step 1: Open your task
Go to the existing task within your ClickUp project space where you want to add a new checklist.
Step 2: Start creating your checklist
Look for the “Action items” tab near the task description or comments section, and click the “+” icon to start building your checklist.
Step 3: Add items to your checklist
On each line of your checklist, type in the details of a task and hit enter to create a checklist item. You can copy-paste a list of items or tasks, and ClickUp will automatically add a new checklist item for each line. You can even drag and drop items between different ClickUp checklists!
Step 4: Edit your checklist
Click on the ellipsis (…) next to the checklist’s name to add more tasks to your checklist, remove existing items, rename the checklist, or assign the entire checklist to another team member.
Step 5: Assign items to users on your team
Click the ‘assign’ icon (the greyed-out silhouette next to a checklist item) to set users as ‘owners’ for tasks. This is a quick way to distribute tasks and responsibilities within your team.
Step 6: Nest items
Nesting tasks under a main or ‘parent’ task accurately detail all the sub-tasks that need to be completed to accomplish the parent task. ClickUp allows the nesting of items up to five levels deep on checklists.
Step 7: Track the progress of your checklists
When a task has a checklist associated with it, you will see an indicator of its completion status next to the task name on ClickUp’s List view. You can check which tasks have been completed and track the progress of ongoing tasks on the checklist.
Read More: Best AI Excel tools
If you want to set up and manage your first project, here’s a checklist template created by ClickUp that you can simply plug and play.
Experience the epitome of organized documentation with the ClickUp Checklists Template. Geared towards the content creators, writers, educators, and anyone who wishes to keep their work well-organized, this template cleverly integrates a checklist into your documentation process. Whether you’re preparing a comprehensive guide on using OneNote or outlining a grand project plan, this checklist will aid in methodically segmenting your tasks and documenting the progress, all in one place. Cultivate productivity while ensuring smooth documentation of your endeavors.
The ClickUp Project Checklist Template is a beginner-friendly template that covers most of the general requirements for any new project. It can help anyone set up a new project on ClickUp from scratch in minutes. With the Project Checklist Template, you will have the task-subtask structure in place.
To kickstart the project, you can start by inviting your team members to the project and assigning tasks to team members. Use it to ensure tasks are being executed in the correct order, track the overall progress of the project, identify and address potential risks on time, and ensure the project meets its deadlines.
Checklists are a simple and efficient way to start with task management. While Obsidian is a powerful tool for note-taking and documentation, it is overkill for users looking to create checklists to manage their everyday tasks.
By contrast, ClickUp checklists offer a more versatile solution for anyone looking to get started with task management. Their user-friendly interface makes it easy to create, manage, and share checklists across teams to facilitate real-time collaboration.
Additionally, smart features such as recurring checklists, task dependencies, and automated workflows powered by integrations eliminate repetitive grunt work and boost team productivity.
If you want to get started with ClickUp checklists, we offer checklists and to-do tracking on all our plans (including our Free Forever Plan).
Sign up on ClickUp for free and get started with creating interactive checklists.
© 2025 ClickUp