Let’s face it. Your brain processes tons of information and ideas every day. 🧠
Now, if you’re Sherlock Holmes, you could create a mind palace to organize all that information right inside your head.
But for the rest of us, creating simple mind maps on Excel could do the trick.
You can create mind maps to visualize your ideas and gain useful insights into them.
In this article, we’ll show you how to make a mind map in Excel. We’ll then highlight its drawbacks and give you an excellent alternative for making interactive mind maps.
Let’s get started!
What Is a Mind Map in Excel?
A mind map is a type of hierarchical diagram built around a central concept. Instead of feeding data in basic tables, it helps you visualize, analyze, and organize information in a non-linear way.
⭐ Featured Template
Excel mind maps are slow, lack task management, and limit integrations. Try ClickUp’s free Simple Mind Map Template for easy brainstorming, collaboration, and task tracking—free! 🚀
Check out some awesome mind map examples here.
Sherlock creates a web of ideas in his mind and mind maps are something like that.

Wish we all had a brain attic like his. 😮💨
Now when you create this hierarchical diagram in Excel, you get an Excel mind map.
Essentially, an Excel mind map will consist of a central idea with tons of related sub-ideas branching out from it. Each of those sub-ideas has sub-ideas of their own that branch out further sub-ideas… and it goes on.
But don’t get lost in the branches.
Let’s come out of Sherlock’s impressive brain and break into an Excel mind map.
An Excel mind map has some common characteristics:
- Central concept or the main idea
- Subtopics flow as branches from the central concept
- Each branch covers a key image or keyword
- Branches form a connected nodal network
- Different colors are used to highlight a distinct concept within the map
Drawing a mind map sounds fun, right?
Let’s learn how to create a mind map in Excel.
How To Create a Mind Map in Excel?
There are two ways to create a mind map in Excel:
- Using the Shapes library
- Using SmartArt
Follow these steps to create a mind map in Microsoft Excel and visualize your central idea or concept.
A. Using Shapes
Microsoft Office offers a Shapes library to add boxes, circles, arrows, etc., that you can use to create a mind map in spreadsheets.
Let’s say you want to create a mind map for “Project X,” which will include its scope, goals, budgeting, and so on.
Here’s how you can use shapes to create this mind map in Excel:
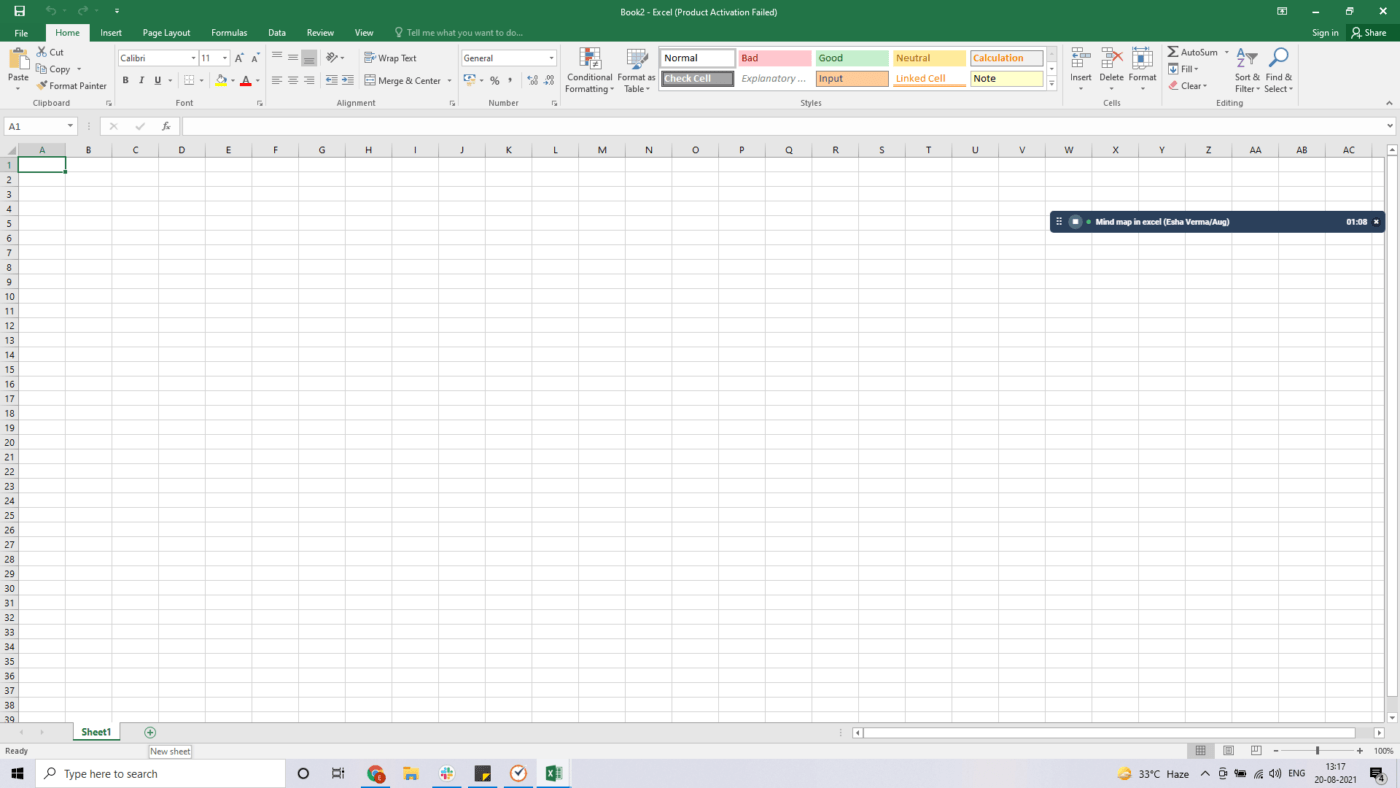
Step 1: open a new Excel sheet
Open Excel and select a blank workbook to start working on a new file.
You can also add a mind map to an existing file by adding a new sheet using the + icon present at the bottom of your excel sheet.
Step 2: open the Shapes menu
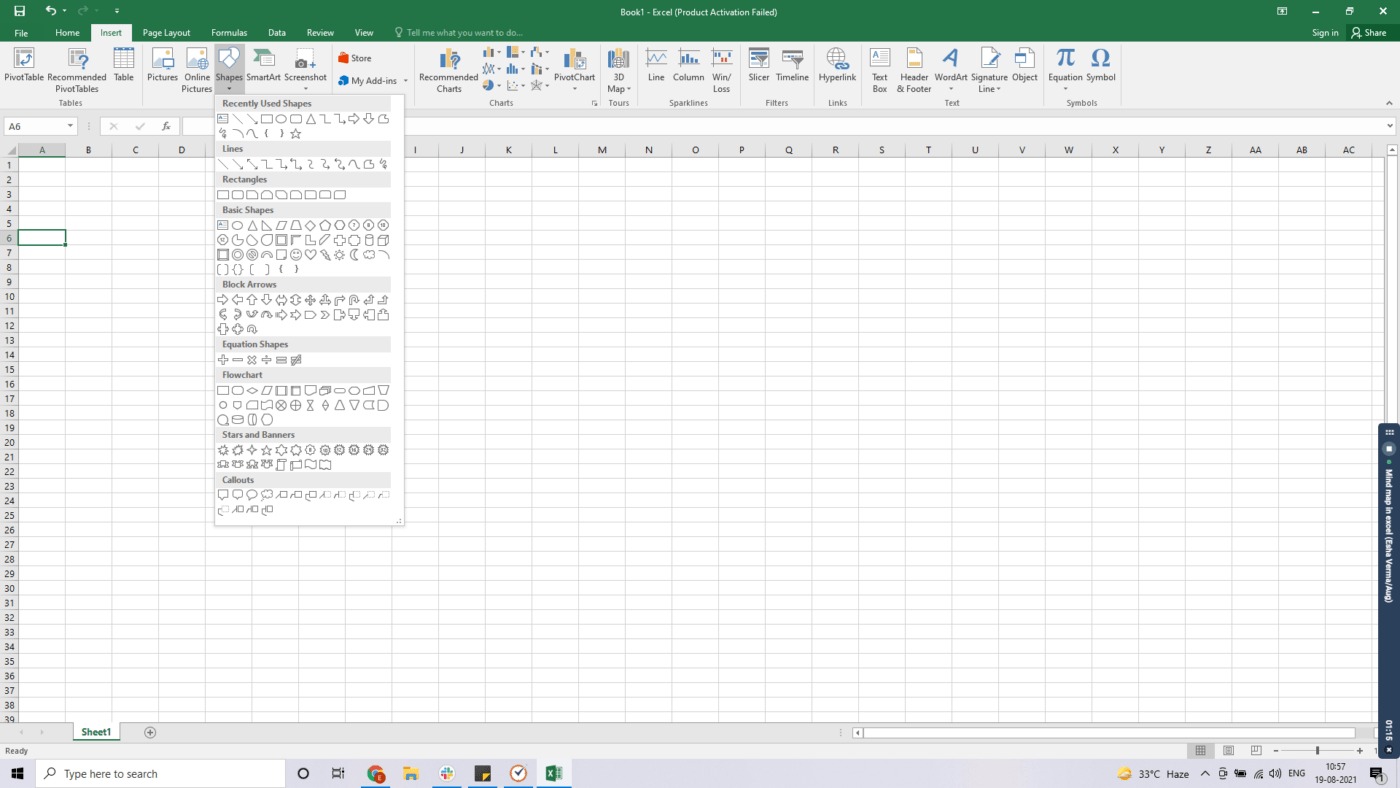
To add a shape, click the Insert tab. You’ll find it on the green ribbon, next to the Home tab. Then, select Shapes, and a drop-down menu will appear.
Step 3: draw the shapes
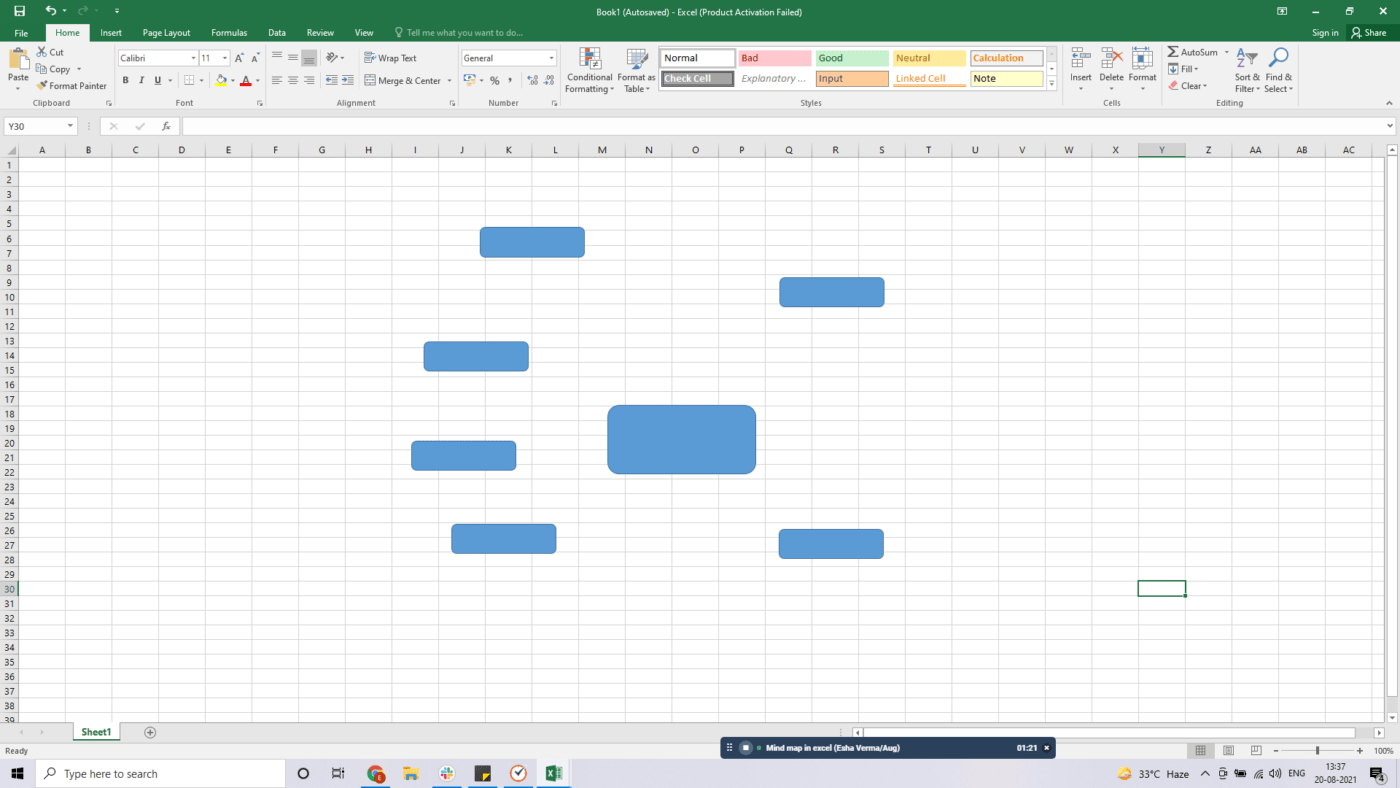
Select a shape you like, then click and drag to draw it anywhere on the sheet.
Here, we have used a rounded rectangle, but you’re free to select the shape of your choice!

The next step is to add shapes branching out of this central shape or the “central idea.”
Here’s how to go about it:
Follow the same process as Step 2 to select and draw the branching shapes.
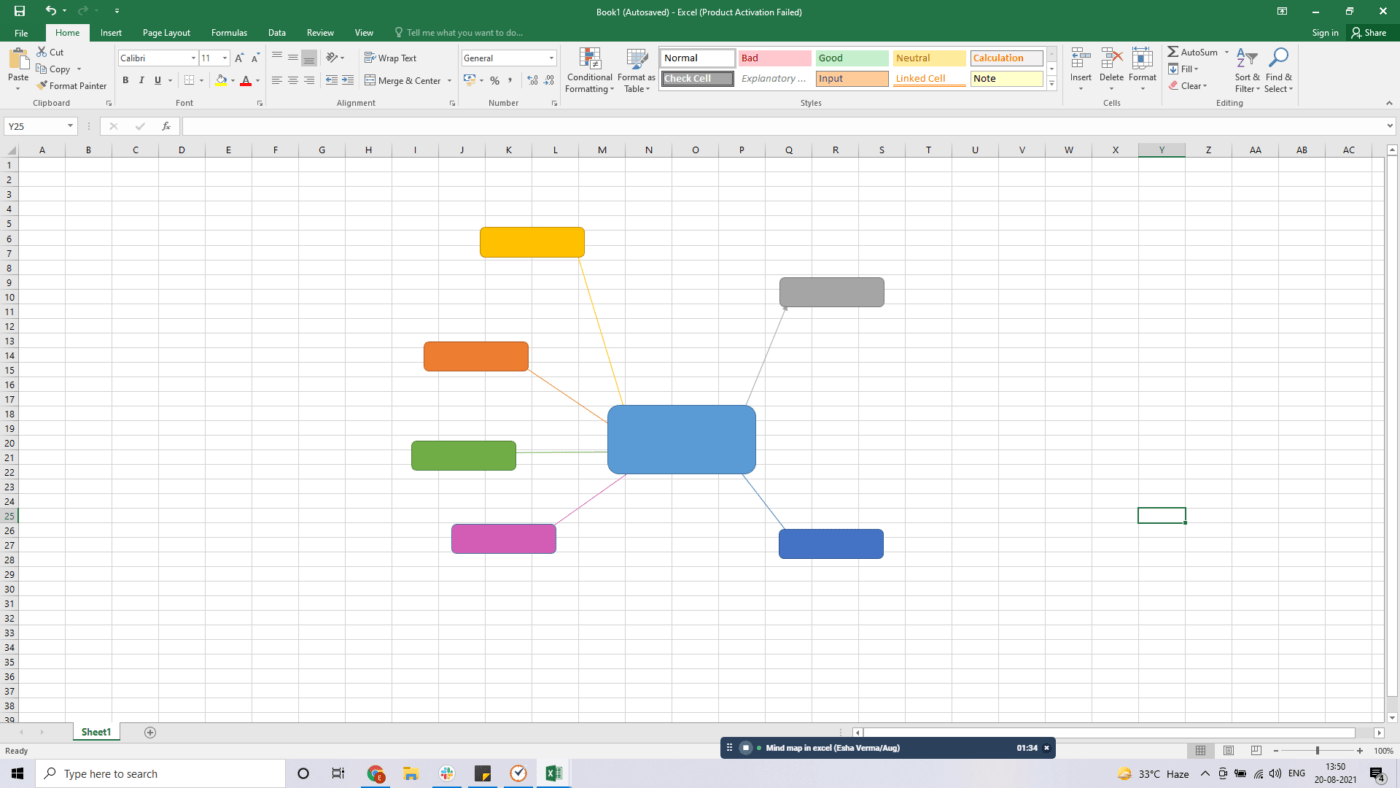
Here, we’ve created six new boxes, but you can add as many as you want. Place them around the central box the way you want them to branch out.
Step 4: format the shapes
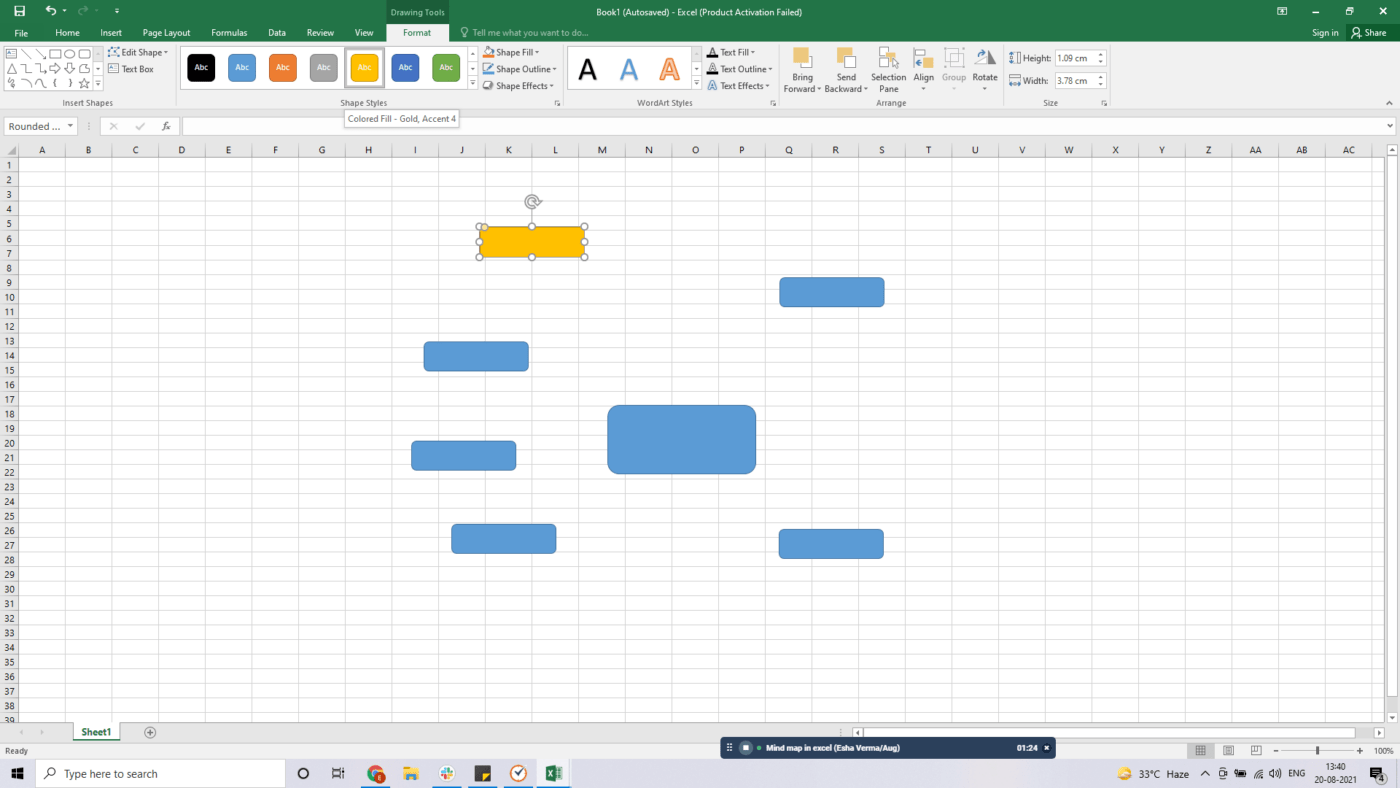
You can select the color of each shape to represent a distinct concept.
To do so, select the shape and click on the Format tab on the green ribbon at the top.
Select the color of your choice from the Shape Styles section. You can also give shape effects or choose a shape outline from this section.
Step 5: connect shapes using lines
Once you’ve changed the colors, you can now connect these shapes to the central shape using lines. You’ll find the Lines option under the Shapes tab.
Simply drag and draw each line the way you added the shapes earlier.

Do this for the rest of the shapes as well.
You can also make these lines colorful with the same Format tab on the green ribbon. Using colors will help you keep track of different branching paths.
At the end of it, your map should look something like this:
Step 6: add the text
Now, you need to fill in these shapes with ideas.
You can do that by double-clicking a shape to add or edit text.
Since this mind map is for “Project X,” the central box will carry the project’s name. The other boxes will contain ideas like scope, goals, risk analysis, etc.

Step 7: expand your mind map
Continue using the Shapes menu to add more lines and shapes to expand your mind map. There’s no limit to how big your mind map can be.
Just like there’s no limit to possibilities when Sherlock is solving a case!
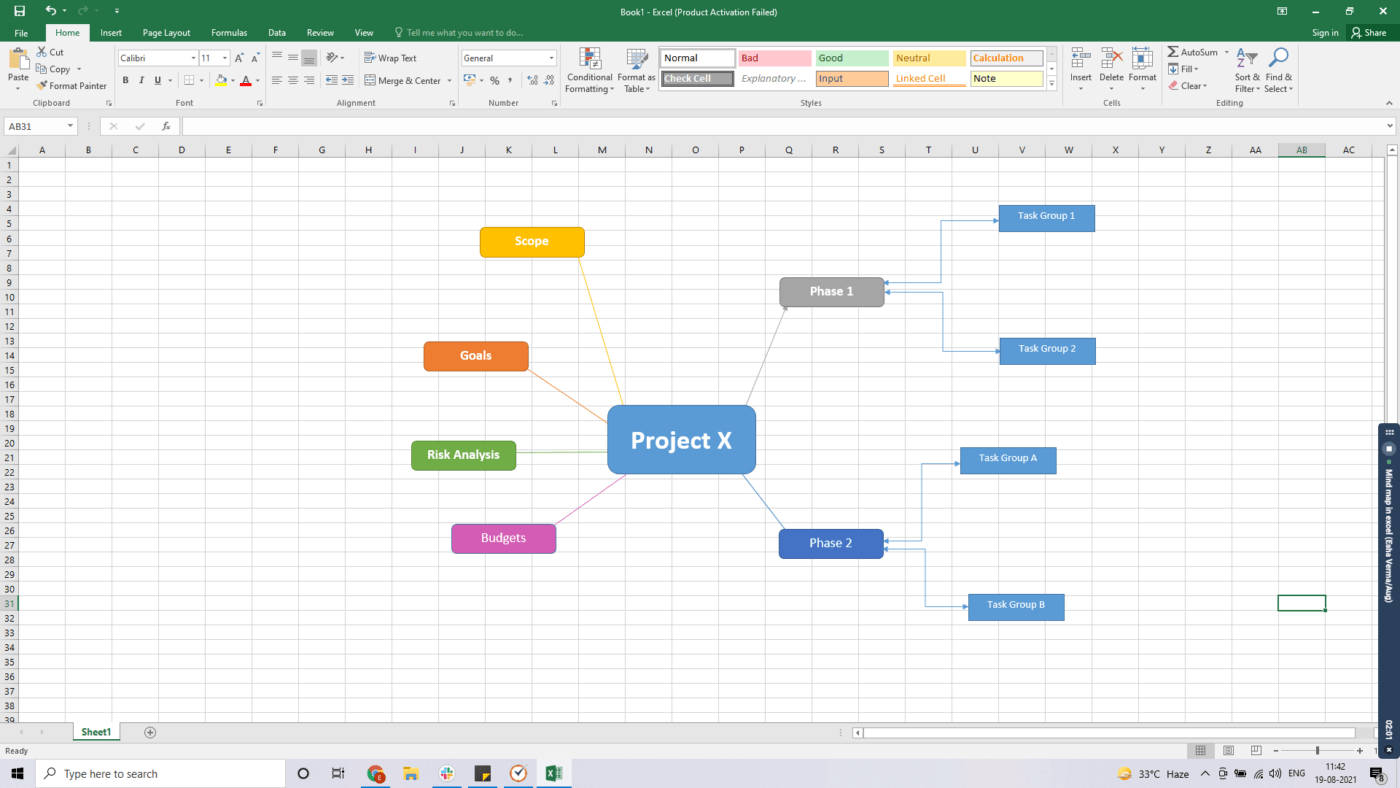
And that’s how you successfully make a mind map in Excel using Shapes.
Now, let’s explore the second option.
B. Using SmartArt
You can use SmartArt to visualize your information and ideas by choosing a layout that fits your concept.
However, these are rigid templates that are difficult to modify.
Like Sherlock’s strange ways of solving cases that are difficult to modify no matter how much Watson tries. 🤷♂️
Nonetheless, here are the steps to create a mind map using SmartArt:
Step 1: open an Excel worksheet
Open your Excel worksheet where you want to insert a mind map.
Step 2: add SmartArt
Select Insert > SmartArt and select a suitable SmartArt graphic from the Hierarchy or Relationship menu.
For this example, we’ve chosen a radial list.

Step 3: add text
Click on the small arrow icon on the left of the graphic to open the Text panel and modify the text. You can also just double-click on [TEXT] to add data.

Step 4: expand the map
To add more shapes to your map, select the graphic > click Enter on the Text pane to add more rows. SmartArt will automatically add a shape below the selected row.

Another option is to select the box that you want to add shapes around.
To do this, click on Add Shape under the Design tab of SmartArt Tools.
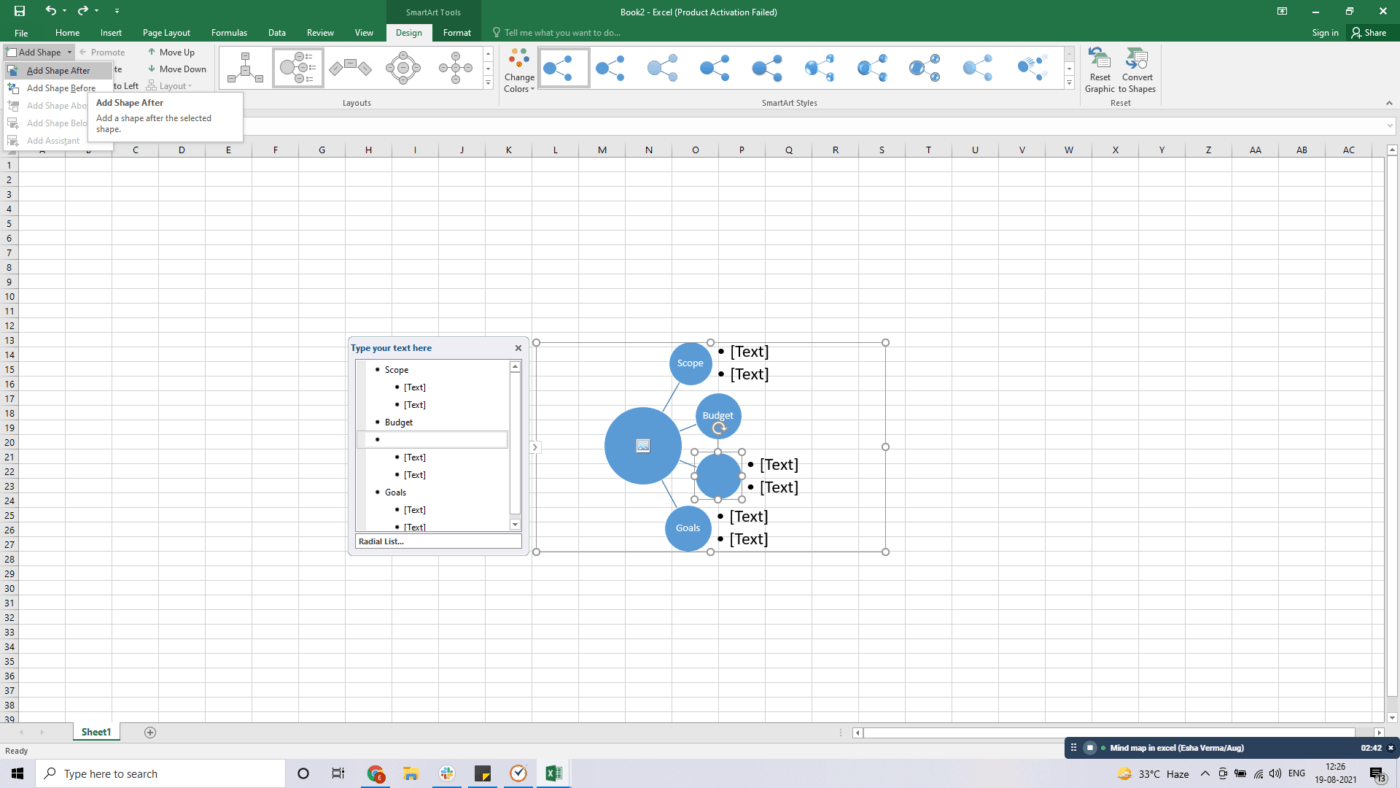
That’s it! Your Excel mind map is ready to use. 🙌
But don’t you think both approaches are pretty exhausting?
Guess what?
You can skip making a mind map from scratch in Microsoft Excel by installing some mind map plug-ins like Lucidchart Diagrams, Diagram Master, and Big Picture.
These add-ins can satiate your mind mapping requirements for a while, but you’ll eventually find Excel severely falling short on several points.
Related Content 👉 How to Make a Mind Map in Word
3 Major Drawbacks of an Excel Mind Map
Using Excel is like an old habit that dies hard.
After all, it’s like a go-to solution for handling all kinds of data.
But, that doesn’t make it the tool to create elaborate mind maps.
Here’s why you need to consider Excel alternatives for creating mind maps:
1. Time-consuming
Making mind maps from scratch in Excel may feel familiar to some old-school project managers.
But in the corporate world, time equals money. ⏱️
Drawing shapes and feeding data requires a lot of manual effort.
The process is also not intuitive enough.
You can’t quickly update or make additions to your map, and the shapes don’t stay aligned when you move them around.
Moreover, neither shapes nor SmartArt can link spreadsheet data.

Bottom line: you end up wasting time connecting lines and shapes instead of brainstorming.
2. Lacks task management and collaboration
Even though Excel has SmartArt, is it smart enough?
Excel mind maps lack project management functionalities.
You don’t get advanced features like adding tasks directly to your mind maps.
That isn’t all.
Want to share your mind maps easily?
You’re going to have a tough time since Excel’s shared workbooks come with tons of restrictions.
As Sherlock would say, “alone is what I have, alone protects me,” you don’t want to admire your creation alone, do you? 🤔
3. Limited integrations
Integrating your mind maps with other apps can help you plan and execute your ideas better.
It also saves you from toggling between different windows.
However, you can’t do this on Excel. Blame it on its limited native integration abilities.
The only way out is to take the help of third-party apps like Zapier.
Now, how do you make up for all these Excel drawbacks and put your mind (maps) to good use?
Enter ClickUp. 👋 😊
Bonus: Mind Maps vs Concept Maps
Create Effortless Mind Maps with ClickUp

ClickUp is one of the world’s highest-rated productivity tools that comes with a host of mind-mapping blowing features you’ll love. 🤯
It’s a versatile project management software used by teams to boost productivity, and better manage their ideas and projects.
With ClickUp’s Mind Maps, you can effortlessly convert your thoughts and ideas into beautiful Mind Maps. 🧠✨🌈
How?
ClickUp gives you two modes for mind mapping:
1. Blank mode
Want your ideas to flow freely? No problem.
ClickUp gives you a Blank mode to create free-form mind maps.
With the Blank mode, you can create mind maps from scratch that don’t have to connect to any conventional task structure.
We know the unconventional Sherlock in you wants to rise and shine.
In this mode, you can create as many nodes (branches) as you want.
And if you want, you can also convert them to tasks on any list.

Creating a new Mind Map, adding branches, and customizing colors in ClickUp
In the Blank mode, you can:
- Create a node using the node toolbar or your keyboard
- Create sibling nodes by using the icon on the bottom of each node
- Drag and drop a node and its connected branch to any other node
- Create a new child node using the + on the end of each node
- Delete any node by selecting it and clicking on the trash icon
What’s more?
You can use the Public Sharing option to share your Mind Maps with anyone outside your Workspace. This helps stakeholders view and stay updated on project progress.

Adjusting Public Sharing options in ClickUp’s Mind Maps
2. Tasks mode
Want to follow a more structured approach?
In the Tasks mode, you can map out the structure of your workspace by organizing projects into logical paths.
You can create, edit, rearrange, or filter out tasks in the mind map itself. This will give you a good idea of how your projects and tasks are connected to one another.
Here’s how you can customize your mind map in this mode:
- Select a List node
- Click + to add a new task
- Write in the task title
You can also move your tasks from one place to another:
- Click on the task branch. A small diamond will appear
- Grab it and move the diamond to another list

Using Tasks mode in ClickUp’ Mind Maps to structure and organize projects into logical paths
However, creating mind maps isn’t the only thing you can do with ClickUp.
Here are the other fantastic features that this powerful and intuitive mind mapping tool offers:
- Table view: get a more condensed view of all the information at once. Navigate between fields, edit in bulk, and export data like you would do in Excel
- Docs: easily create, share, and edit documents in real-time with your virtual team
- Tasks: break down your projects into smaller tasks and subtasks and assign them to Multiple Assignees
- Checklists: create to-do lists for complex tasks to keep track of work done
- Notepad: note down your ideas, create personal checklists and take unlimited notes in any browser
- Dashboard: get a high-level overview of all your projects. Select from 50+ widget variations that instantly provide data for any activities or information you want
- Views: select from different views such as Board view, Box view, Calendar view, Gantt chart, Workload, etc.
- Automations: automate repetitive tasks with 50+ pre-built workflow automation commands
- Integrations: integrate work apps like Google Drive, Dropbox, Zoom, etc., into your ClickUp workspace
Who’ll Solve the Case of the Mind Maps Better: Excel or ClickUp?
You don’t have to be Sherlock Holmes to solve this case! 🕵️♂️
Sure, Excel is a widely used spreadsheet software, but it’s not a mind map tool.
You can only manipulate it to make one.
Instead, use ClickUp, a powerful project management tool to let you create free-flow mind maps within seconds.
And that’s not where we rest our case.
ClickUp has a long list of features such as Notepad, Checklists, Table view, Docs, and more, that can help increase your productivity tenfold.
Hop on ClickUp for free to use mind maps and visualize out-of-the-world ideas every day.

Related readings:
- How to create a Gantt chart in Excel
- How to create a dashboard in Excel
- How to show dependencies in Excel
- How to make a graph in Excel
- How to make a mind map in Google Docs
- How to Make a Waterfall Chart in Excel
- Mind Map Examples for Students


