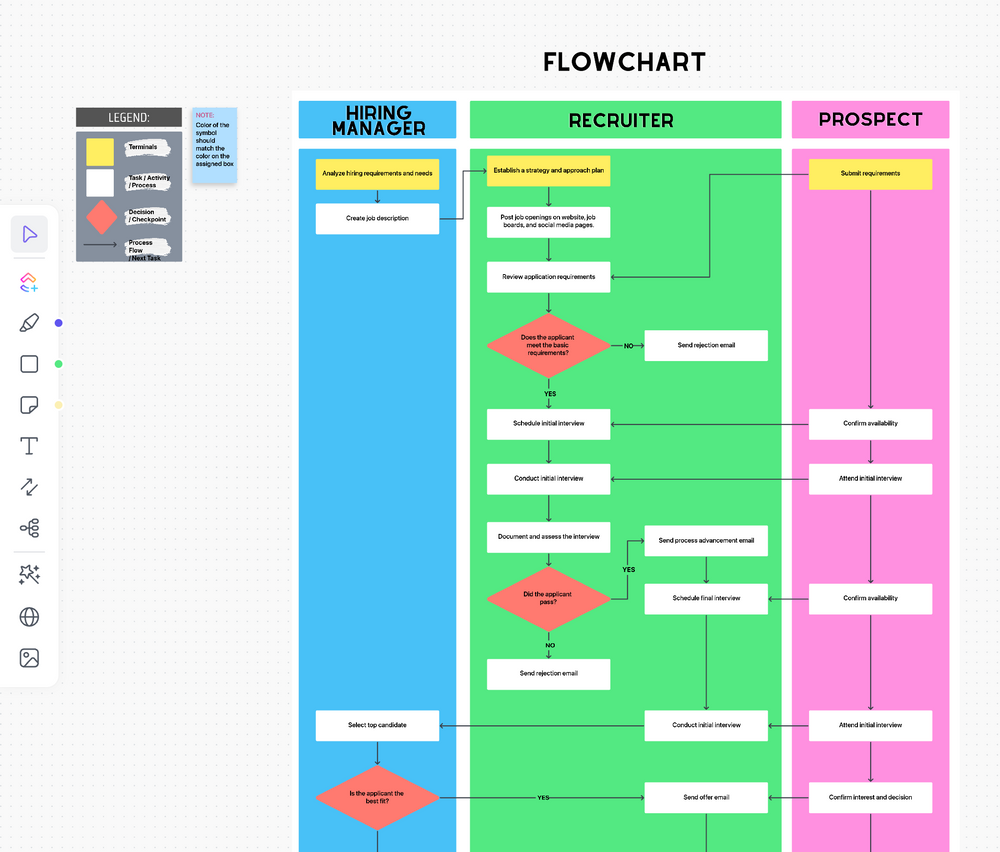
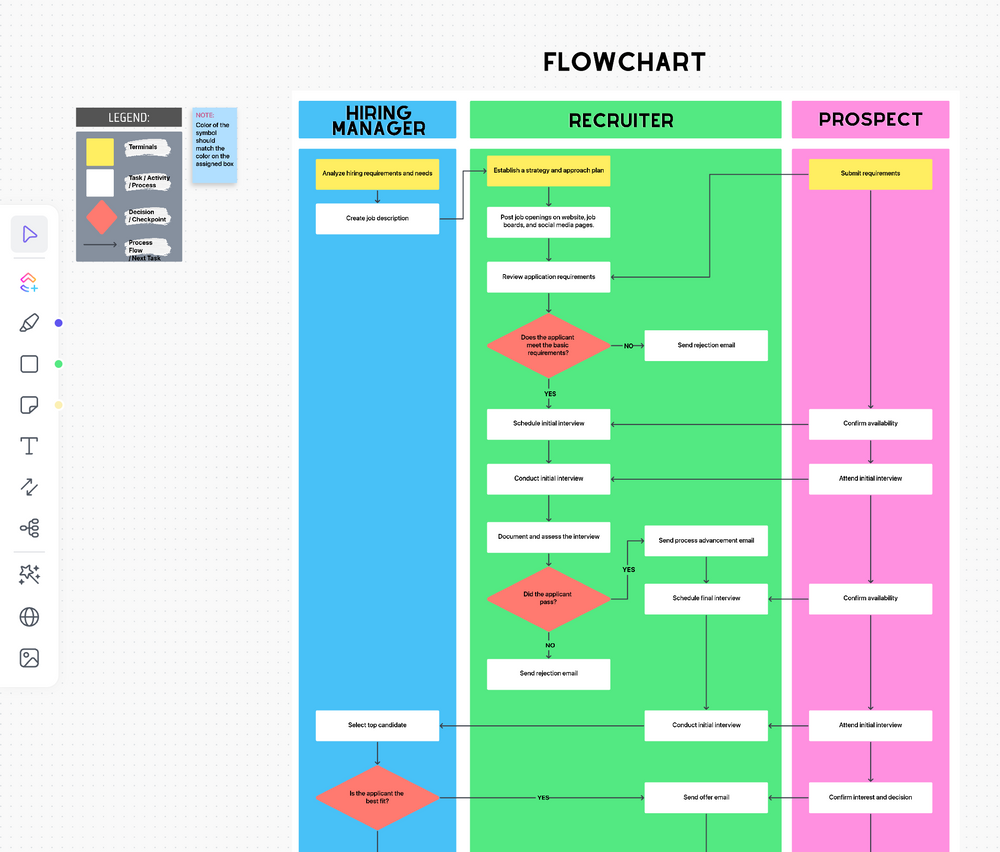
Microsoft Excel is a spreadsheet software program generally used to organize and format large amounts of data, but it also packs a diverse shapes gallery to make flowcharts!
A SmartArt graphic is the go-to illustration to create any diagram in Excel. However, you need a more compelling flowchart for collaboration and communication.
In this guide, we’ll walk through the function of flowcharts, how to create a flowchart in Excel, and two Excel alternatives to make your flowcharts come to life. (Spoiler: the two alternatives are in the same software!)
⏰ 60-Second Summary
- Consider using tools like ClickUp for better flowchart creation and task management
- Flowcharts visualize workflows and processes
- Key shapes include Oval (Terminator), Rectangle (Process), and Diamond (Decision)
- Create flowcharts in Excel using Insert > Shapes
- Customize shape sizes and text for clarity
- Connect shapes using arrows to show relationships
- Excel is not ideal for collaboration among teams
What is a flowchart?
A flowchart is a diagram made of shapes connected by arrows to visualize a workflow, process, or any decision-making procedure. Flowcharts are for everyone because unlike text-heavy documents, they condense information so the audience can digest the information faster.
Flowcharts turn ideas into thought-out actions to solve problems and ultimately, increase productivity because things run smoothly. Think about any event you’ve encountered at some point at your organization, for example. It could be new hire onboarding, requesting PTO, or organizing a project kickoff meeting. These events have a process in place so everyone consistently takes the right steps towards success. Flowcharts help the person creating these processes visualize the scope, sequence, stages, and stakeholders involved.
Bonus: Diagram software!
Basic shapes used in Excel flowcharts
It’s not necessary to be well-versed in flowchart programming. All you need to know are the basic building blocks to make your flowchart easy to understand. The four main flowchart shapes we’ll use for this tutorial are:

| Symbol | Function | How to Add |
|---|---|---|
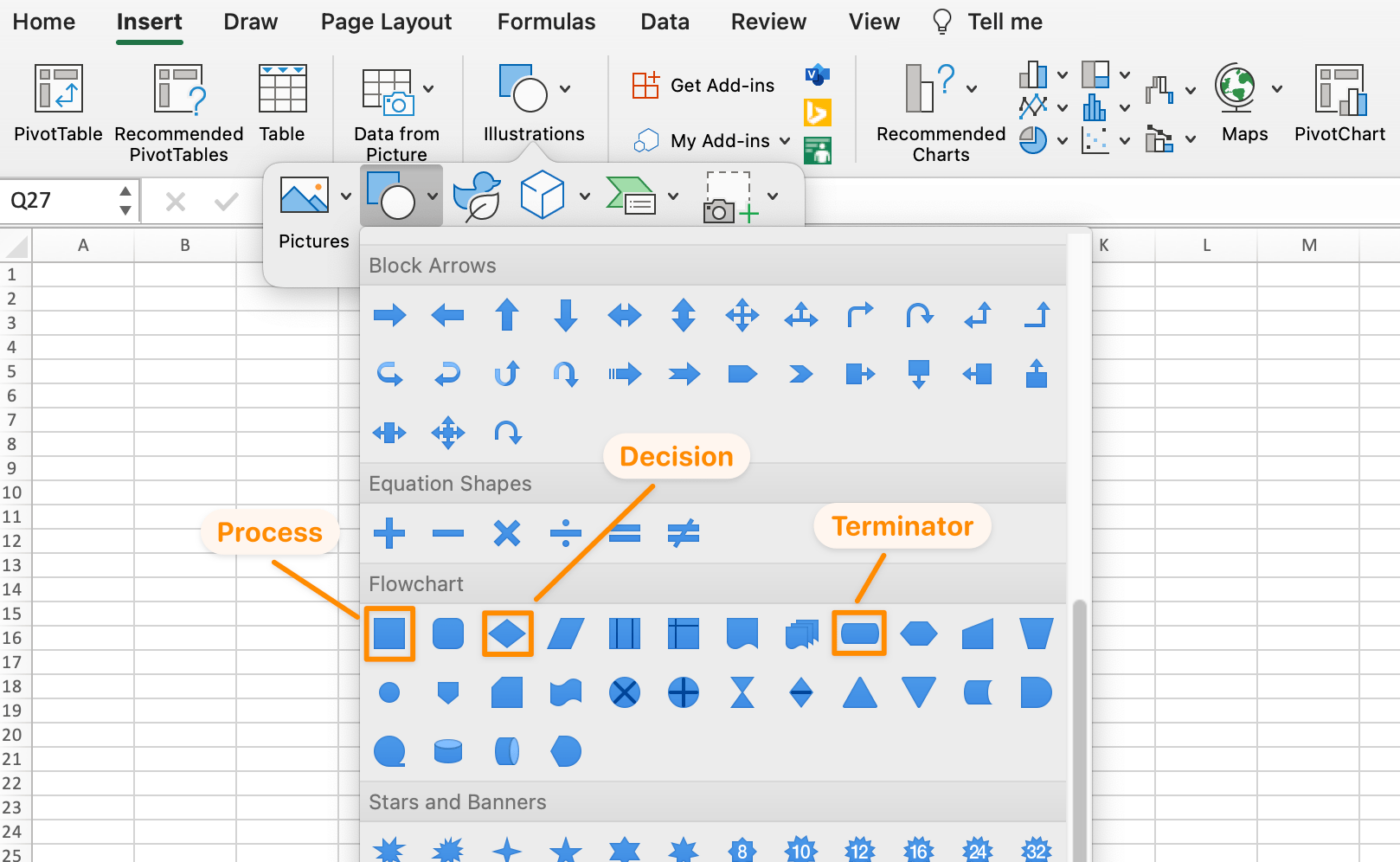
| Oval | Terminal: the start point and end point of a flowchart | Insert tab > Illustration > Shapes > Flowchart > Terminator |
| Rectangle | Process: represents a single step in the procedure | Insert tab > Illustration > Shapes > Flowchart > Process |
| Diamond | Decision: represents a decision action | Insert tab > Illustration > Shapes > Flowchart > Decision |
| Arrow | Arrow: connects shapes to show the relationship | Insert tab > Illustration > Shapes > Flowchart > Arrow |
Ready to create a flowchart of your own? Choose one of your ideas or tasks and follow along with our step-by-step guide to create this flowchart! ⬇️
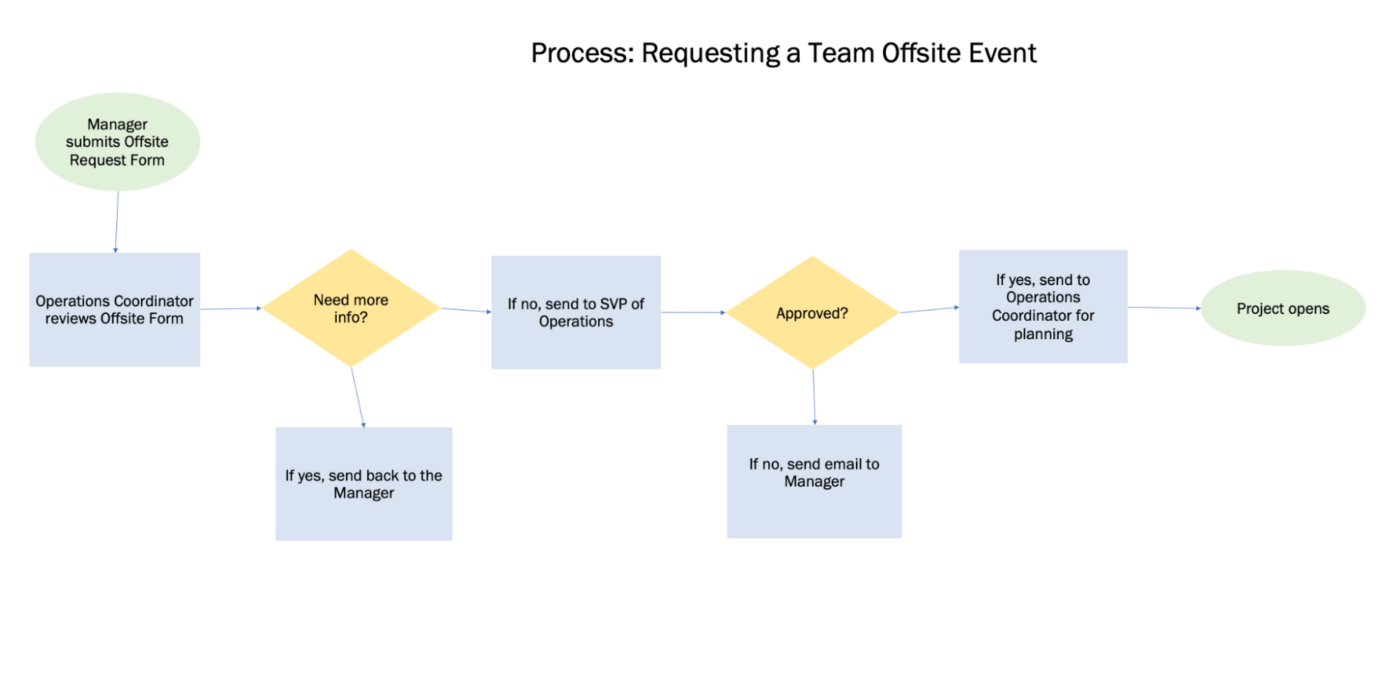
How to create a flowchart in Excel with custom shapes
⭐ Featured Template
Before you try building a flowchart in Excel, try ClickUp’s free Data Flow Diagram Template. It’s made for visual planning, so you can sketch out your process without getting stuck in cells and shapes.
Note: In this tutorial, we use Microsoft Excel for Mac Version 16.60. The steps and features may look different if you’re on another version.
Excel is a large application with hundreds of functions. The two most important functions to use and speed up your flowchart build are: copy and paste. So rather than adding shapes one by one to your spreadsheet, we’ll format the shapes first. Then you can copy and paste the shapes into your flowchart process. Here we go!
Related: Learn how to create a flowchart in Google Docs.
1. Add the terminator, process, and decision flowchart shapes
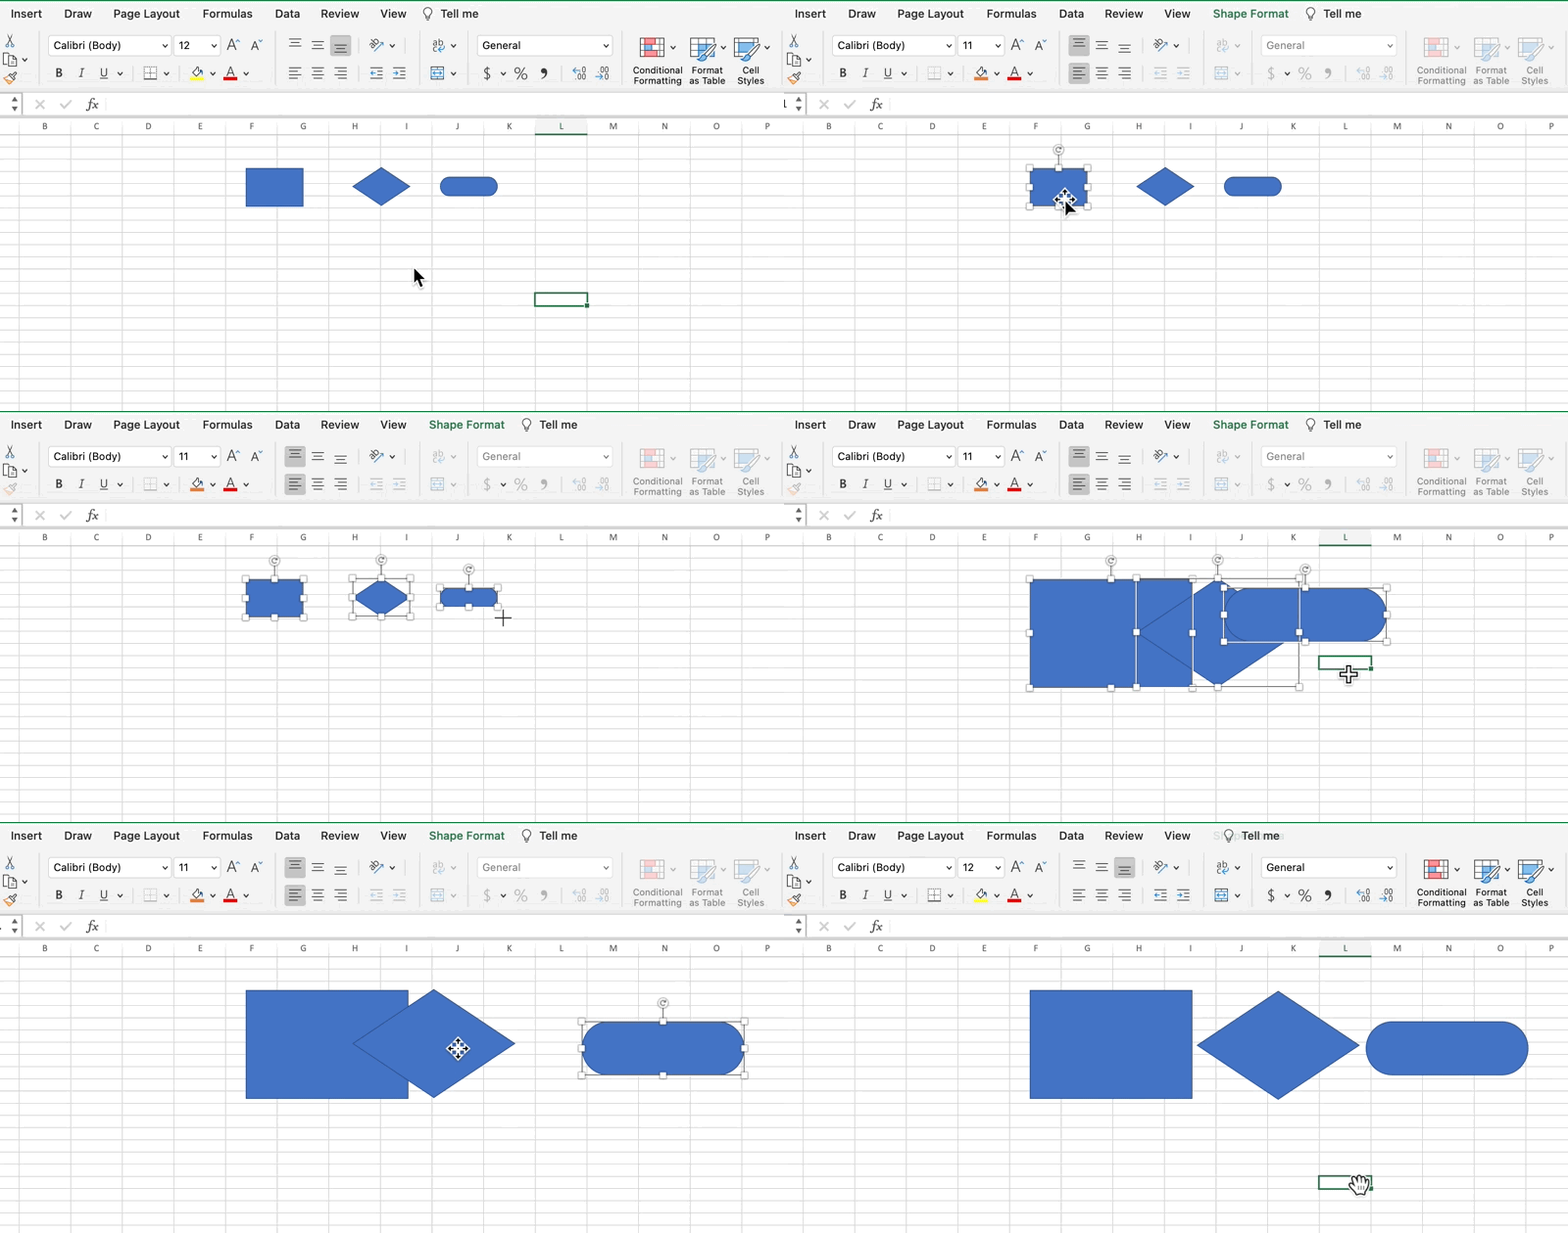
Go to the Insert tab > Illustration > Shapes > Flowchart > select a shape > click at the top of the spreadsheet to add.
2. Adjust the flowchart shape sizes
We want to add text inside the shapes, so let’s make them bigger. Select one of the shapes > press Command + A on your keyboard to select all shapes > hold Shift > go to a shape’s corner and drag to expand all three flowchart shapes.
3. Customize each flowchart shape
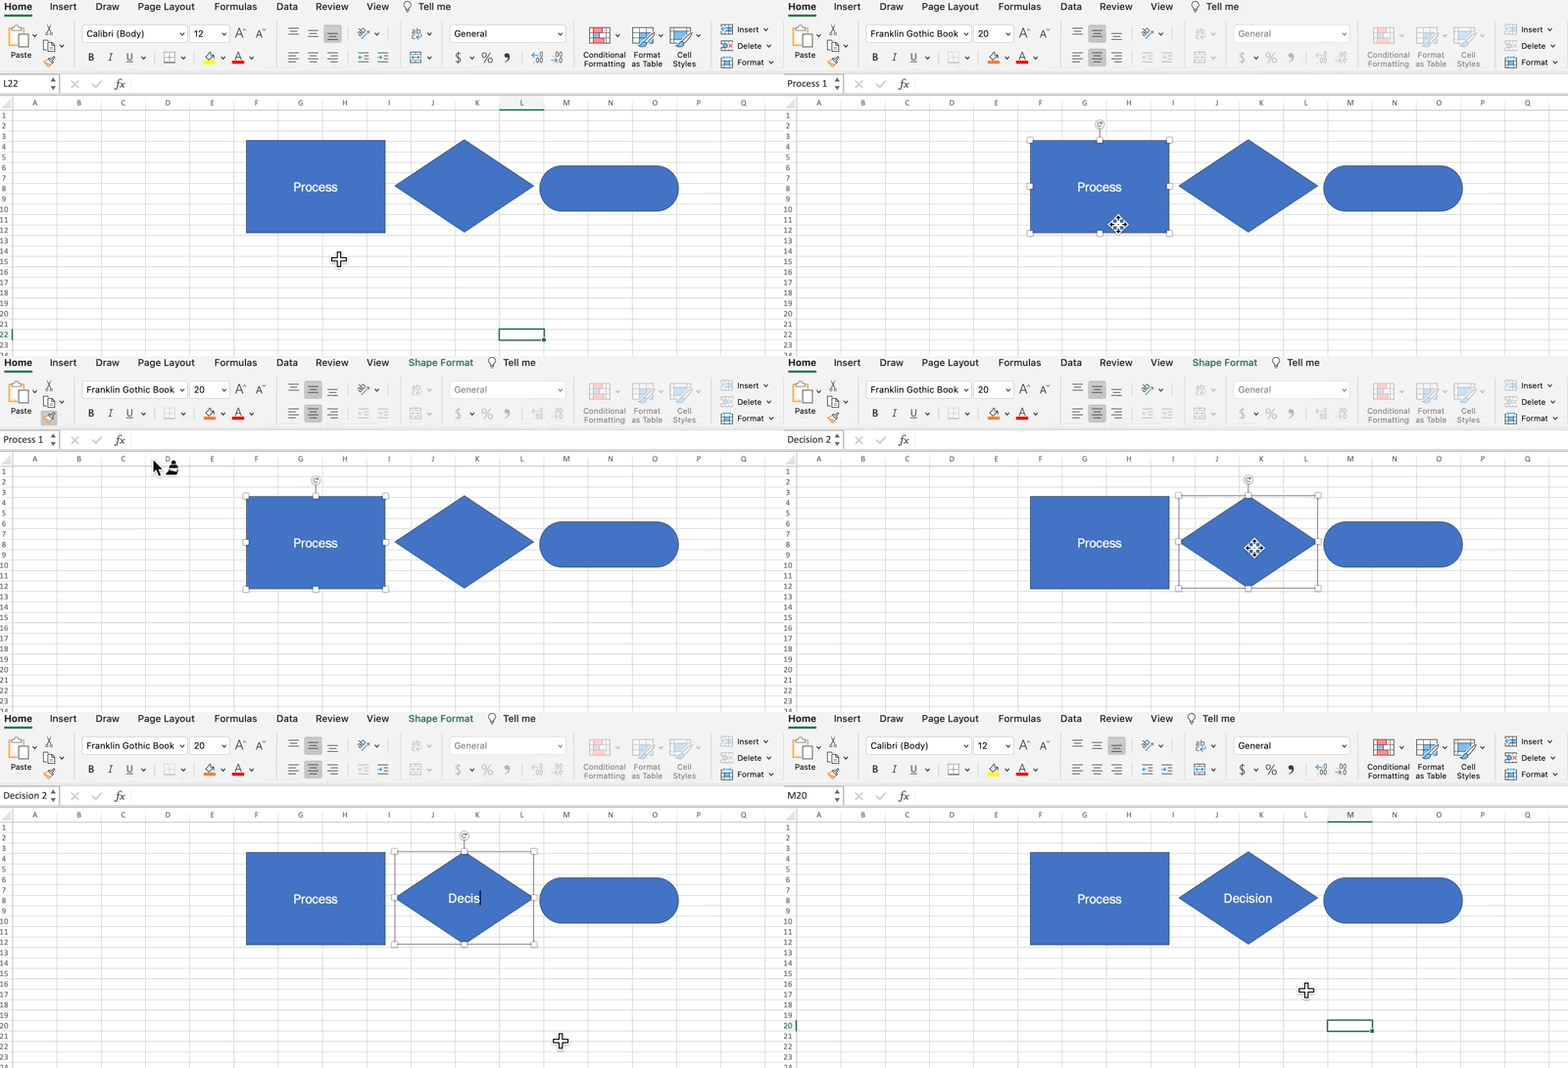
We’ll use the copy and paste function to customize the shapes, but there’s a handy Format icon to help us with this!
- Double click inside the Process shape to reveal a cursor, label the shape Process, and center the text
- Change the font name and font size to your preference
- Select the Process shape > click the Format icon under the Home tab > click on the other shapes to paste the format
- Label the diamond shape Decision and the oval shape Terminator
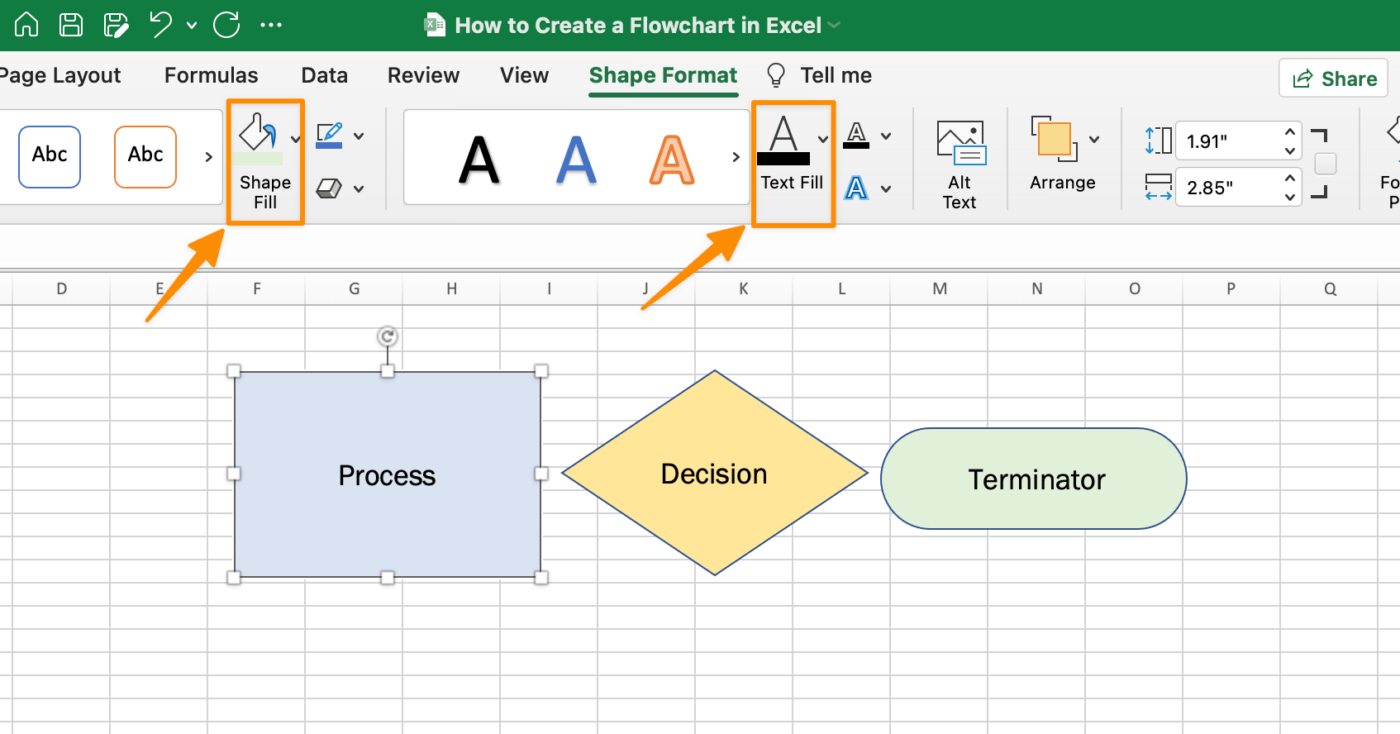
Next, select background and font colors for each shape. Click on a shape > go to the Shape Format tab > Shape Fill and Text Fill
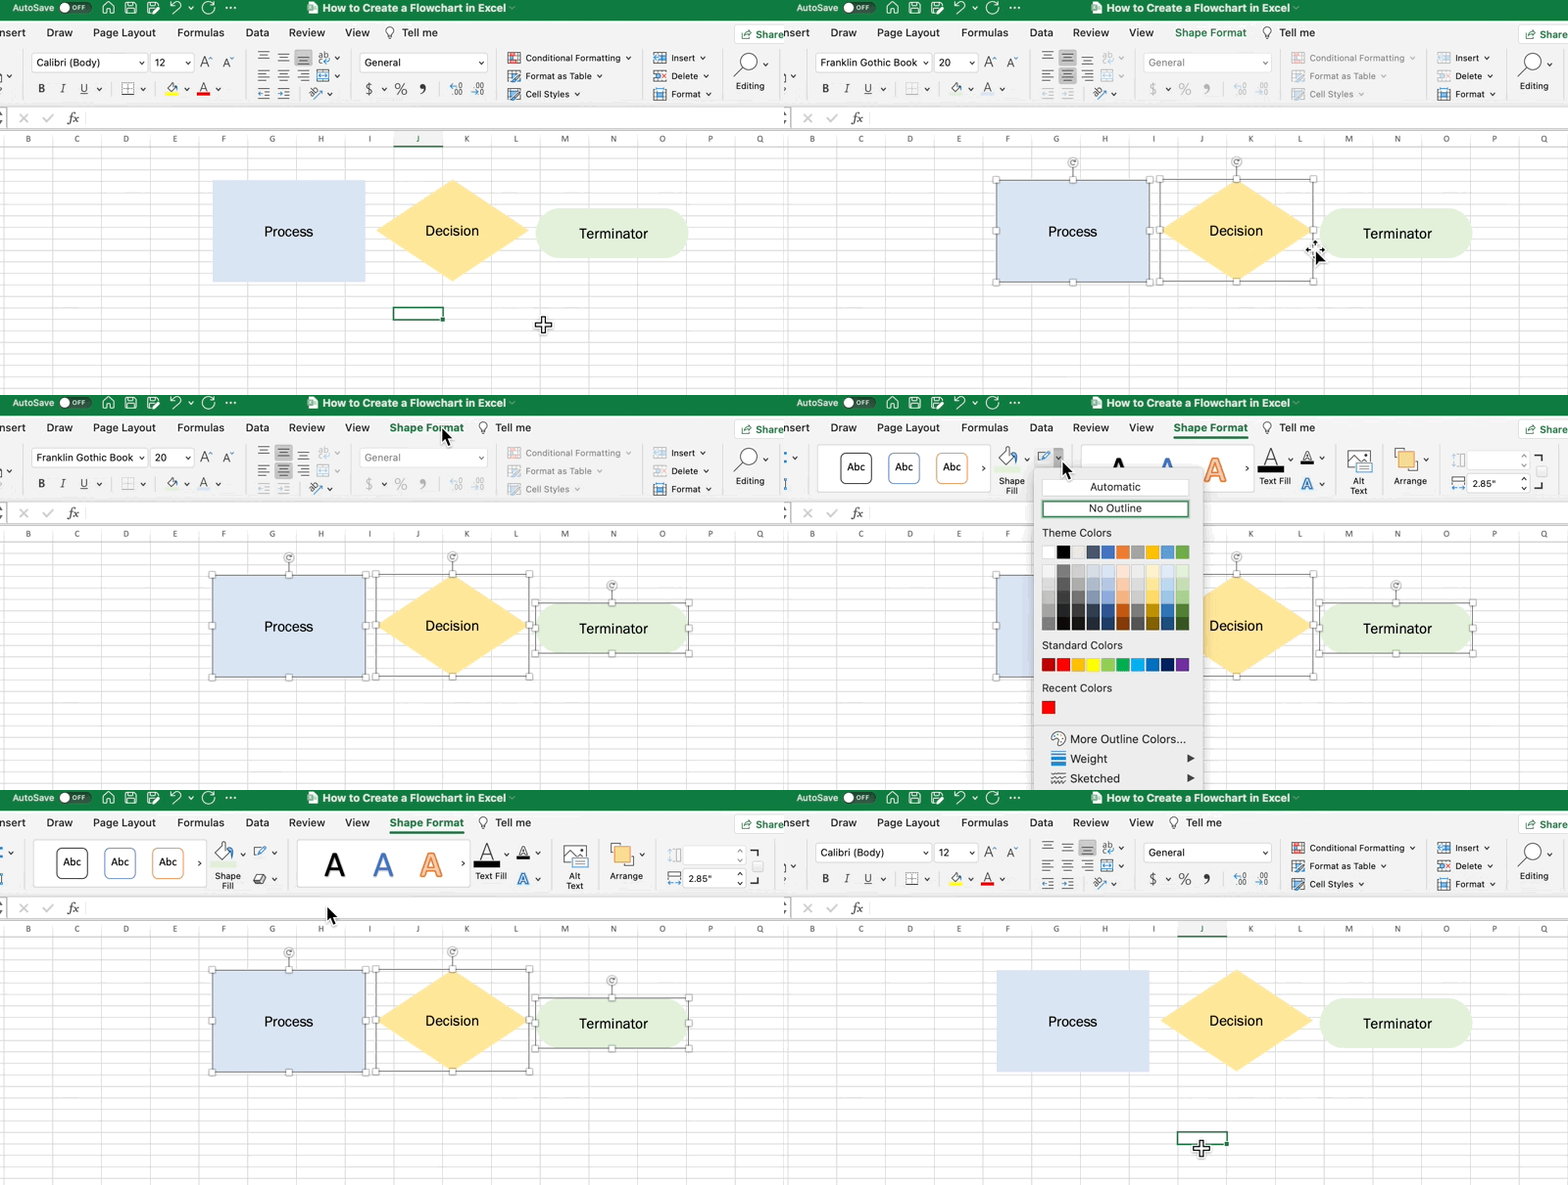
Pro Tip: To remove the shape outline for a cleaner look, select all shapes > Shape Format tab > Shape Outline > No Outline
4. Begin adding your flowchart steps
With your fully customized (and consistent) shapes, copy and paste the Excel flowchart shape to map out your steps!
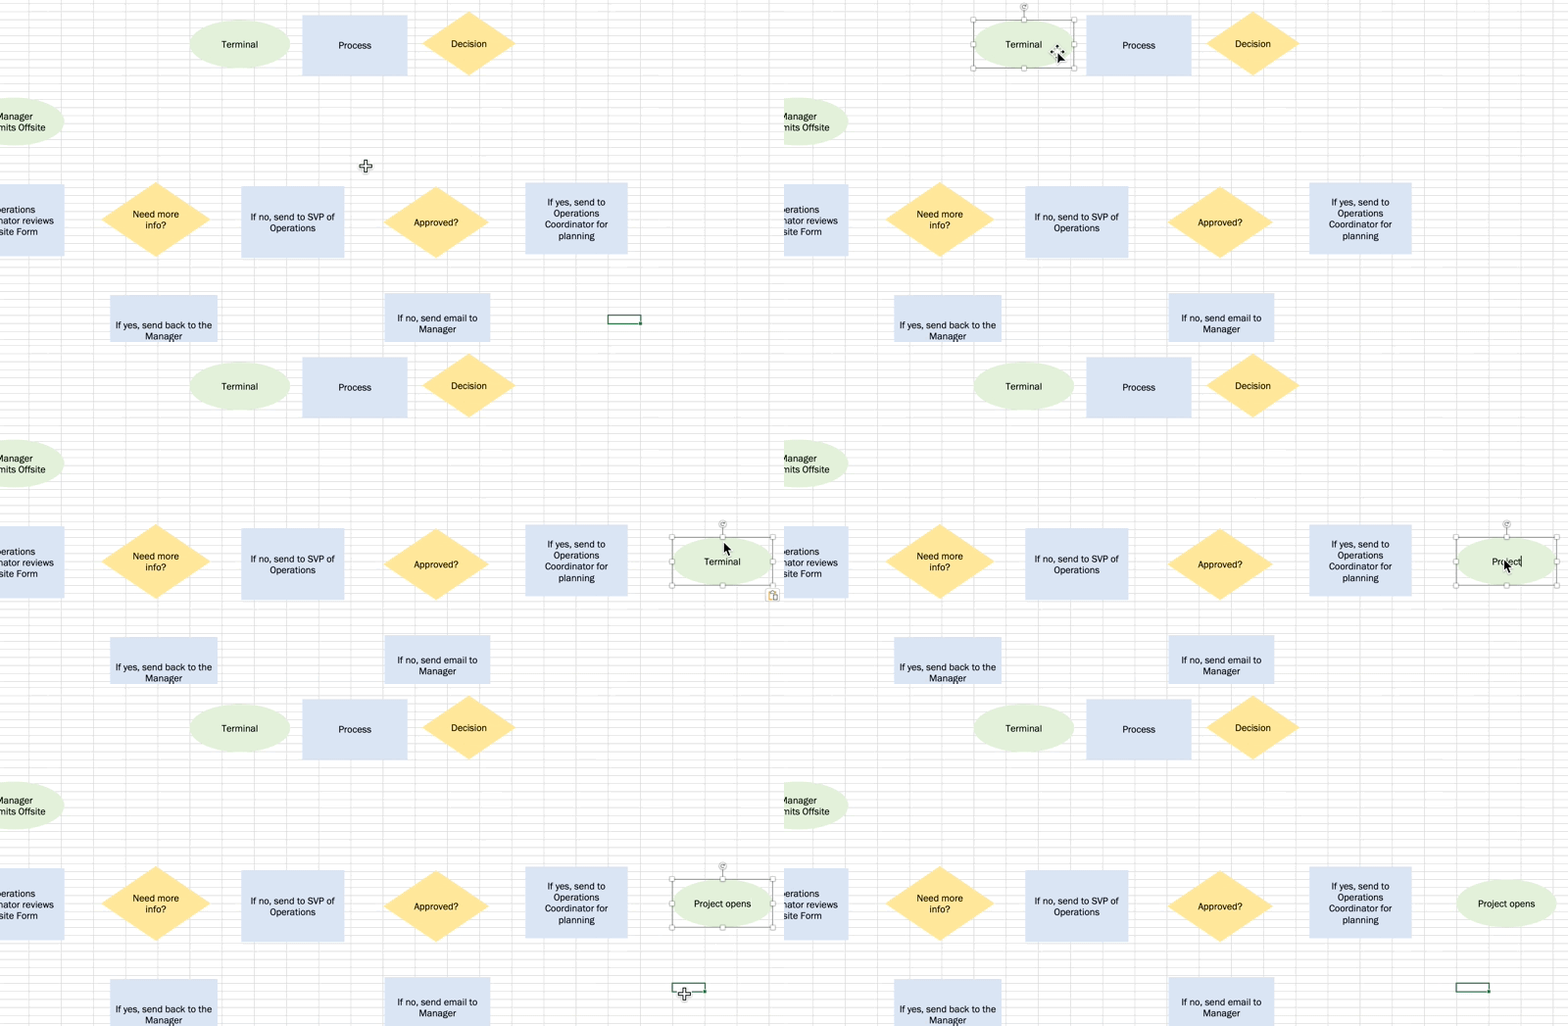
5. Insert Tab to add the connectors to show each shape relationship
Go the Insert tab > Shapes > Lines > Arrow.
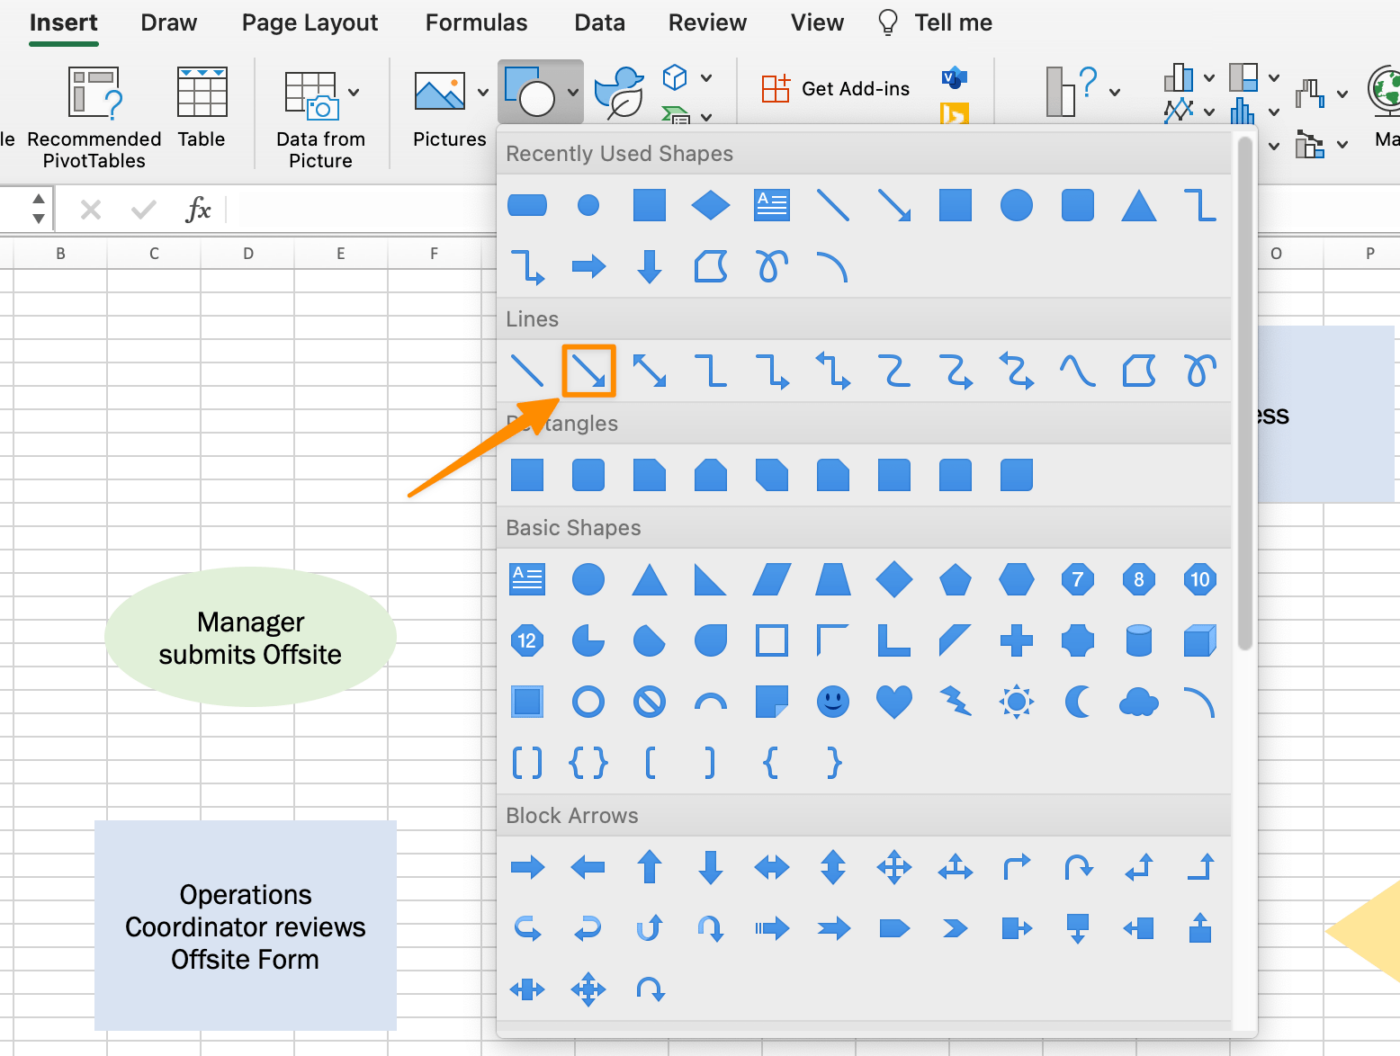
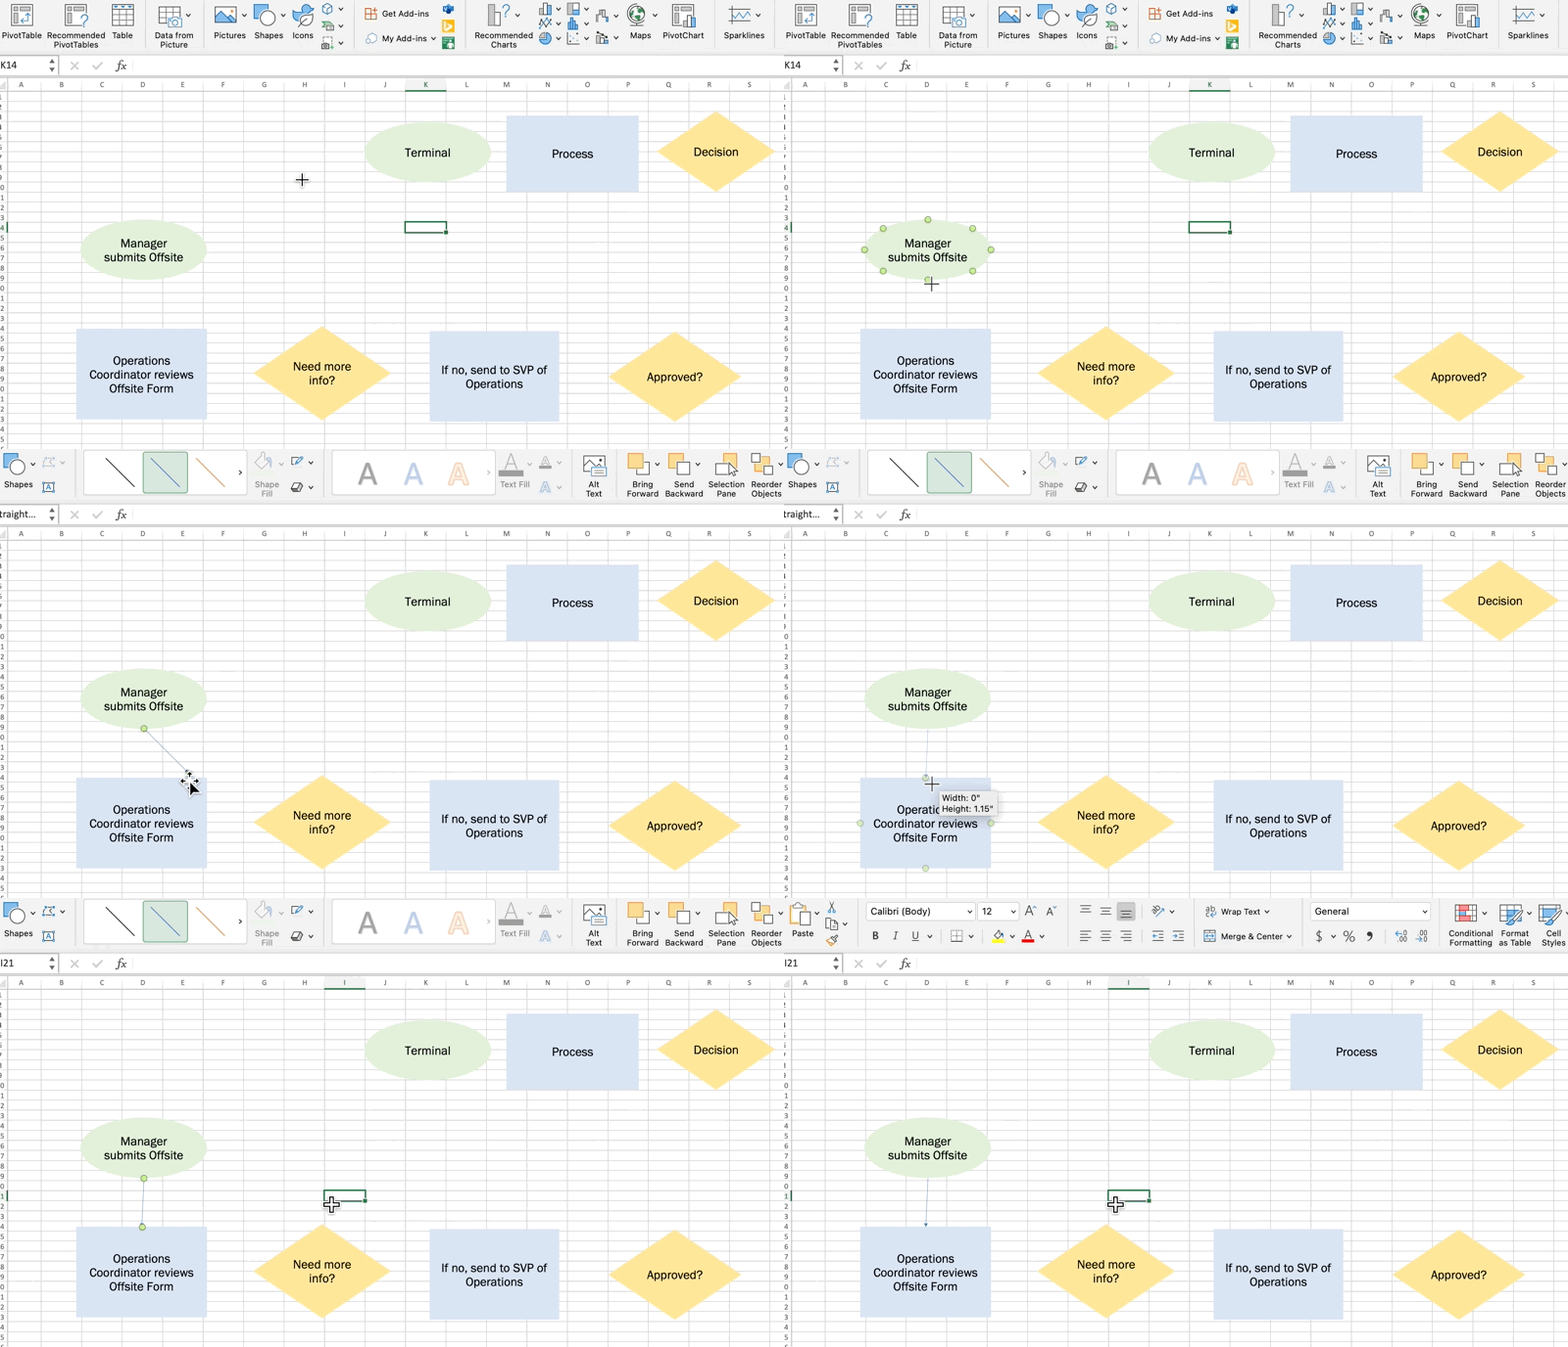
Use the green circles as a guide to draw the arrows and connect the shapes.
6. Add a title to your flowchart
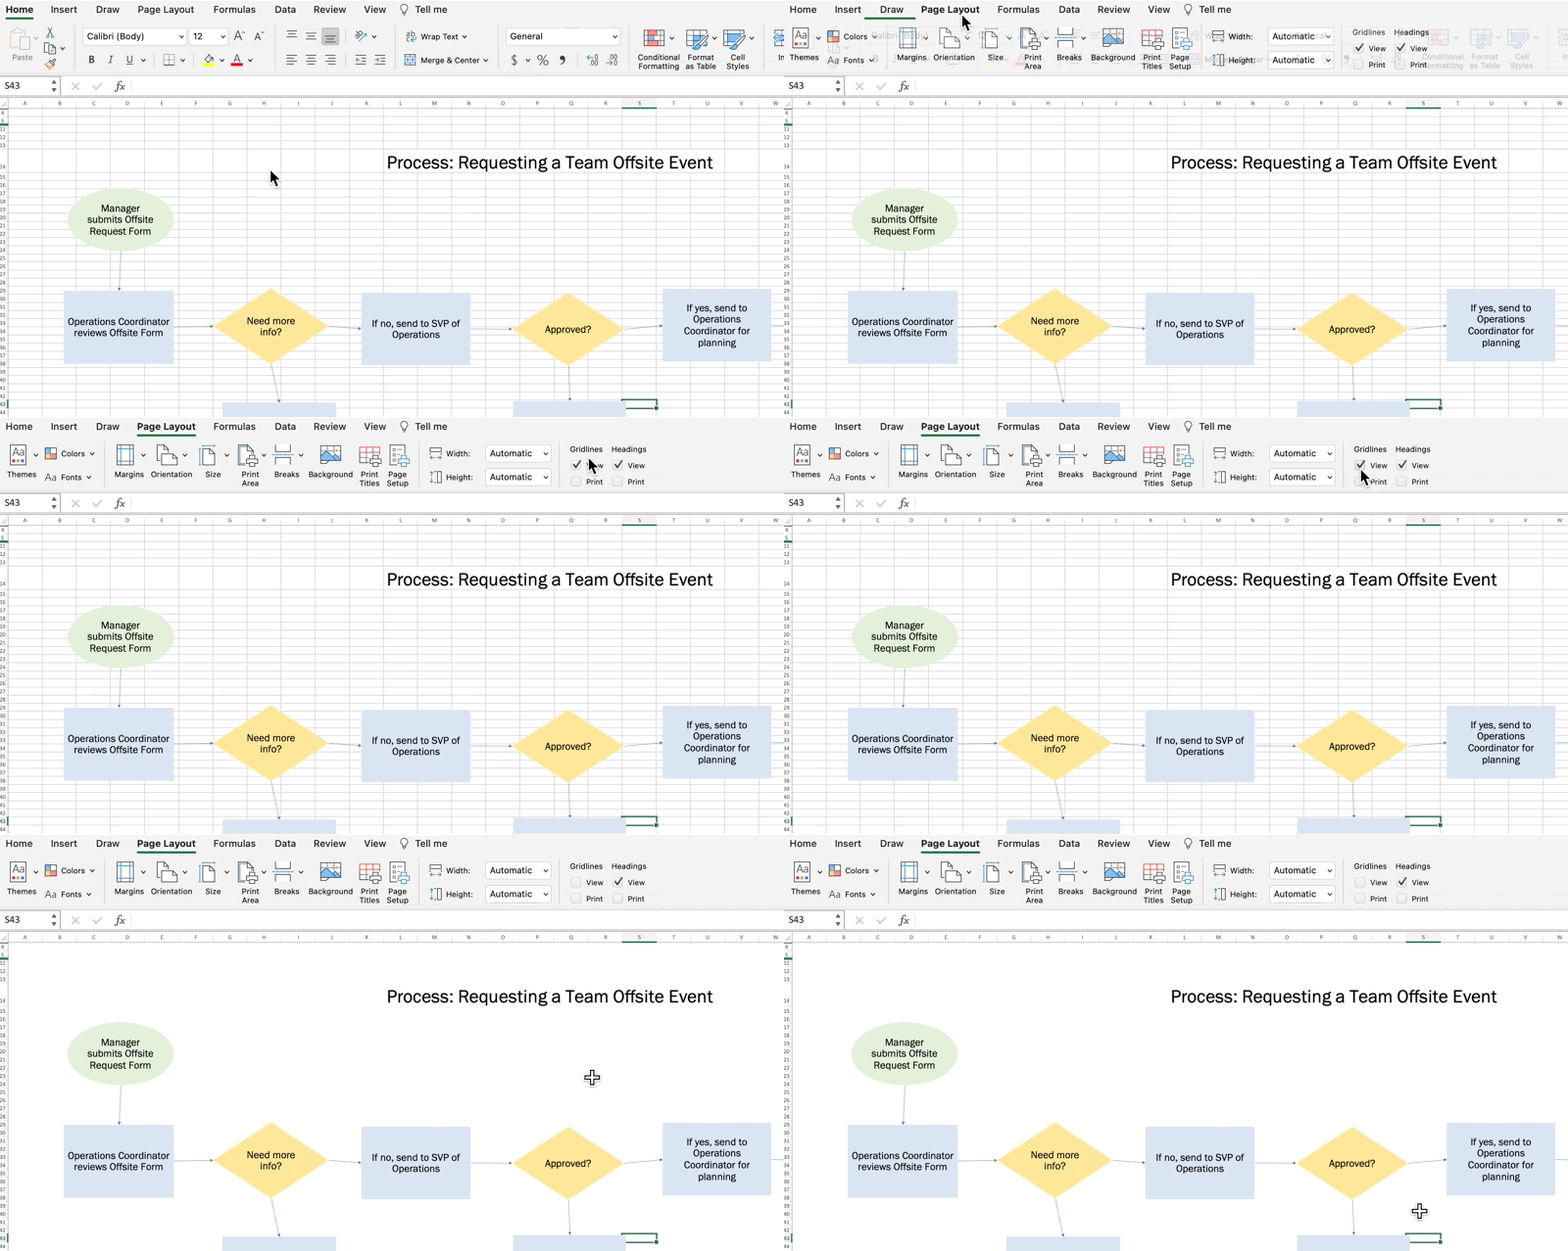
Delete the shapes at the top of your spreadsheet and add a title.
Tip: For a cleaner look, remove the gridlines in your Excel flowchart. Go to the Page Layout tab > uncheck the View box under Gridlines
Bonus: Best Flowchart Software Tools for Mac
8. Save your Excel flowchart as a template
Go to File > Save as Template. Name your flowchart template and click Save. (Double check the File Format is set as Excel Template.)
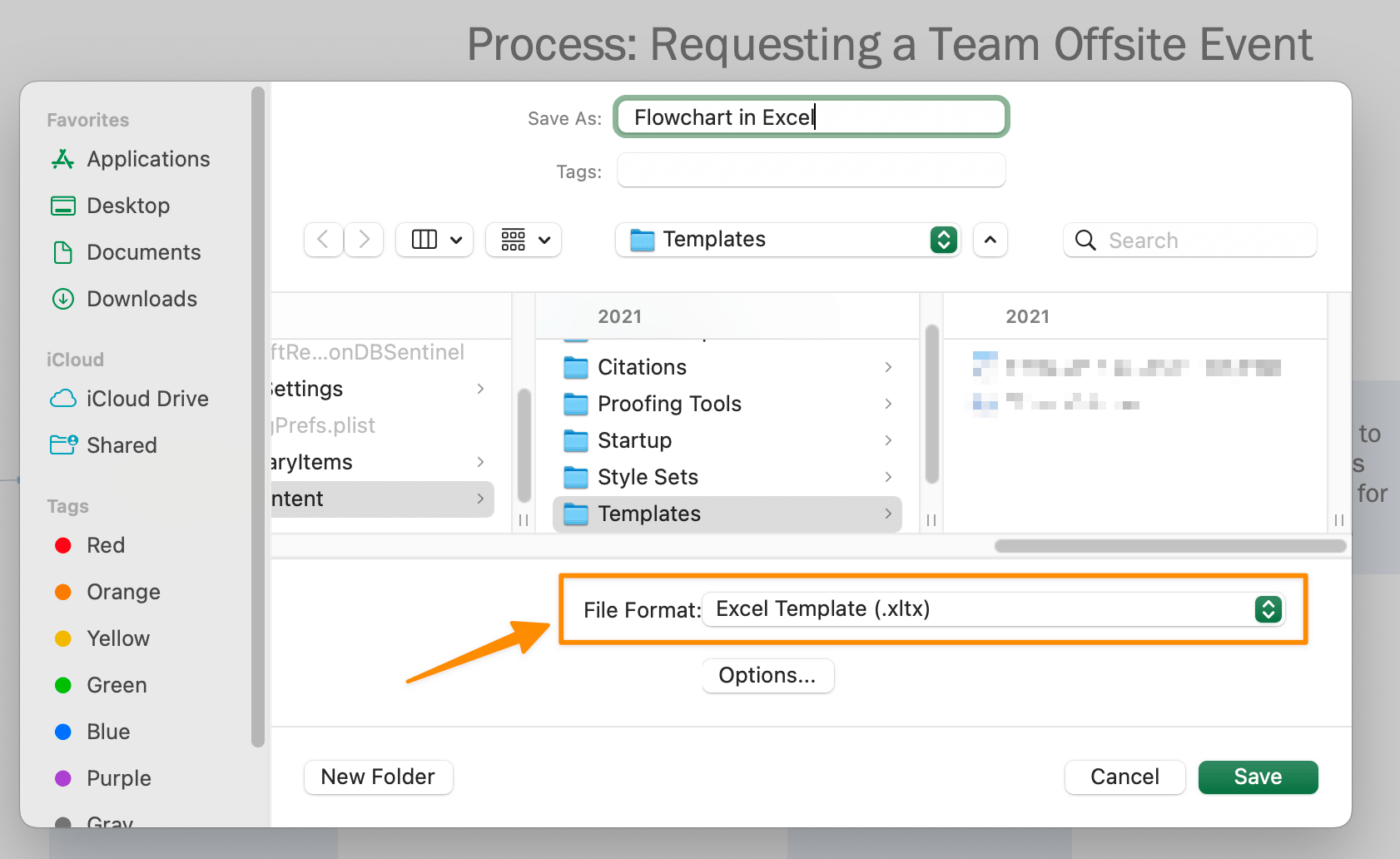
There you have it! You now know how to make a flowchart in Excel! We have other Microsoft Office resources and recommendations if you’re looking for other alternatives to improve your planning needs. ⬇️
- How to Create a Timesheet in Excel
- How to Create a To Do List in Excel
- How to Create a Mind Map in Excel
- How to Make a Schedule in Excel
- How to Create a Form in Excel
- How to Make a Dashboard in Excel
- How to Make an Org Chart in Excel
- How to Make a Graph in Excel
Limitations of Excel flowcharts
While it’s handy to know how to create flowcharts in a popular tool like Microsoft Excel, spreadsheets are not collaboration-friendly. People who are less familiar with Excel navigation will have a harder experience and longer learning curve to complete work.
As we all know (and experience), projects change daily. So while you’re busy manually creating flowcharts in Excel, the data, people, and circumstances might change, and you’ll have to start over. However, that’s not ideal for creative brainstorming sessions!
This inevitable situation is why it’s essential to use an intuitive flowchart software tool to remove the manual work and update in real-time. With ClickUp, a powerful Microsoft Excel alternative, you won’t need to create multiple versions of flowchart templates!
Create Flowcharts with Excel Alternatives
ClickUp is an all-in-one productivity platform where teams come together to plan, organize, and collaborate on work using tasks, Docs, Mind Maps, Goals, Whiteboards, and more! Easily customized with just a few clicks, ClickUp lets teams of all types and sizes deliver work more effectively, boosting productivity to new heights.
Flowcharts in ClickUp do what Excel spreadsheets cannot: turn each business process into actionable tasks.
Flowcharts aren’t made to be built and stored somewhere in a shared drive. They’re meant to be a usable solution or workflow. With ClickUp, tasks are created directly from the flowchart so everyone is aware of roles, tasks, and deadlines!
Related: Show dependencies in Excel & make a waterfall chart in Excel
Mind Maps in ClickUp
Mind Maps in ClickUp are perfect to offload a stream of consciousness or planned information. With Mind Maps, you won’t have to stress over the formatting details of each shape or step. You’ll have more brainpower saved for the actual work.
It’s easy to create a ClickUp Mind Map and get started on your projects, ideas, and even existing tasks for the ultimate visual outline. To kick things off, download the Mind Map template with two different types of mind maps:
- Task Mode Mind Map: map out your ideas and turn them into trackable ClickUp tasks
- Blank Mode Mind Map: create free-form diagrams to organize your ideas
Whiteboards in ClickUp
Earlier we mentioned Excel spreadsheets are not ideal for creative brainstorming workshops. So, what’s the alternative? ClickUp Whiteboards!
Similar to Mind Maps, the Whiteboards feature offers more functionalities like freehand drawing, rich text formatting, images, and web links to create more context while you’re planning. Whiteboards are the fastest way to collaborate with your team and bridge the gap between brainstorming and getting work done.
A blank canvas and blinking cursor might be intimidating if you’re new to visual collaboration tools. ClickUp also come with templates to jumpstart your brainstorming sessions! Get started with ClickUp’s Process Flow Chart Template below ⬇️!
Create memorable flowcharts in ClickUp
Spreadsheets serve the purpose of storing data. However, you need intuitive software to keep track of your evolving tasks and projects. The collaboration and customization features in the ClickUp platform are all you need in one place.
Take Mind Maps or Whiteboards for a spin for free today and bring your best ideas to life!


