Still downloading templates?
There’s an easier way. Try a free AI Agent in ClickUp that actually does the work for you—set up in minutes, save hours every week.
Sorry, there were no results found for “”
Sorry, there were no results found for “”
Sorry, there were no results found for “”
Wondering how to draw in Photoshop? You’re in the right place!
Photoshop might initially seem intimidating, but with simple tools and tips, you can quickly turn your ideas into digital art.
The drawing mode in Photoshop offers endless creative freedom, from mastering essential brush tools to adding shape layers and textures.
So, whether you’re a beginner or looking to polish your skills, this article will break down Photoshop essentials, making it easy to dive in and bring your creative imagination to life! ✨
Starting your artistic journey in Photoshop? Let’s break down the basics to get you drawing with confidence.
The question of the day: Can you draw in Photoshop with just a mouse? Technically, yes—but if you’re serious about achieving smooth, professional results, a tablet with pressure sensitivity is necessary.
Also, if you are working on a tablet, you can use the Pen Pressure option to adjust the width of your pen according to the amount of pressure you exert on your stylus. It’s like using different pressures with a pencil on paper; a tablet replicates this feeling digitally, allowing greater stroke control.
If you’re looking for quality, Wacom and XP-Pen are reliable brands, though affordable options are also available if you’re just starting. Exploring new drawing tools and brainstorming techniques can help you get the most from your digital drawing setup.
When you open Photoshop, the first step is to set up your canvas. Regardless of the version, the layout is user-friendly and easy to navigate.
This guide will work well with most versions, even older ones, so you’re covered!
Step 1: Go to File → New to start a new canvas
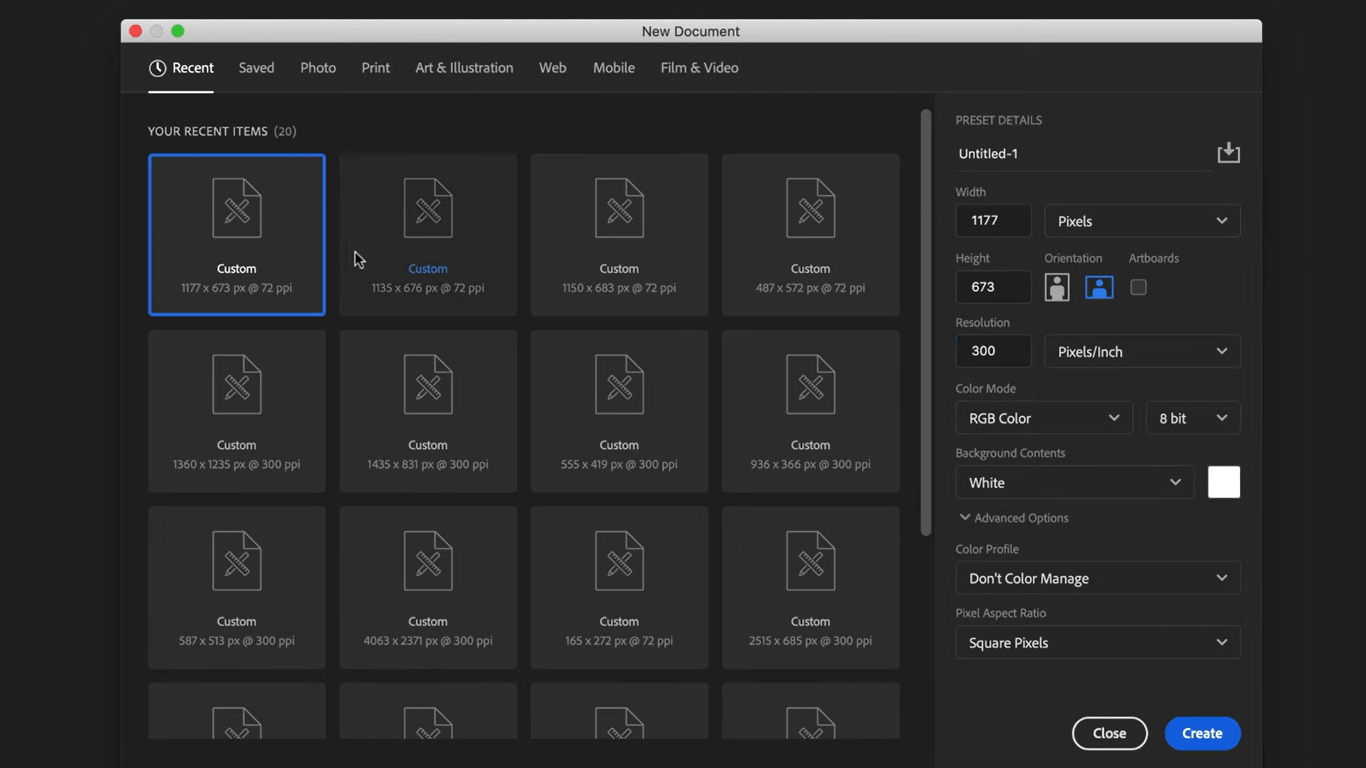
Step 2: In the new window, explore preset canvas options under tabs like Photos, Print, and Art & Illustration. Select Art & Illustration for this tutorial
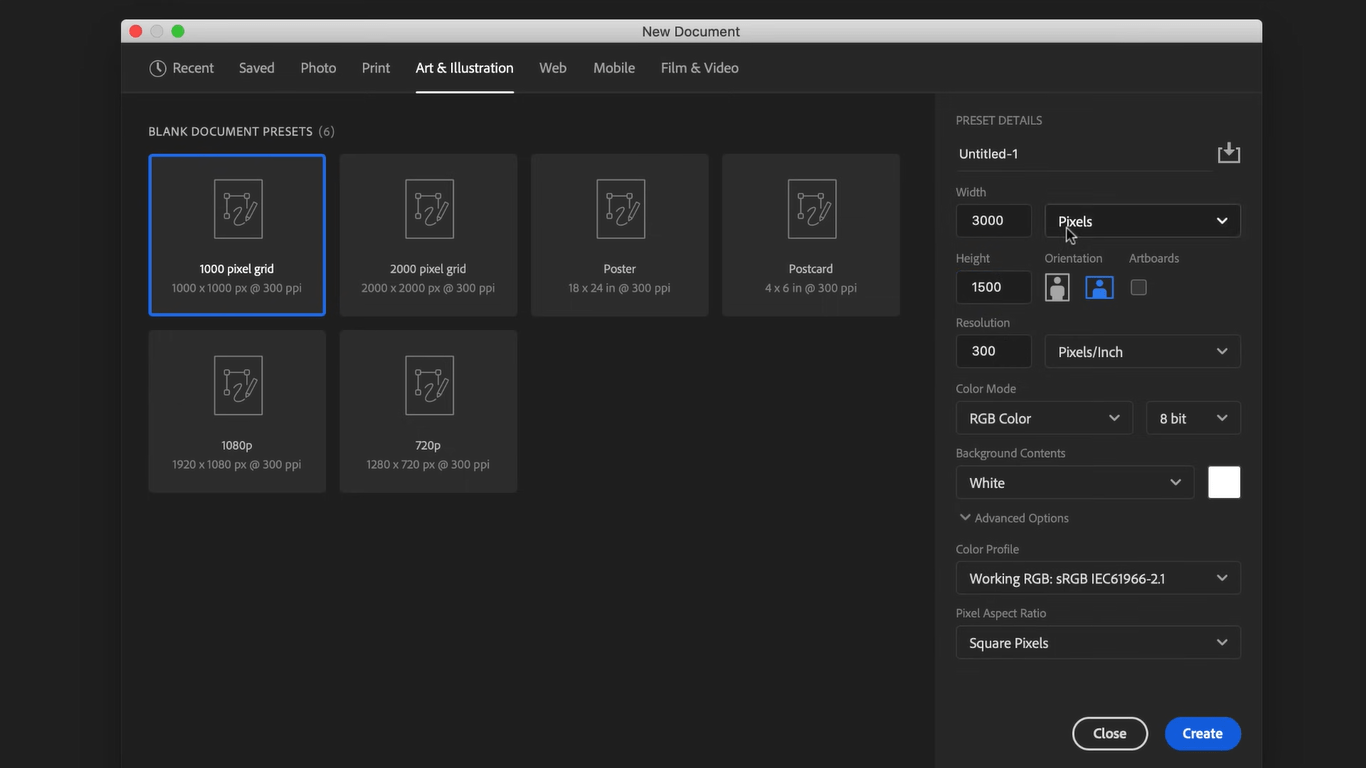
Step 3: Choose a preset canvas size. You’ll see additional settings on the right, which you can skip for now
⚡Pro tip: For a custom setup, set Width to 3000, Height to 1500, and Resolution to 300 for high-quality results.
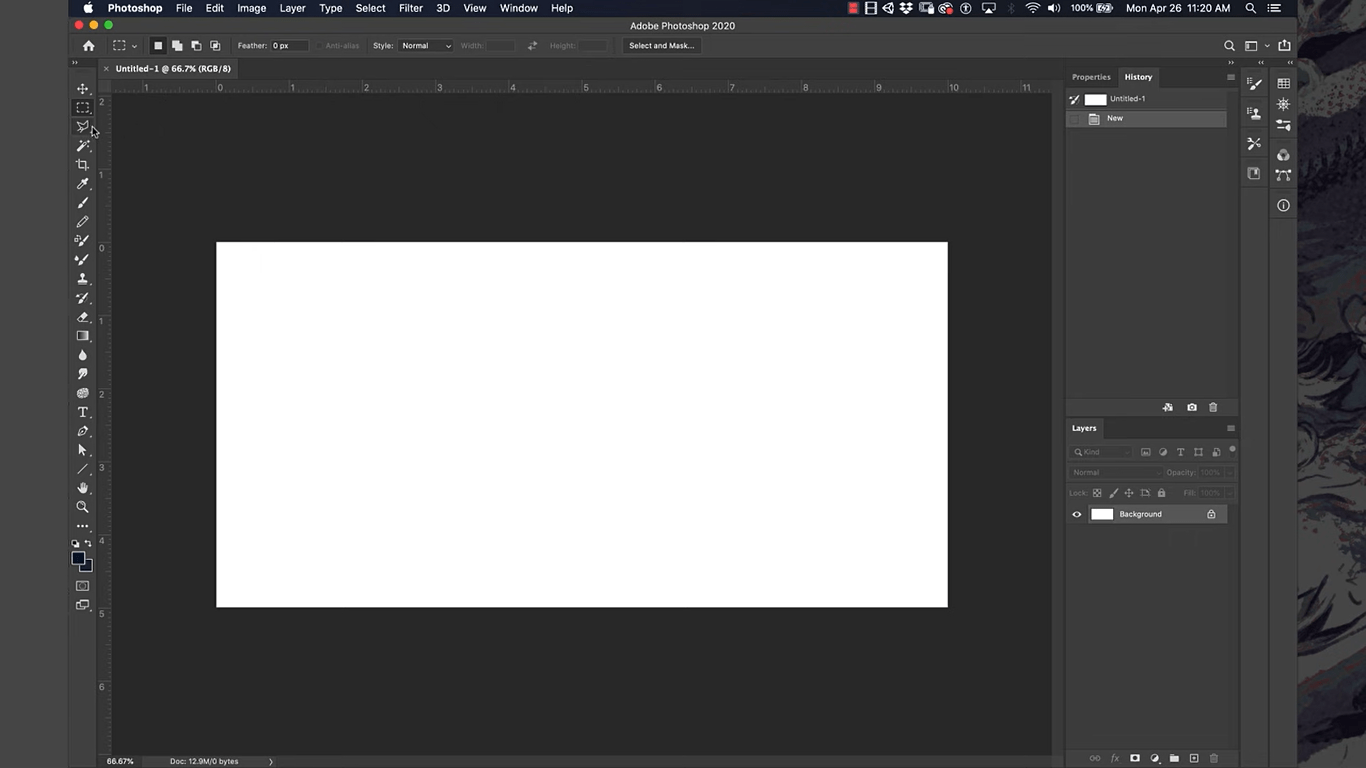
Step 4: Click Create to open your new canvas
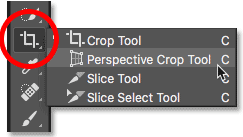
Step 5: To adjust canvas size, select the Crop Tool and drag the grid’s black bars as needed
The Brush Tool is essential for digital drawing and one you’ll use often.
Here’s how to get started with using it:
Step 1: Locate the Brush Tool on the left toolbar (it looks like a small paintbrush) or press B on your keyboard for a shortcut
Step 2: Start by drawing simple lines on your canvas to get a feel for the tool
Step 3: Adjust Brush Settings in the Options bar at the top:
⚡Pro Tip: Brush presets give you specialized brush tips, like softer, sharper, or textured lines, ideal for various drawing scenarios. Try them out to see what fits best!
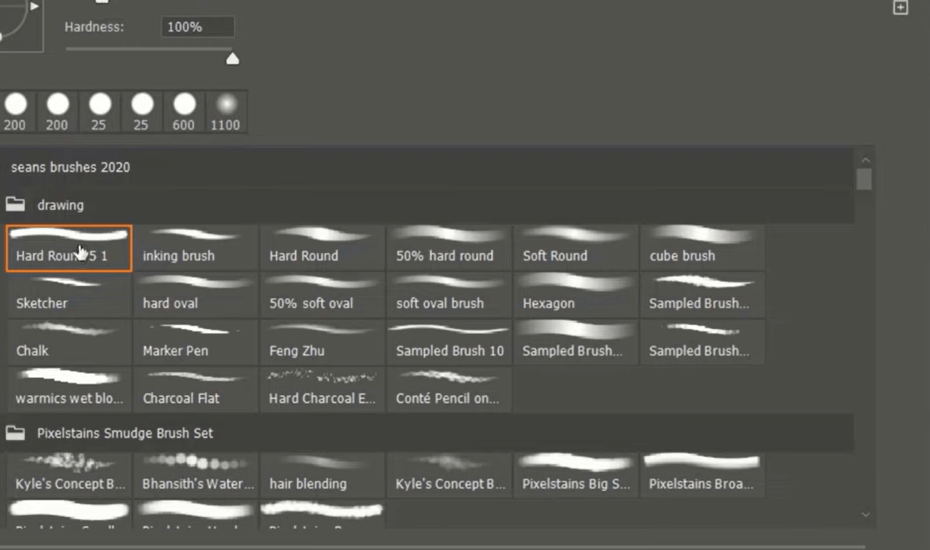
Now that your brush is ready, let’s dive into one of the most crucial aspects of painting and drawing—color!
Step 1: Locate the Current Color on the left toolbar (the colored box shows your active color)
Step 2: Click the Color Box to open the color picker dialog
Step 3: For Color Blending:
⚡Pro Tip: Experiment with the blending to achieve a smooth, custom color palette for the shading of your artwork.
Here are a few tips and tricks for handling a brush tool like a pro.
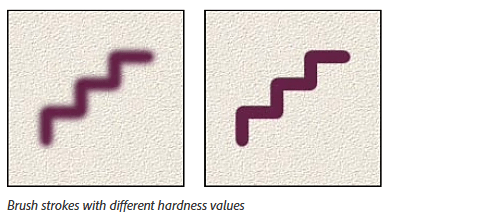
Hardness:
Opacity:

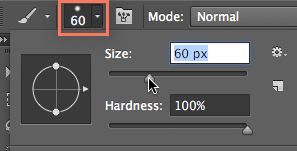
Brush size:
Brush tip:
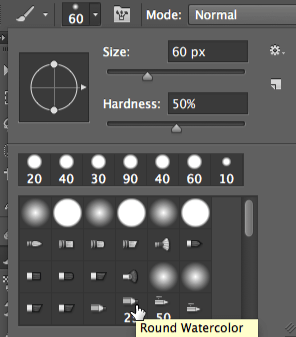
Enhance your brush skills with these handy tips:
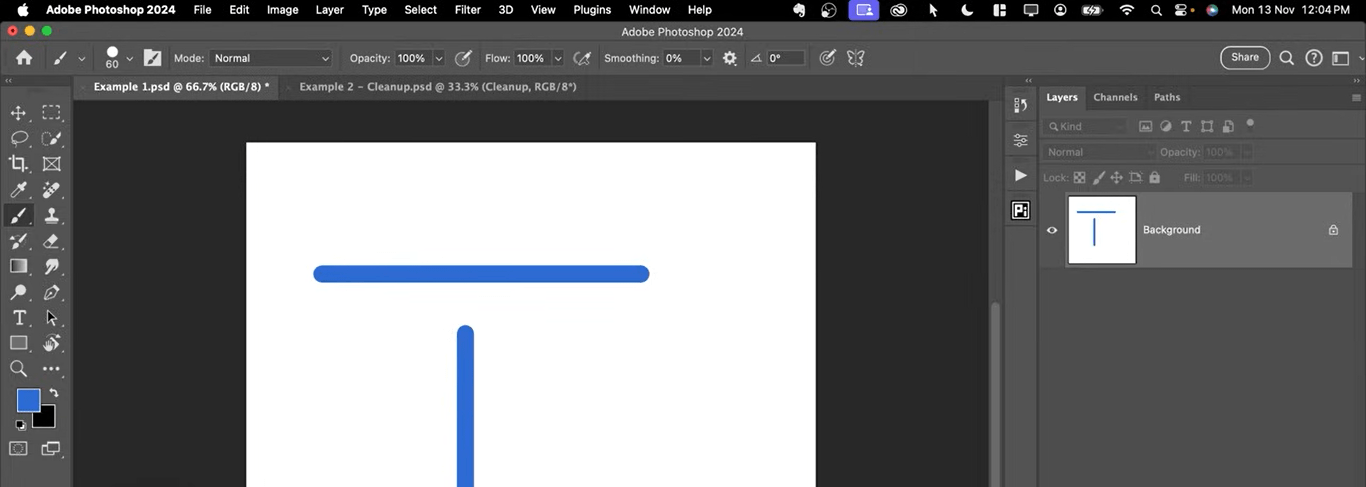
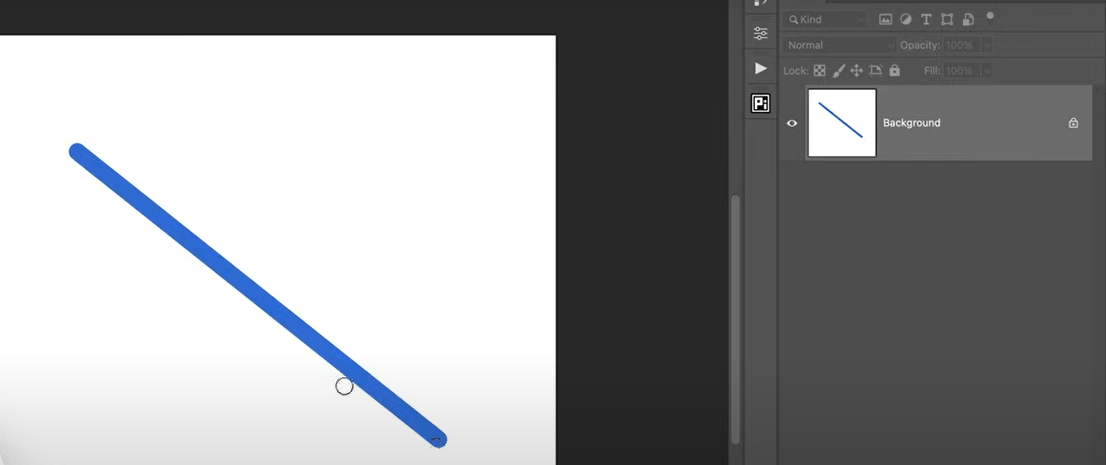

The Pen tool in Photoshop is an essential feature for creating precise paths, masking a layer, making selections, drawing shapes, and more.
Unlike brushes or other tools (like the Eraser tool or the Lasso tool), the Pen tool gives you complete control over the direction and curvature of the path. ‘Path’ is another name for vector-based line segments in Photoshop.
Before you begin drawing with the Pen tool, save your work path in the Paths panel to avoid accidental loss.
Select the Pen tool from the toolbar (or press P) and get used to the cursor, which looks like a pen icon until you add anchor points.
Anchor points control the shape and direction of a path in Photoshop, letting you create lines and curves.
Step 1: Click on your canvas to create an anchor point where you want to start
Step 2: To create straight lines, continue clicking at different points along the path you want, forming anchor points that connect in straight lines
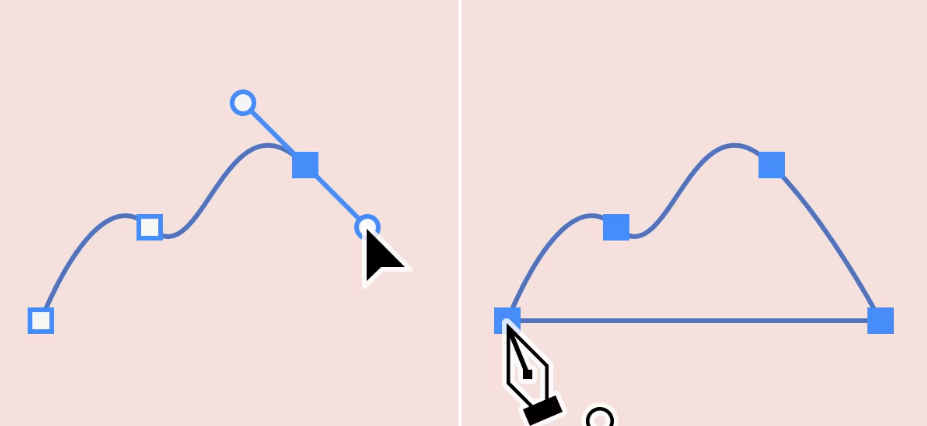
Step 3: To draw curved paths with the Pen tool, click and drag to place an anchor point with direction handles that shape the curve, allowing smooth adjustments between points.
⚡Pro tip: Use the Curvature Pen tool (Shift + P) for easier curve drawing—just click on points to create smooth curves without adjusting anchor points precisely.
Step 1: Click back on the starting point to close a path. A small circle will appear next to the Pen tool cursor, indicating closure
Step 2: If you prefer to keep the path open (for custom lines or shapes that don’t need to connect), simply avoid clicking back on the starting point
Unlike paths, shapes create a solid image, not just a line. Here’s how to create shapes:
Step 1: Select the Shapes option and make two anchor points to create a curved line. Photoshop will fill in the shape automatically with the selected foreground color
Step 2: Combine shapes with paths and use different paint colors to craft complex illustrations
⚡Pro tip: The Pen tool can also double as a selection tool:
Using the Pen tool isn’t the only way to draw shapes. You can also use the Shapes tool to create several shapes easily.
Step 1: To access the Shapes tool, either tap U on your keyboard or click the Shapes button in the toolbar
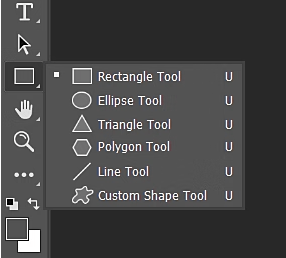
Step 2: Once in the toolbar, click and hold the Shape tool group icon to display the available shape tool options: Rectangle, Ellipse, Triangle, Polygon, Line, and Custom Shape
Step 3: Choose the tool for the shape you’d like to create
Step 4: Click and drag on the canvas to create your shape. Hold Shift while dragging to constrain proportions (e.g., perfect circles or squares)
To customize your shape’s appearance, use the settings in the options bar at the top with your shape selected. Here, you’ll find various adjustments to refine your design.

Combining shapes in Photoshop allows you to create complex illustrations, icons, logos, infographics, and patterns by merging, subtracting, intersecting, or excluding different shapes.
Exploring diverse diagram examples can also inspire unique ways to structure your designs.
Step 1: Choose the Path Options menu from the top toolbar, located next to the Shape Options
Step 2: Use Boolean operations like Add, Subtract, Intersect, or Exclude to merge or cut out parts of shapes
Step 3: Create more complex designs by layering multiple shapes using the Layers panel and adjusting their size, position, and opacity
⚡ Pro tip: Access a variety of pre-made shapes that already come with Photoshop from the Custom Shape tool in the Shape toolbar. You can even import your own custom shapes from saved files for personalized designs.
Creating custom brushes in Photoshop opens up a world of creative possibilities, allowing for unique textures, patterns, and effects beyond the standard options. Customize these brushes with specific tips, hardness, textures, and shapes—even mimicking watercolor, oil, or charcoal.
Here’s how to create your own custom brushes or import brush packs for your digital artwork:
Step 1: Start by creating a new document in Photoshop. Draw your desired shape using the Pen Tool, Freeform Pen Tool, or Shape Tool, or import an image. Ensure the background is transparent
Step 2: Define the brush. Go to Edit → Define Brush Preset. Name your brush and click OK. Your custom brush is now saved in the Brushes panel
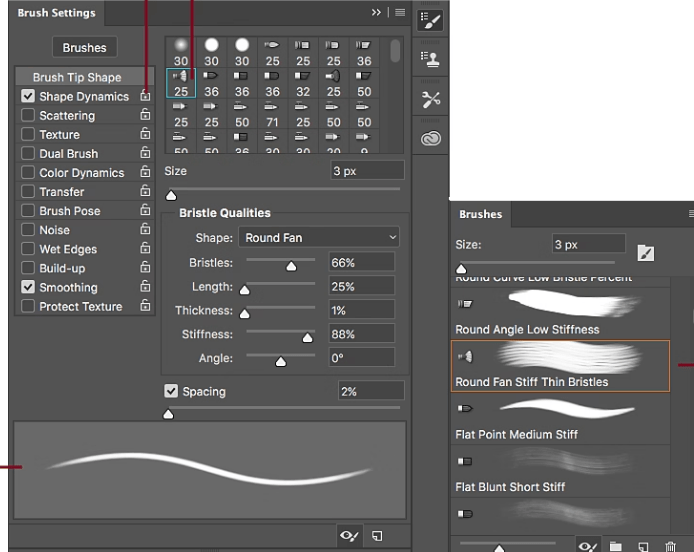
Step 3: Fine-tune your brush’s behavior with the Brush Settings panel. Adjust parameters like:
A real-time brush stroke preview at the bottom of the panel lets you visualize the impact of your settings before applying them to your canvas.
Another way to use custom brushes is to import brushes (many free and paid ones are available online) into Photoshop.
Here’s how to do it:
Step 1: Download brush packs (e.g., for watercolor, textures, etc.) from resources like Adobe or third-party websites. You have plenty of free and paid options available online
Step 2: To import, go to Window → Brushes, click the gear icon, and select Import Brushes
Step 3: Navigate to your downloaded brush file (.ABR format) and load it. The brushes will now appear in your library and can be used for drawing or texturing
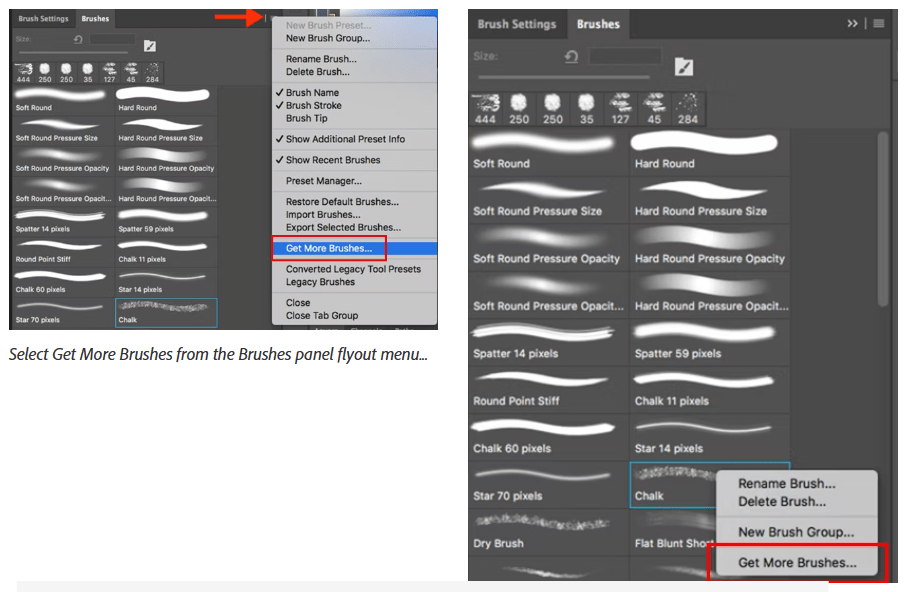
Step 4: You can also use the in-built option by opening the flyout menu and selecting Get More Brushes. Alternatively, you can right-click on any brush in the panel and choose Get More Brushes from the menu
While Photoshop is a fantastic tool, it has its limitations:
If you’re looking for a tool that blends creativity with productivity, ClickUp has you covered.
While primarily known for project management, ClickUp has helpful drawing and visual planning features, such as ClickUp Docs, ClickUp Whiteboards, and ClickUp Mind Maps.
These tools are designed for seamless visual project management, supporting your creative workflow from ideation to execution. Whether sketching ideas, building diagrams, or mapping out a project visually, ClickUp offers the right tools to help you easily organize and collaborate.
Here’s how:

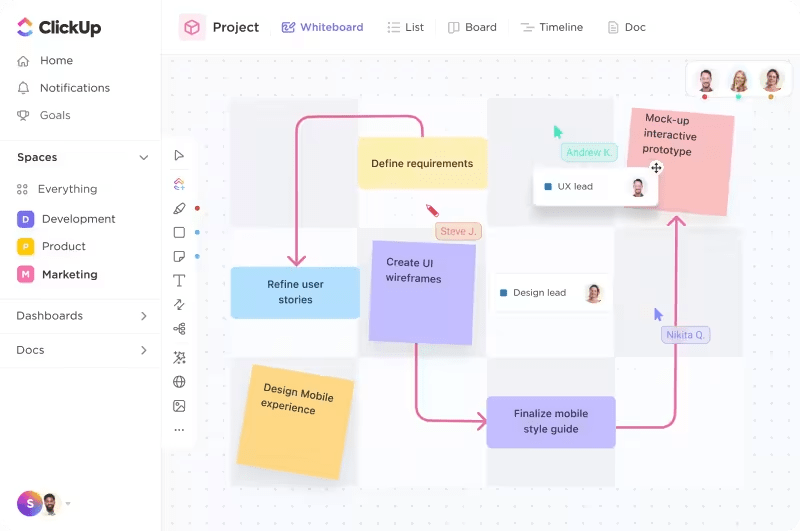
ClickUp Whiteboards give you a blank canvas to visualize your ideas. Whether you’re drawing flowcharts, diagrams, or mind maps, ClickUp Whiteboards lets you sketch freehand, making it easy to express ideas quickly.
What’s exciting is that you can turn any element on the ClickUp Whiteboard into a task with a simple click, bridging the gap between brainstorming and execution.
Need to make changes in real time? Use a whiteboard template for collaboration to work live with your team, drawing and connecting ideas seamlessly during brainstorming sessions. The ability to draw and customize visuals directly without switching tools makes this feature essential for creative teams.

If you need a more organized approach, ClickUp Mind Maps are perfect for breaking down complex ideas into manageable pieces. You can outline tasks or steps visually, ensuring your team is aligned and focused.
ClickUp is ideal for planning processes, creating hierarchies, or brainstorming in a structured way, so you can also use it as diagram software. That’s not all. ClickUp also provides a range of mind map examples to inspire your creativity and jumpstart your brainstorming sessions.
ClickUp Design offers graphic designers a streamlined platform with AI tools for designers to manage creative projects and boost collaboration. These include:
When it comes to creating artwork, Photoshop is great. It’s a good tool with which to begin your artistic journey. However, it’s not an all-purpose tool like ClickUp is.
ClickUp may not have advanced drawing tools but compensates well by focusing on project management and visualization. With Whiteboards, Mind Maps, Kanban, Gantt, and more options, ClickUp is the best tool for merging creativity with productivity.
There’s much more to the ClickUp software, so you need to experience it yourself. What are you waiting for?
Sign up to ClickUp for free today.

© 2026 ClickUp

There’s an easier way. Try a free AI Agent in ClickUp that actually does the work for you—set up in minutes, save hours every week.