


Still downloading templates?
There’s an easier way. Try a free AI Agent in ClickUp that actually does the work for you—set up in minutes, save hours every week.
Sorry, there were no results found for “”
Sorry, there were no results found for “”
Sorry, there were no results found for “”

If you’re in a data-heavy line of work, it’s likely you’ve found yourself overwhelmed by Excel sheets at one point or another. Entering dates, in particular, can be tricky and throw up a bunch of errors.
Learning a few key date functions allows you to control your time and make Excel work for you.
In this post, we’ll cover Excel date functions in detail, whether you’re entering deadlines, project timelines, or important events. We’ll also show you how to format dates in Excel just right so your data is immaculate.
Let’s dive in.
Microsoft Excel handles dates by converting them into serial numbers. This may sound odd at first, but it’s actually a smart way for Excel to manage dates efficiently.
Each data value is assigned a unique serial number based on its position relative to a base date (usually January 1, 1900, in Excel’s default date system). This allows Excel to easily perform calculations like subtracting dates, adding days, or finding the differences between dates.
For example, January 1, 1900, is represented as 1, while January 2, 1900, is 2, and so on. This numbering continues indefinitely, allowing Excel to handle a vast range of dates—from centuries ago to centuries into the future.
Understanding this concept is key because it means that every time you enter a date into Excel, you’re actually working with a number under the hood. Think of these numbers as coordinates on a map; if they’re slightly off, you could end up in the wrong location (or, in Excel’s case, the wrong date).
Consider the DATE function, for example.
You might have a year in cell A1, a month in B1, and a day in C1. If you want to combine these into a particular date value, you’d use the formula =DATE(A1, B1, C1). This function combines the year, month, and day as separate parameters to form a full date.
Let’s break it down:
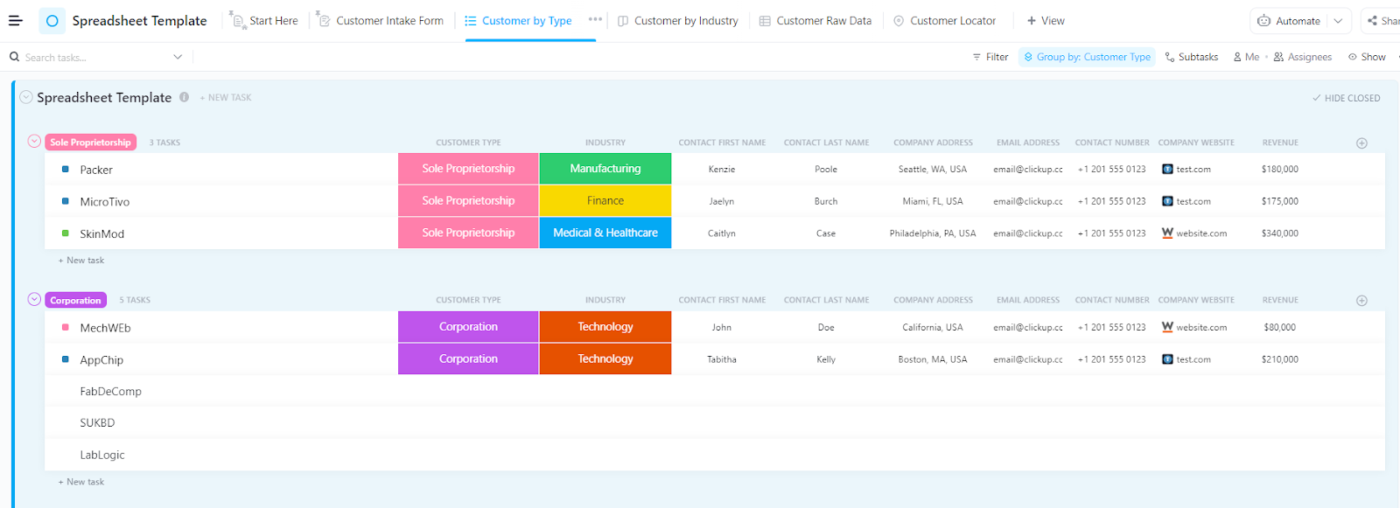
If you’re about to tackle Excel date functions, why not skip the hassle? ClickUp’s Spreadsheet Template lets you organize dates and data easily with no-code automation.
Excel’s date and time functions are powerful tools that can help you manage and manipulate date data efficiently.
Let’s explore the most important Excel date functions and how they work.
The MONTH function in Excel is designed to extract the month from a given date, returning it as a number between 1 and 12. This function is particularly useful when analyzing or categorizing data by month, making it easier to identify trends or patterns.
Syntax: =MONTH(serial_number)

The Excel DATE function is a versatile tool that allows you to construct a date from the individual year, month, and day components. This is particularly useful when working with datasets that have separate columns for year, month, and day or when you need to perform calculations involving dates.
Syntax: =DATE(year, month, day)

The TEXT function is incredibly useful for formatting dates. It allows you to convert a date into a text string in any format you choose. This Excel function is particularly helpful when displaying dates in a specific format for reports or presentations.
Syntax: =TEXT(value, format_text)

The NOW function is a dynamic function that returns the current date and time. It’s particularly useful for tracking when a worksheet was last updated or for creating timestamps that automatically update.
Syntax: =NOW()

👀 Bonus: Explore spreadsheet templates to find ready-made solutions for common tasks like project planning and budgeting. These templates can simplify complex processes, allowing you to focus more on the content and less on formatting.
The WORKDAY function in Excel is designed to calculate the date, which is a specified number of working days before or after a given start date. This function is extremely useful for project management and scheduling tasks where you need to account for weekends and holidays.
Syntax: =WORKDAY(start_date, days, [holidays])

The YEARFRAC function in Excel calculates the fraction of the year represented by the number of whole days between two dates. This is especially helpful for financial calculations like interest accrual, age calculations, or any scenario where you need to determine the proportion of a year between two dates.
Syntax: =YEARFRAC(start_date, end_date, [basis])

👀 Bonus: If you have a date of birth in a cell, you can calculate age with: =YEAR(TODAY()) – YEAR(A2). This uses the Excel YEAR function to determine the age based on the current year and the birthdate in cell A2.
Excel date functions are powerful tools, but they can also be a bit like trying to solve a Rubik’s Cube—sometimes, everything just doesn’t align perfectly.
We’ll now look at some common errors and issues that you might encounter when dealing with Excel date functions and how to navigate them without pulling your hair out.
One of the most common issues is mismatched date formats.
Excel might interpret your dates differently depending on your regional settings, leading to some serious head-scratching.
For example, entering ‘08/12/2024’ could mean August 12th in the US or December 8th in Europe (and the rest of the world). To avoid this, always ensure your date formats are consistent by explicitly formatting your cells as dates or using the TEXT function to standardize how dates appear.
The dreaded #VALUE! error often pops up when Excel can’t recognize a date.
This typically happens when you’re trying to perform calculations on text that looks like a date but isn’t formatted correctly.
To fix this, double-check that Excel indeed recognizes all date inputs as dates—use the DATE function to construct dates from year, month, and day components, ensuring they are properly formatted.
Sometimes, Excel date functions don’t behave as expected—like when adding days to a date, only to find weekends or holidays haven’t been accounted for.
Functions like WORKDAY can help by skipping non-workdays, but be sure to specify holidays as an additional parameter.
Similarly, be cautious with YEARFRAC, as it can return unexpected results depending on how leap years and day-count conventions are handled.
Leap years can throw a wrench into your otherwise perfect date calculations.
If you’re working with functions that depend on the number of days in a year, like YEARFRAC, ensure you account for leap years to avoid skewed results.
A quick Excel hack to check if a year is a leap year is to use the formula =MOD(year, 4)=0.
Excel may not automatically adjust for time differences when working across different time zones. This can lead to discrepancies, especially if you’re managing project schedules, deadlines, or meetings globally.
Consider using UTC (Coordinated Universal Time) as your baseline for accurate time tracking and manually adjust the times when converting between different time zones. While this method ensures consistency, it requires careful attention to detail and may take some time to execute.
Also Read: 10 Free Time-Tracking Templates
The #NUM! error typically occurs when a date is outside of Excel’s acceptable range. Excel only recognizes dates from January 1, 1900, to December 31, 9999.
If you attempt to enter a date before 1900, Excel will return the #NUM! error, as it cannot process dates outside of its recognized range. To address this, ensure that all dates fall within this range.
However, if you need to work with historical dates before 1900, consider using text strings to represent those dates.
Excel’s default setting interprets two-digit years based on a cutoff year, which can cause ambiguity.
For example, entering ’25’ could be interpreted as either 1925 or 2025, depending on Excel’s settings. This can lead to confusion, especially in financial or historical data.
To avoid this, always enter dates using four-digit years. You can also adjust Excel’s settings to change the cutoff year, but using four digits is the most straightforward and reliable approach.
💡 Pro Tip: Make your Excel schedule pop by using Conditional Formatting. Just select your cells, head to the Home tab, click Conditional Formatting, and set up rules to color code tasks based on deadlines or priorities. This way, you’ll instantly spot what’s urgent and keep everything on track.
While Excel is a powerhouse for data analysis and number-crunching, it has its limits, especially when managing complex projects and workflows.
ClickUp offers solutions that go beyond these limitations, making it a strong alternative to Excel. Let’s explore how this software enhances your project management experience and addresses some of Excel’s constraints. ⬇️
Excel is great for data entry but can be restrictive when managing dynamic project information.
ClickUp’s Table View provides a powerful way to manage and visualize your tasks and data. It allows you to create and customize tables in a spreadsheet-like format, making bulk editing and data organization straightforward.
You can set up tables using the /table command within ClickUp or import data from CSV or Excel files.
Adjusting table elements such as column resizing, reordering, and color changes helps you tailor the view to your specific needs.
Next up, let’s talk about ClickUp Custom Fields.
In Excel, you’re limited to predefined columns and rows. ClickUp, however, allows you to add custom fields like text, numbers, dropdowns, and more. This flexibility means you can track project-specific details—client information, budget breakdowns, or schedules—in a way tailored to your needs.
No more squeezing data into generic spreadsheet cells; ClickUp lets you create fields that precisely capture your needs.

Also Read: 10 Best Agency Timesheet Software Tools
While Excel formulas are powerful, they can be limited when interacting with project data.
ClickUp’s Formula Fields is a more integrated solution that allows you to do more than calculate dates and perform basic arithmetic.
Need to find out how many days are left until a deadline or calculate the total budget spent so far? With Formula Fields, you can handle these tasks seamlessly and even sort or filter tasks based on your calculations.

Excel has its functions, but ClickUp’s Advanced Formulas support various advanced functions for math, dates, text, and lookups. You can use these to perform sophisticated calculations, such as summing values based on conditions or formatting results to highlight important data.
The ability to nest formulas and perform lookups adds a level of complexity and precision that’s hard to match in Microsoft Excel.

Finally, let’s not forget about ClickUp Automations. Here’s where ClickUp really races ahead of Excel.
Automation in ClickUp allows you to set up rules that handle repetitive tasks for you.

For instance, you can set up rules to automatically assign tasks when their status changes or send reminders a day before a deadline. This means fewer manual updates and more focus on the critical aspects of your projects.
Formula Fields in ClickUp enhance your project management automation options by allowing you to use calculated data as triggers and conditions. Here’s how it improves your workflow:

Microsoft Excel remains a staple for professionals, especially for handling dates with functions like DATE(), NOW(), and WORKDAYS().
But, let’s face it, Excel’s date functions can be tricky. When you’re tackling complex calculations or large datasets, things can quickly get complicated and unwieldy. Nested formulas might start to resemble cryptic symbols, and your system can slow down under the weight of thousands of rows.
Well, that’s your cue to head over to ClickUp.
ClickUp shines in managing large datasets that might slow Excel to a crawl. Its advanced date functions and user-friendly interface make it a strong contender, especially when working with a team. Curious to see how ClickUp stacks up against Excel in managing your date-related data? Give ClickUp a try and experience the difference for yourself!

© 2026 ClickUp

There’s an easier way. Try a free AI Agent in ClickUp that actually does the work for you—set up in minutes, save hours every week.