
Sorry, there were no results found for “”
Sorry, there were no results found for “”
Sorry, there were no results found for “”
The humble checklist is still one of the most powerful tools for managing everyday work.
It’s a simple to-do list that lets you organize and manage your activities by day, week, or month. You can use it to prioritize your tasks and keep track of all the work you need to complete. There’s a special thrill in checking off an item from a checklist once it’s done!
Because checklists are so popular, you can choose from dozens of to-do list apps. But if you’re looking for something easy to use and familiar to everyone on your team, Microsoft Word is a good starting point.
In this blog, we’ll walk you through the details of how to create a checklist on Microsoft Word. We’ve also included a bonus tool if you’re looking to level up your productivity.
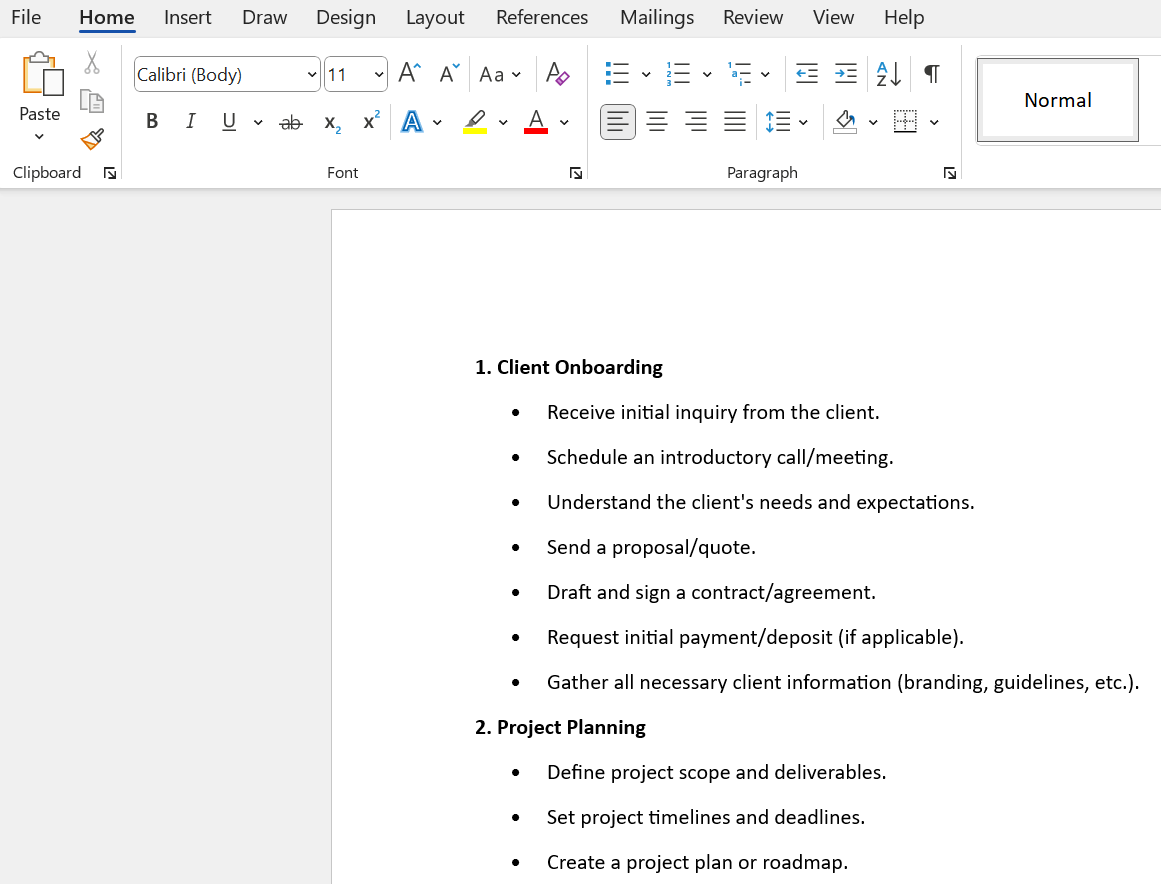
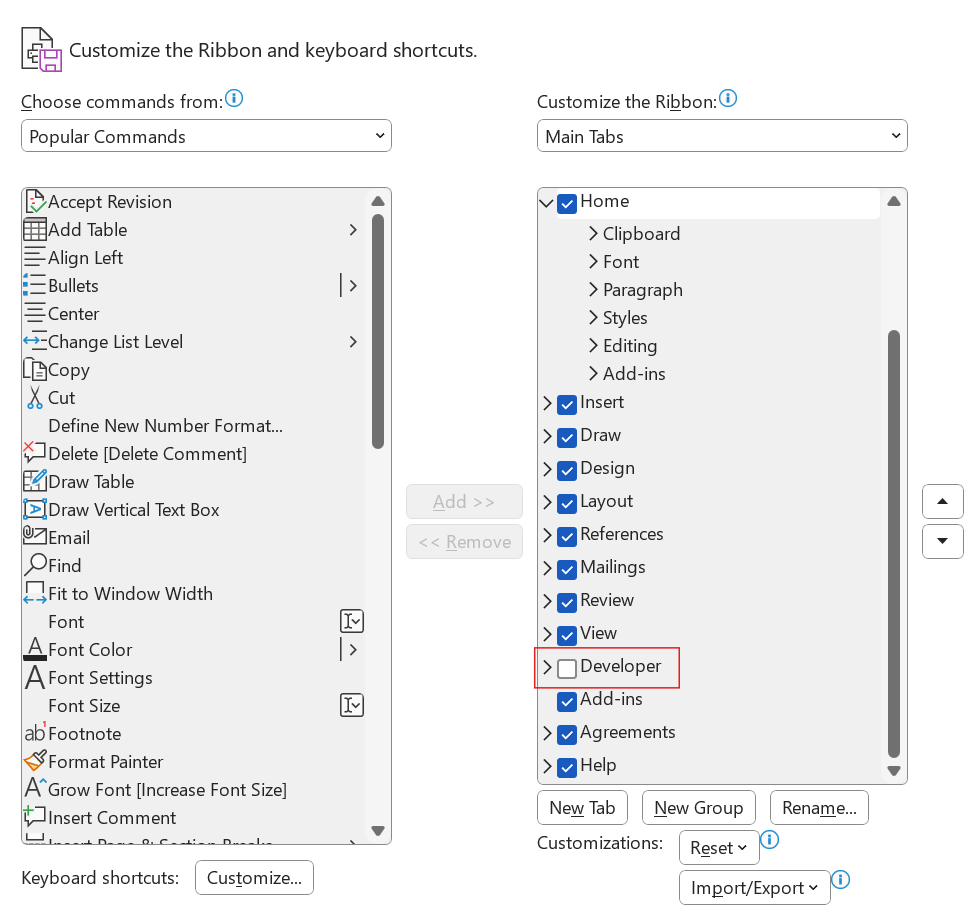
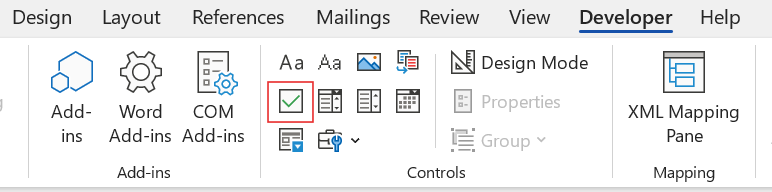
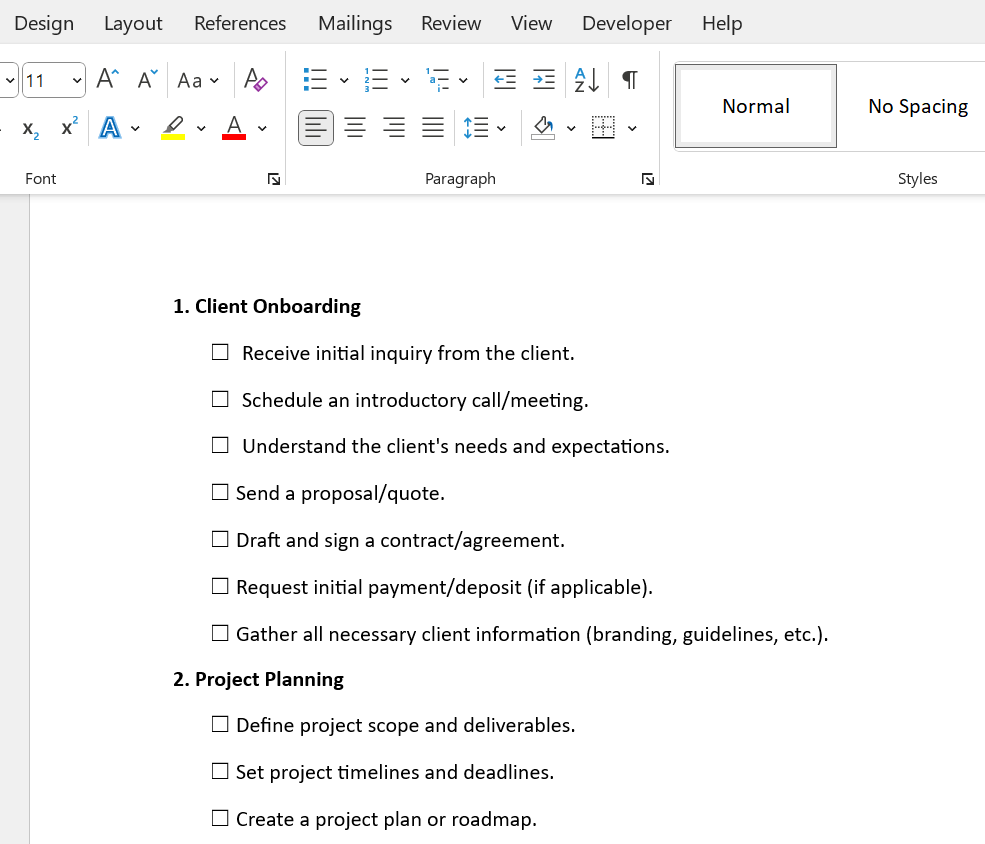
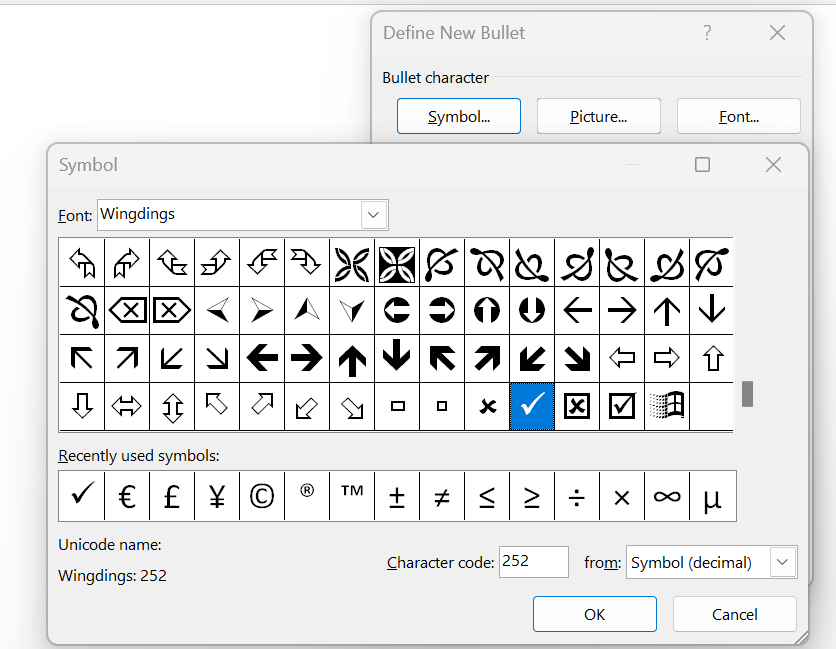
To make a checklist in Microsoft Word, you create a document, list your tasks, and insert clickable checkboxes using the Developer tab so you can mark items complete as you go.
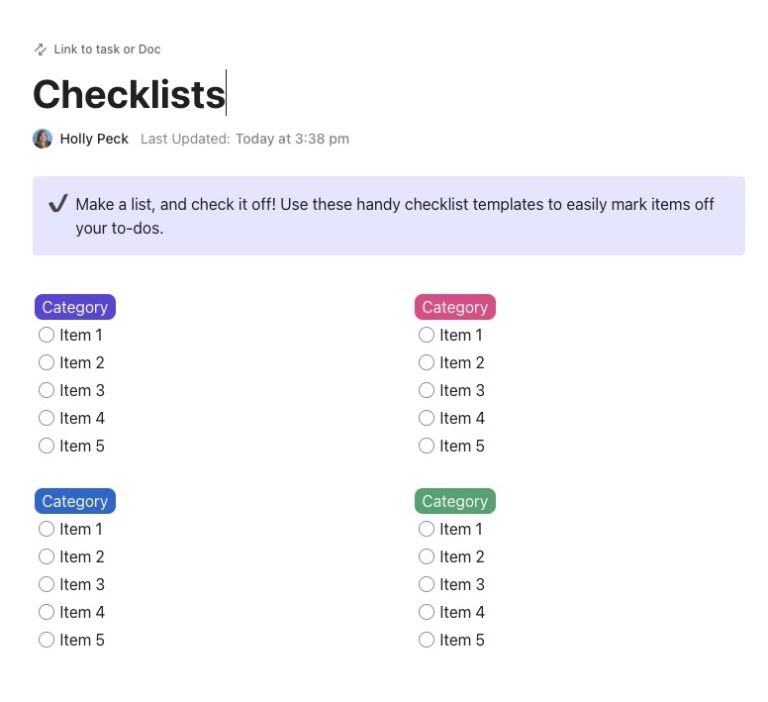
Struggling to build checklists in Word without the mess? Try ClickUp’s free Checklist Template—it makes organizing tasks simple, fast, and actually enjoyable.
Here’s a step-by-step guide on how to create a checklist in Microsoft Word:
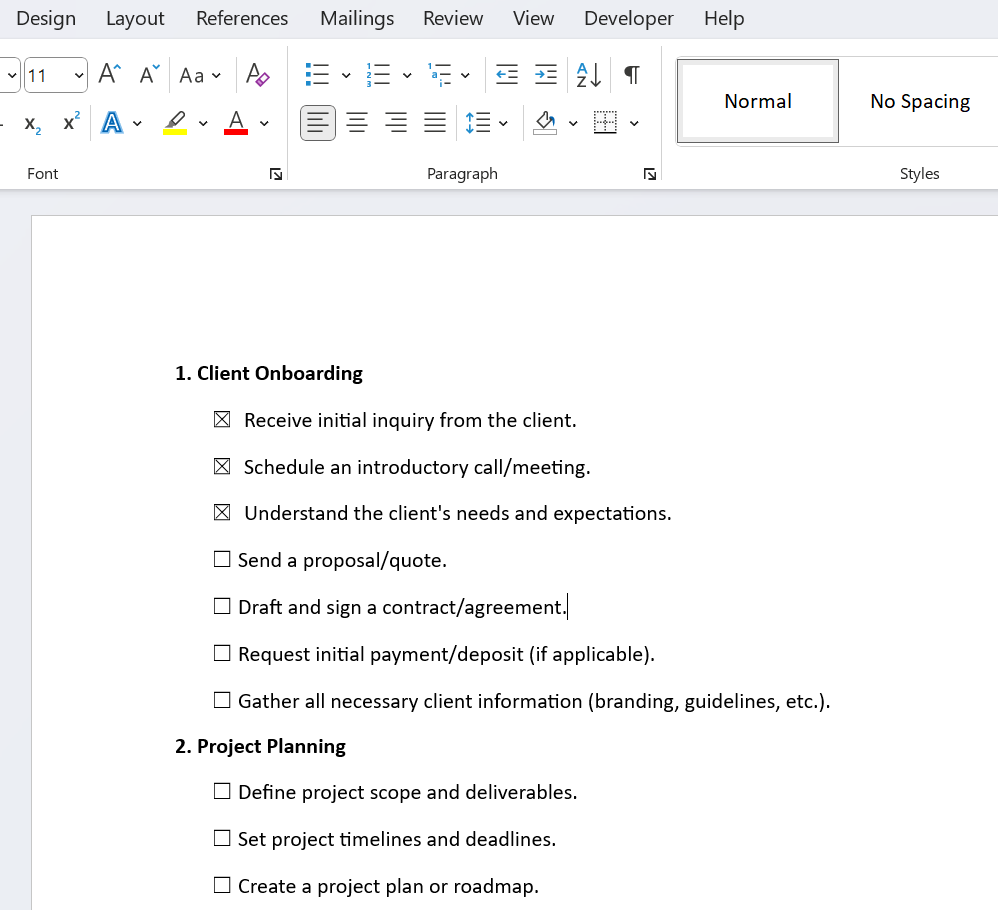
And voila, your checklist is ready for use! Simply click on a check box to mark a checklist item as completed, or un-click an already marked check box to leave the task as ‘to be done.’
Now that you know how to set up a basic checklist in Microsoft Word, let’s look at some tips to improve your checklist game!
Automating typical tasks allows you to take your Word checklists to the next level.
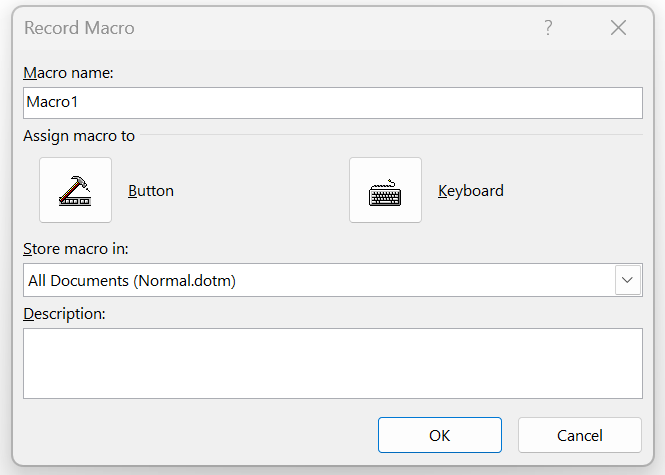
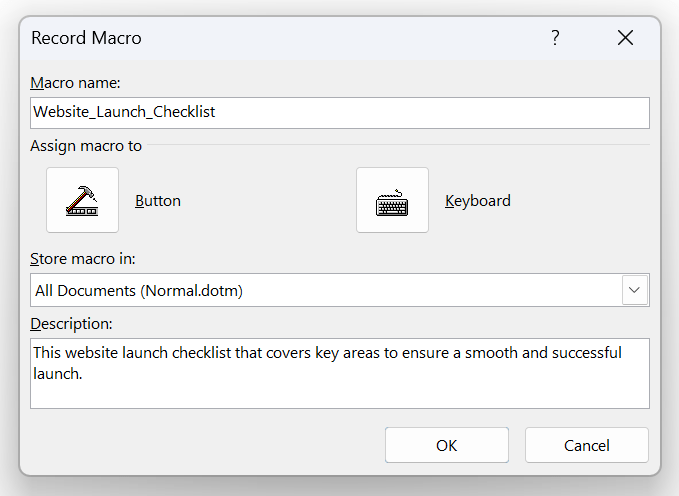
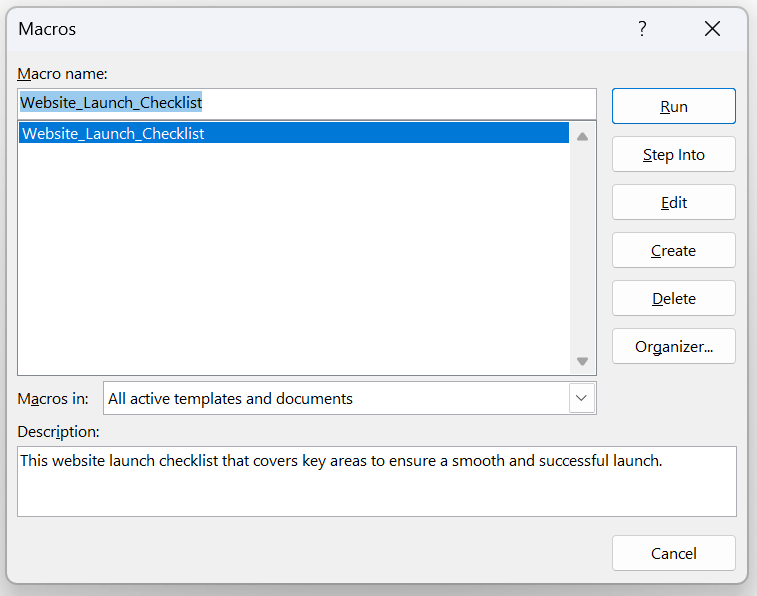
For example, you can create a script that automatically notes the completion date next to each item when the checkbox is ticked. This requires some knowledge of VBA (Visual Basic for Applications), but it can dramatically improve the functionality of your document.
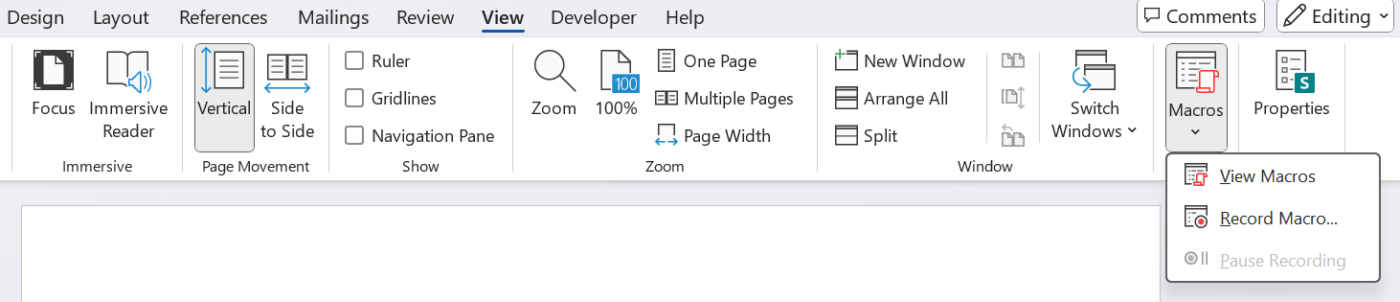
To automate repetitive processes in Word, you can also use macros. This can save you a significant amount of time, especially if you frequently need to generate comparable checklists.


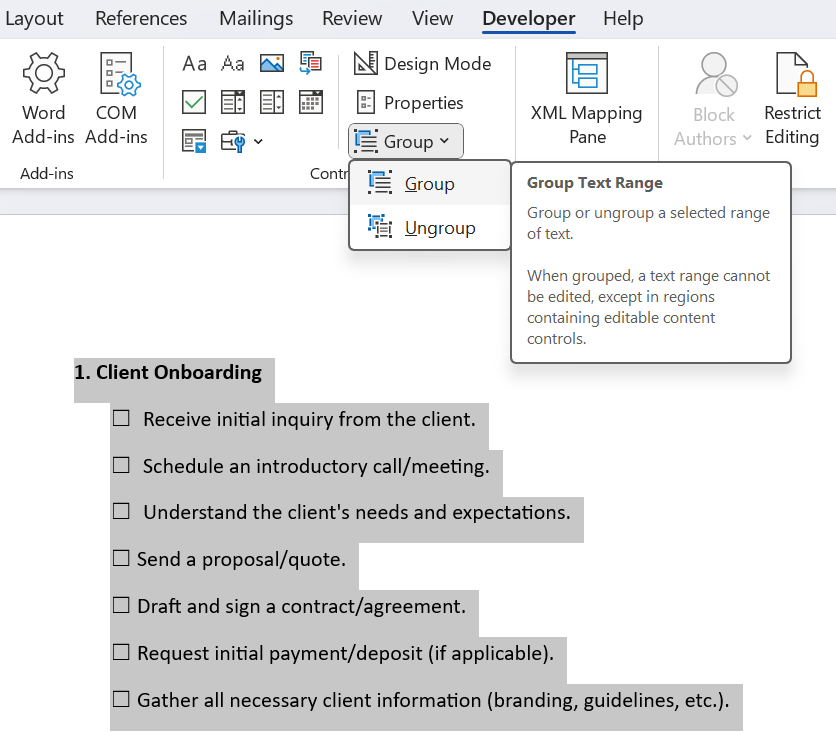
To make data entry easier, you can include form controls such as check boxes, options, and toggle buttons. Checkboxes are ideal for forms with several alternatives. Option buttons are more useful when your user only has one option. When a toggle button is clicked, its state changes from enabled to disabled.
Document automation offers numerous advantages, including increased productivity and cooperation.
Let’s look at some of the strategies, apart from Macros, that you can employ.
For example, if you frequently add your business address to letters, you can save it in the fast parts menu for future use. Consider it an unlimited copy-and-paste.
🎯Also Read: How to Make a Checklist in Google Docs
While users may appreciate the ease of creating and using checklists on MS Word, it offers only basic features. Let’s look at the limitations of creating checklists on Word:
Further, if you want to explore Google Sheets to create a checklist, you will also find a few limitations there.
Checklists on Microsoft Word or Excel are adequate for managing simple, everyday tasks and smaller projects.
But even with the array of Excel AI tools, you may feel the need for a holistic, collaborative, and advanced checklist experience. If you manage complex projects involving multiple collaborators and teams, you’ll probably need a feature-rich task management tool.
Meet ClickUp—a powerful and intuitive software designed to help you manage all kinds of projects with ease.
With use cases across task management, reporting, progress tracking, and collaboration, ClickUp goes beyond creating vanilla checklists and acts as a comprehensive project management solution.
📮ClickUp Insight: 83% of knowledge workers rely primarily on email and chat for team communication. However, nearly 60% of their workday is lost switching between these tools and searching for information.
With an everything app for work like ClickUp, your task management, messaging, emails, and chats all converge in one place!
ClickUp helps you build checklists that actually run work—not just list it—by combining tasks, collaboration, workflows, and automation in one place (unlike Word, which is limited to static documents).
ClickUp offers an array of features for multiple use cases:
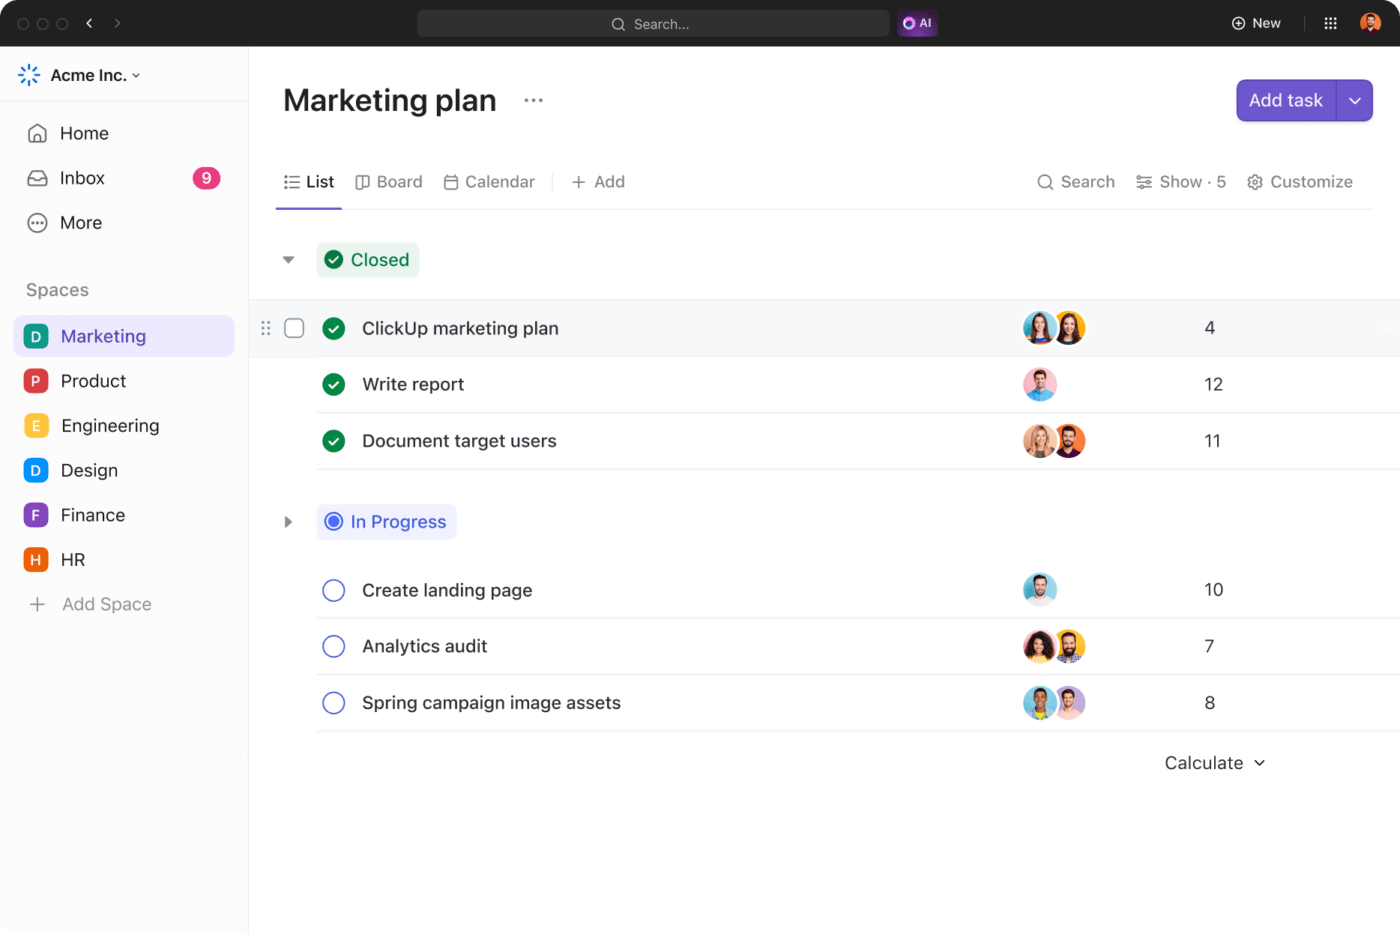
Break down larger projects into tasks using ClickUp Tasks. For every action item, add a due date and choose from five different color-coded priority levels. This way, you can identify tasks that need immediate attention.
Need to make your tasks more detailed? Add descriptions and custom fields to include files, links, videos, and more. Use ClickUp Dependencies to connect tasks dependent on the completion or initiation of other action items.
Read more: How to Create a Priority List
Organize your to-dos into neatly structured checklists using ClickUp Task Checklists. Break down larger tasks into sub-items with nested checklists so you can check your progress along multiple levels.
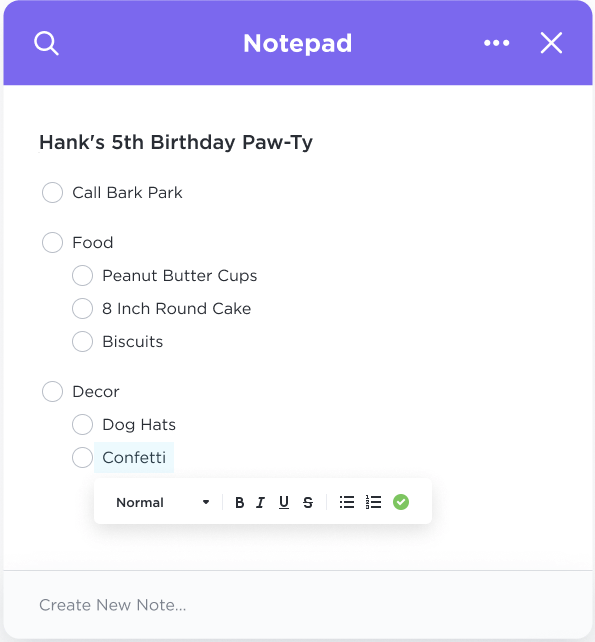
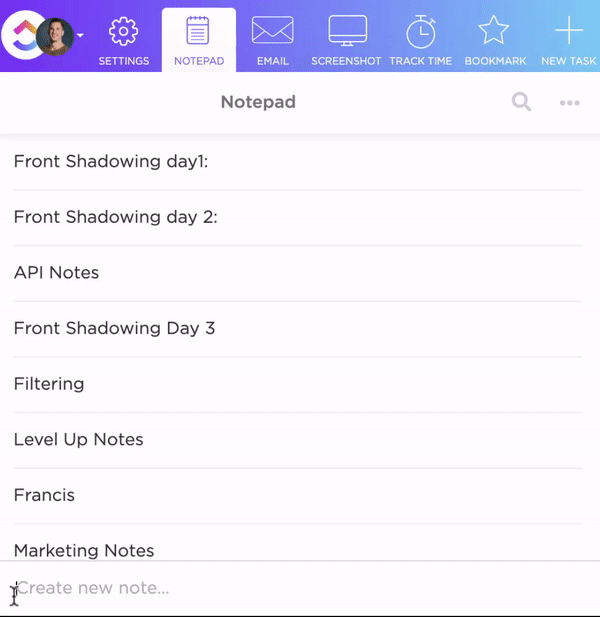
Save your tasks, checklists, and notes in the ClickUp Notepad so that all your important to-dos and ideas can be viewed anywhere on any device. Use Notepad’s editing features, such as bullets, headers, and colors, to structure your information and add distinct sections for easy navigation. You can even convert ideas on Notepad into trackable tasks.
Read More: To-Do List Examples
Ideate, brainstorm, and plan on a digital canvas with ClickUp Whiteboards. Visualize and explain complex concepts and ideas in a way that’s easy for clients and stakeholders to understand.
Use connectors to interlink your ideas and show the relationships between concepts or establish workflows for your processes. Once you’ve finalized your ideas, you can convert them into actionable tasks directly from your whiteboard.
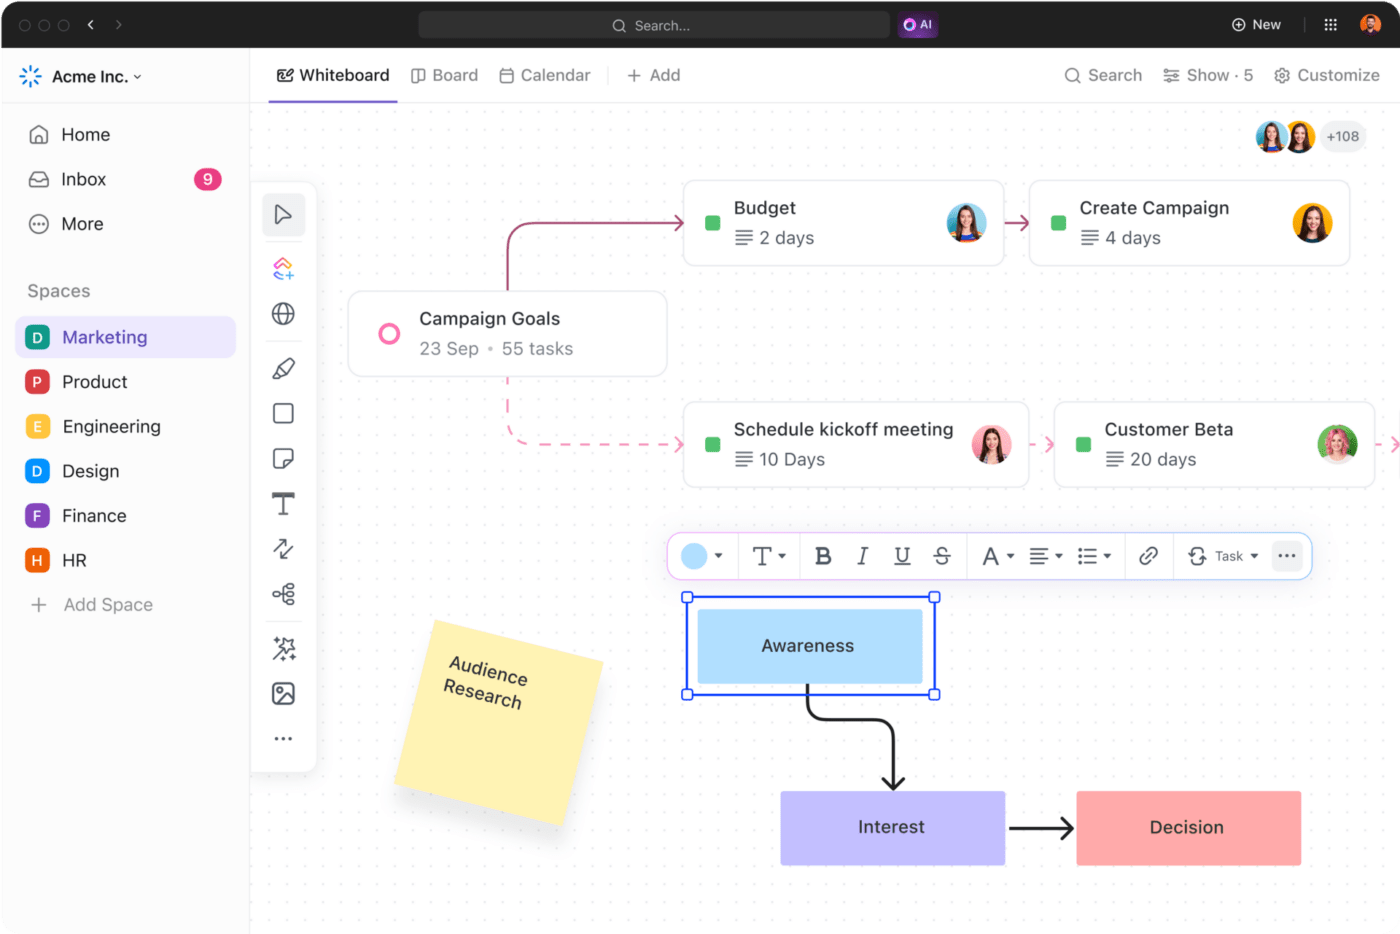
Design clear workflows to represent the different stages of your project using the ClickUp Kanban Board.
Group tasks into multiple lists such as ‘Planning,’ ‘Approval,’ ‘In-progress,’ and more. Move tasks from one stage to another as soon as they are ready. You can even color-code your lists to indicate your project’s priorities.

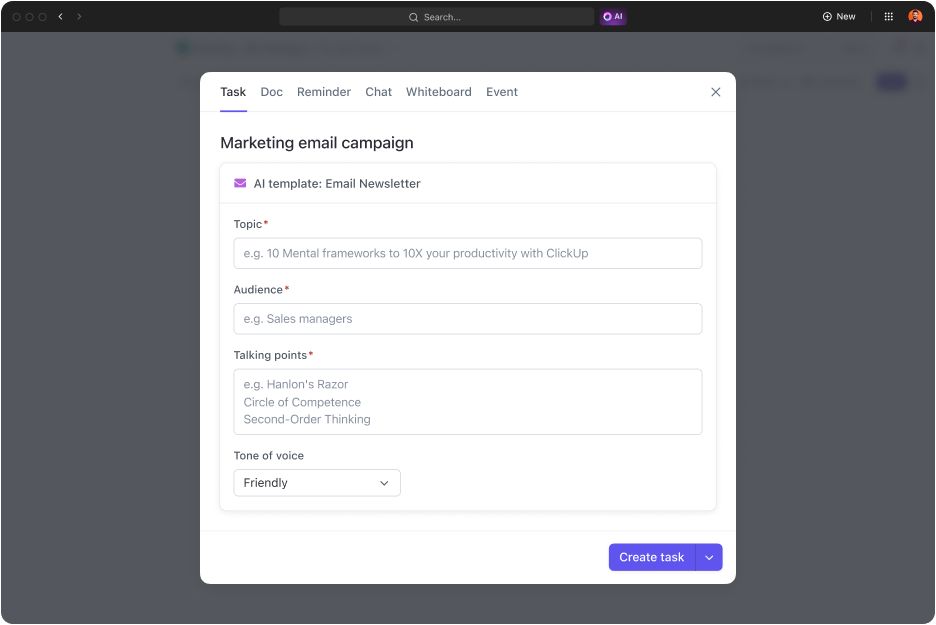
Get quick insights into anything related to your work using ClickUp Brain. Simply ask your query and ClickUp’s AI writing assistant and project manager will sort through your workspace to provide relevant answers.
You can also summarize meeting notes, schedule project updates, and craft email replies with ClickUp Brain.
To simplify things further, ClickUp Brain can auto-generate task lists for your marketing campaigns, project management, and event planning.
Read More: Free Project To-Do List Templates
ClickUp has a modern interface for creating checklists and managing tasks. By comparison, legacy tools like MS Word offer a dated user experience and limited functionality. While you can create checklists, add tasks and sub-tasks, and assign them to users with in-line keyboard shortcuts on ClickUp, Word forces you to scour through clunky menus and several irrelevant options.
Let’s look at how ClickUp and Word stack up against each other:
| Features | ClickUp | Microsoft Word |
| Collaboration | Seamless, real-time collaboration features | Not suitable for teams |
| Customization | Highly customizable for specific needs | Limited customization options |
| Integration | Integrates with many checklist apps, productivity, and collaboration tools | Limited integration with other tools |
| Accessibility | Accessible on various devices | Requires the Word app for compatibility |
| User interface | User-friendly and engaging | Functional, navigating menus and options can be tedious |
| Task detailing | Detailed task descriptions and subtasks | Basic task descriptions, as items added to the checklist |
| Progress tracking | Advanced tracking with analytics | Basic progress tracking through checked-off tasks |
Read More: Daily Checklist Apps to Stay Productive
Here are the advantages of creating and managing checklists in ClickUp:

ClickUp checklists live inside tasks, so you can turn a simple to-do list into a trackable, team-friendly workflow with owners, structure, and progress visibility.
Templates to start faster
Let’s look at a step-by-step guide on how you can create a ClickUp task checklist:
Go to the existing task within your project space on ClickUp, where you want to add your checklist.
Once you find the “Action items” tab near the task description and comments section, click the “+” icon and select Checklist.
To add items to your checklist, type in each action item or task that you need to complete. You can also directly paste a list of items/tasks, and ClickUp will automatically add a new item for each line to your checklist. ClickUp even allows you to drag and drop items between different checklists.
By clicking on the ellipsis (…) next to the checklist’s name, you can add more items, remove existing items from the list, rename the checklist, or assign the entire checklist to another person.

You can assign users responsible for each item (or ‘owners’) on your checklist by clicking the ‘assign’ icon (usually depicted by a greyed-out silhouette) next to the item. This is an efficient way of distributing tasks if you work with a team.
Nesting tasks under a main or ‘parent’ task allows you to break a larger, more complex task into smaller, manageable ‘subtasks.’ You can nest items up to five levels deep on ClickUp for detailed organization.

On ClickUp’s List view, tasks that have an associated checklist show an indicator of the checklist’s completion status next to the task name. This allows you to track the progress of different tasks and identify completed tasks at a glance.

As your task management workflows evolve, you might need to solve advanced use cases using ClickUp checklists. The good news is that ClickUp offers several advanced features:
If you’re new to ClickUp and want to get started with setting up and managing your first project, here’s a checklist template created by ClickUp that you can plug and play.
Efficiency meets adaptability with the ClickUp Checklists Template. Perfectly suited for any task management needs, this checklist template provides an easy way for you to note, organize, and prioritize your tasks across all aspects of your life. Whether you’re dealing with day-to-day errands or a complex work project, this checklist can be tailored to fit your individual needs. With the ability to customize as required, let productivity become a seamless part of your routine, paving the way to achieving your goals and milestones.
The ClickUp Project Checklist template is beginner-friendly and covers all the general requirements for any new project. It can help anyone set up a new project on ClickUp from scratch.
With the Project Checklist Template, you will have the task-subtask structure in place. To kickstart the project, start by adding tasks and assigning priorities and deadlines. You can ensure tasks are executed in the correct order, track the overall progress of the project, identify and address potential risks on time, and ensure the project meets its deadlines.
💡Pro Tip: You can also use the ClickUp Checklist Templates to create checklists for recurring processes and save them as templates.

For instance, you can create checklist templates for project planning, campaign execution, employee onboarding, travel itineraries, and event planning. Most of these processes will have repeatable workflows that require your team members to be consistent in how they execute them.
Checklists are a simple and efficient way to get started with task management. While checklists on MS Word can get the job done, they cannot scale to meet the needs of a collaborative or complex ecosystem.
That’s where a solution like ClickUp makes a difference. Its advanced task management capabilities are built to make individuals and teams more productive. ClickUp checklists are easy to set up and manage and allow individuals to collaborate in real time.
If you want to get started with ClickUp checklists right away, they’re available on all plans (including the Free Forever Plan). So what are you waiting for? Sign up on ClickUp for free today.

Arya Dinesh
Max 19min read

Manasi Nair
Max 21min read

Praburam Srinivasan
Max 22min read

© 2026 ClickUp