Sorry, there were no results found for “”
Sorry, there were no results found for “”
Sorry, there were no results found for “”
Zoom recordings offer a way to revisit discussions at your pace. Whether you missed a crucial detail in a board meeting or need to replay a lecture, these recordings can be a lifesaver.
The only challenge is locating where these videos are saved on your device. We’re solving that for you today.
This guide will walk you through how to access Zoom recordings, whether they’re stored on your computer or in the cloud.
Here’s a quick overview of where you can find your Zoom recordings:
So, you’ve recorded a Zoom meeting—great! But now comes the big question: Where did it go?
Fortunately, Zoom keeps things simple. Your recordings can only end up in two places:
Now, let’s break down how to access Zoom recordings in both cases.
If you recorded a meeting using the Zoom desktop app, your recording files are stored directly on your computer. But don’t panic if you can’t find them right away! Here’s how to track them down:


💡 Pro Tip: Stepping into a new leadership role can feel overwhelming, but having a clear strategy makes all the difference. The First 90 Days Summary: Key Takeaways and Review breaks down the essential steps to quickly get up to speed, build rapport with your team, and confidently navigate your transition.
By default, Zoom saves local recordings in the following locations:
Each Zoom folder is named with the meeting ID and date, so you can easily match it to the session you’re looking for.
Still can’t find it? Use your computer’s search bar and type:

📌 Bonus tip: Change your default recording folder
Want Zoom to save your files somewhere more convenient?

This prevents future scavenger hunts for your saved recordings.
If you’re a licensed Zoom user (Pro, Business, or Enterprise), you get the luxury of Zoom cloud recording. This means your meeting recordings are stored safely in the Zoom Cloud and can be accessed from any device.
💡 Friendly Reminder: Cloud recordings can take a few minutes to process. If your recording isn’t showing up immediately, grab a coffee and check back later.
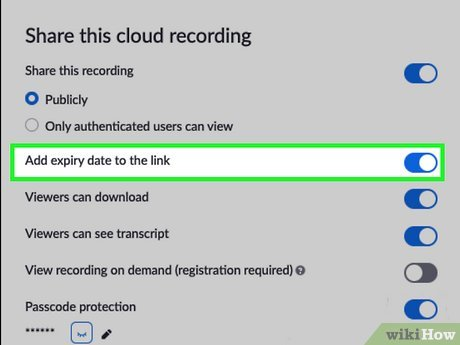
How to share a screen recording? Follow these easy steps:
Also Read: Best Zoom Alternatives
Now that you know where to find Zoom recordings, let’s look at the different ways to access them.
If you prefer a quick way to find your local Zoom recordings, use the Zoom desktop client:


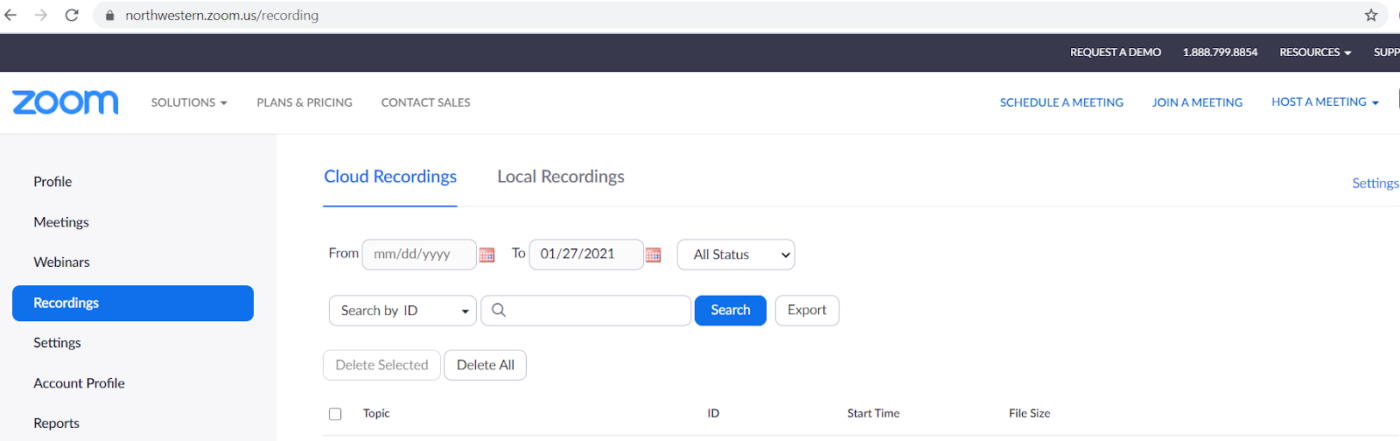
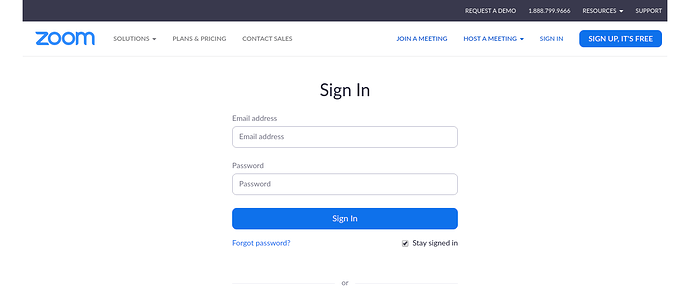
If you use cloud recording, the easiest way to find your saved recordings is through the Zoom web portal:
💡 Pro Tip: Inefficient file-sharing can waste hours in back-and-forth emails and lost attachments. The Best File-Sharing Software for Online Documents guide breaks down the top tools for simplifying collaboration, strengthening security, and keeping your team in sync.
If all else fails and you still can’t find your Zoom meeting recording, try these methods:
📮 ClickUp Insight: A major chunk of your workforce lacks the necessary information to make crucial decisions
Around one-third of knowledge workers reach out to 1 to 3 colleagues daily just to gather the context they need. But what if all that information was already documented and easily accessible?
With ClickUp Brain’s AI Knowledge Manager, context switching has become a thing of the past. Simply ask your question directly within your workspace, and ClickUp Brain will instantly retrieve the relevant information—from your workspace and connect third-party apps!
Now that you’ve found your Zoom recordings, let’s talk about how to manage and share them effectively.
To keep things organized, rename your recording files:


If sharing sensitive meeting content, enable password protection and restrict access to specific users.
Zoom cloud storage isn’t unlimited, so it’s a good idea to delete old recordings:
For local recordings, simply delete them from your computer folder to free up space.
Also Read: Meeting Agenda Examples & Free Templates
So, you finished an important Zoom meeting, hit the record button, and now your recording seems to have vanished into thin air.
Don’t worry—you’re not alone! Many users have found themselves asking, “Where are my Zoom recordings?!”
Before you assume your video has been sucked into a black hole, let’s go through some key troubleshooting steps to track down your missing recording.
✅ Solution: If you were using Remote Desktop or logged into a different device, your recording may have been saved there instead. Check the Zoom desktop app on your work or secondary computer and see if the file appears under Recordings.
Also, to avoid confusion in the future, use different wallpapers to distinguish between devices.
✅ Solution: Some users found that clicking “Open Folder” in the Zoom app led to an old or incorrect location. Instead, manually open File Explorer (Windows) or Finder (Mac) and navigate to your Documents > Zoom folder.
💡 Pro Tip: Many free screen recorders add watermarks that can ruin the professional look of your videos. Don’t waste time searching—the Top Free Screen Recorder No Watermark Tools list helps you find the best options for clean, high-quality recordings without hidden catches!
Bonus: Top Zoom Shortcuts!
✅ Solution: If your meeting was long, Zoom may have split the recording into separate files. Open the Zoom recording folder and look for files labeled zoom_0.mp4, zoom_1.mp4, etc.
✅ Solution: Zoom automatically lowers resolution if a participant has poor internet. If you need better quality, switch to Active Speaker mode instead of Gallery View.
✅ Solution: If your recording appears as a .zoom file, it hasn’t been processed yet. Open Zoom, go to Recordings, and click Convert Recording to generate an MP4.
✅ Solution: If the host has disabled downloads, ask if they can enable them temporarily or share a direct download link.
This Zoom user posted on Reddit looking for a solution to their unique problem.
I host long educational meetings and have encountered a cloud recording issue multiple times. Any recordings I make past the three-hour mark in a meeting do not show up in my cloud storage (I have 90GB free).
There are several issues Zoom users face without clear solutions. Here’s an overview:
Also Read: How to Make a Training Video at Work?
Let’s say you’re trying to automate some parts of the onboarding process by recording processes on Zoom for new hires to watch whenever needed. However, using Zoom recordings, here’s what their onboarding experience would look like:
So why stick with a tool that complicates your work instead of simplifying it?
Work today is already broken—projects, knowledge, and communication are scattered across too many disconnected tools.
ClickUp fixes these issues by being the everything app for work. It combines task management, knowledge sharing, and chat in one place, powered by AI, to help you work faster and smarter.
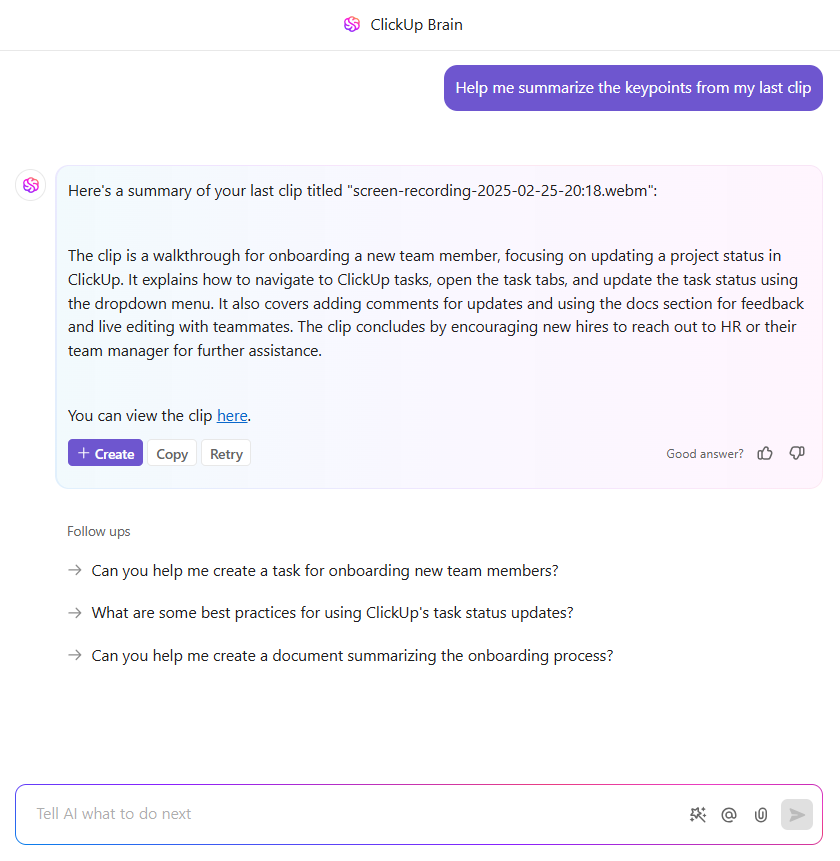
We all hate wasting time in unnecessary live meetings just to catch up on simple updates or walkthroughs. ClickUp Clips offers a smarter alternative to Google Meet and Zoom’s live call structure by letting you record and share videos asynchronously.
With ClickUp Clips, you can:

One feature that Zoom and most videoconferencing apps are lacking is AI transcription tools.
ClickUp’s AI Notetaker is a powerful tool to transform meeting discussions into actionable outcomes, ensuring that meetings foster productivity. It automatically captures key insights, decisions, and action items and streamlines the workflow by providing clear, actionable summaries that connect discussions to ongoing projects.
With ClickUp Brain, you can skip manual note-taking and let AI automatically transcribe your meeting in real time. Here’s how AI tools for meetings help you stay ahead:
Still need to attend live meetings? ClickUp makes sure your Zoom calls aren’t wasted by linking discussions to tasks.
With ClickUp’s Zoom integration, you can:
There’s more! ClickUp integrates with Microsoft Teams, Google Meet, Slack, and other video conferencing tools, so you can work the way that suits you best.
The cherry on top is ClickUp Meetings.
Here’s why it’s a great meeting management software:
❌ With Zoom alone:
✅ With ClickUp Meetings:
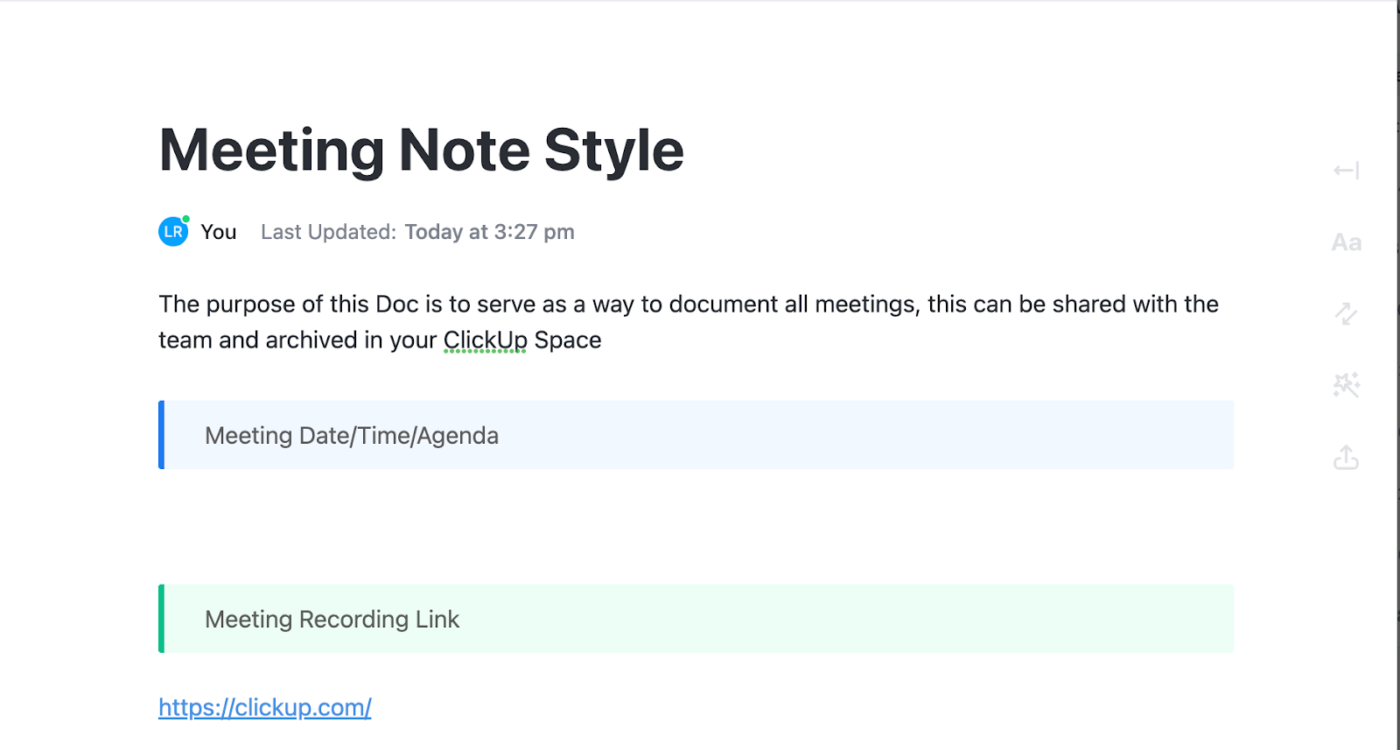
Speaking of meeting notes, ClickUp’s Meeting Notes Template makes for the perfect outline.
The template ensures that every discussion stays structured, focused, and actionable. It also offers a clear format for agendas, notes, and follow-ups and eliminates scattered meeting takeaways. And since everything is in one organized place, teams can easily track progress and decisions.
Sections in this template include:
You can record new Clips directly from the Clips Hub.
If it’s your first time using Clip on your browser, a popup displays asking you to give ClickUp access to your microphone. Click Allow. Permission can be given later by visiting your browser’s Privacy & Security settings.
To record a new Clip from the Clips Hub:


To share a Clip from the Clips Hub:

B. Commenting on Clips
When you view a Clip, you’ll see a timeline of all comments on the video progress bar at the bottom so you can quickly navigate through all comments on the Clip.
Each comment you leave includes a timestamp that can be clicked to play the Clip from the moment the comment was left.
To comment on a Clip from the Clips Hub:
There are four tabs at the top of Clips:
To search for Clips from the Clips Hub:


That’s all; it is that easy with ClickUp.
This is what Michael Turner, Associate Director at Miami University, said about ClickUp.
I have biweekly meetings with my supervisor, and we use ClickUp for our agenda. I feel more on top of my game because all of my event and presentation requests live here, along with an up-to-date status indicator that she can check out.
ClickUp doesn’t come with just one feature; it is a bouquet of tools that make sense together.
Think about it: Once you record a meeting, sharing becomes effortless; once shared, feedback flows naturally; and with a click, that feedback transforms into actionable tasks—all in one place.
ClickUp lets you record, transcribe, organize, track, and follow up—all without switching between apps.
Try it yourself and experience the future of meetings by creating a free account on ClickUp today!

Arya Dinesh
Max 11min read

Praburam Srinivasan
Max 44min read
Arya Dinesh
Max 16min read

© 2026 ClickUp