How to Create a New Team in Microsoft Teams

Sorry, there were no results found for “”
Sorry, there were no results found for “”
Sorry, there were no results found for “”
Few communication apps are as versatile as Microsoft Teams. You can quickly send messages, hop on a video call, and seamlessly integrate it with Office 365 to make everything run smoother.
One of the best features? The ability to create new teams that fit your unique needs.
Knowing how to set up and organize your team effectively can really boost productivity and streamline communication in your organization.
When used correctly, Teams can be a great collaboration software for both in-office users and remote workers, keeping everyone aligned and in the loop, no matter where they are.
This article is a detailed guide on how to create a Team in Microsoft Teams, ensuring you have all the steps and tips you need!
Building a team in Microsoft Teams is a flexible process. There are multiple ways to create teams based on your specific needs and preferences.
We’ve outlined the steps to help you set up a new team in Microsoft Teams.
If you don’t have an existing Team on the Microsoft Teams app, no worries! You can start fresh and design your team exactly how you want it. This allows you to organize everything to fit your goals and working style.
Plus, once your team is created, you’ll automatically get a SharePoint site and OneNote to help keep everyone connected and on the same page.
Click on the Teams icon on the left side of the app.
Click on Create Team. A menu will appear, giving you options to join or create teams. Choose Create Team to continue.

In the Create a Team window, provide a name for your team. You can also add an optional description.

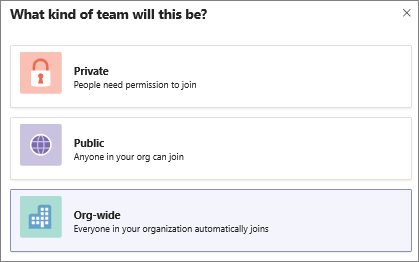
Select the privacy level for your team:

If your organization uses data classification, you can also apply a sensitivity label to ensure the right level of protection for your team’s information.
Once you name the Team and set its privacy, click Create.
Microsoft Teams will automatically create the first channel for your team. You’ll need to provide a name for this channel, which cannot be deleted or archived, but you can add more channels later.
You can easily create a new team by replicating the data, channels, and settings from an existing team or using an existing Microsoft 365 group. This approach helps you streamline the setup process and ensures that your new team has all the essential resources and configurations in place.
Here’s how to do it:
Click the Teams icon on the left side of the app and select Create or Join Teams at the top of your list of teams.

Click on Create from. In the pop-up menu, select More create team options.

Choose From Another Team. You’ll see a list of teams that you’re currently a member of. Select the team you want to copy.
Choose From a Group. Here, you’ll see a list of Microsoft 365 groups you own that don’t already have a team and have fewer than 10,000 members.
Select the group you want, and a new team with the same name, privacy, sensitivity, and members will be created automatically.

Name your new team, provide a description, adjust the privacy settings, and set the sensitivity label (if applicable).
Microsoft Teams will automatically create a new channel named ‘General’ for your team, which you can rename later.
Use the checkboxes to select which parts of the existing team to copy channels, tabs, settings, apps, and even members.
If you choose not to copy members, remember to add members to the team manually.
Once everything is set up, click Create to complete the process.
Looking for a quick way to get your team up and running? Teams offers a variety of templates that let you start with a solid foundation without having to build everything from scratch.
These templates come pre-loaded with channels, apps, and settings designed for different purposes. It’s a fantastic way to save time and ensure you have the right tools at your fingertips.
Click on the Teams icon on the left side of the app. Select Create or Join Teams at the top of your list of teams.
Click on Create Team. In the menu that appears, select More Create Team Options.

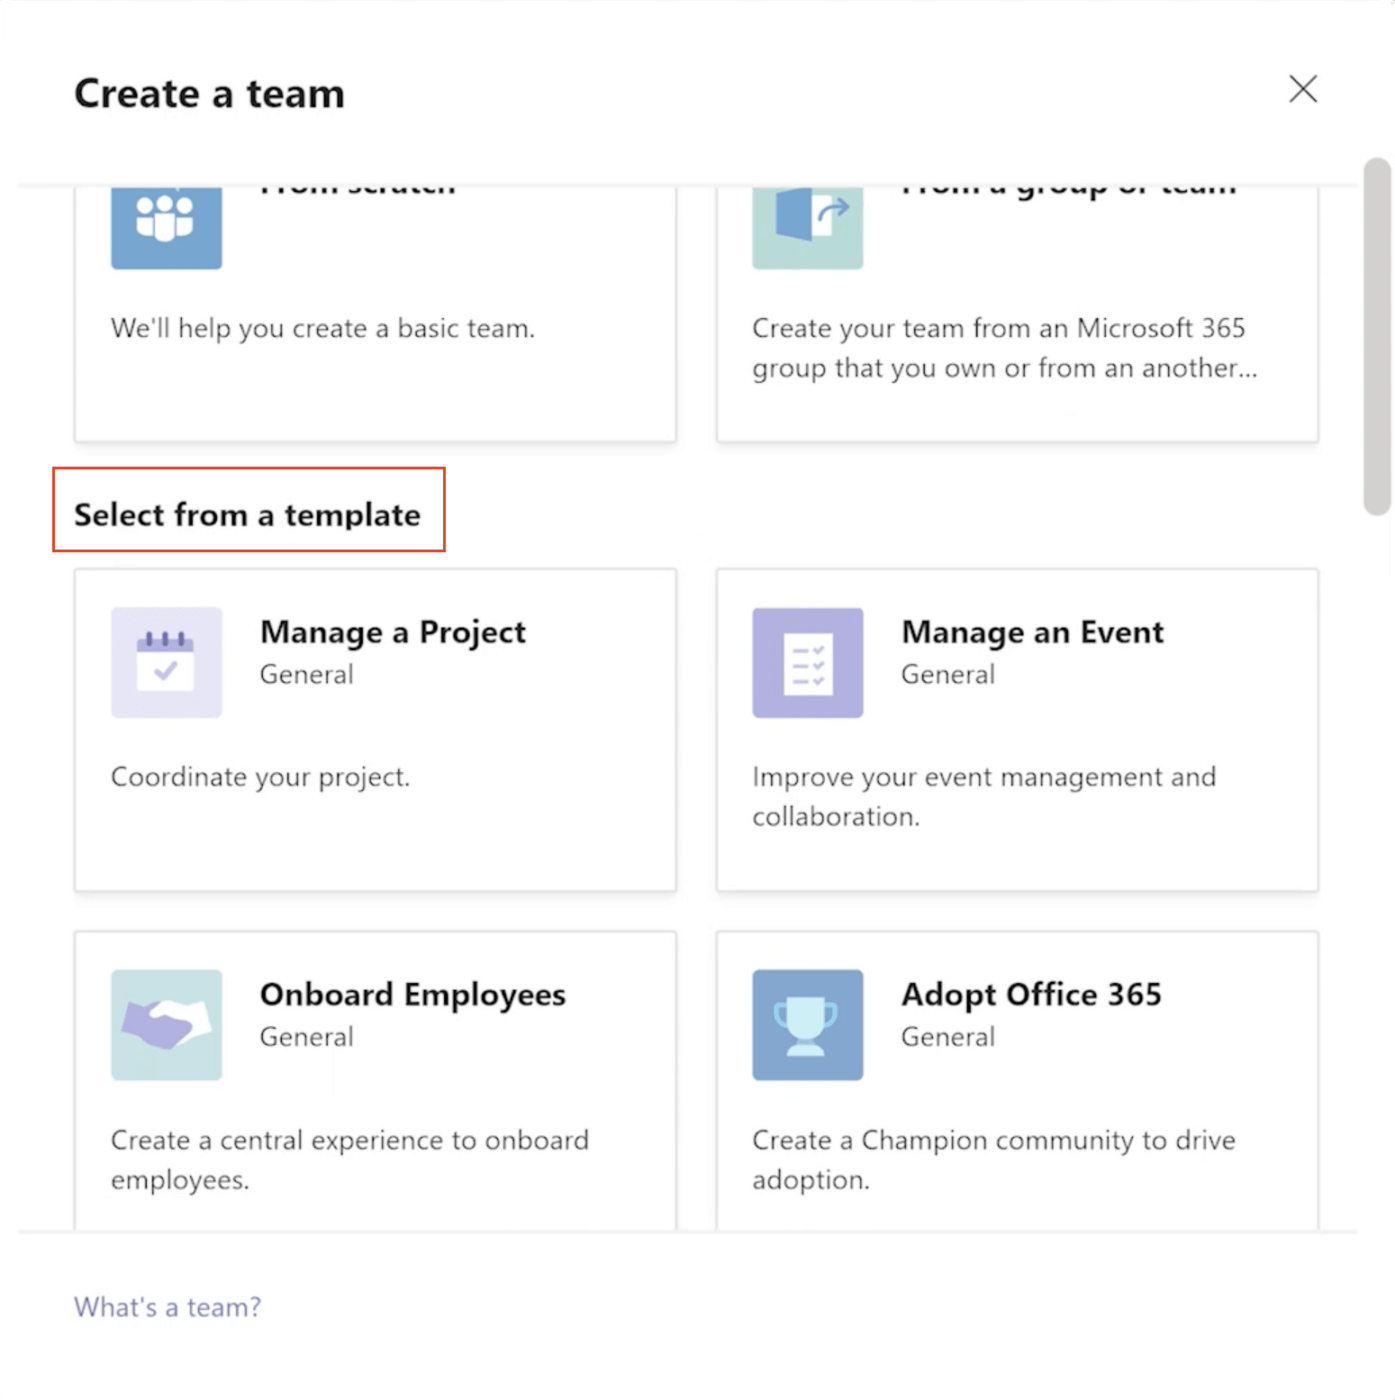
Go to Select from a template. Browse the list of available templates, such as project management, event management, retail services, or healthcare. Your organization’s admin may also have custom templates.

Review the list of channels and apps included in the template. You can customize or change these later. Click Use This Template to proceed.
Choose the privacy setting for your team and select the Sensitivity label for your team. Enter a team name and add an optional description. You can also rename the automatically created General channel or any other channels provided by the template.
When you’re ready, click Create at the bottom to start the team creation process.
An organization-wide team in Microsoft Teams allows your entire company to stay connected. It can support up to 5,000 members, making it perfect for large organizations looking to improve transparency and ensure every employee stays informed.
Click on the Teams icon on the left sidebar of the app. This will bring up a list of your current teams and the option to create new ones.
Once you’re in the Teams section, click the Create a Team button. A pop-up window will appear with different ways to create your team.
To set up a new custom team, select Build a Team from scratch. This will give you full control over the structure and settings of the new team.
If you’re a Microsoft 365 admin, you’ll see the Org-wide option. This lets you automatically include everyone in the company, saving you from adding members individually. As new employees join, they are automatically added as well.

Enter a name for your team and add a brief description explaining its purpose. This helps team members quickly understand the goal of this org-wide team.
After naming your team, click Create Team. Microsoft Teams will automatically add all employees and any new hires to the org-wide team, ensuring that your team stays up to date without additional work.
Once you create a team, you become the owner by default. This means you can invite members to join and add channels to make collaboration easier. Plus, you have the freedom to create even more teams—up to 250 teams per account!
When using Microsoft Teams for project management, communication, and file sharing, it’s important to understand some of its limitations. It is a great tool for bringing people together for virtual meetings and offers a range of integrations. Still, a few constraints may affect collaboration, especially in larger organizations or complex projects.
In Microsoft Teams, each team is capped at 200 channels. While this might work for small projects, it can feel restrictive for larger teams or complex project management setups. Users working on intricate tasks with multiple channels for communication plans or file-sharing may require restructuring or finding creative workarounds.
While Microsoft Teams offers excellent integrations with popular project management and file-sharing software, not all apps are available in private or shared channels. This can disrupt workflows, especially when teams rely on specific tools for virtual meetings or managing communication strategies.
When presenting in a virtual meeting, Teams offers limited capacity to chat with attendees during screen sharing. This can be frustrating, particularly when real-time communication or feedback is essential. This can lead to delays in decision-making and hinder collaborative engagement.
Meeting recordings are valuable, especially for keeping a record of important discussions. However, in Microsoft Teams, these recordings expire after a certain period. This can be problematic for long-term projects that require access to past discussions, meeting agendas, or communication plans.
For extended documentation, you’d have to explore alternatives or find additional file-sharing software for archival purposes.
One surprising limitation is that team owners in Microsoft Teams aren’t automatically added to private channels. This means that important discussions around project management, file-sharing, or even integrations might happen without the team owner’s knowledge. It can create a gap in oversight, making it harder to keep the whole team aligned on communication and collaboration goals.
ClickUp serves as a versatile productivity platform where teams can gather to brainstorm, plan, and collaborate on everything, including process documents and product designs. It streamlines various workflows, allowing teams to manage multiple aspects of their work in one place.
What makes ClickUp particularly effective is its ability to adapt to different use cases without sacrificing functionality or ease of use. Whether tackling complex project management, organizing communication templates, or handling detailed design tasks, ClickUp is a comprehensive tool that enhances productivity and collaboration.
ClickUp Teams integration makes managing projects and tasks seamless—no more switching between platforms. Integrating ClickUp with MS Teams allows you to easily create and manage tasks, assign them to team members, and track progress directly within your familiar Teams environment. You can also view and discuss tasks in real time during meetings, eliminating the need to switch between applications.
Now, let’s look at the other collaboration features available within ClickUp!
ClickUp Chat is designed to make collaboration effortless. It’s not just a messaging tool—it’s your project management partner, integrating Tasks, Docs, Comments, and Chats together in one place.

Got a comment that needs to turn into a task? Create FollowUps to ensure accountability. Plus, Sync Threads to Tasks keeps every conversation aligned with your project updates—no more jumping back and forth between chats and task boards.
That’s not all! You can structure your conversations into Spaces that mirror the way your team works. This feature helps you stay focused and productive without getting overwhelmed by scattered discussions across various projects.
Have important announcements or updates? Use Posts to make announcements and ensure clarity across the board.
Whether you’re chatting through Direct Messages, setting reminders, or hopping on Voice & Video Calls, ClickUp Chat ensures that you stay connected and in control.
💈Bonus: You can also use the ClickUp Instant Message Template to create an internal chat room for your team, which will help you organize conversations in one place.
ClickUp Clips has completely changed how teams communicate, offering a fresh approach to screen recording that enhances clarity and collaboration. It lets you articulate your ideas effortlessly, helping you cut through the noise.
Creating a Clip is simple and intuitive. Just click the video icon in any ClickUp conversation, and you can instantly start recording your screen. This functionality is a fantastic alternative to traditional chat tools, allowing you to convey complex information or share feedback easily.

When it comes to sharing your Clips, it couldn’t be easier. You can embed them in ClickUp, share a public link, or download the video file to use as you please.
This level of flexibility ensures everyone stays on the same page, whether they’re within your team or external stakeholders. After sharing your Clip, your team can easily seek feedback or clarification by adding comments to it. Pretty convenient, isn’t it?
Effectively managing meetings can make or break your sanity, especially when the meeting minutes are longer than the actual meeting!
Luckily, ClickUp Meetings makes the entire process seamless. Start by using Assigned Comments to clarify responsibilities. When a comment requires action from a team member, you can assign it directly, ensuring everyone knows what they need to do.

Next, utilize Checklists to create a structured list of discussion topics. As each item gets addressed, mark it off the list to keep your meeting on track and organized.
You can also take advantage of Recurring Tasks to save time when creating meeting agendas. Once you establish an agenda, it will automatically reappear for future meetings, freeing you from repetitive task creation.
💡Pro Tip: Want to skip the endless clicking and take action instantly? Slash Commands make it easy to jump into tasks and streamline your meeting notes! Just type a slash (/) in any text field to access a menu of commands, allowing you to take immediate action without unnecessary clicks.
Still, wondering if ClickUp is the right fit for your business messaging needs? The platform doesn’t just excel in project management; it also offers powerful collaboration features that integrate with tools like Zoom and Slack.
With the Zoom integration, scheduling and starting meetings right from ClickUp is hassle-free. You can connect tasks with specific meetings, ensuring everyone knows what to discuss. This integration streamlines your workflow, keeping discussions relevant and organized.

On the other hand, the Slack integration helps you stay connected with your team in real time. You can receive updates, assign tasks, and manage conversations directly from your Slack channels. Whether you’re sharing progress or discussing project details, this integration keeps everything centralized.
The integration enhances workflows, especially for managing communication plans, file sharing, or updating meeting agendas. This makes ClickUp one of the best Microsoft Teams alternatives for a unified project management experience.
Effective communication is crucial for any team, and having clear communication goals can significantly improve collaboration and productivity.
For instance, the ClickUp Internal Communication Strategy and Action Plan Template helps you achieve communication goals by providing a structured approach. You can outline actionable strategies to enhance your team’s communication, ensuring everyone is on the same page.
It offers a Board View to organize your strategy visually, making it easier to assess and adapt as needed. You can also track key metrics with ClickUp Dashboards to measure the effectiveness of your communication initiatives.
💡Pro Tip: You can access 1,000+ templates in ClickUp to streamline your workflow. The templates make it easier to kickstart projects, manage tasks, and enhance team collaboration.
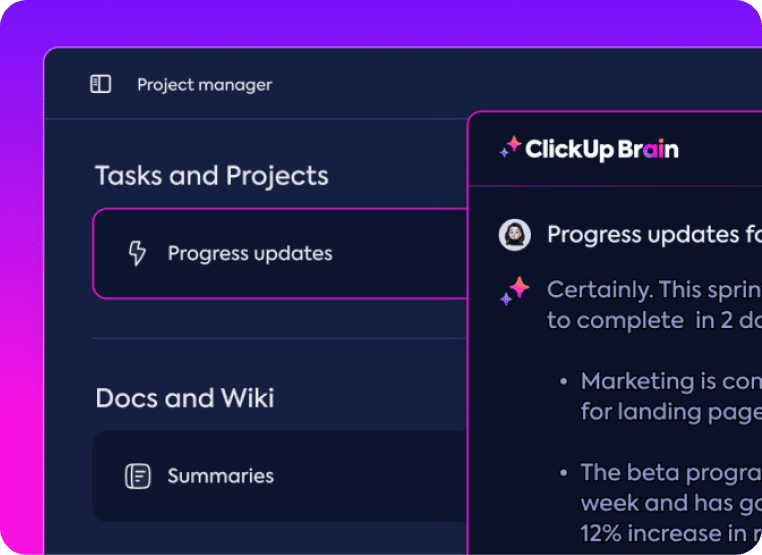
ClickUp Brain, the AI powerhouse within ClickUp, is here to simplify your virtual meetings and collaboration efforts. We know how boring it can be to sift through lengthy recordings or notes after a meeting, which is why ClickUp Brain automatically generates meeting summaries so you can instantly find relevant information.

During virtual meetings, ClickUp Brain ensures real-time note-taking, capturing key points and action items on the fly. This means you can focus on discussions while AI handles the details. You don’t have to worry about deciphering your own messy notes later!
Instead of trying to remember who needs to do what after a meeting, use AI Task Creation to turn decisions into tasks, so your team can focus on getting things done right away.
Microsoft Teams stands out as a fantastic platform for enhancing communication and collaboration within any organization. It allows seamless messaging, video calls, and integration with Office 365, helping keep everyone connected and informed.
Creating teams tailored to specific needs can significantly improve productivity and ensure smooth communication among team members.
Integrating ClickUp with Microsoft Teams can elevate your work experience even further. With ClickUp, you can manage tasks, projects, and communication all in one place, making collaboration more efficient.
This can take your teamwork to the next level, ensuring that everyone is on the same page and working toward common goals. Sign up for ClickUp today!
© 2026 ClickUp