How to Create Whiteboard Animation Videos?
Sorry, there were no results found for “”
Sorry, there were no results found for “”
Sorry, there were no results found for “”

Most of us have probably been in situations where conveying complex topics and ideas through static presentations simply didn’t work. Either the message wasn’t communicated, or the audience lost interest while you were still on the third slide.
This is where whiteboard animated videos come to the rescue.🤩
From disseminating complex concepts to keeping viewers engaged, whiteboard animation uses audio and visuals that make the whole process fun and engaging. The best part? These animation videos can be adapted into professional presentations.
In today’s blog, you’ll find out how to create engaging whiteboard videos and presentations without expensive equipment or tools. Let’s start!

Have you ever watched explainer videos where the narrator uses hand-drawn illustrations on a whiteboard to illustrate a concept, teach something, or simply make a point? That’s what a whiteboard animation looks like!
Whiteboard videos bring messages to motion, which is why they’re so fascinating to watch. In professional scenarios, boring presentations might be an equally dreary event for the presenter and their audience. But you can turn that around with fun and engaging videos.
With the help of whiteboard videos, you simplify complex ideas through images, graphics, and a range of other multimedia elements—almost making it feel like you’re telling a story. While this helps grab the attention of the viewer watching the presentation, it also allows you to provide more insights into a topic and explain it in your own style.
Whiteboard animations are fun to watch. There are no two-way about it!
But what’s the recipe for creating whiteboard animation or an explainer video? It’s simple. You only need to have the most comprehensive work management tool, ClickUp!🤷🏻
You heard that right! With ClickUp, you can create whiteboard animation videos that take half the effort and deliver double the results. With various innovative features and functionalities, ClickUp is an excellent whiteboard animation maker for professional purposes.
Here is the step-by-step guide for using ClickUp to create life-like whiteboard animation:
What’s the backbone of a hit movie? You guessed it right—a good story!
Even in the case of whiteboard animations, if the story is not compelling, no amount of amazing graphics or captivating sound effects can make up for it.

Start by writing a strong script for your whiteboard video. You don’t necessarily need to be a pro at storytelling.
Once the ideas float in, visualize the scenes that convey your message most effectively. Then, open ClickUp Docs and start drafting.
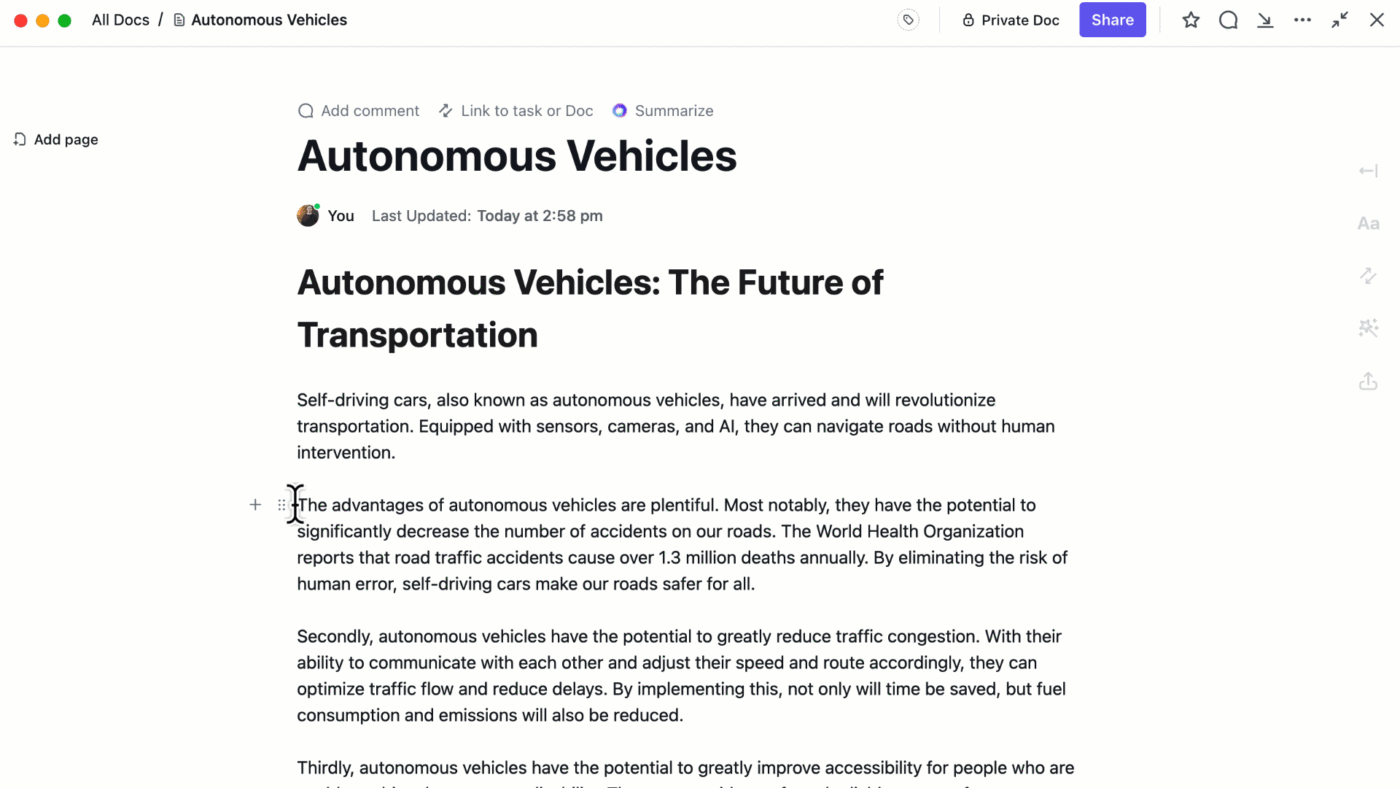
If it’s a team project, collaborate with other members to create a solid script. Assign tasks and action items to specific individuals and track changes to create a polished draft.
Alternatively, when lacking the resources or time to script your story, let ClickUp Brain take over wherever you get stuck. This powerful AI assistant helps you edit text, generate ideas, and fine-tune your video draft! 🛠️
💡Pro Tip: Feeling confused about fine-tuning ClickUp Brain for your specific needs? Learn the different ways ClickUp Brain and its top features help you!
Story? Check! Now, it’s time to decide what your animation video will look like.
When creating animation videos, it is very important to ensure your graphics correspond with your script. This is called visual planning or storyboarding. If they are not in sync, your message will get lost in visual translation, confusing viewers.

ClickUp Whiteboard solves this issue and more. With Whiteboards, you can brainstorm ideas and create digital storyboards with images and illustrations appropriate for your script. Collaborate with your team in real time to select and organize the best ones.
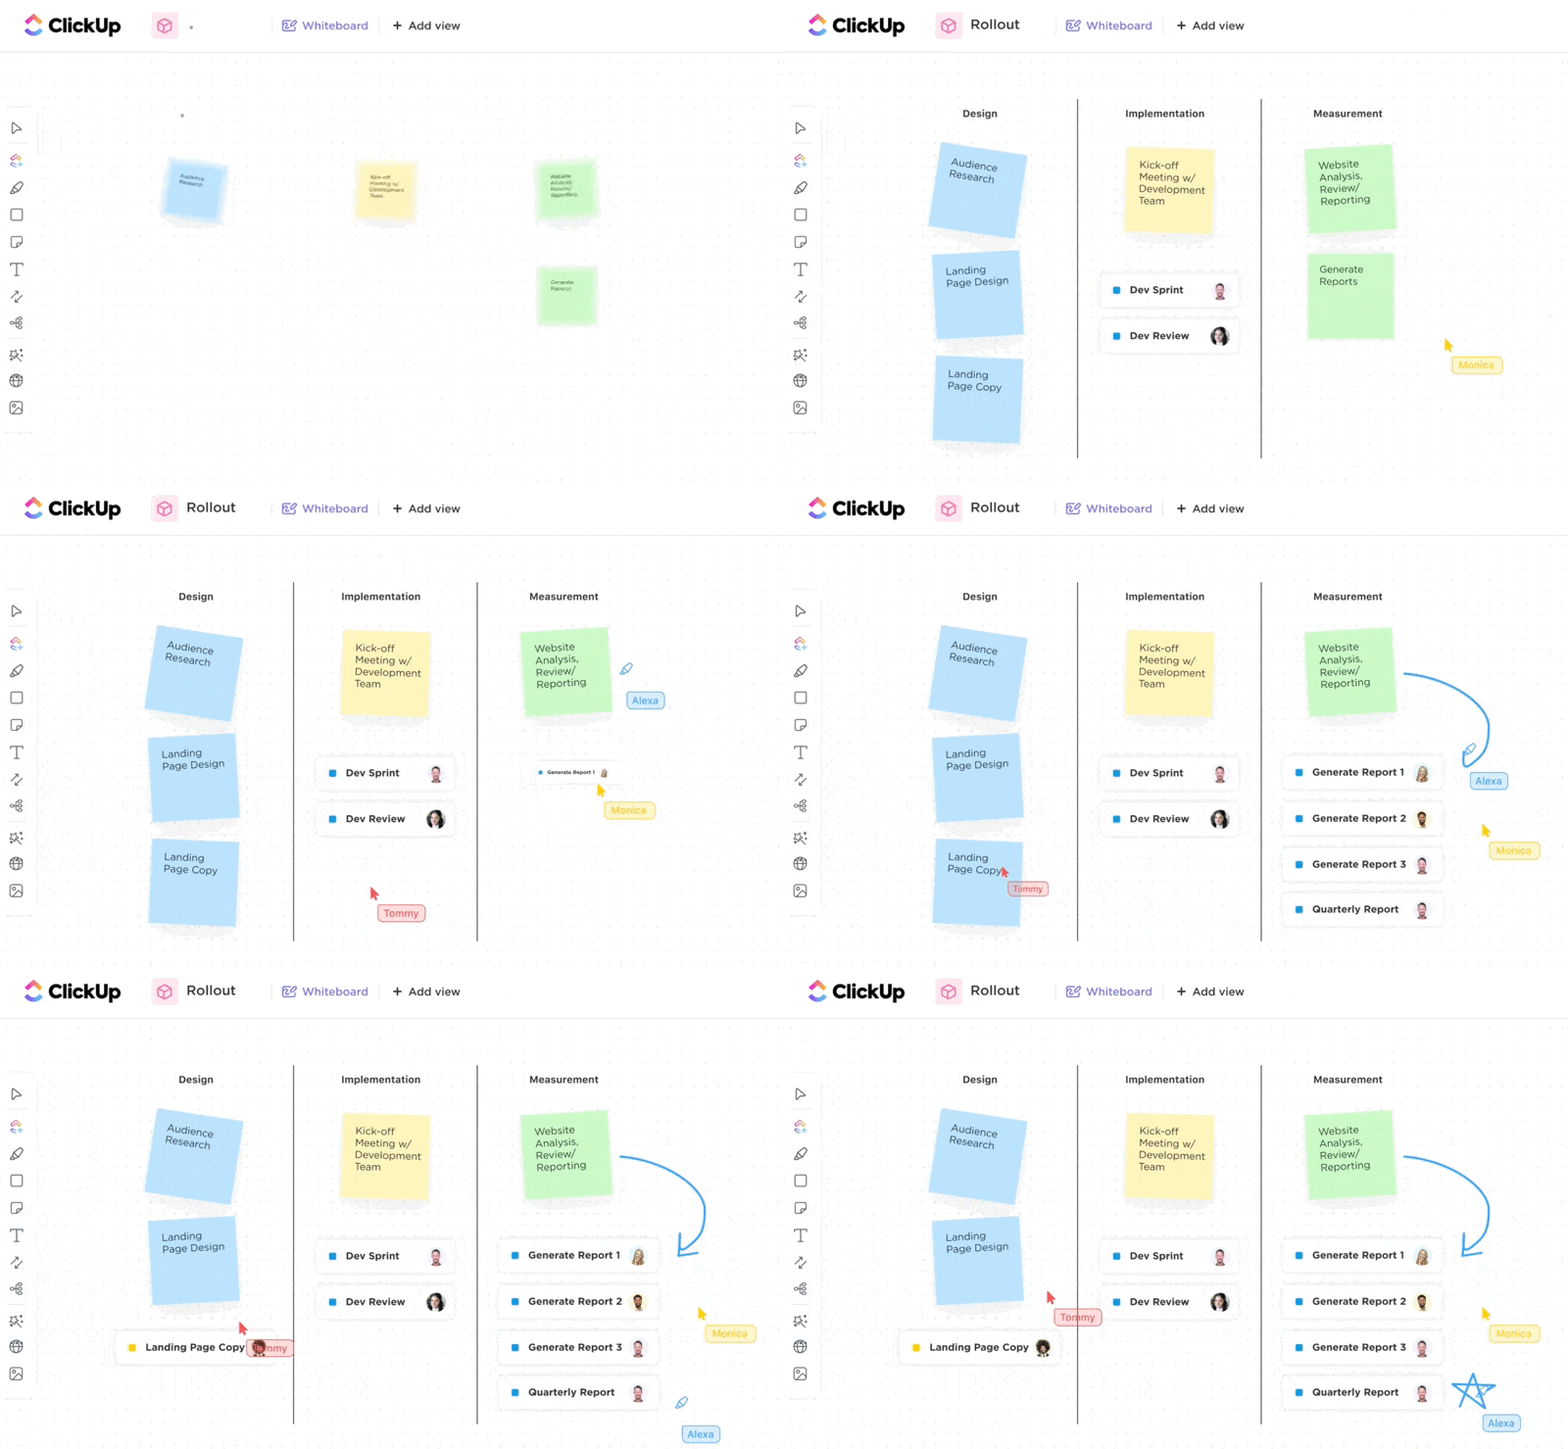
If you still feel there’s room for help, connect your whiteboard with ClickUp Tasks and assign action items to specific team members with a drawing hand. This way, your digital storyboard mirrors the core of your script.
Recording an expressive and captivating voiceover for the animation video is as essential as selecting the right graphics and images. Even if your animation style is great, the video will ultimately be discarded if the voiceover is not up to par.
While ClickUp does not help record animation voice-overs directly, it does optimize the process.
Start by downloading a secure third-party voiceover tool on your browser—plenty of free ones are available online. Upload your script, browse through the tool’s library of AI voices, pick the most appropriate voice for your script, and generate the voiceover.
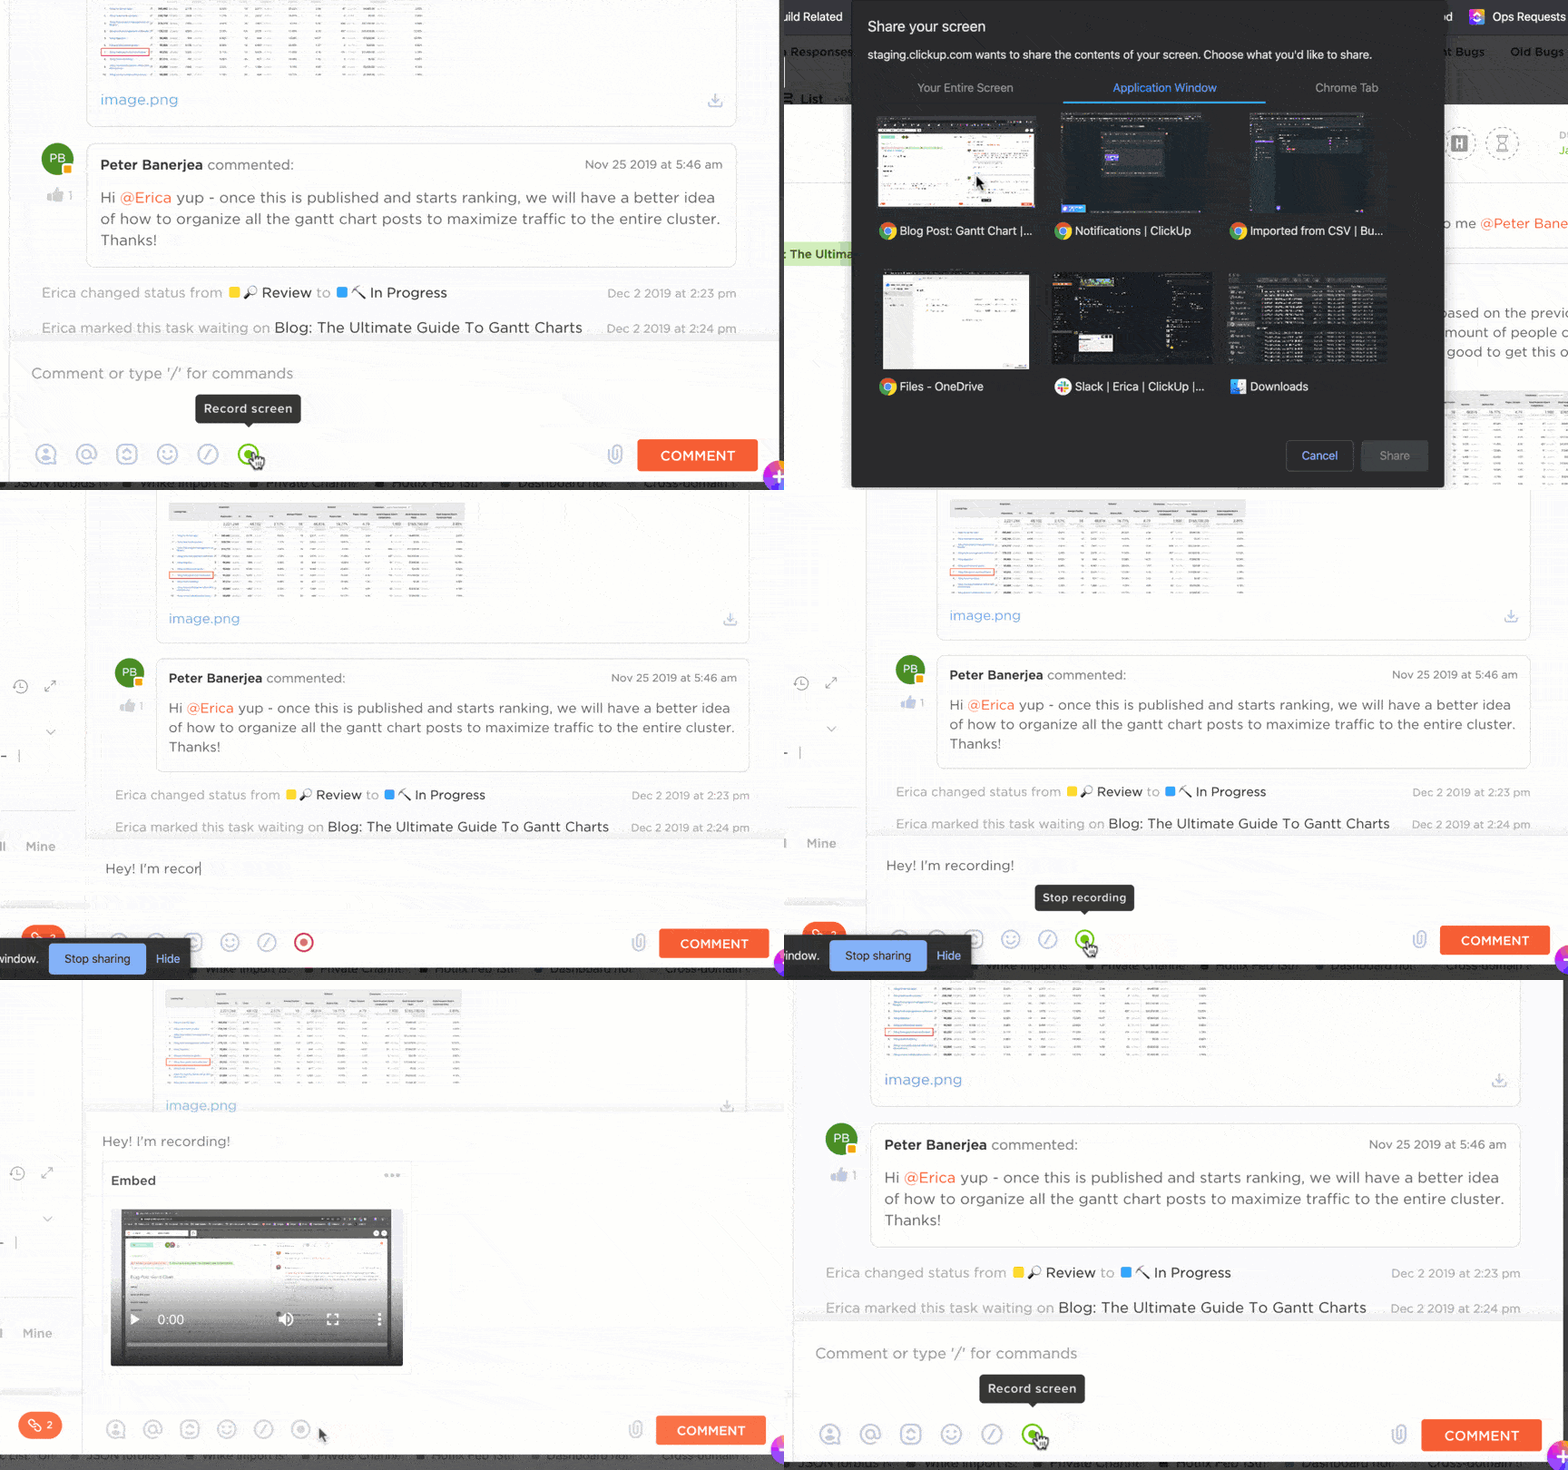
Though this entire process seems straightforward, there’s a lot of room for mismanagement and inefficiencies, which is where you can employ ClickUp Clips.
With Clips, you can create short screen recordings explaining the nuances of your animation voice. For example, suppose you’re making a training video and want to change the tonality style during a specific scene. You can simply record your screen and convey the feedback to your team members.
Moreover, dedicated tasks should be designated for every team member so that voice-over recordings can be scheduled efficiently. Set deadlines for when a team member should have generated voice-overs, assign action items for any post-production task, etc.
💡 Pro Tip: Learn more about using different software to create user-friendly training videos for education, upskilling, and reskilling.
Animation is the lifeblood of whiteboard videos. It’s the element that makes them engaging, memorable, and, most importantly, easy to comprehend. So, let’s breathe some life into yours!

With the script, images, and voice-over ready, use ClickUp Integrations to plug in the platform with an animation tool. ClickUp has over 1,000+ integrations, so you can easily find a tool and use it to animate your whiteboard video.
Use ClickUp Tasks to manage the lengthy animation process. Simply break the project into smaller tasks and manage each one’s progress, timelines, and other details.
There are so many tools and integrations across the ClickUp platform, and they truly have thought of every possibility when it comes to project management.
By this point, you will have a fully animated video. The next step involves adding the right music to the video content.
While the voice-over is present, if animated videos lack the proper sound effects and background music, they won’t be as impactful and dynamic as they should be. However, the biggest problem is sourcing the background audio. You must be mindful of many things: content fit, copyright issues, usage license, etc.
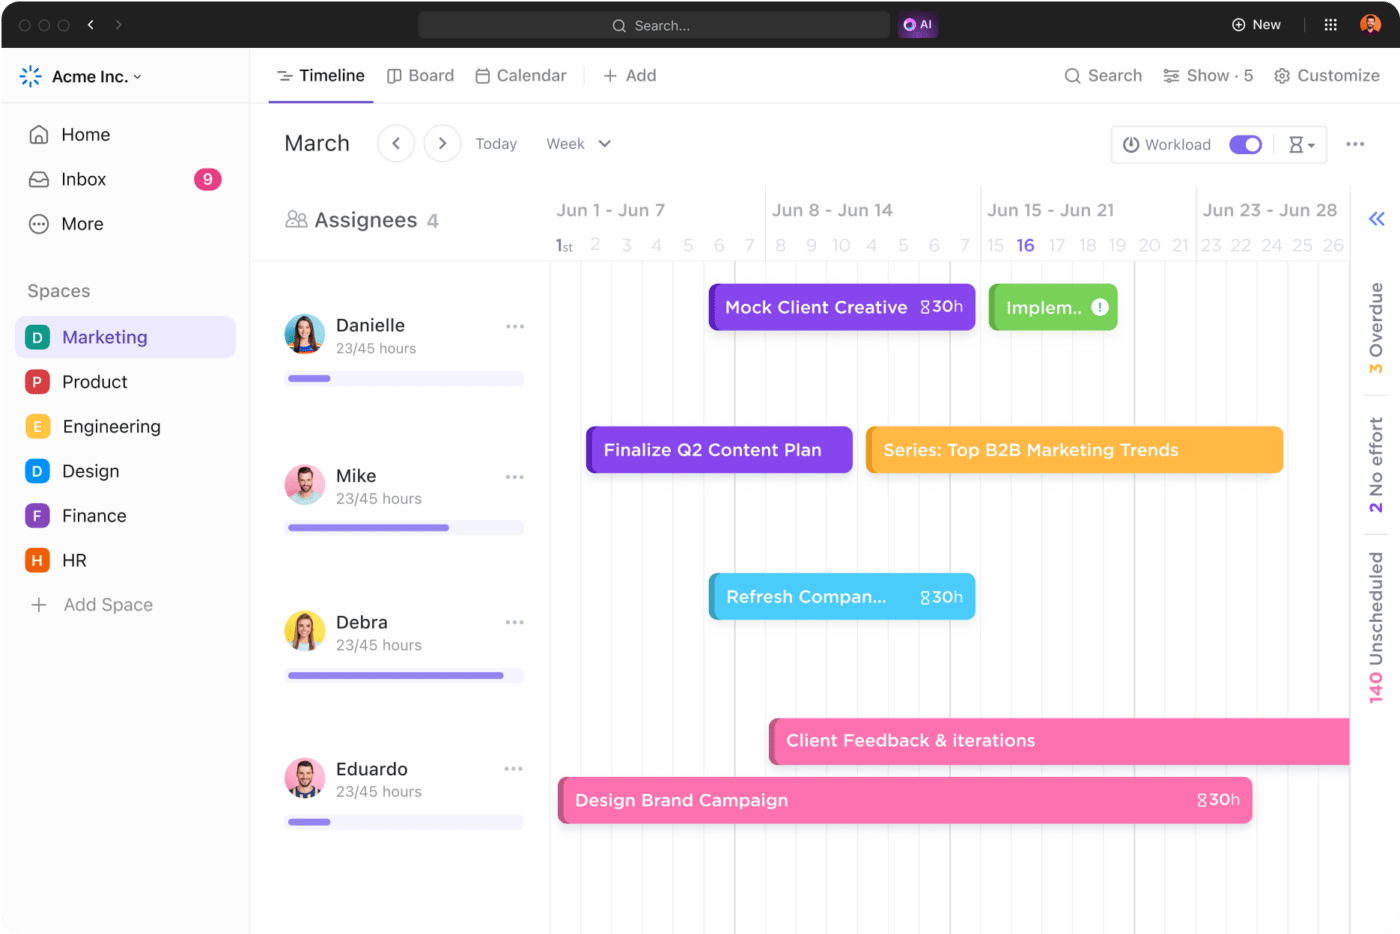
This is where features like ClickUp Reminders and ClickUp Timelines prove indispensable. With their help, you can keep track of every activity related to sourcing and reviewing music and sound effects.
Set timelines, send reminders, and even comment on a task to highlight issues with a track. These features also let you collaborate with your team to finalize the soundtrack for your whiteboard animation video.
With everything done, you should move on to the final edit!
Since you’ll be using the whiteboard animation video for professional purposes, it’s vital to ensure it’s polished and free of silly mistakes.

In this context, there’s nothing better than ClickUp Tasks. With its help, streamline the entire video editing process. Two of its features that prove exclusively helpful in whiteboard project management are Comments and Approvals.
Whether you need to tweak the writing, add text, change animations, or customize a voice effect, easily tag a team member in your comment and assign the task to them.
With Tasks, you also track the progress of every action item daily. Once all tasks are done, mark them as approved and complete the project!
You just learned how to create whiteboard videos, but what about presentations? Can they be as engaging as animations? Yes, they can! You can turn a dull presentation into a lively one simply by adapting it into a whiteboard animation video. Here’s how:
To create a presentation from a whiteboard animation, begin by extracting your key points. So, list all the facts, figures, and highlights you want to discuss in your presentation.
Once you have your key points figured out, it’s time to create PPT slides. Ideally, you should create a slide for every fact, figure, or pointer that is core to your presentation. This makes the content less overwhelming for viewers to consume.
Make your presentation more compelling by adding narration to it. Write a script from scratch or download the one you used in the animation video. You can also edit text, use different styles of narration, etc.
Next, add visual elements to your whiteboard presentations.
Taking screenshots from the whiteboard video you’ve created is an effortless yet effective way to do that. If that doesn’t produce satisfactory results, insert images and multimedia elements from other sources, like free stock photo platforms.
Lastly, it’s time to organize the slides. The ClickUp Presentation Template is the perfect free choice here.
Customizable and beginner-friendly, this template lets you focus and organize every section of your whiteboard presentation by helping you systematically arrange them. Along with this, the ClickUp Presentation Template also helps:
And that’s how ClickUp can turn dull assignments into fun and compelling whiteboard presentations.
Whiteboard animations and presentations may seem like fancy deals—and, to some extent, they are!
However, given the incredible engagement and attention they receive, creating them with a whiteboard animation maker has become an integral part of the business landscape.
But the challenge doesn’t end there. Even if you create animated videos and presentations for your next meeting, how do you choose a whiteboard animation maker equipped with all the necessary tools and features?
A one-stop work management solution like ClickUp does the job well. ClickUp’s extensive library of features and functionalities includes everything you need to create animated videos and presentations from whiteboards.
So hurry up and sign up on ClickUp today to design fun and creative whiteboard animations!
© 2025 ClickUp