

PDF editing tools are the unsung heroes of a professional’s toolkit. From students to product designers, everyone works on PDF documents. And everyone, at some point, needs to edit them.
Here’s what editing PDFs unlocks for you: you can circle sections with the pencil tool, add sticky notes, or drop in text boxes to make your points loud and clear.
Just imagine how much easier your life would be if you could draw directly on that PDF.
But let’s be real: converting PDFs to another format is like untangling Christmas lights. The formatting, alignment and style elements can get totally scrambled, and putting it all back together is double the work if you don’t get it right.
So, let’s learn how to draw on a PDF. ✏️
How to Draw on a PDF File
⏰ 60-Second Summary
Here’s a quick summary of the best ways to enhance your PDFs with drawings and annotations:
- Shapes for highlights: Use circles and rectangles for clean annotations
- Freehand with pencil tool: Perfect for personal doodles, underlines, or quick notes
- Text boxes and sticky notes: Add clear explanations without cluttering the layout
- Opacity and colors: Adjust for subtle or standout annotations
- Stylus precision: Ideal for detailed markups on touchscreens
- PDF limitations: Editing requires premium tools, has no real-time collaboration, and lacks interactivity
- Try ClickUp: Whiteboards, Mind Maps, and Docs streamline brainstorming, task conversion, and real-time collaboration—perfect for students and professionals
How to Draw on a PDF File?
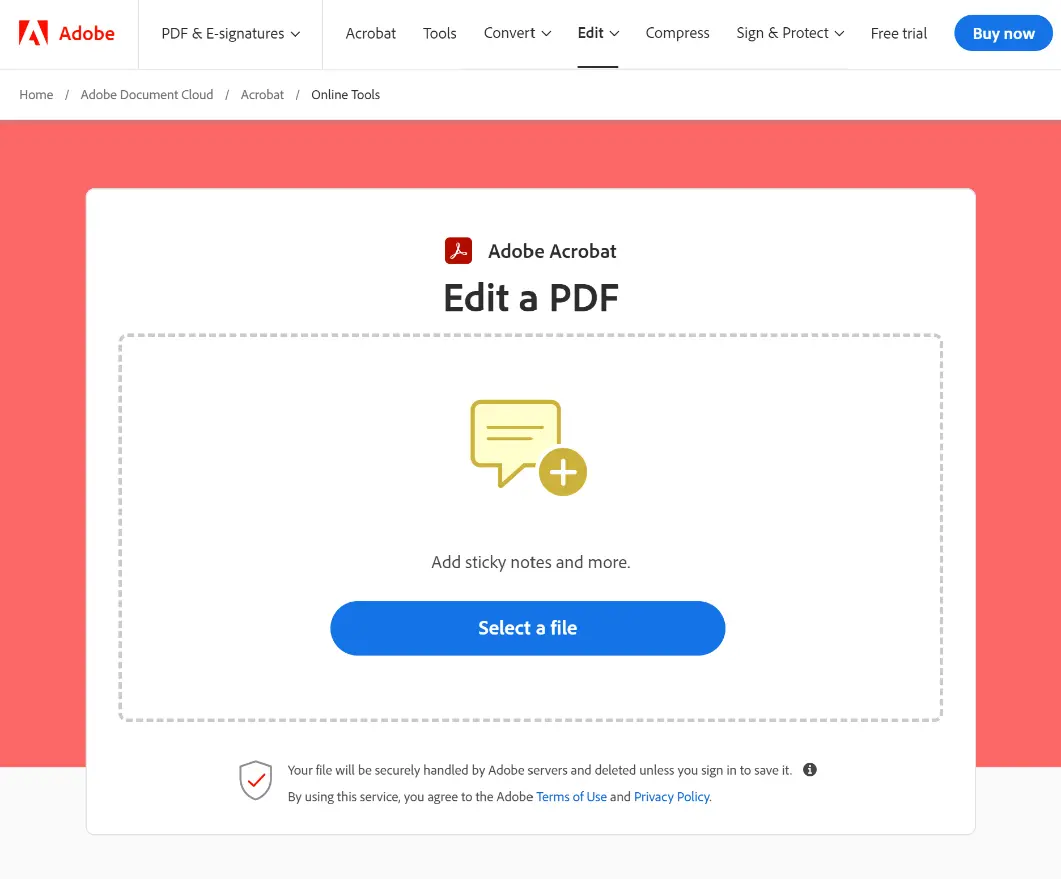
Let’s walk through some fun, easy ways to draw on your PDF online (or a reliable offline tool if you’ve one) without making your brain do cartwheels. Whether you need to add shapes, draw lines, or just add some creative annotations, here’s how to do it:
1. Add shapes for instant highlights
Shapes are the go-to option when you want a clean, professional look for annotating a PDF file. To start, look for the shape tool in your free online PDF editor or drawing tool (find it in the “Comment” or “Markup” toolbar).
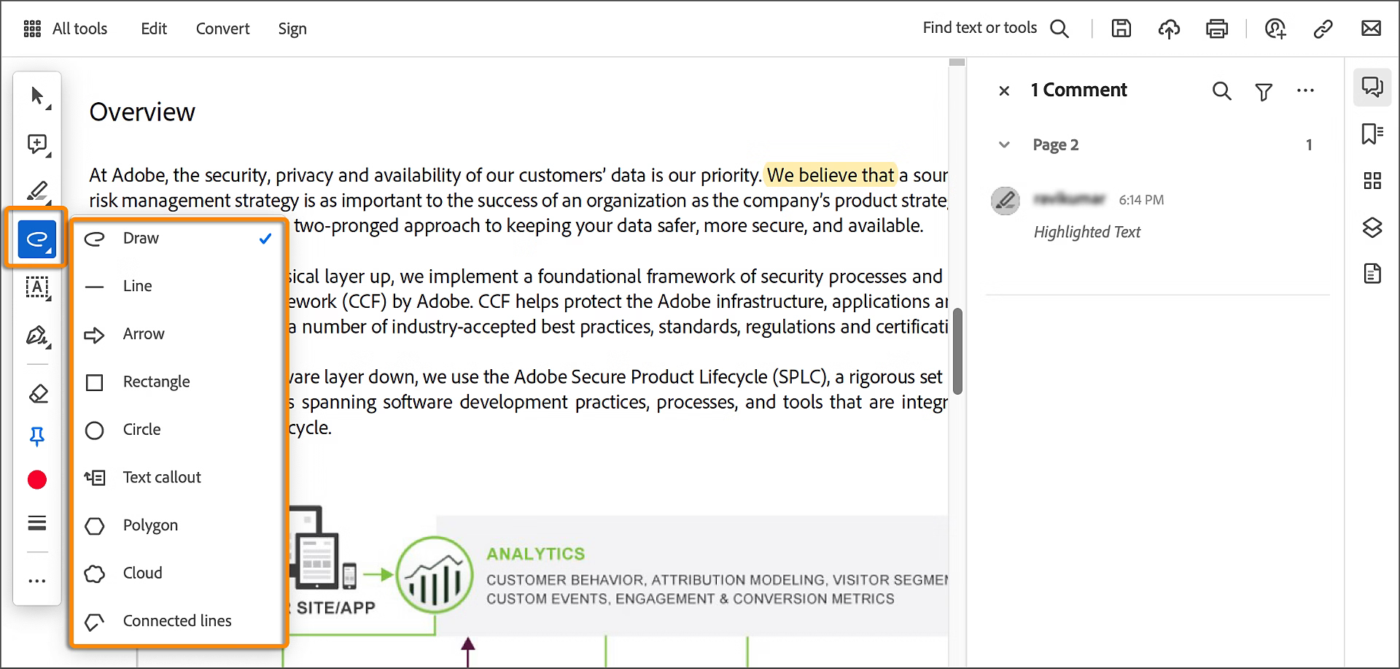
You’ll find circles, rectangles, and other shapes that you can place and resize on your PDF document. It’s like playing with digital stickers but way more productive.
💡 Pro Tip: Adjust the line thickness and color to make sure your highlights stand out without overshadowing the text.
2. Use the pencil tool for freehand magic
Feeling artistic? The pencil tool is perfect for adding personal touches, like doodles or freeform notes.
Look for a little pencil icon in your PDF editing tool—many free and paid options have this feature. Click it, then draw directly on the PDF document as if it were paper. This is great for underlining, circling, or even drawing arrows to key points.
💡 Pro Tip: Don’t worry about perfection; many editors let you adjust line thickness and color and erase any “oops” moments!
3. Draw lines to direct focus
Want to keep it simple but impactful? Try drawing straight lines.

Most PDF editing tools will have a line option, often in the “Shapes” or “Draw” section. Use lines to connect ideas, underline important points, or create a flow between sections.
4. Add text boxes for clear annotations
Sometimes, a picture just isn’t enough, and you need words.
For this, use text boxes. They’re easy to insert from the “Comment” or “Markup” toolbar and allow you to add additional notes right on the PDF.
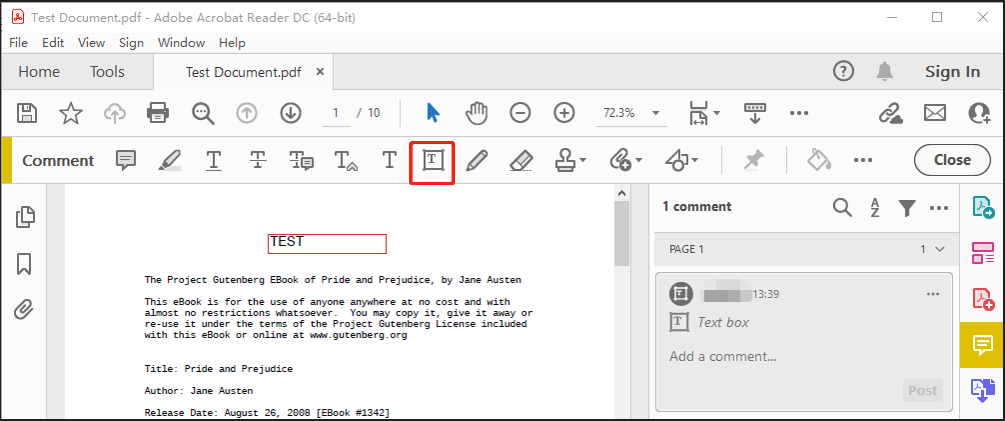
Write explanations, ideas, or gentle reminders without cluttering the main content.
5. Use sticky notes for quick comments
If you want to add comments without changing the PDF layout, go for sticky notes.
These digital Post-its can be added anywhere on the page and are great for quick remarks. You can also double-click to add longer notes and thoughts—perfect for team collaboration or personal reminders.
6. Play with opacity for subtle notes
Want to keep your markups visible but not overwhelming?
Adjust the opacity settings—By reducing the transparency, you can keep your annotations low-key so they don’t distract from the original text. This feature is especially handy for adding “background” notes.
Here’s how you can adjust opacity settings:
- Step 1: Open the PDF in your editor (e.g., Adobe Acrobat, Foxit Reader)
- Step 2: Go to the Comment or Markup toolbar
- Look for the Properties or Settings option (usually a right-click on the annotation or a toolbar icon)
- Arrow → Select your annotation (e.g., highlight, shape, or note), then find the Opacity slider or percentage dropdown
Also Read: How to Search PDF Files Quickly
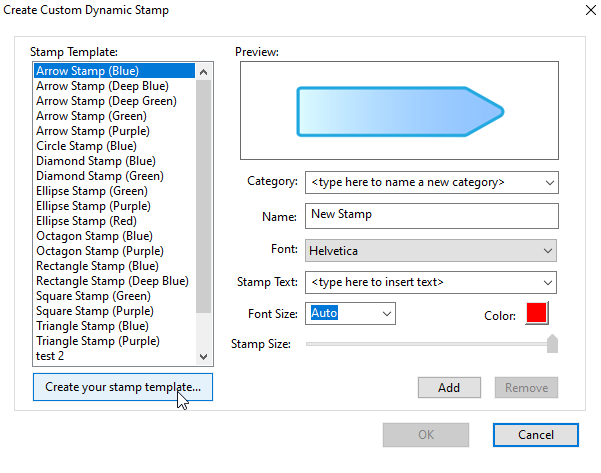
7. Experiment with colors and line thickness
PDF tools usually let you customize the color and thickness of your annotations, from neon pink to subtle gray. Colors are great for differentiating between types of notes (e.g., red for urgent, blue for informational). This keeps your PDF clear and organized.
Here’s how to customize your annotations:
- Step 1: Open your PDF in a tool like Adobe Acrobat
- Step 2: Navigate to the Comment or Markup toolbar
- Arrow → Click on the annotation tool you’re using (e.g., shape, pencil, or line)
- Arrow → Find the Properties bar or right-click on the annotation
- Arrow → Choose Color and Line Thickness options from the dropdown menus or style palette

8. Use a stylus for extra precision
If you’re using a tablet or device with a touch screen, grab a stylus. It’ll give you more control over freehand drawings.
Perfect for detailed markups, quick sketches, or even some digital calligraphy if you feel fancy.
🧠 Did you know: “PDF” stands for Portable Document Format, invented by Adobe Systems in 1991. Adobe co-founder John Warnock dreamed up the PDF as part of The Camelot Project with one big goal: to create a universal document format that could be viewed or printed on any device.
Limitations of Using a PDF for Drawing and Beyond
Working with PDFs is super handy, but there are problems with this online tool.
Here’s a rundown of why PDFs, while reliable, might sometimes feel a bit clunky for drawing and beyond:
1. Editing? Bring your wallet
Editing PDF documents directly isn’t free—most PDF editors and online tools, like Adobe Acrobat, come with a price tag. Without them, you’re stuck with the basic view-and-annotate options, leaving true edits and design tweaks off-limits.
2. Fixed annotations only
Annotating a PDF is easy, but you’re limited to fixed pages. Want to shift text or images around? Not going to happen. Existing content stays where it is, making creative changes a bit of a hassle.
3. Design tweaks are tough
If you’re hoping to make some design edits, brace yourself—PDFs aren’t as flexible as other formats. Adding or adjusting layout elements, colors, or fonts? That’s often harder than it looks.
Also Read: 10 Best Diagram Software Tools (Free & Paid)
4. Real-time collaboration is a no-go
Unlike online docs, PDFs aren’t ideal for real-time teamwork. To collaborate, you’ll often end up exchanging countless versions, which can get confusing and time-consuming.
5. Content extraction isn’t easy
Grabbing a paragraph or image from a PDF? Easier said than done. PDF files weren’t really designed for easy content extraction, so you’ll need to rely on special tools to get it done.
6. Cost of expertise
PDFs often require specialized software, and if you’re hiring someone to work on them, the costs add up quickly. A professional’s time isn’t cheap, especially if it’s a high-skill task like design or complex editing.
7. PDFs are static, so engagement suffers
Unlike interactive web content, PDFs are more like digital “printouts.” They can feel rigid and static and lack the engaging qualities that make digital content interactive and visually stimulating. To make your content visually appealing, it’s important to have a few drawing tools handy in your toolkit.
8. Page size limitations
PDFs typically follow standard A3 or A4 formats. This can be limiting, especially when trying to view the whole page at once on smaller screens, and makes zooming and panning a near necessity.
Also Read: How To Annotate A PDF (A Complete Guide)
Using ClickUp for Drawing and Document Creation & Management
Some apps help you edit and draw in documents.
Then there’s ClickUp, which takes creativity and organization to a whole new level and introduces incredible collaborative brainstorming techniques.
ClickUp is a productivity and project management tool built with collaboration in mind. So, whether you’re a small team or a large organization, ClickUp has you covered with its vast array of tools and features.
To see why ClickUp is perfect for all your drawing, brainstorming, and document-sharing needs, let’s meet Ambroise—a design student who handles multiple college projects and is planning the big leap to professional life.
Ambroise started using ClickUp in college to keep his group projects on track, and it quickly became his secret weapon for organizing notes, brainstorming ideas, and managing tasks.
Now, as he steps into his first design job, he’s still relying on ClickUp’s powerhouse features—Whiteboards, Mind Maps, and Docs.
Here’s how each tool supports his journey:
ClickUp Whiteboards: A creative canvas
Ambroise first discovered ClickUp Whiteboards in a brainstorming session with classmates.
Instead of endless notebooks and post-it notes, Ambroise could drag and drop sticky notes, sketch out ideas, and organize his thoughts in real time.

Fast-forward to his current role as a designer, and Ambroise uses Whiteboards for quick sketches and team collaboration. Here’s how:
- Visual brainstorming and real-time edits: With Whiteboards, Ambroise can add shapes, lines, and text boxes, create freehand sketches, and quickly link concepts. During client meetings, he’ll often illustrate initial ideas directly on the Whiteboard and adjust in real time based on feedback
- Instant task conversion: One of Ambroise’s favorite features is turning sketches into actionable tasks. Each element on the Whiteboard can be converted into a to-do item or project, making it easy to carry ideas from concept to execution without a hitch
Starting out with ClickUp Whiteboards? Here’s a Beginner’s Guide to ClickUp Whiteboards With Use Case Examples

💡 Pro tip: To hit the top 1% of shared articles on social media, you’re aiming for around 2,409 shares. So, to stand out in a crowded digital space, aim for visually engaging and interactive content—PDFs are great for print, but digital readers want more! For top shareability, consider formats beyond PDFs that allow videos, animations, and interactive features to boost those shares.
- Embedded elements: Ambroise enriches his Whiteboards with embedded visuals and website links. Adding images, diagrams, and other visual elements helps him showcase ideas to clients and team members in a compelling, organized way
Also Read: 10 Diagram Examples for Any Type of Project
ClickUp Mind Maps: Mapping out projects
As a student, Ambroise used ClickUp Mind Maps to break down complex topics, visually mapping out assignments, ideas, and connections.

In his professional life, he’s now applying this feature to develop project workflows, track deadlines, and create action-based flowcharts.
- Start with the central concept: For his current projects, Ambroise places the core idea in the center, building out nodes that branch into tasks, research links, and subtasks. Each project has its own mind map, allowing him to see the bigger picture and all of the moving parts
- Real-time collaboration: Mind Maps come alive during team brainstorms. Ambroise and his colleagues add ideas, categorize steps, and prioritize tasks—ensuring everyone is aligned on goals and next steps
- Customization and reorganization: ClickUp Mind Maps allow Ambroise to color-code branches and rearrange tasks as plans evolve. The re-layout option instantly tidies up the map, keeping everything organized and visually appealing even when the project expands
💡 Pro Tip: Start with your end goal when choosing a workflow diagram. Are you visualizing a new process, analyzing inefficiencies, or setting expectations for your team? Tools like ClickUp Goals help you set clear objectives, track tasks, and celebrate milestones.
Also Read: 10 Best Mind Mapping Software
ClickUp Docs: From class notes to professional proposals
In college, ClickUp Docs was where Ambroise organized his class notes, wrote reports, and documented group project updates.
Now, it’s his go-to tool for creating client proposals, project wikis, and team guidelines.
- Organized and shareable: Ambroise can structure his Docs with tables of contents, headings, and bookmarks, making them easy to navigate. Whether he’s sharing a design proposal or writing a guide for new team members, his Docs are always professional and accessible

- Rich formatting and embedded elements: ClickUp Docs lets Ambroise embed diagrams from Whiteboards, images, and visual notes, enhancing the document’s engagement factor. It’s not just words—it’s where he can showcase his ideas visually
ClickUp is the Ultimate PDF Upgrade for You
Ambroise isn’t the only one seeing huge benefits from ClickUp’s features. Corporate clients like Bazza Gilbert (Product Manager at AccuWeather) share similar praise.
You can achieve similar results with ClickUp’s features like Whiteboards, Mind Maps, and Documents. Want to upgrade your collaborative experience?
Sign on ClickUp for free!


Everything you need to stay organized and get work done.


