


Still downloading templates?
There’s an easier way. Try a free AI Agent in ClickUp that actually does the work for you—set up in minutes, save hours every week.
Sorry, there were no results found for “”
Sorry, there were no results found for “”
Sorry, there were no results found for “”


You break the rhythm whenever you stop typing to bold a text or drag a bullet point into place. Markdown shortcuts can fix that; they’re built to keep you moving.
This guide gives you a quick-reference cheat sheet to help you write faster, format smarter, and never touch your mouse again (unless you really want to).
We’ll also introduce you to a document tool that makes formatting text in Markdown editors second nature. (No guesses here, it’s ClickUp, the world’s first Converged AI Workspace!)
Before we dive in, let’s look at a few basics first.
Markdown is a lightweight markup language designed for formatting text using simple syntax. You can write Markdown in any text editor that interprets and renders the formatting.
Markdown shortcuts are the simple, plain-text syntax that you can quickly use to apply formatting elements while you type. Instead of pausing to format a heading or bold a word using your mouse, type characters like # for headings, * for bullet points, or Ctrl+B to bold text.
It’s fast, convenient, and keeps you in your writing flow. You can use these formatting shortcuts while capturing notes, outlining a project, or documenting code. They help you focus on the content, not the formatting.
👀 Did you know: While basic Markdown covers most formatting needs, extended syntaxes like MultiMarkdown support tables, simple footnotes, headers, citations, and more. This allows users to create complex documents while writing in a simple, readable syntax.
Let’s get into that cheat sheet now! This is your go-to reference for styling text, organizing information, and adding structure in any Markdown syntax-supported document editor or note-taking app, such as Notion and Obsidian—and of course, ClickUp!
Headings break down long blocks of text and organize your writing into scannable sections. The hashtag symbol [#] defines the hierarchy of your content.
👉 How it works: Markdown converts these headings into HTML tags like <h1> to <h6>, depending on the number of hashtags. Always press space after the # sign and then your text.
Let’s try this raw Markdown shortcut in ClickUp Docs:
Here’s a quick video on ClickUp Docs for you👇🏼
Another commonly used Markdown shortcut involves adding text styling for emphasis. To use these, add asterisks or underscores to style text for clarity or structure.
Here’s a list of emphasis you can use:
👉 How it works: Wrap your text with the appropriate symbols. Two for bold, one for italic, and ~~ for crossing out text. Markdown editors apply the formatting instantly.
Here’s a demo of Markdown syntax in Obsidian:
📖 Also read: How to Customize and Format Google Docs
Create quick bullet points or numbered steps to keep information clear and organized.
👉 How it works: Start each list item with the symbol ‘-‘ (for an unordered list) or number + period (for an ordered list), followed by a space. Markdown will auto-format and even auto-increment numbers for ordered and unordered lists.
Check out this example in ClickUp Docs:
🧠 Fun fact: One in three employees can focus for only ten minutes or less before getting distracted.
Insert external URLs or display visuals without interrupting your writing flow.
👉 How it works:
This is what it looks like in Obsidian:
You can create inline code snippets, commands, or whole code blocks with Markdown shortcuts.
👉 How it works
Notion, ClickUp Docs, and Google Docs do not support language-specific syntax highlighting via Markdown input. When you paste Markdown with triple backticks and a language name, Notion and ClickUp render the content as code blocks but ignore the language tag—no syntax coloring is applied.
Notion allows you to manually choose the programming language from a dropdown menu inside the code block UI, while ClickUp Docs displays plain monospaced text with no highlighting options.
Google Docs doesn’t support Markdown syntax and offers no built-in way to format or highlight code without third-party add-ons. In contrast, Obsidian does support language tags in Markdown and applies syntax highlighting correctly.
Let’s see how this works with an example from Notion:
📖 Also Read: Free Knowledge Base Templates in Word & ClickUp
Use Markdown shortcuts for structure, emphasis, and task tracking.
Here’s what it looks like:
Block quotes:
Dividers:
Checkboxes (task lists):
👉 How it works:
Explore this Markdown syntax in ClickUp Docs:
Using Markdown shortcuts can feel like a tiny productivity hack, but the impact adds up fast, especially if you work with text all day. They’re quick, keyboard-friendly, and keep your hands off the formatting toolbar.
Here are five reasons why you should develop a habit of using them:
📮ClickUp Insight: Low-performing teams are 4 times more likely to juggle 15+ tools, while high-performing teams maintain efficiency by limiting their toolkit to 9 or fewer platforms. But how about using one platform? As the everything app for work, ClickUp brings your tasks, projects, docs, wikis, chat, and calls under a single platform, complete with AI-powered workflows. Ready to work smarter? ClickUp works for every team, makes work visible, and allows you to focus on what matters while AI handles the rest.
ClickUp, a Converged AI Workspace, integrates formatting with real project execution, making it a better choice for everyone using Markdown shortcuts to make creating a workflow easier.
In a few examples mentioned above, we saw how ClickUp plays well with Markdown shortcuts you’re already familiar with. Let’s now take a deep dive into how you can use Markdown shortcuts in ClickUp like a pro:
ClickUp Docs supports Slash commands that help you format as you go. You can type /h1 to insert a heading, /table to start a table, or /divider to break up sections right from within the doc.
If you’ve used Markdown syntax before, like # for headings or ** for bold, you’ll feel right at home.
What makes it better is that you don’t need to memorize syntax. Just type /, and ClickUp suggests everything from banners and buttons to embed blocks and task checklists.
ClickUp’s Markdown-ready Docs live in the same workspace as your projects, lists, tasks, and whiteboards. That means you can:
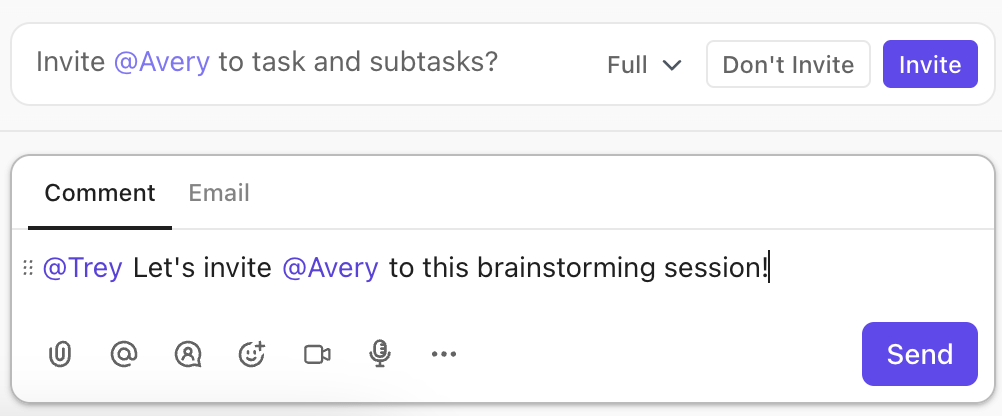
Let’s say you’re writing an onboarding document. You list the following steps: ‘Set up company email,’ ‘Join the #introductions channel,’ and ‘Schedule 1:1 with manager.’
In most tools, this would stay a passive checklist. In ClickUp, each task can become actionable, assigned, prioritized, and tracked.
Since Docs, tasks, and chats are all in the same workspace, the person reading your doc can ask contextual questions, leave comments, or jump to the linked task. Connected features make context-switching within the same tool easier than app-hopping between multiple software applications.
👀 Did you know? 61% of employees spend time updating, searching, and managing information across scattered systems. This is work sprawl in action, and it’s a drain on personal productivity and organizational efficiency.
Formatting is often the hidden tax of writing. You write the draft, then spend 15 minutes fixing lists, standardizing headers, or restructuring sections. ClickUp Brain, your trusty AI partner, makes it easier.
Inside ClickUp Docs, Brain can automate content creation by generating outlines, formatting responses with Markdown, and applying consistent styling using built-in templates. It can convert your chat summary into a formatted project brief. However, that’s not it.
ClickUp Brain will turn your notes into headers, bold the key takeaways, and even auto-generate a task list at the end. For example, if you want to summarize a client call, paste it in your notes, highlight it, and ask ClickUp Brain to ‘Format this like a project update’.
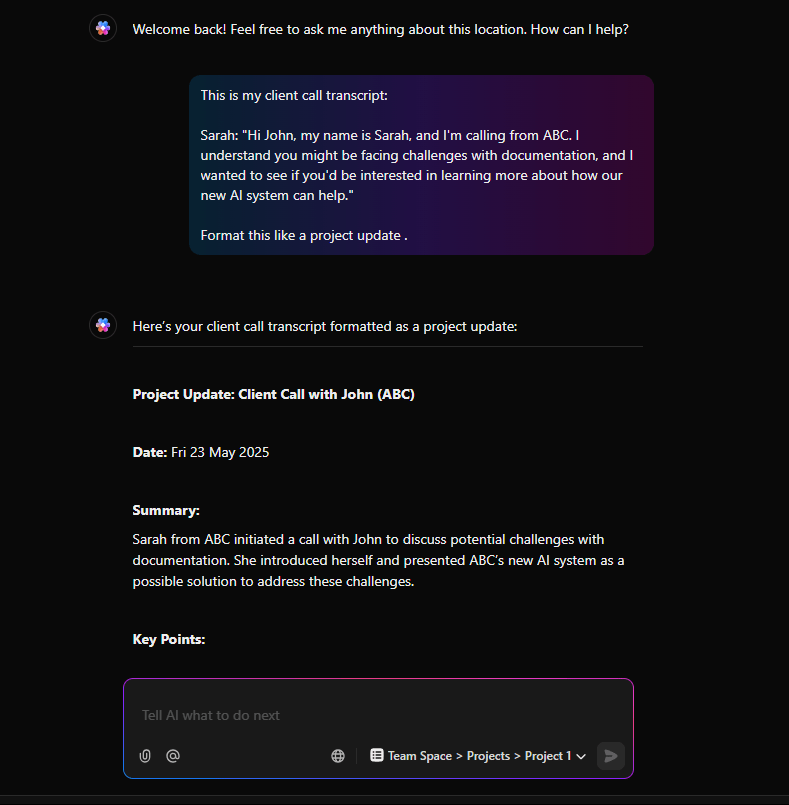
The AI content creation tool will deliver clean headings like ‘Goals,’ ‘Decisions Made,’ and ‘Next Steps,’ complete with Markdown formatting.
While marketers and writers save time and energy with this process, developers can also format changelogs, product managers can structure briefs, and support teams can build FAQ docs.
The best part? The shortcuts and AI workflows remain the same.
📌 ClickUp Brain gives you access to multiple LLMs. If you want to use ChatGPT, Claude, or Gemini to generate content, switch to the required large language model while using ClickUp Brain.
💡 Pro Tip: You can use AI for documentation in ClickUp. Ask ClickUp Brain to create a doc template using Markdown formatting and your company’s writing style. It learns from your workspace and auto-formats sections like an internal wiki or product spec.
Pallav K, a Manager at a mid-market company, has this to say about ClickUp:
Boards and wikis may be made for nearly any kind of workflow, which is what makes them so flexible. The text editor, which offers both inline markdown and rich text editor options, is a noteworthy feature. The time tracker is also quite useful. It is both easy to use and powerful. Working on shared documents in real-time is smooth and allows you to see your colleagues’ cursors, which is great for group writing.
If you’ve made it this far, you already value speed, structure, and clarity in your writing. ClickUp improves your process by helping you format faster and connecting your writing to work in real time.
From inline task creation to AI-powered formatting, it’s built for anyone who writes purposefully. Markdown syntax makes formatting easier, and ClickUp turns your docs into execution-ready plans.
Sign up for ClickUp for free and design custom workflows today!

© 2026 ClickUp

There’s an easier way. Try a free AI Agent in ClickUp that actually does the work for you—set up in minutes, save hours every week.