
Sorry, there were no results found for “”
Sorry, there were no results found for “”
Sorry, there were no results found for “”
From logos to banners, creative text design can make a lasting impression.
Among the many design tools, Canva is a go-to tool for many. As powerful as Canva is, figuring out how to curve text in Canva may leave you lost in a design labyrinth.
This guide will walk you through curving text in Canva with ease. Plus, we’ll introduce ClickUp, the everything app for work, to make visual design workflows smoother and smarter.
Here’s a detailed step-by-step guide on how to curve text in Canva:
Canva helps you create quick and compelling content but doesn’t improve your workflow. Choosing an alternative like ClickUp is a short and simple answer to better design management and overall efficiency.
Design, especially in text, is a highly creative process. A minor creative tweak could lead to a visual blast. With that in mind, let’s review what curving text does and why you need it.
🧠 Trivia: In 2012, luxury fashion brand Saint Laurent changed to a Neue Helvetica font for a new brand image. In doing so, they embraced a new era’s design trends and reflected their creative director’s minimalist, rock-and-roll aesthetic.
Curved text fits into brand images and creative content pretty easily. Let’s understand how to bring that out when you’re on the Canva platform.
💡 Pro Tip: Before diving in, pen down what you need from your visual content. Do you want to form waves, add circular text, or even add effects to each letter? A clear goal helps adapt curve text (and all design elements, for that matter) more effectively.
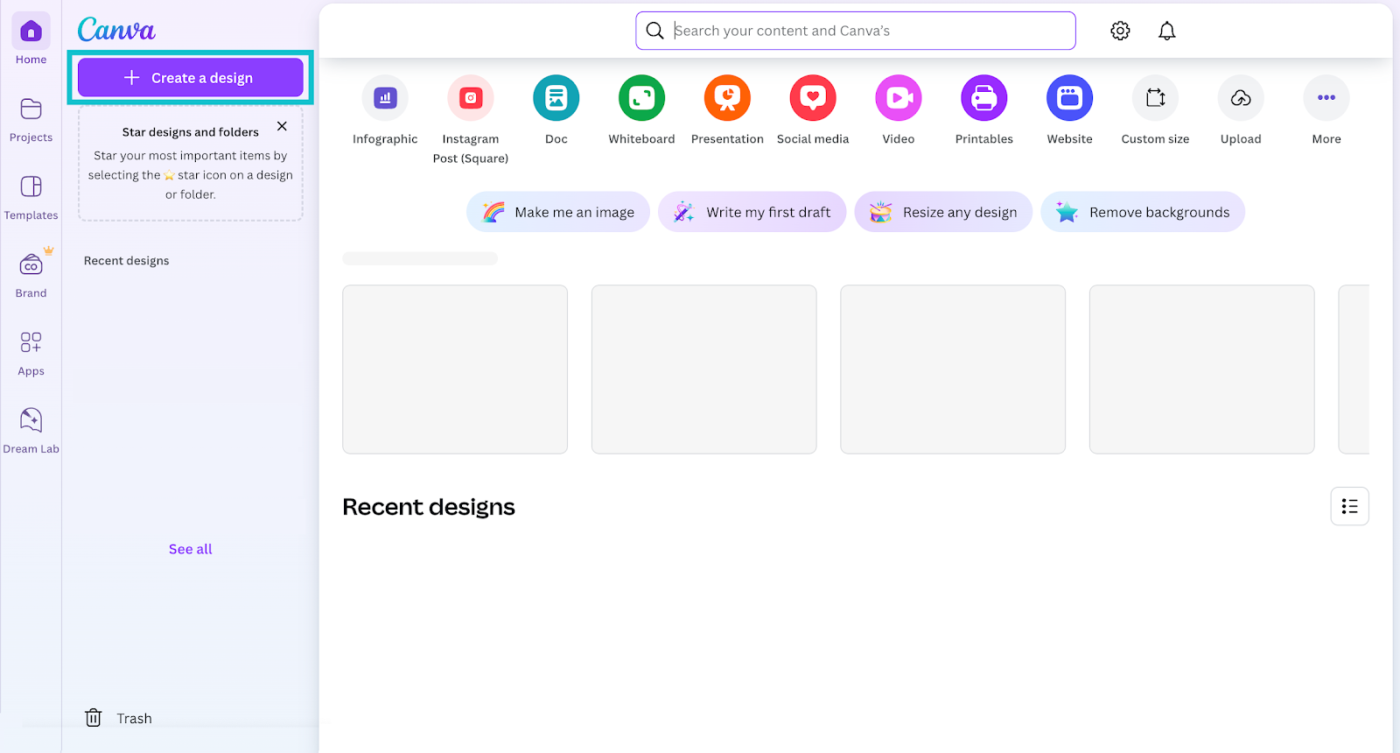
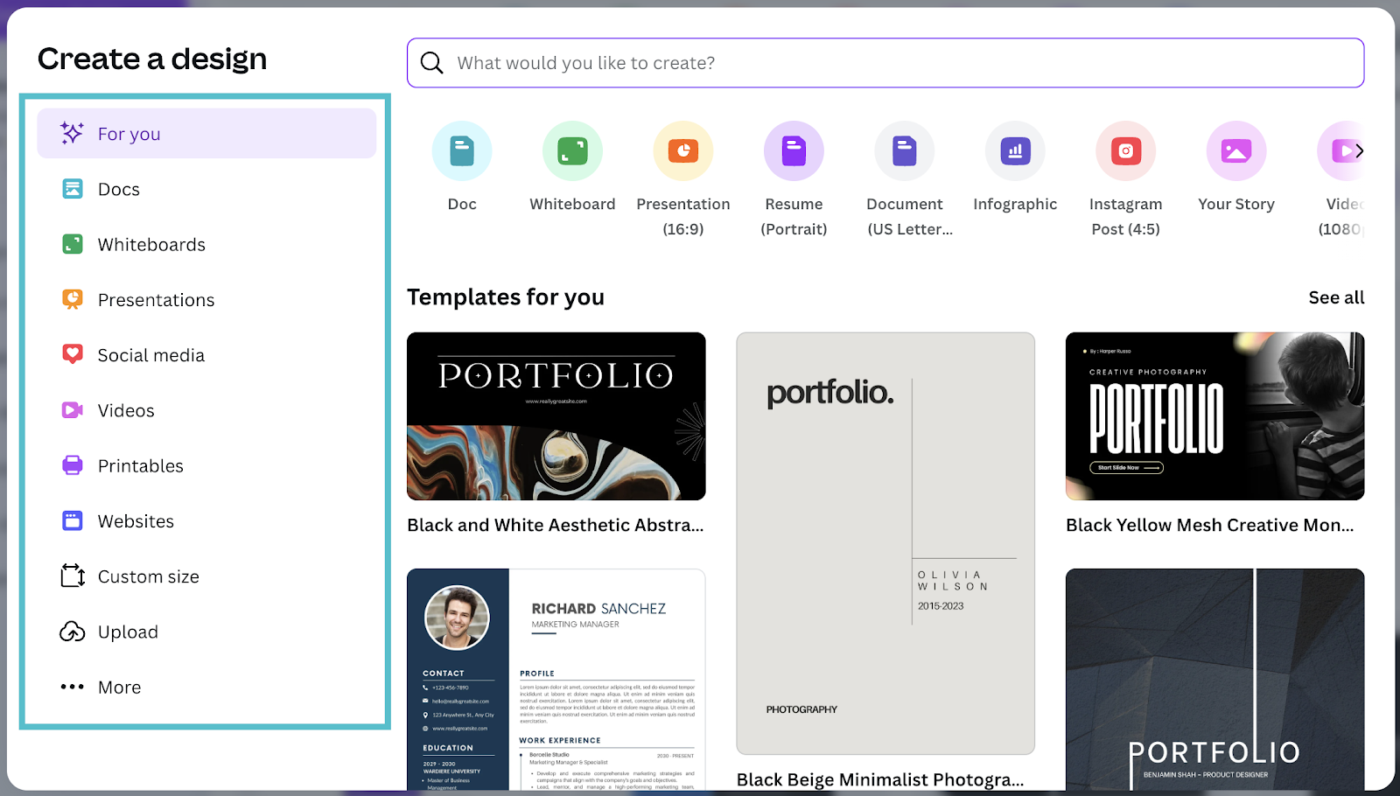
Start by setting up the space you’re designing in. Open up your browser and follow these steps:
Using the curved text feature isn’t usually the design team’s first priority.
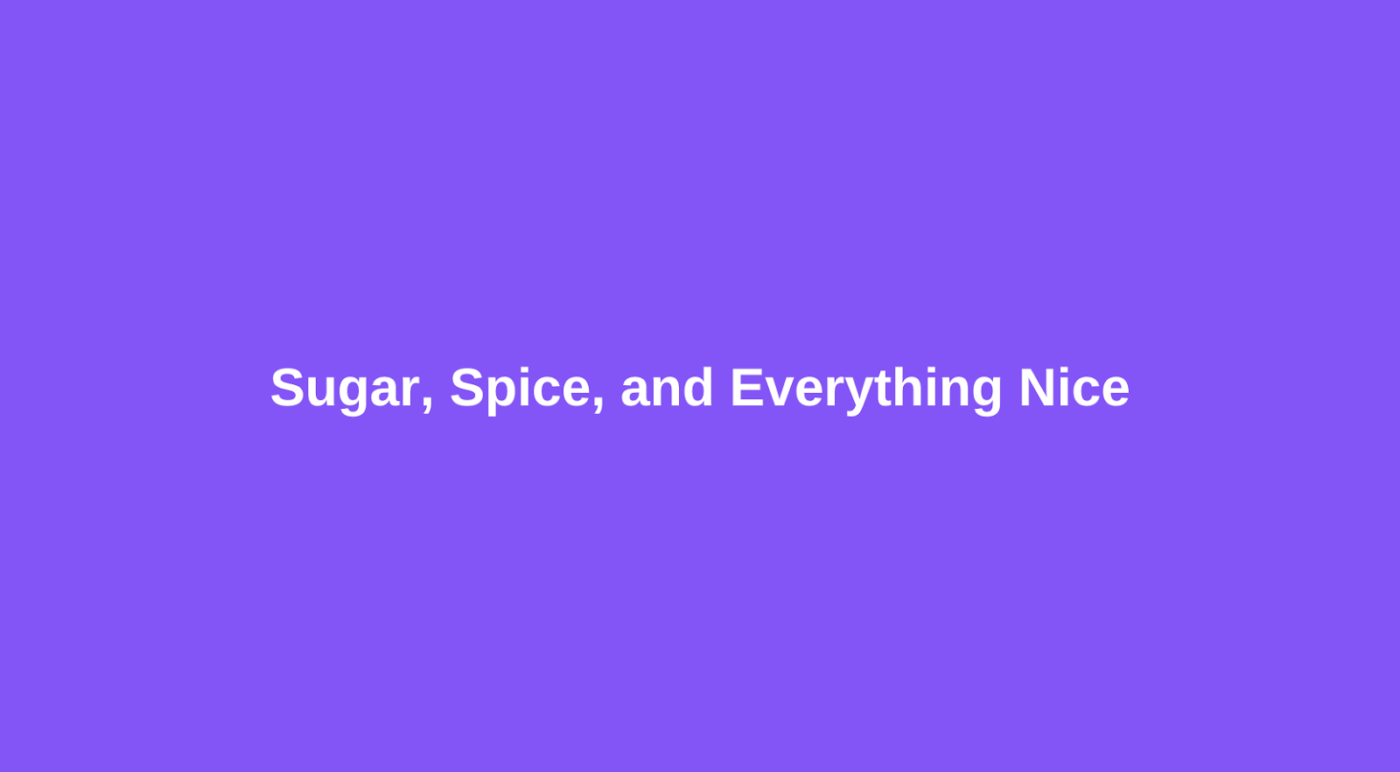
Let’s assume your background colors, letter spacing, and layout are set for this case. So, now add the required text:
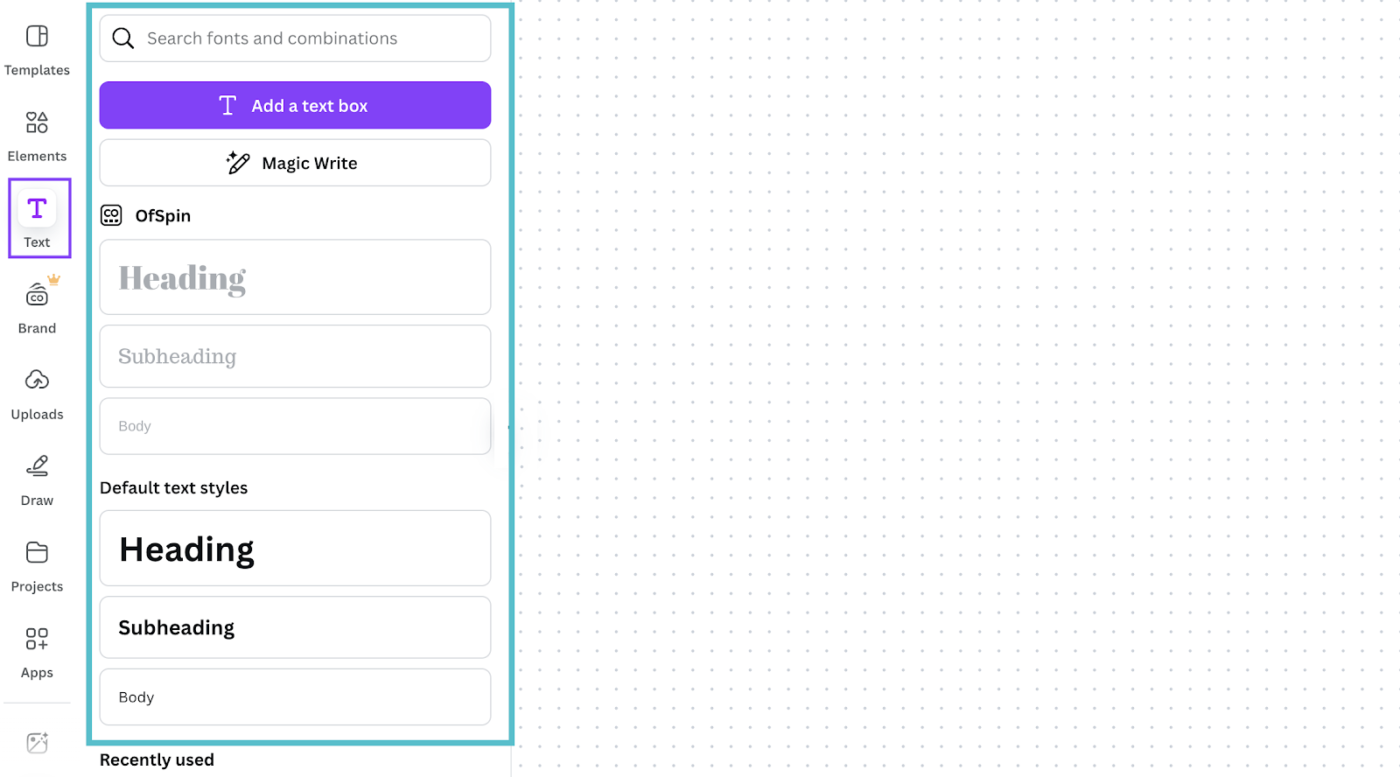
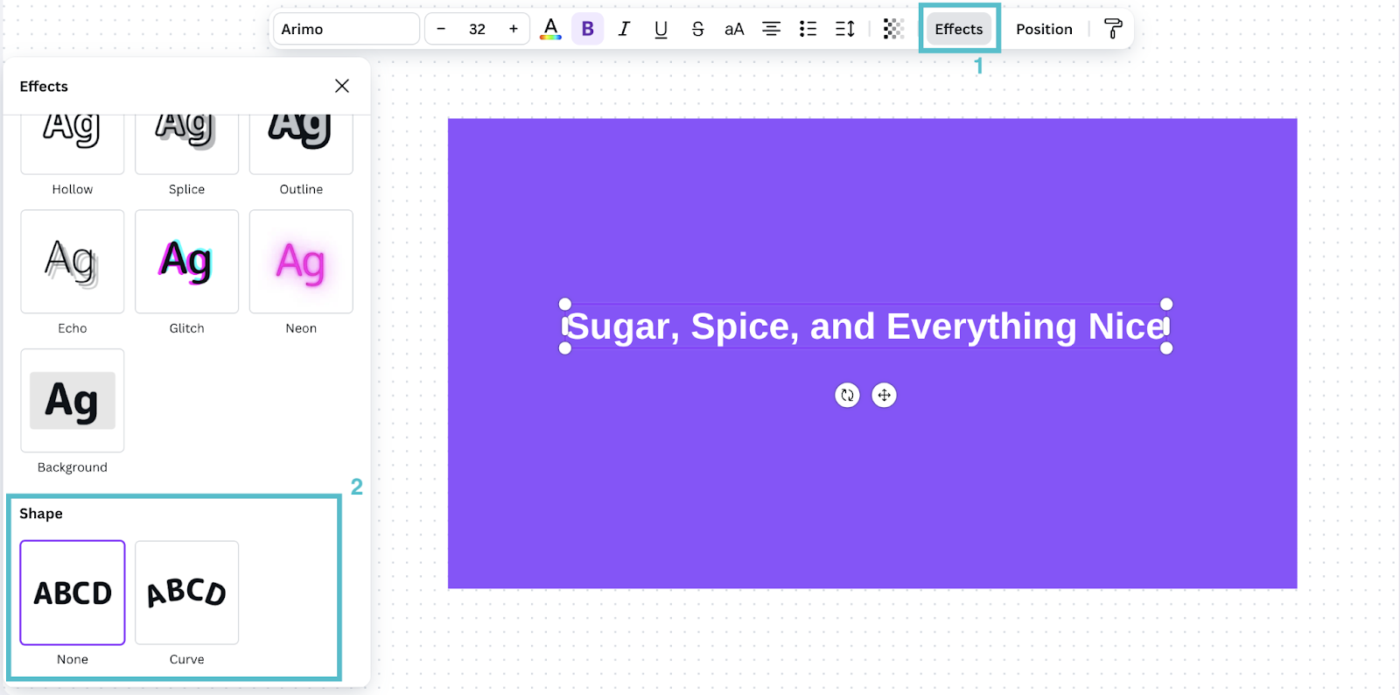
Now, it’s time to create curve text. Here’s how you add the effect:
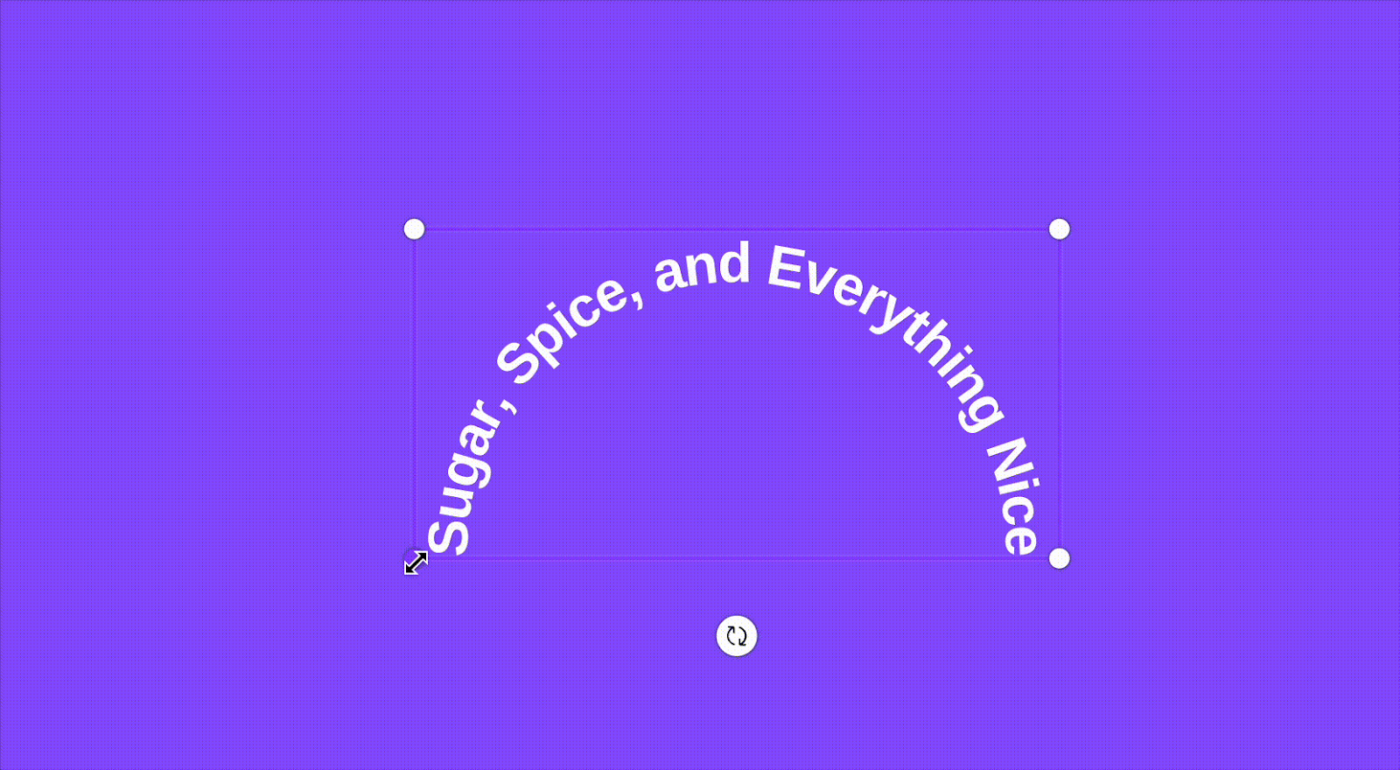
Once you’ve selected the feature, the text will instantly become curved. If the default effect doesn’t work well, adjusting the degree is also possible:
While making the adjustments, a circle shape will appear along the curved text to help align with nearby elements.
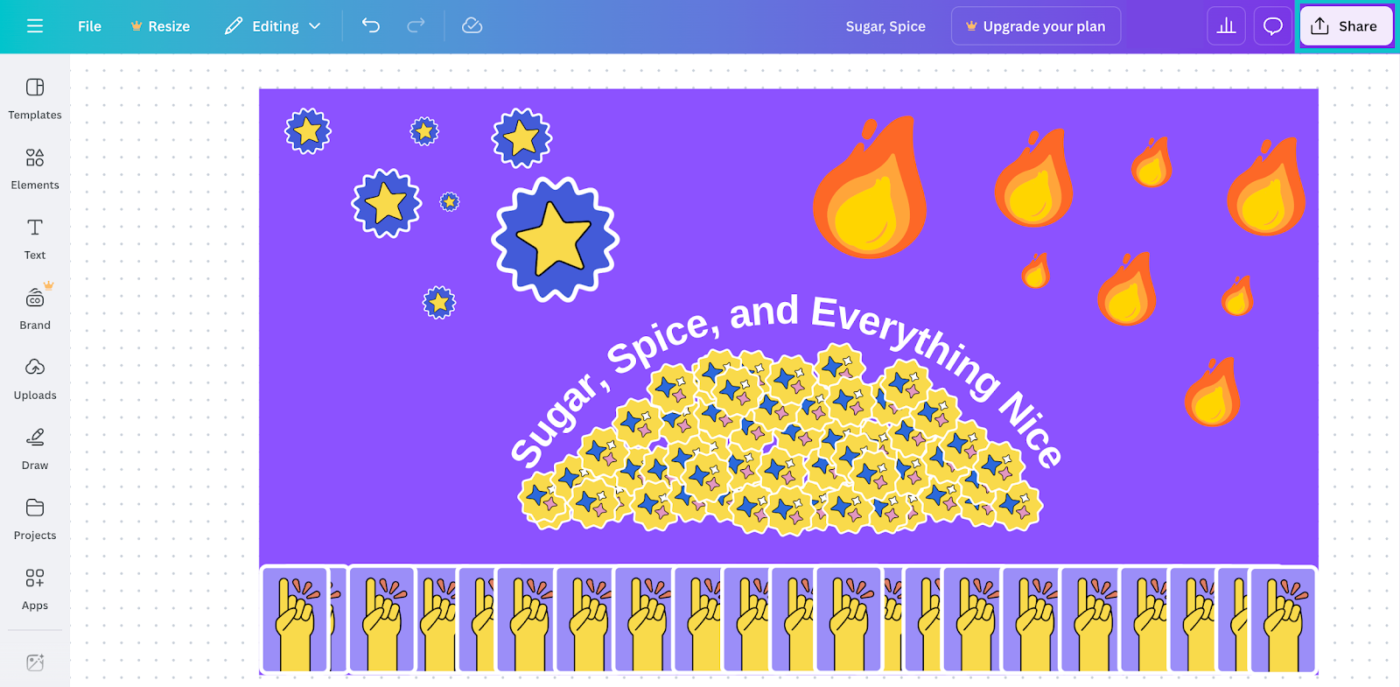
After curving your text, add a few final touches. This could be about changing its position or size:

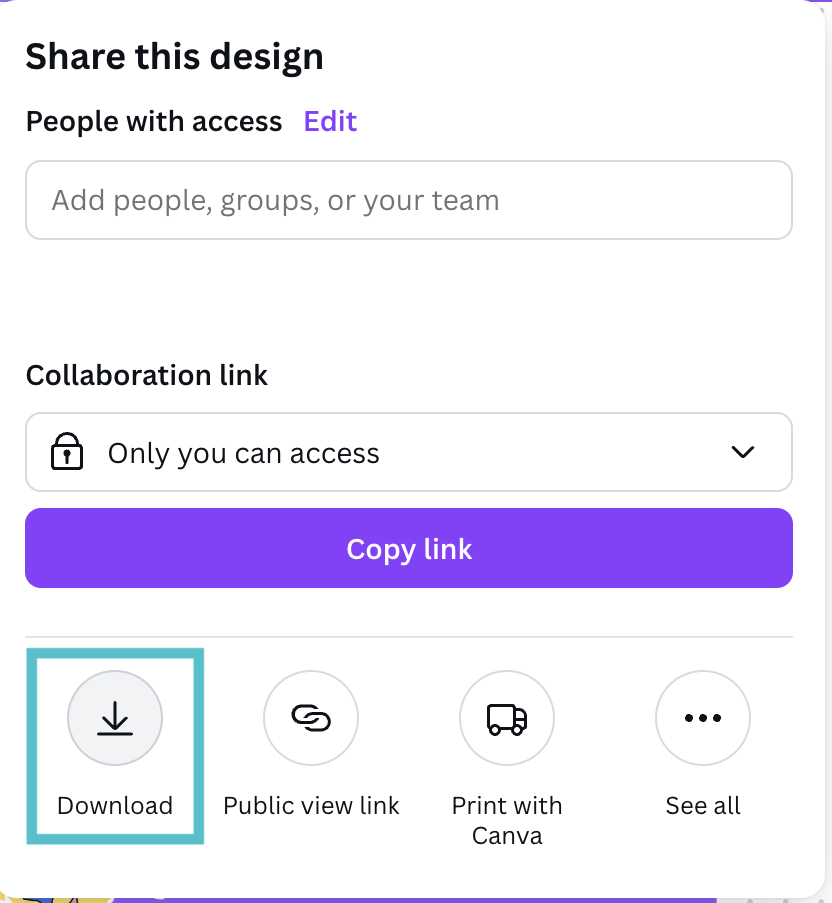
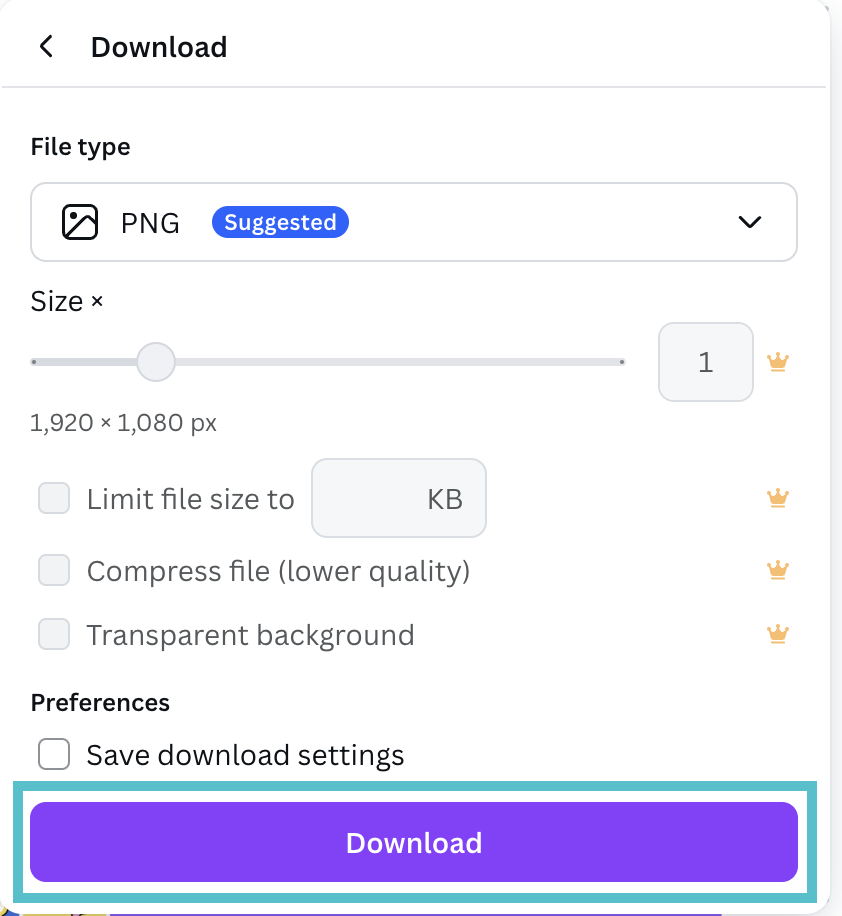
Finally, you’re design is ready. The last step is to review, download and share:
➡️ Read more: Best AI Tools for Designers
Canva’s a go-to for content and graphic design, but like all good things, it’s has some limitations.
Before you hit that “Create” button for your business, team, or personal project, here’s what you might want to know about its limitations:
🔍 Did You Know? The Dove typeface, one of the most prestigious fonts ever, met a watery grave in the River Thames! Its creator, determined to keep it out of his business partner’s hands, tossed it all into the river in 1917. Talk about a bold design choice!
➡️ Read More: How to Create an Idea Board for Brainstorming
Success for your business takes more than perfecting your own font and text design.
Sure, Canva helps with quick, compelling content, but it doesn’t facilitate advanced workflows.
For teams that work with advanced design workflows, ClickUp offers a unified workspace that pulls all the files, projects, and assets together in one place. Each of its 30+ tools offers supercharged creative elements and even AI-powered customizations.
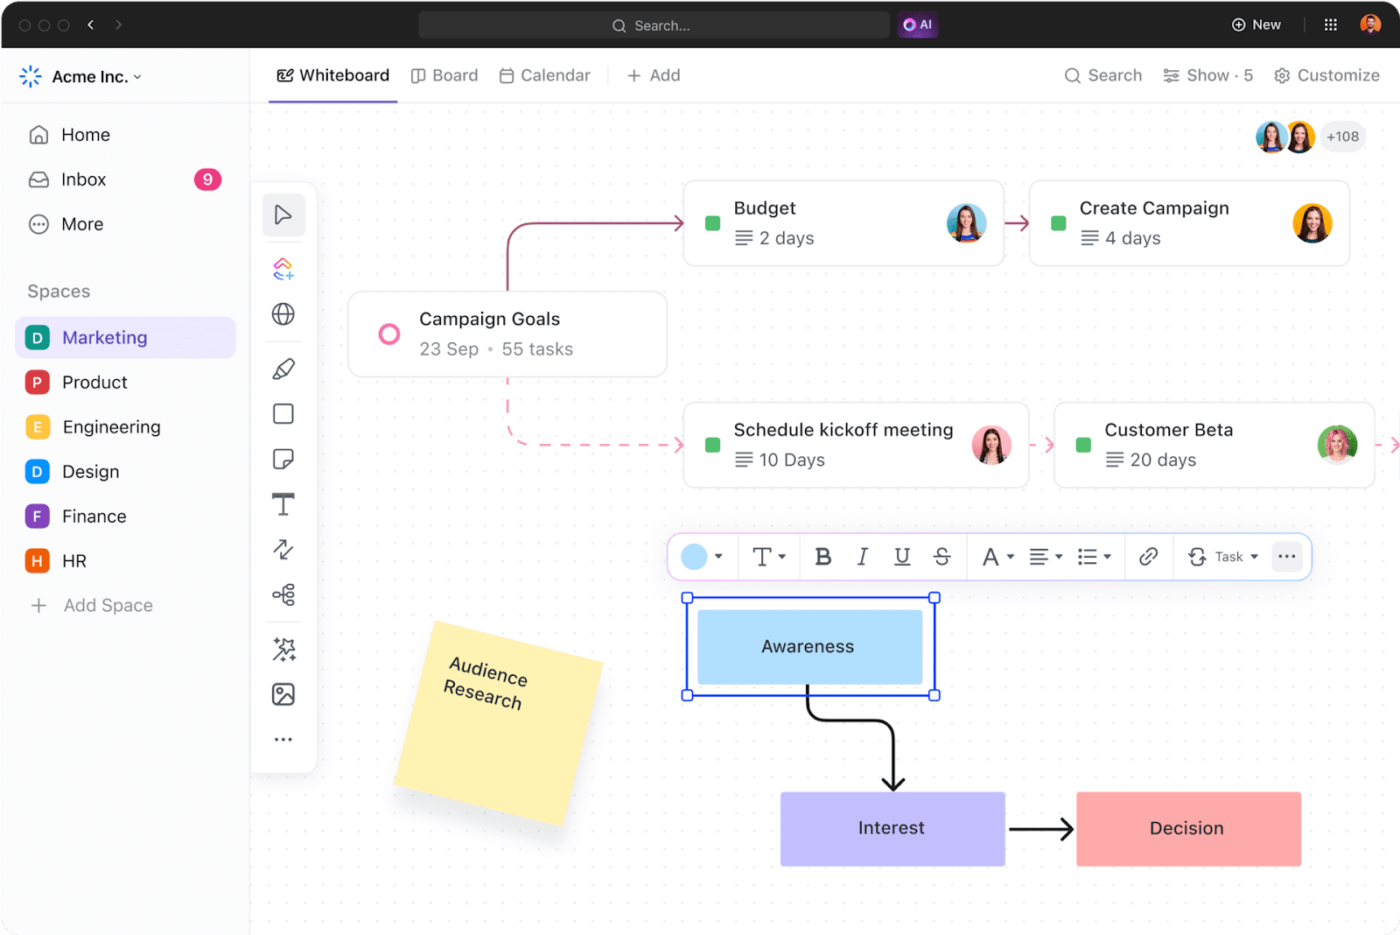
A large collaborative space for creativity makes all the difference when it comes to effective design. ClickUp Whiteboards provides this open canvas and elevates your team’s brainstorming sessions.
For instance, ClickUp Whiteboards allow users to convert anything (even images) into tasks with clear assignees and deadlines. If you need someone’s input on a project, the tool lets you tag them and share constructive feedback without skipping a beat.
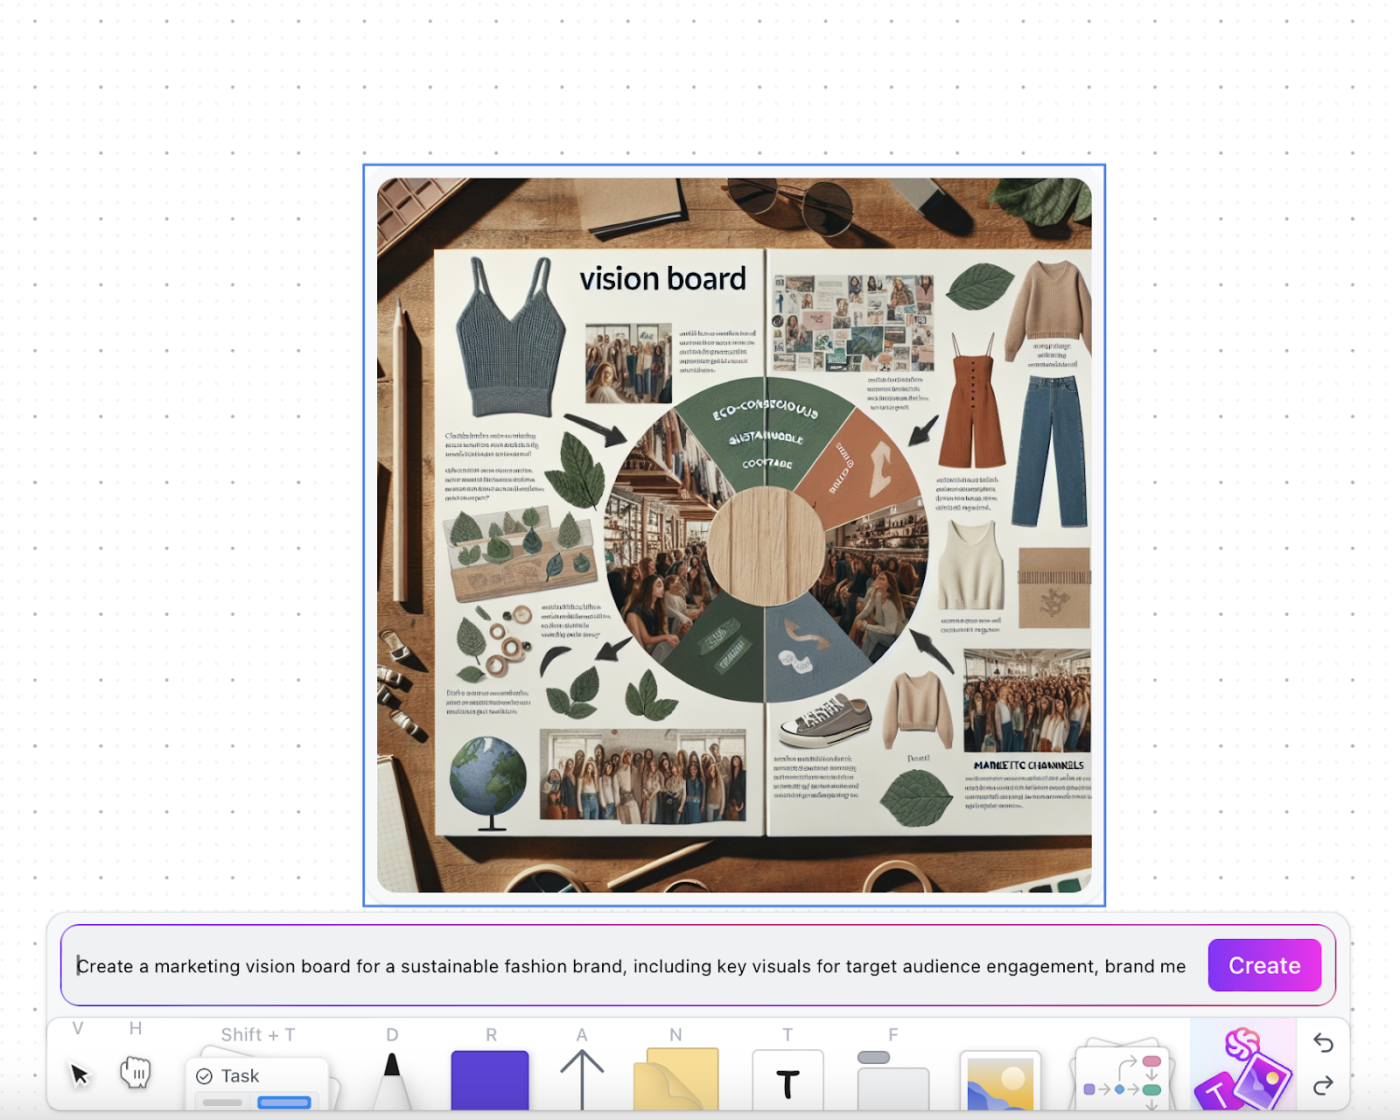
The star feature? An AI-powered image generator that can help you turn rough ideas into images! ClickUp Brain, ClickUp’s built-in AI assistant, can help you turn simple prompts into detailed design mockups for a seamless collaborative experience!
➡️ Read More: AI Art Prompt Ideas to Spark Your Creativity
And yes, multiple departments can edit content easily via ClickUp Whiteboards and in real time. Plus, its robust access control ensures secure collaboration in the same space. Want to level up how you handle design projects? ClickUp’s AI can help there, too.
ClickUp Brain is all about streamlining and empowering your design workflows. Use it to fast-track processes like :
✅ Ideation & research: Instantly generate creative briefs, user personas, and project journeys to establish a strong foundation for your design
✅ Task automation & planning: Automatically sets up tasks, deadlines, and dependencies, ensuring a structured workflow
✅ Content & strategy development: Create presentation outlines, marketing campaign strategies, and taglines to align with project goals

ClickUp also has something for teams who’d like a more all-in-one solution.
ClickUp Design Project Management Software is what businesses need to fast-track their creation through productivity and efficiency. It offers powerful form tools and real-time project management to organize design requests and priorities in one place, including:
The best part? All this is easily managed from one platform instead of dozens of different tools. ClickUp offers 1000+ integrations, including development tools, email integrations, and design systems.
Here’s what Nancy Hamlet, owner of Kokua Creative Space, has to say about ClickUp:
ClickUp is perfect for any agency looking to manage projects with multiple team members. We use it to manage creative design projects, content, social media, website projects and a host of other projects. Every client has its own board and we can look at projects by client or across the enterprise.
➡️ Read More: Best Canva Alternatives & Competitors
Curving text is a handy tool. It makes your content more approachable and fun by adding a fun and engaging appeal. While it’s up to the creative teams to use it, our six steps help you do it easily on Canva.
But is Canva the only design solution you need? It isn’t the ideal option if you need something creative that also improves productivity. That’s where ClickUp is a great alternative.
Its visualization, task management, analytics, and AI make it equally creative without losing focus on getting the job done.
Ready to blend visual magic and productivity in your workspace? Sign up with ClickUp today!

Arya Dinesh
Max 11min read

Praburam Srinivasan
Max 44min read
Arya Dinesh
Max 16min read

© 2026 ClickUp


