


Still downloading templates?
There’s an easier way. Try a free AI Agent in ClickUp that actually does the work for you—set up in minutes, save hours every week.
Sorry, there were no results found for “”
Sorry, there were no results found for “”
Sorry, there were no results found for “”
Do you often need to email a group of people at once?
In a professional setting, mass emailing is common, especially when you’re coordinating with multiple clients, teams, or stakeholders. It’s a quick way to keep everyone in the loop and on the same page regarding important updates or tasks.
If you’re using Outlook, creating a distribution list can save you loads of time. This handy feature lets you pull together select email addresses into one group. So, instead of typing out each name individually, you just type in the group name, hit ‘Send,’ and you’re done!
Sounds simple, right?
In this blog post, we’ll walk you through how to create a distribution list in Outlook—whether you use Outlook Web, Mac, or Windows.
As a bonus, we’ll introduce you to a powerful email management software that can take your mass emailing game to the next level.
Let’s start. ✉️
Start with the basics and see how you can create a distribution list on Outlook Web (Outlook.com):
1. Launch Microsoft Outlook Office on your browser to view your Inbox.
2. Click the ‘People’ icon in the upper left corner of the feed. This will take you to your Outlook contacts or ‘Address Book.’
3. Next, click ‘All contact lists’ under the ‘Contact’ panel. On doing so, you’ll find an option to ‘Create a contact list.’
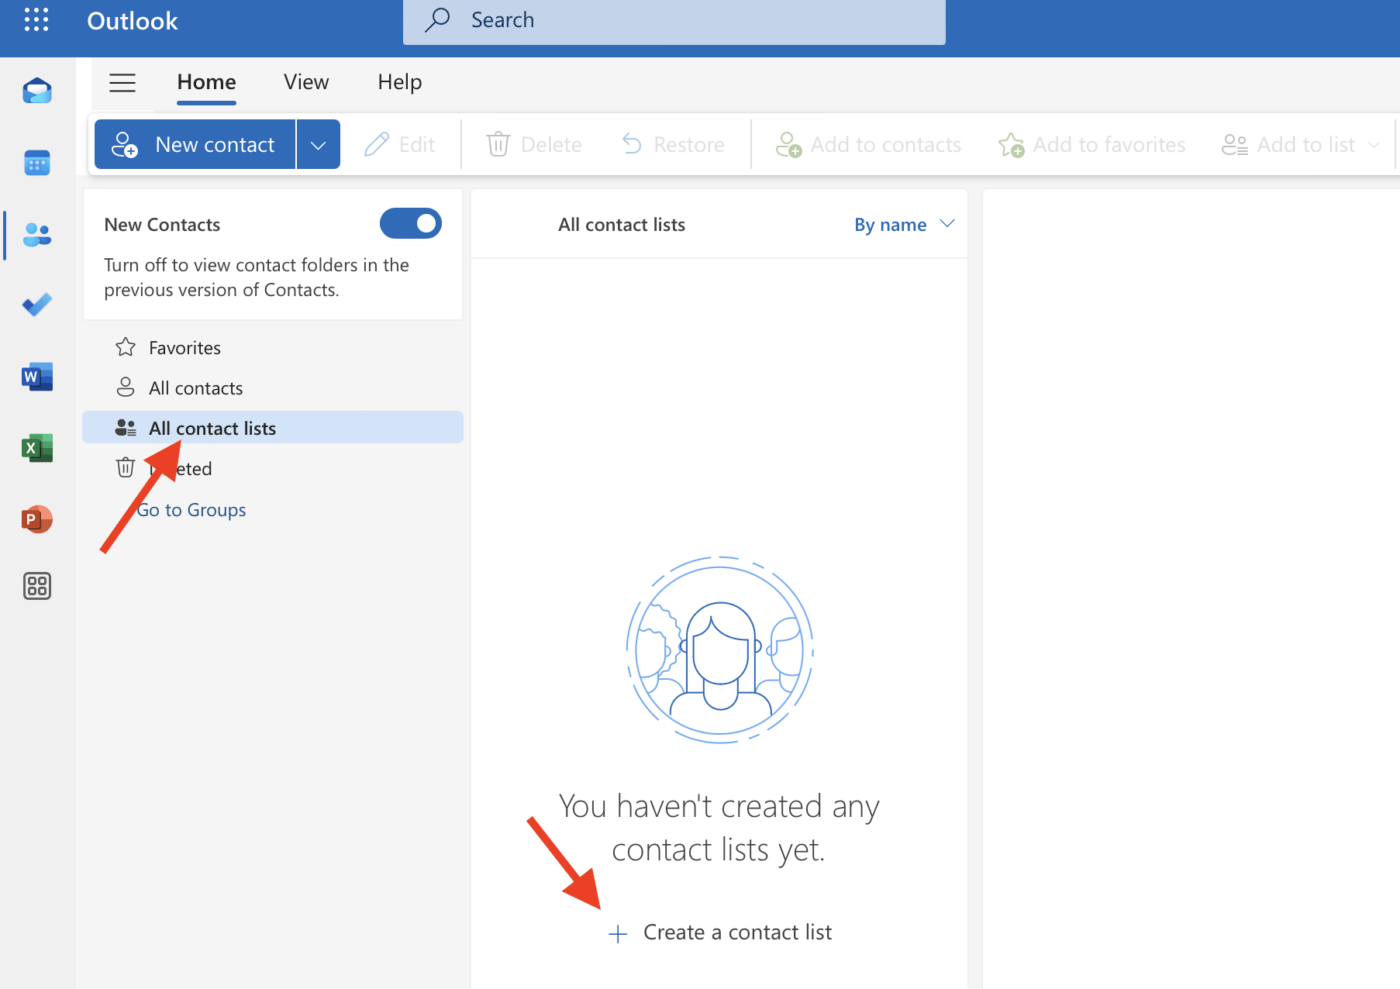
4. Clicking it will open a window that prompts you to enter details for the contact list.
5. Type in the contact list name, add the email addresses of those you want to include in the distribution list, and provide a clear description to remind you what the list is for.
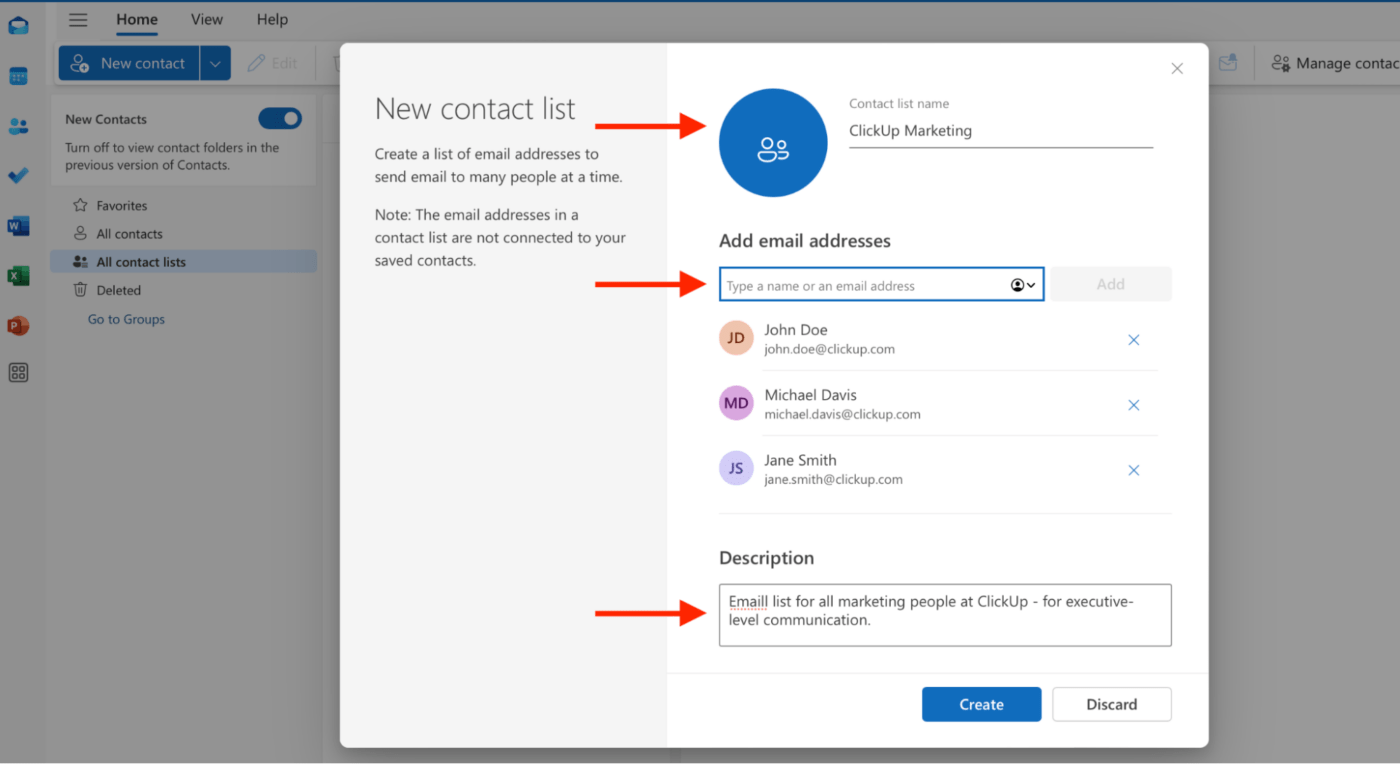
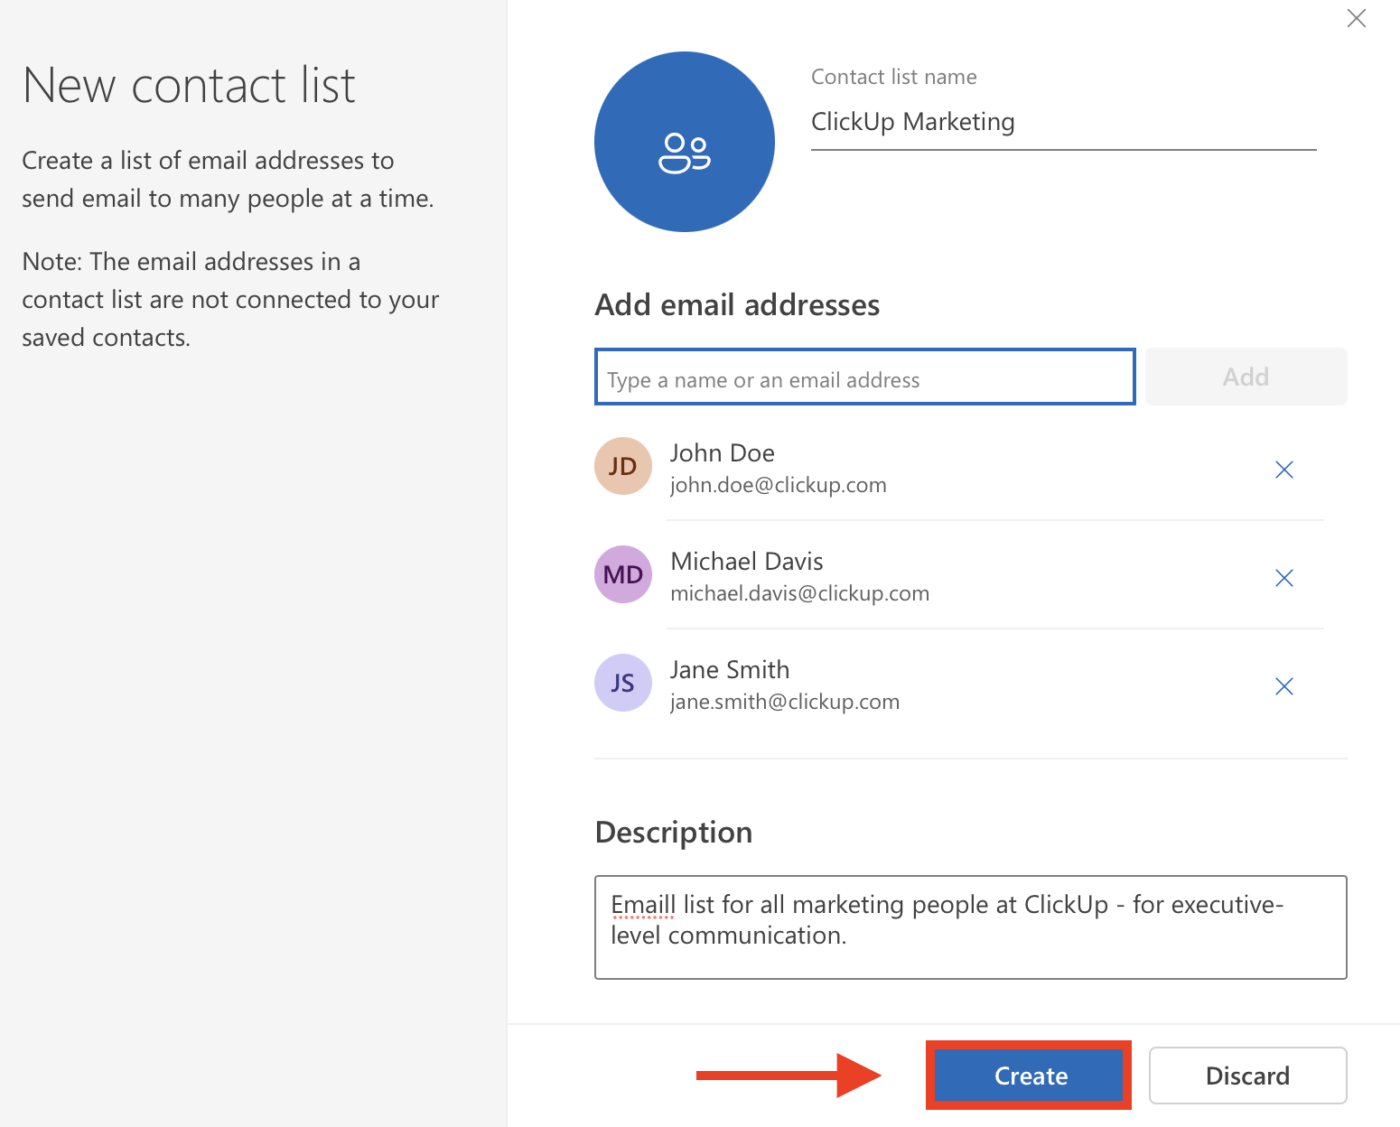
6. Press the ‘Create’ button to finalize your email distribution list.
Your feed will resemble the screenshot below.
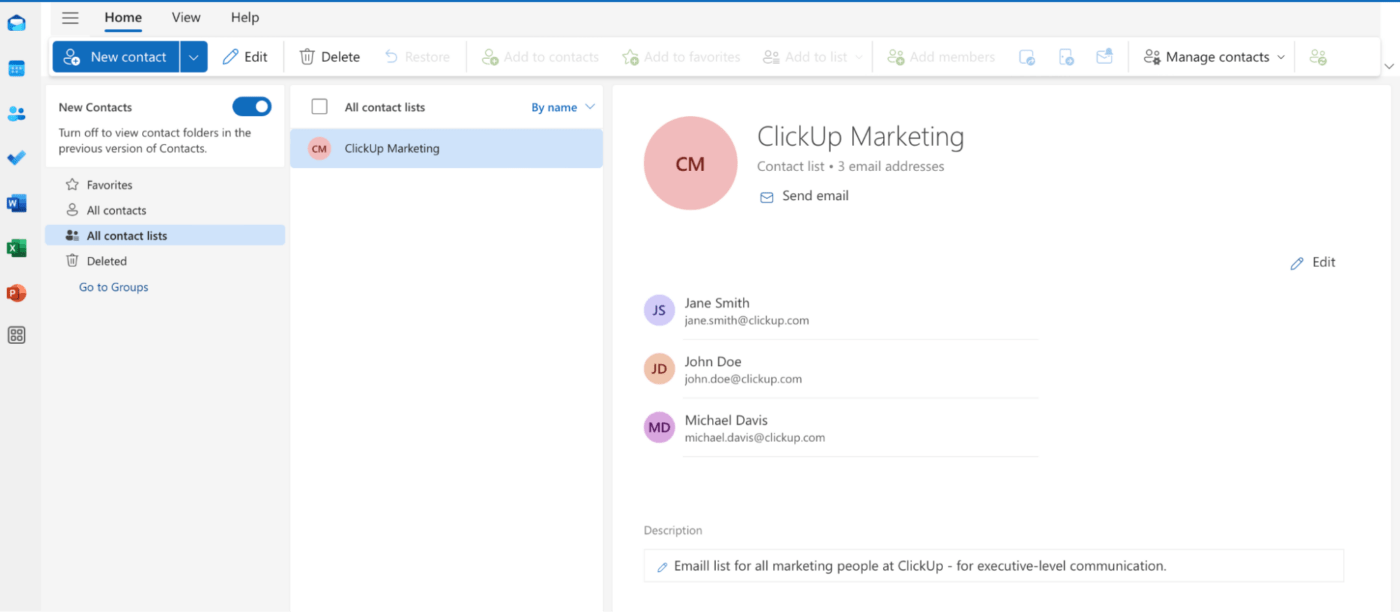
You can now send emails to the selected contacts by typing the contact list name in the recipient bar, which, in this example, is ‘ClickUp Marketing.’
Note: Ensure the email addresses are already saved in your address book. The web version doesn’t allow adding new contacts during list creation.
While the steps in Outlook for Mac and Windows are similar to those in Outlook Web, the interface is slightly different. Follow these steps to create a distribution list on both.
1. Open Outlook’s desktop app.
2. Navigate to the ‘People’ or ‘Contacts’ section by clicking the ‘People’ icon from the navigation bar.
3. From the toolbar, select ‘New Contact List’ (on Mac) or ‘New Contact Group’ (on Windows).
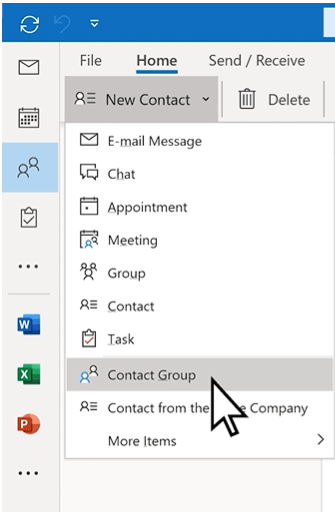
4. Name your contact group. Click on ‘Add Members’ and then ‘From Outlook Contacts’ to add people to your group.
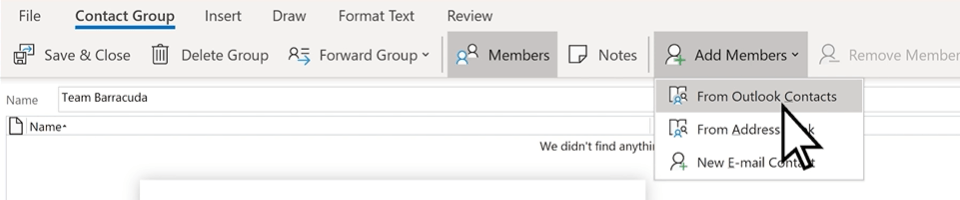
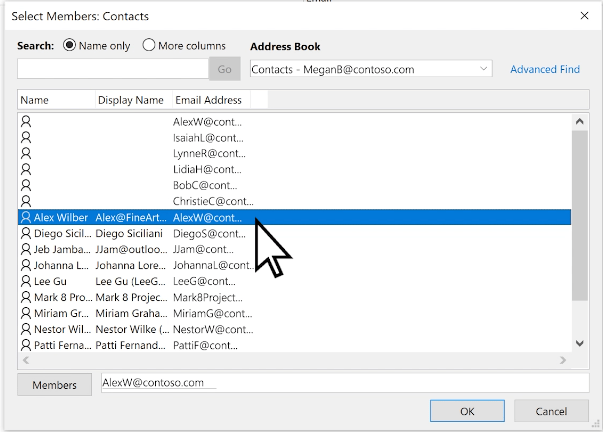
5. Add email addresses by either selecting from your contacts or manually typing them. Unlike the web version, Mac and Windows apps allow you to add new email addresses during creation.
6. To remove a contact from your distribution list in Outlook, select their name and click ‘Remove Member.’
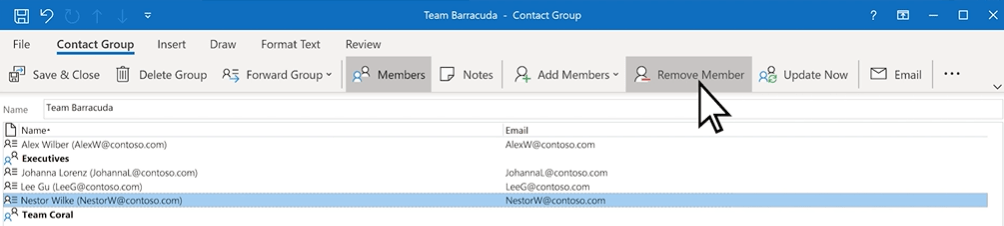
7. Press the ‘Save & Close’ button to create your new group or email distribution list.
Read More: 10 Best Email Productivity Tools in 2024
Outlook introduced mailing lists in Office 2007. Regardless of how convenient it has made sending mass emails, it does come with a few drawbacks:
The system doesn’t provide a confirmation step to double-check the recipient list before sending. This can lead to mistakes, potentially causing confusion or privacy breaches if the sender sends sensitive information to a list that isn’t updated.
Outlook distribution groups or lists often have a cap on the number of email addresses you can add, especially if you’re using an older version or a non-enterprise account. This can be a challenge if you need to send emails to a larger group.
Exceeding this limit may prevent your email from being sent or require splitting your list into multiple groups.
This means that if there is a modification in the number of members or their email addresses, you must update the distribution list manually, which can be time-consuming and prone to human error.
You cannot personalize the email content for each recipient, such as addressing them by name, without using additional AI email marketing tools or add-ins. This lack of personalization can reduce engagement, as recipients might feel the message is generic or less relevant.
Unlike other outreach tools, distribution lists in Outlook don’t offer segmentation capabilities. This means you can’t easily divide your email addresses into subgroups or target specific audience segments with tailored content.
As a result, multiple recipients receive the message, which may not be relevant to everyone on the list.
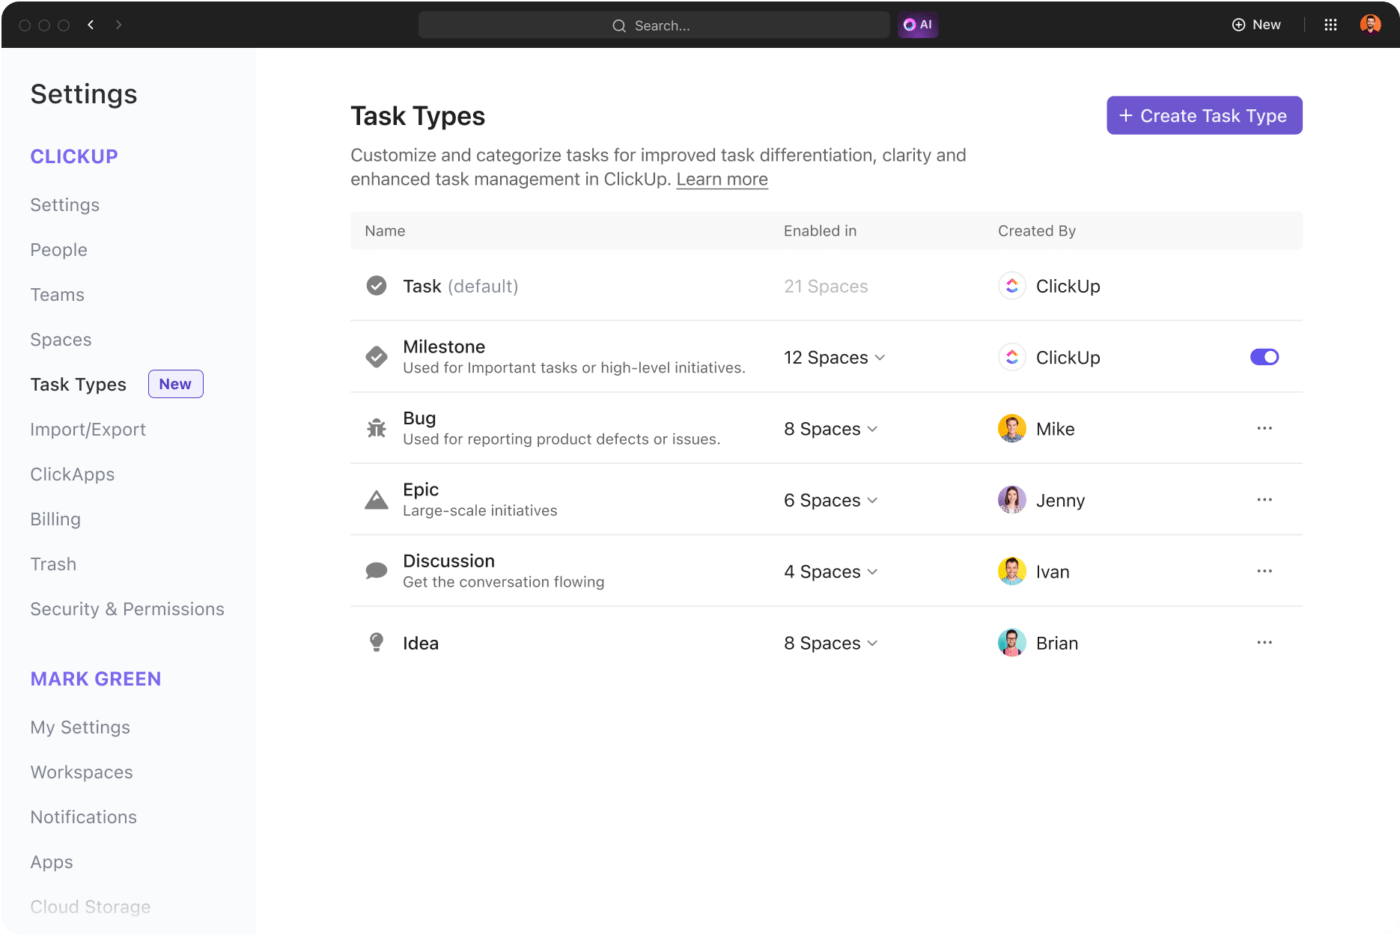
You may think ClickUp is perfect for managing projects, tasks, and teams at scale. But you’ll be pleasantly surprised at how this all-in-one project management software also integrates with Outlook to manage emails and distribution lists in one place.
It’s a brilliant CRM for email marketing. In this section, we’ll explore why and how.
The ClickUp Email Project Management feature allows you to send and receive emails directly within the platform without switching between tabs or different tools. Whether a quick reply or a detailed update, you can attach documents, forms, clips, and more.
You can automate emails and tasks with rule-based triggers for Custom Fields, form submissions, and task updates. Your inbox becomes the project command center that allows you to create and comment on tasks from email notifications, add start and end dates to set deadlines, link emails to tasks to add context, and set up automations for newsletters, drip campaigns, and email forwarding.

For Outlook users, ClickUp’s Outlook Integration adds an extra layer of functionality to project management.
Incoming emails, for example, aren’t just read on the platform—they’re actionable. With just a few clicks, you can convert emails from Outlook into ClickUp Tasks, link them to existing work items, and assign follow-ups to your team with clear deadlines and instructions.

That way, all necessary context and conversations are preserved in a shared inbox software, which is especially useful when dealing with complex projects or client correspondence.
End result? You get to stay on track with everything (and everyone) without missing a beat.
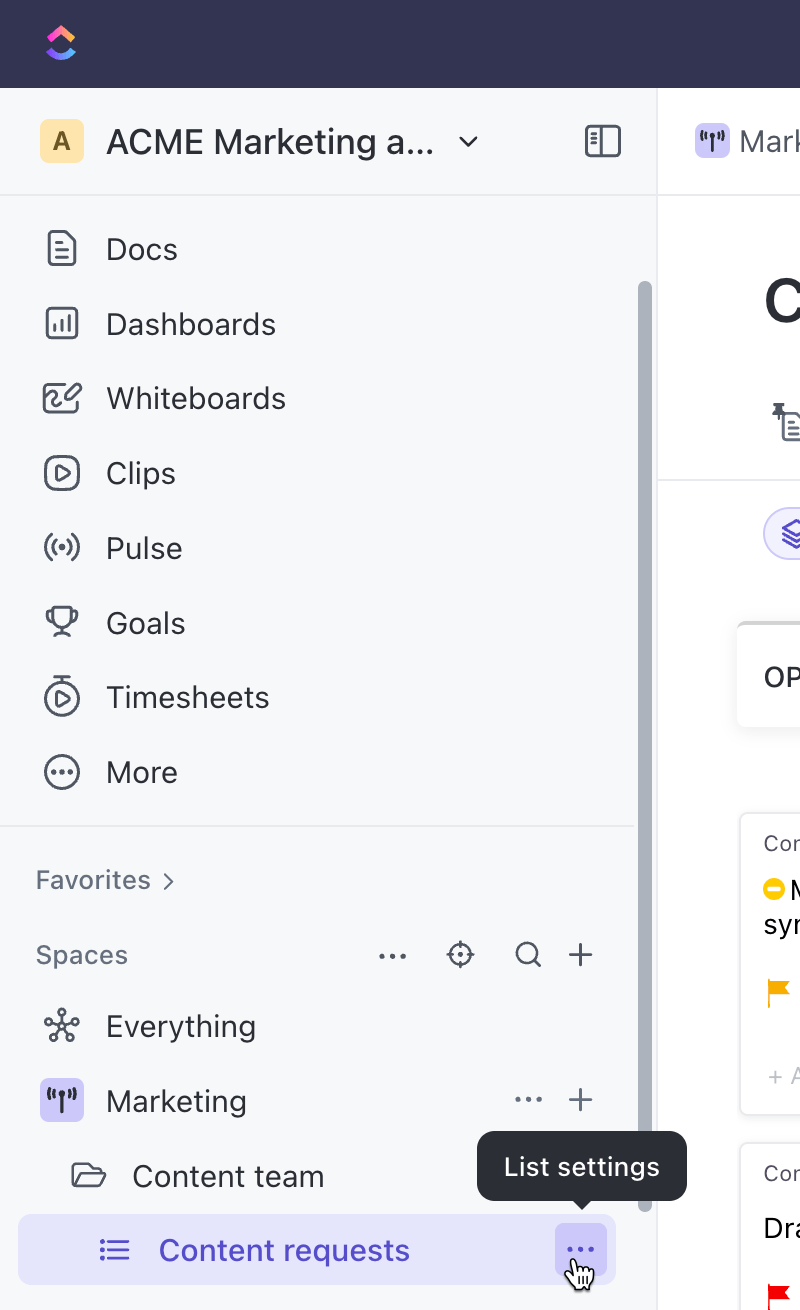
But how do you set up a distribution group or list in ClickUp?
By leveraging its list-based system, you can easily build a distribution list that serves as the foundation for your email project management workflows. Simply follow these steps:


Note: ClickUp doesn’t impose the same restrictive caps on recipients that you might face with Outlook. You can create larger groups without worrying about hitting a limit.
In addition to being a dynamic Microsoft Outlook alternative, it’s a versatile solution that allows you to manage and monitor each step of email distribution in real time, ensuring clarity and transparency across the team.
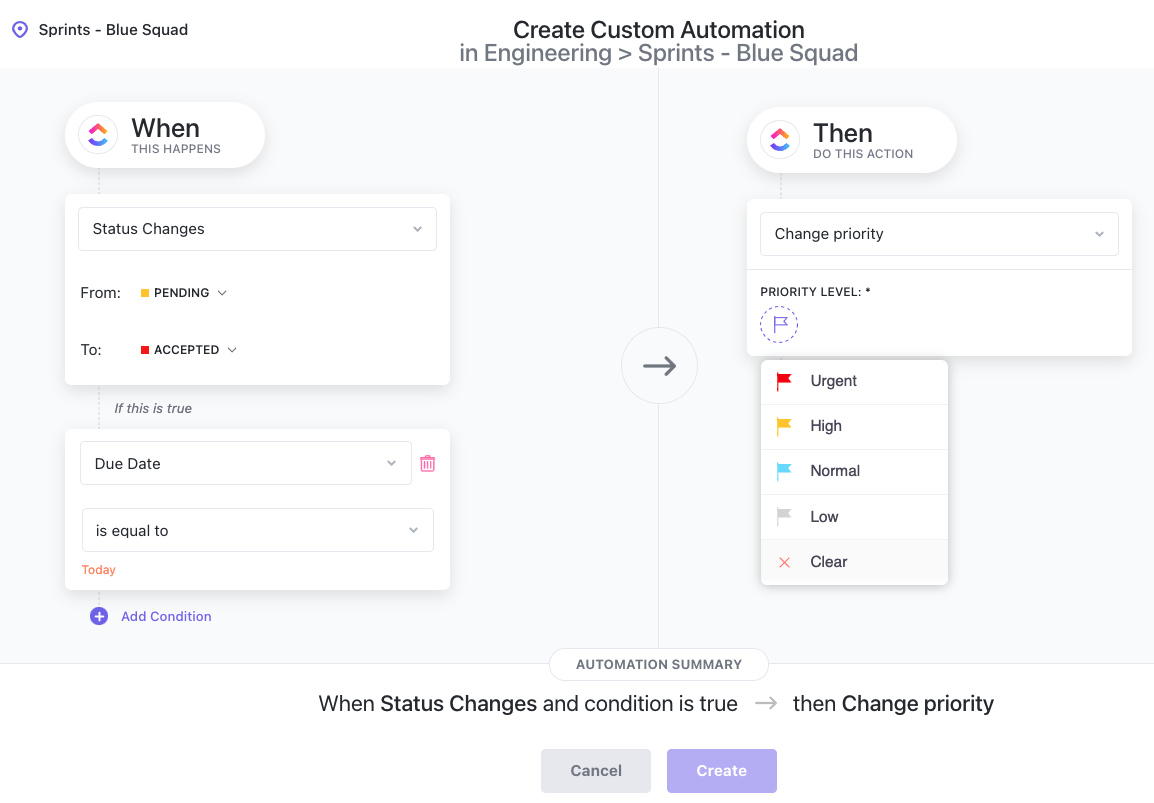
The ClickUp Automations feature enables you to automatically send emails based on triggers like Task creation, Task completion, or Custom Fields from the platform—for example, when a “Project Status” field is updated to “Completed” or when a “Due Date” is reached.
If you need to send a series of follow-ups or updates, ClickUp helps with that, too.
Set up recurring email reminders for Tasks approaching their deadlines or automate follow-up emails when a team member hasn’t responded to or updated a task within a specified timeframe.
Email Automation with ClickUp Template is particularly helpful for tracking the performance of your automated emails and making necessary adjustments to improve engagement. It also helps you ensure that every task is completed on schedule.
Plus, when team members join or leave projects, ClickUp adjusts the List in real time, so you no longer have to worry about outdated contact groups or lists. The template also helps reduce manual and repetitive administrative tasks by automatically triggering emails when certain conditions are met.
With email automation, you can improve response times to customer queries, conduct schedule-based follow-ups without manual intervention, reach contacts at their preferred time across time zones, and keep customers engaged with product updates, newsletters, and personalized information.
💡Pro Tip: Use ClickUp Dashboards to monitor metrics such as open rates, click-through rates, and unsubscribes and get an overarching view of your marketing campaign’s success.
The Email Marketing Campaign Template by ClickUp enables you to use Custom Fields and Views to categorize your email recipients into different segments. This approach helps the right messages reach the right people.
With built-in analytics and dashboards, you can monitor metrics like open rates, Click-Through Rates (CTRs), and conversions.
The template offers a pre-designed framework for reaching out to existing and potential customers. It helps identify target groups and segment them into relevant categories based on their needs and preferences.
You can use ClickUp Docs to write personalized emails and add elements, like images and videos, to make them interactive. Once the campaign is launched, you can use custom fields to track key metrics, tweak content, and make the necessary adjustments.
The template helps structure emails to ensure your brand’s voice stays consistent across campaigns.
💡Pro Tip: Use drip campaign templates to increase conversion and retention by nurturing leads through every stage of the customer journey.
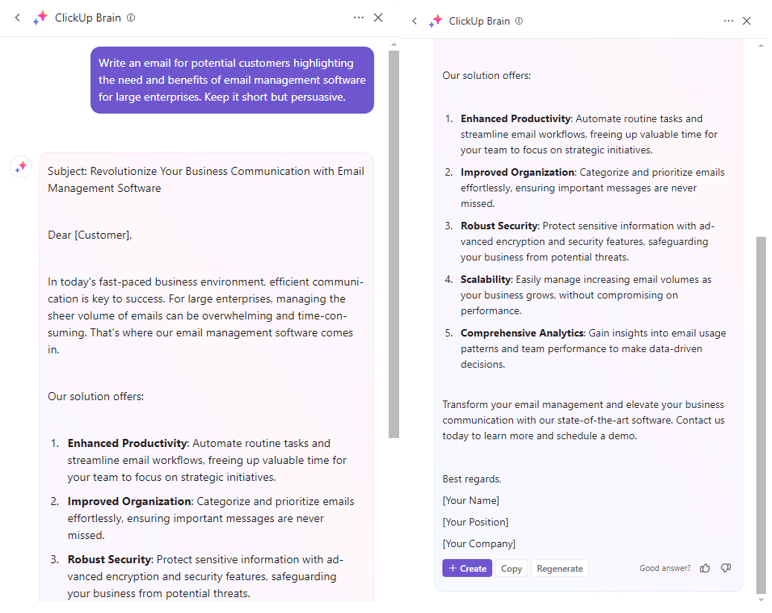
Additionally, ClickUp Brain, with its AI Knowledge Manager, can quickly retrieve specific details from tasks or documents without sifting through multiple sources.
This feature can automate progress updates, summarize project statuses, and even handle routine follow-ups based on task changes—enhancing email efficacy and distribution.

It also acts as your AI-powered writing assistant and helps draft emails targeted at generating and nurturing leads.
Emails are a critical part of our work life. Knowing when, what, and who to email, especially when your recipients are large groups, can quickly become daunting.
When done right, mass emailing can help you reach the maximum number of people in one go and manage communications in a hassle-free manner.
So go ahead and streamline group emails with distribution lists on your Outlook. But if you’re looking for something more advanced, use ClickUp.
You can set up a new List, add Tasks, and assign team or group members while benefiting from its powerful project management, automation, and integration features.
Sign up on ClickUp for free today.

© 2026 ClickUp

There’s an easier way. Try a free AI Agent in ClickUp that actually does the work for you—set up in minutes, save hours every week.