


Still downloading templates?
There’s an easier way. Try a free AI Agent in ClickUp that actually does the work for you—set up in minutes, save hours every week.
Sorry, there were no results found for “”
Sorry, there were no results found for “”
Sorry, there were no results found for “”

“Time is what we want most, but what we use worst.” ~ William Penn
Whether you’re managing work deadlines, meetings, or personal plans, a calendar lets you prioritize and stay on top of everything.
You can create a calendar in Google Sheets to manage your schedule effectively.
It’s easily accessible as part of Google Workspace—no extra downloads or logins are needed. You can customize it by color-coding tasks, adding columns, and including notes to suit your processes and workflows.
And the best part? It’s completely free.
In this guide, we will walk you through how to create a calendar in Google Sheets and even suggest a better alternative for more advanced needs.
You can insert a calendar in Google Sheets using either Data Validation to create an in-cell date picker or the built-in Template Gallery for ready-made calendar layouts. The Data Validation method restricts cells to date entries and shows a visual calendar on double-click. The Template Gallery provides pre-formatted annual and monthly calendars that can be customized with colors and notes. Both methods are simple and require no add-ons.
There are two main ways to insert a calendar in Google Sheets: data validation and the template gallery. Both methods are straightforward and accessible to anyone, regardless of their technical expertise.
Struggling to build a calendar in Google Sheets? Save time and stress with ClickUp’s free Calendar Planner template. Try it now!
Let’s break them down.
The Data Validation method in Google Sheets lets you create a dropdown calendar in a specific cell or range of cells. This allows users to select dates from a visual calendar pop-up, ensuring precise date entry and minimizing errors.
🔍Bonus: Discover practical tips and strategies for efficient calendar organization to ensure you make the most of your time.
Here’s how you can do it:
Open Google Sheets, and select ‘Blank spreadsheet.’ Give it a relevant name, like ‘Event Tracker (year) ’ or ‘Project Calendar (year).’

Next, select the cell where you want the Google Sheets calendar to appear, for example, A1.

From the main menu, go to Data > Data validation.

Next, select ‘Add rule.’

In the ‘Criteria’ dropdown, choose ‘Date is’ to allow only dates in that cell.

Under ‘Advanced options,’ check the box that says ‘Show help text for a selected cell’ to alert users if they enter incorrect data, like text instead of a date.
Finally, click ‘Done,’ and you’re all set.

You’ve successfully added a calendar to your Google Sheets document. Double-click on cell A1 to see the calendar appear.

💡Pro Tip: Another way to insert Google Sheets calendars is to simply type a date in the format yyyy-mm-dd in any cell. Double-click on that cell to make the calendar pop up immediately.
Google Sheets template gallery offers pre-designed templates that save you time by providing fully formatted online calendars. These are designed using a mix of built-in formulas and themes available in Google Sheets.
You can choose from various styles and layouts, making it simple to customize the Google calendar for personal planning, project tracking, or team schedules.
Here’s how to leverage this option:
Open Google Sheets and click ‘Template gallery’ at the top right.
Scroll through the options and select a calendar like the annual or monthly calendar template.
For example, select ‘Annual Calendar’ to open it in a new Google spreadsheet.

This Google calendar template includes both annual and monthly views, with space for notes and reminders. It allows you to:
For those managing complex projects, a dedicated project management calendar can help keep track of milestones, deadlines, and deliverables efficiently.
When finished, share these Google Sheets templates with your team and stakeholders to keep everyone on the same page regarding deadlines and tasks. The simplicity and user-friendliness of Google Sheets make it a go-to tool for basic project management.
While Google Sheets is a flexible and easy-to-use tool for creating calendars, it has its limitations.
Read More: How to Automate Google Calendar Events
ClickUp provides a built-in Calendar View that automatically pulls in task due dates without manual setup. Users can switch between day, week, and month views, filter tasks, and reschedule using drag-and-drop. Calendars sync in real time with updates across devices. This removes the need to manually maintain separate spreadsheet calendars.
Looking for a more effective and feature-rich calendar app for managing calendars?
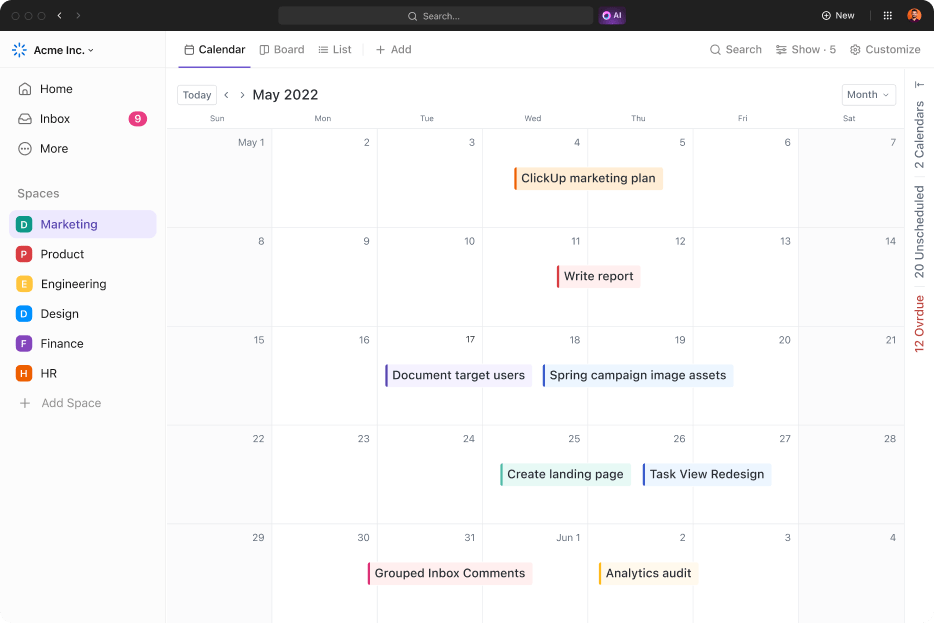
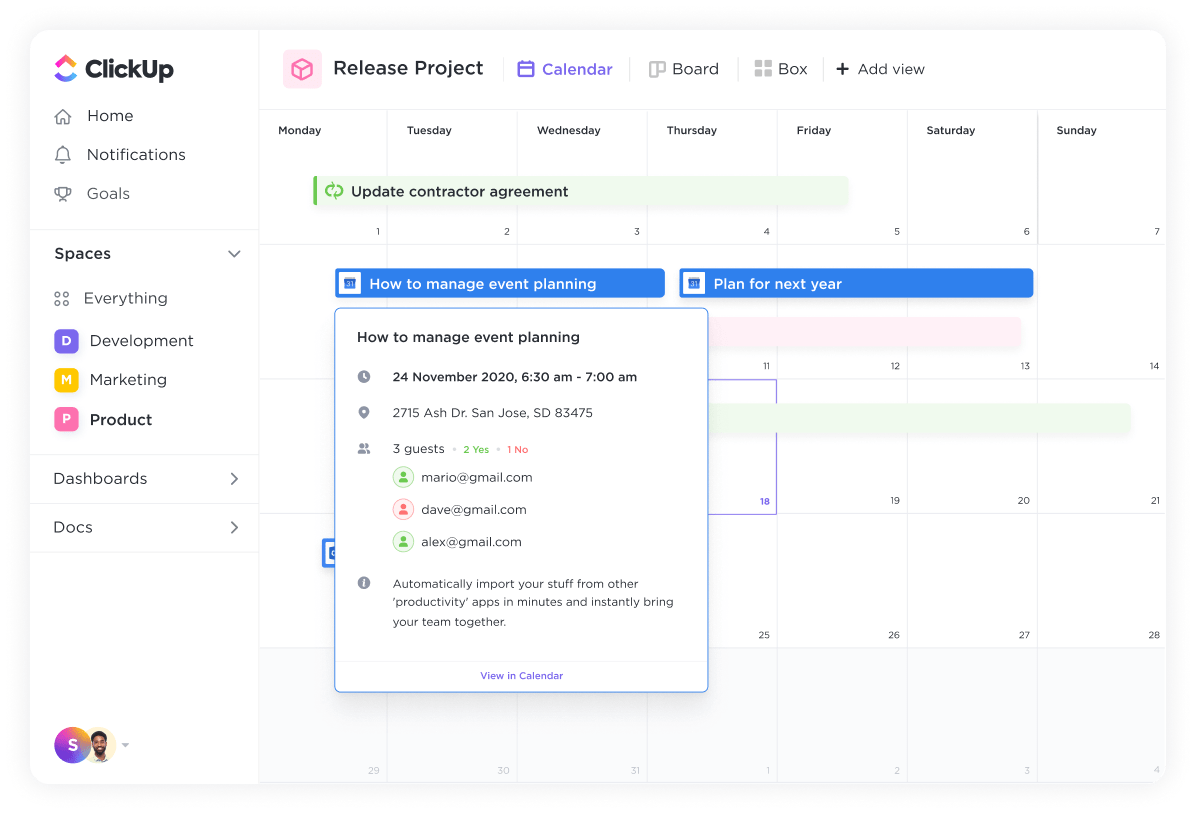
ClickUp is a comprehensive project management platform that simplifies task organization and enhances team collaboration. With its user-friendly interface and robust features, you can effortlessly create and manage highly customizable calendars from different devices—be they laptops, computers, or mobile phones.
With ClickUp’s Calendar View, you can visualize tasks and deadlines in a single interface.
You won’t have to create a calendar from scratch—it’s already integrated into your ClickUp Workspace. Here’s how to add the Calendar view:
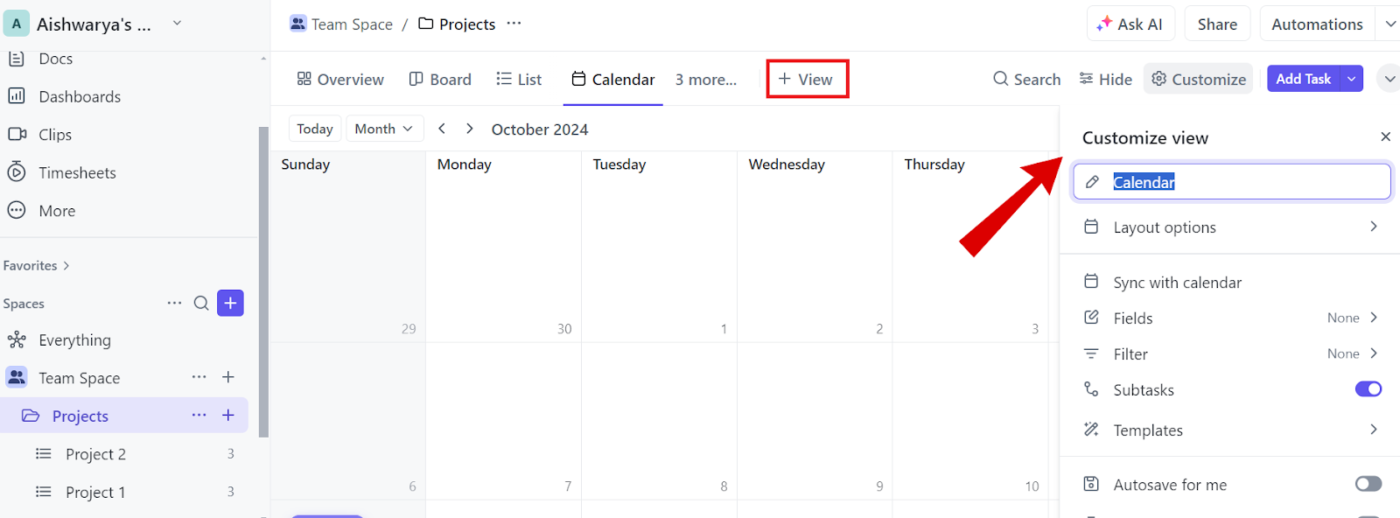
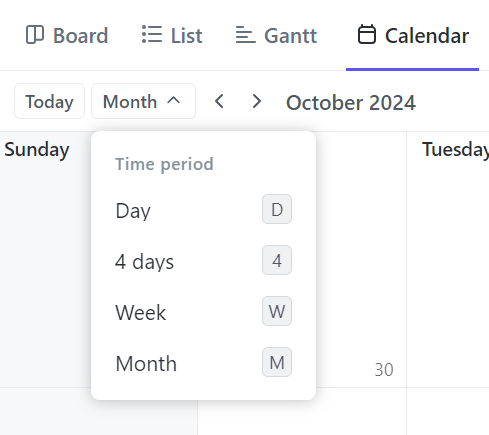
You can also adjust the time span—viewing tasks by Day, Week, or Month—and rearrange them as needed.
To adjust the time frame in your calendar, use the Time Period dropdown next to the tasks search bar. Options include:
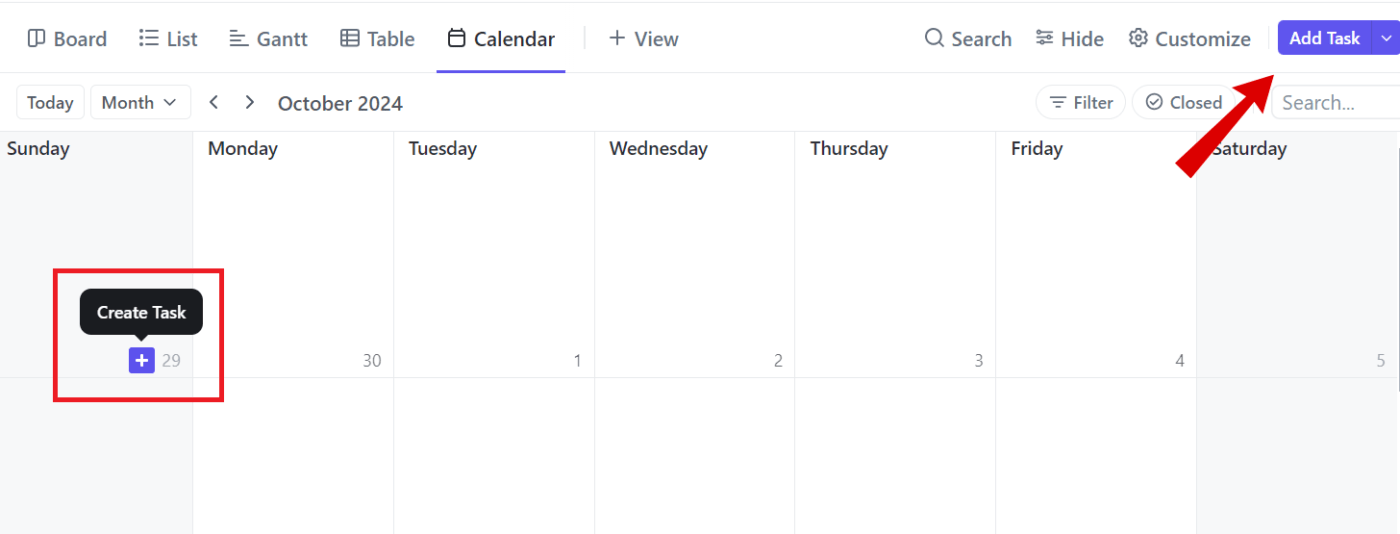
Adding tasks and due dates to your calendar is straightforward—click the ‘Add Task’ button in the right corner or hover over a day and click the ‘+’ icon.
Enter the task name, summary, due date, and priority level. Once you’ve done this, click on the task to add any additional details.
Additionally, the drag-and-drop functionality allows for quick, hassle-free scheduling. If a task is delayed or needs rescheduling, you can easily move it without affecting the project timeline.

💡Pro Tip: To only see tasks assigned to you, click ‘Filter’ in the upper-right corner and enable ‘Me Mode.’ This reduces clutter and helps you focus on your responsibilities without distractions from the team’s tasks or irrelevant information.
📮 ClickUp Insight: 30% of workers stick to set hours, but 27% regularly work overtime, and 19% don’t have a set schedule at all. When work is unpredictable, how do you ever truly clock out? 🕰️
Automated task scheduling in ClickUp Calendar can help bring more structure to even the most unpredictable schedules. Plan your week, set firm work hours, and automate reminders to log off—because your time should be yours to control!
💫 Real Results: Lulu Press saves 1 hour per day, per employee using ClickUp Automations—leading to a 12% increase in work efficiency.
With ClickUp’s mobile app, you can access your calendar on the go—perfect for quick updates and managing deadlines anytime, anywhere.
The best part? ClickUp’s Calendar View syncs with Google Calendar, so any change in one platform is instantly reflected in the other.
When you update a task in ClickUp, those changes are automatically reflected in Google Calendar, and vice versa. This means no more switching between different calendars—everything you need is accessible within ClickUp.
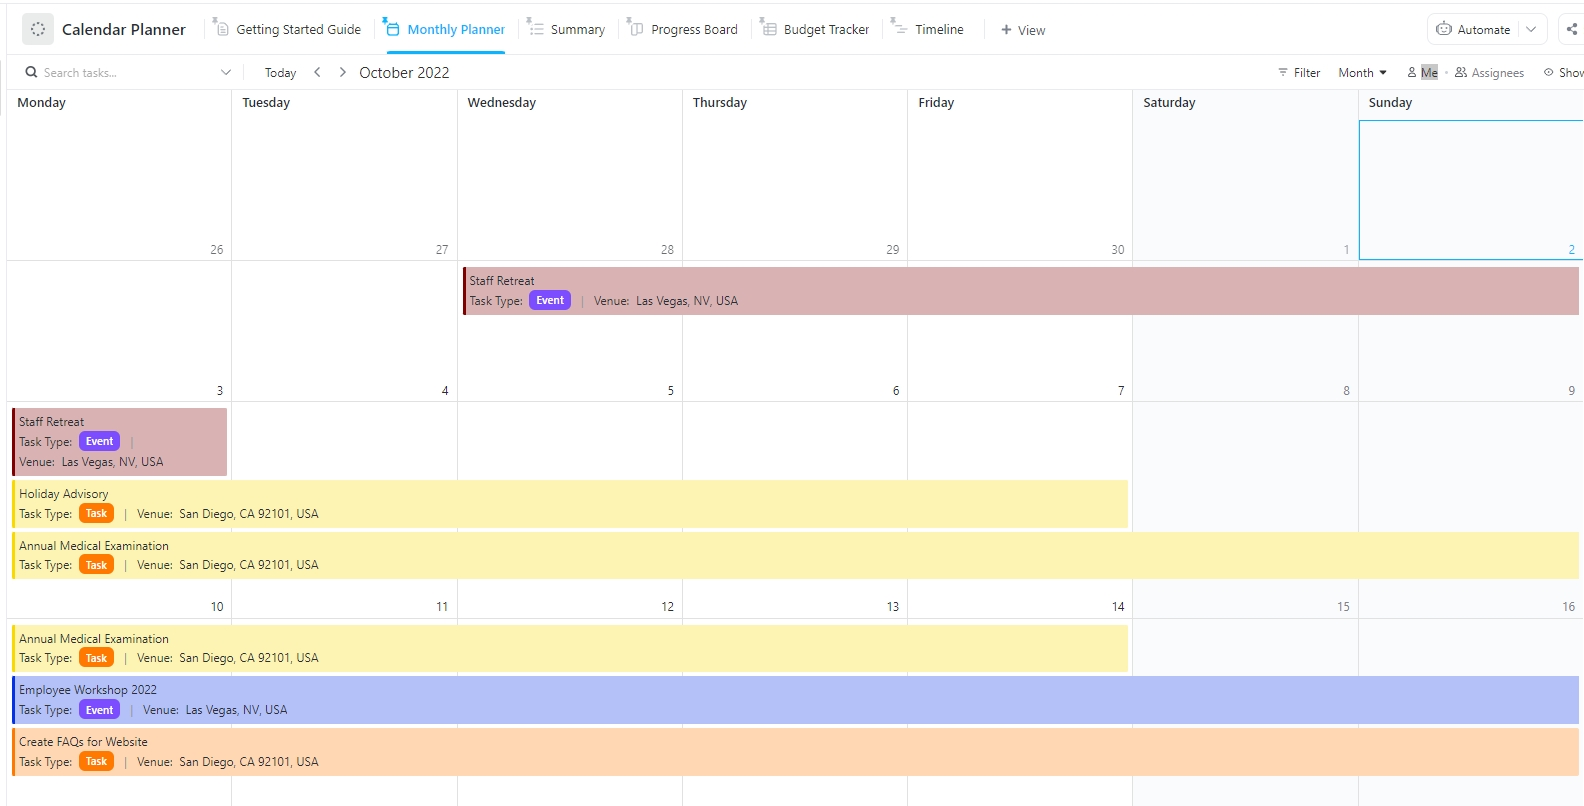
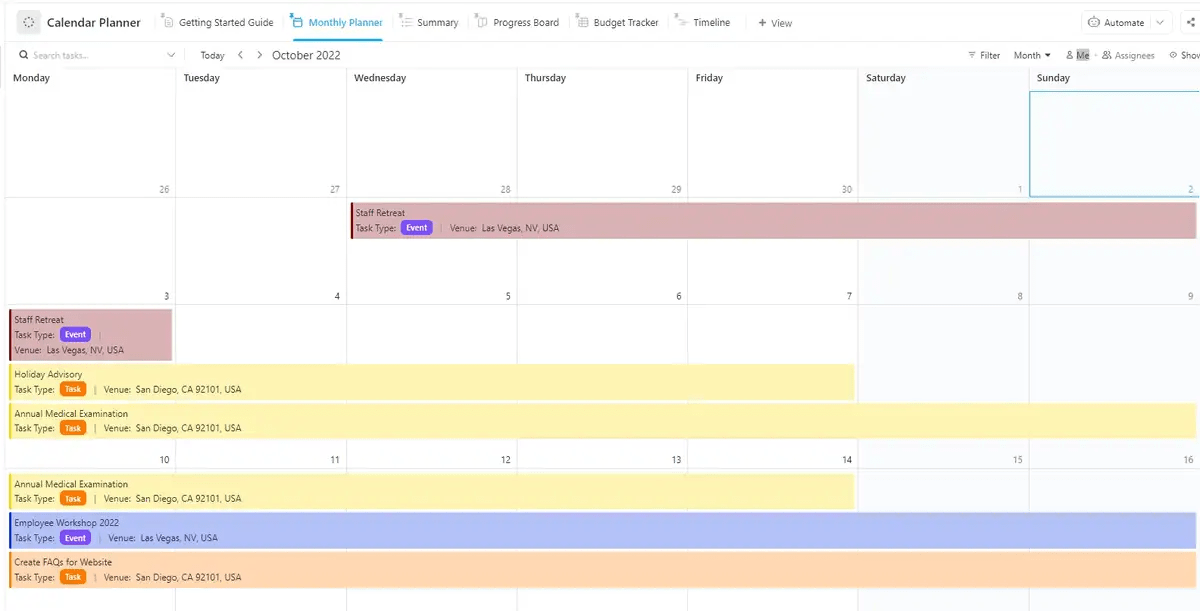
You can also use the ClickUp Calendar Planner Template to organize daily, weekly, and monthly tasks while tracking deadlines and important dates. It also provides the flexibility to adjust your schedule as needed.
ClickUp Calendar Planner Template offers multiple views to visualize your calendar in various formats, including:
Additionally, you can invite team members to collaborate in real time, share updates, and keep everyone informed about task progress and deadlines.
While inserting a calendar in Google Sheets is a good starting point, it has limitations, such as manual updates, basic functionality, and collaboration challenges. This makes it less ideal for managing complex projects.
ClickUp’s Calendar View offers a more comprehensive and intuitive way of visualizing your workload in real time and prioritizing tasks effectively.
With a robust task management feature, you can add detailed task information directly within the Calendar View to access everything you need without juggling multiple tools.
Plus, its integration with Google Calendar guarantees your scheduling remains synchronized.
Want to create a calendar that works for you? Sign up for ClickUp today for free.

© 2026 ClickUp

There’s an easier way. Try a free AI Agent in ClickUp that actually does the work for you—set up in minutes, save hours every week.