


Still downloading templates?
There’s an easier way. Try a free AI Agent in ClickUp that actually does the work for you—set up in minutes, save hours every week.
Sorry, there were no results found for “”
Sorry, there were no results found for “”
Sorry, there were no results found for “”

Businesses worldwide rely on macOS for its speed.
That said, finding files on a Mac is not always as simple as it seems.
Lost files and endless scrolling can disrupt your workflow and kill your momentum.
This article explores how to locate files on a Mac effectively and offers essential file management tips.
Got your Mac fired up and ready to hunt down that elusive sales deck or spreadsheet? Here are seven ways to go about it (and a few tips to organize your files, too).
Let’s start with the Finder, the macOS go-to file manager. Putting it to use involves these simple steps:

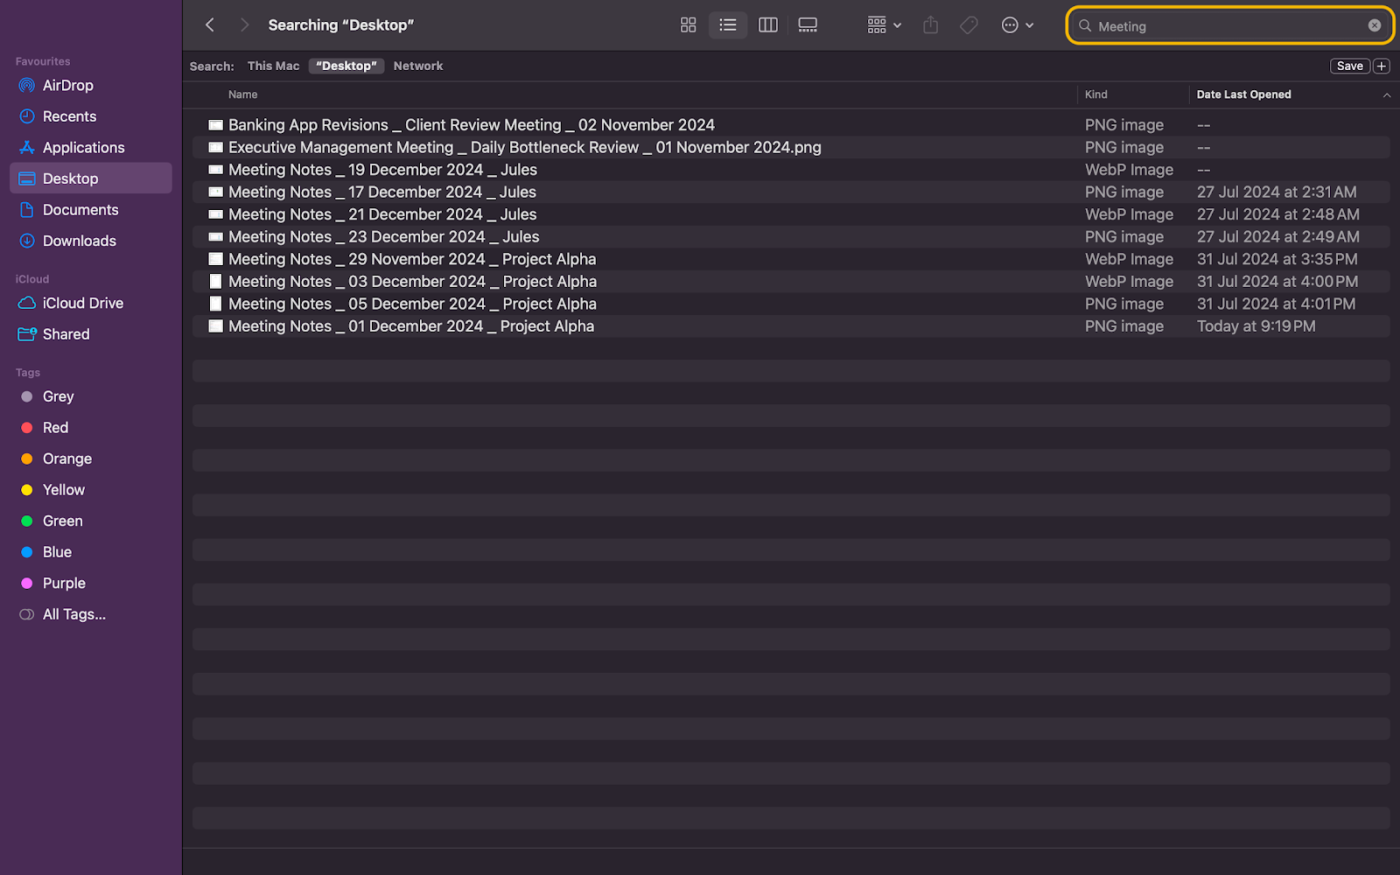
Even if you only know the file format, a portion of the file name, or what it contains, that works, too.
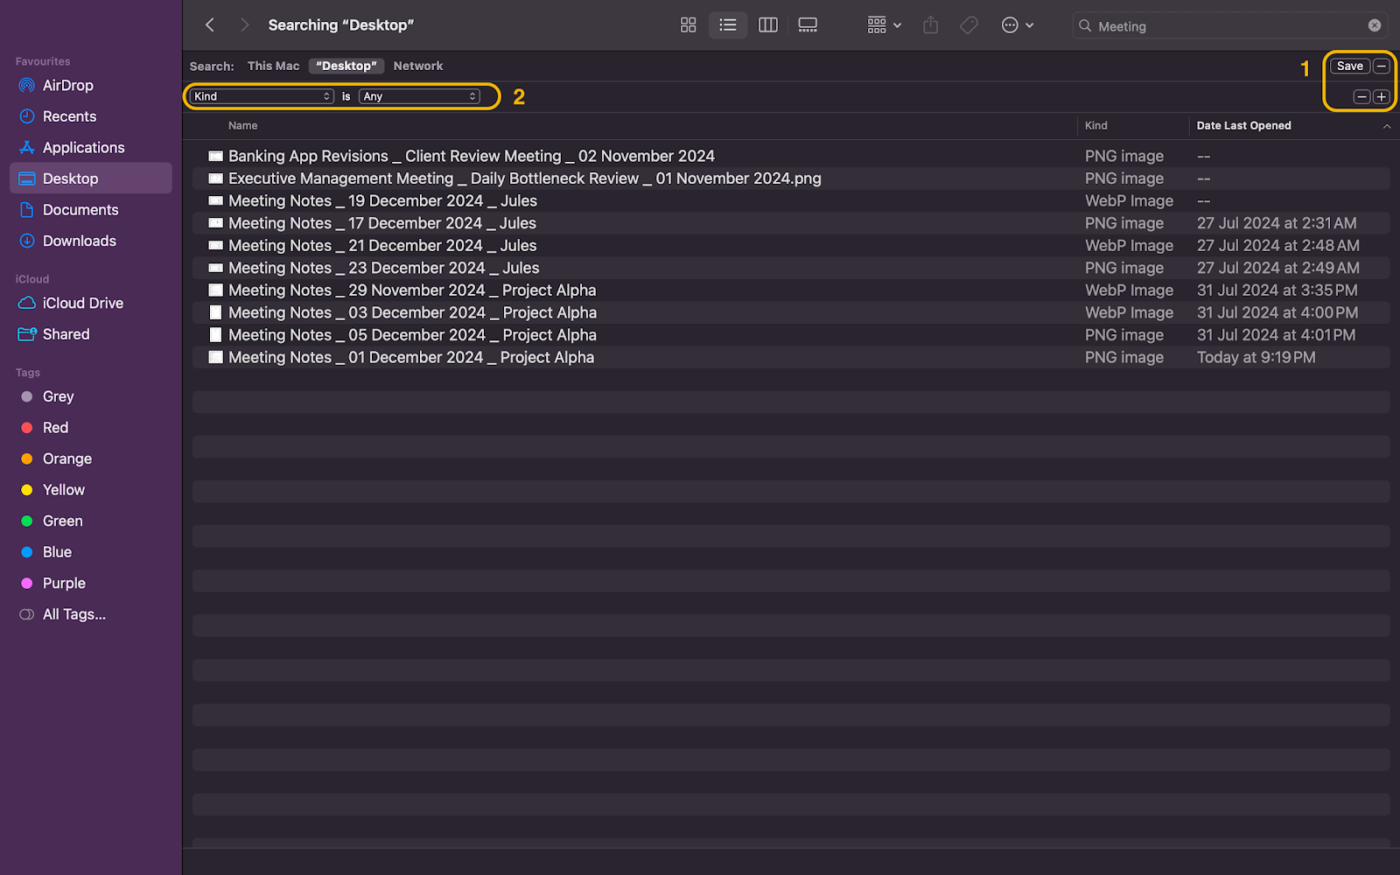
This will let you filter search results by file type, recently edited files, exact file names, and over a hundred more custom rules.
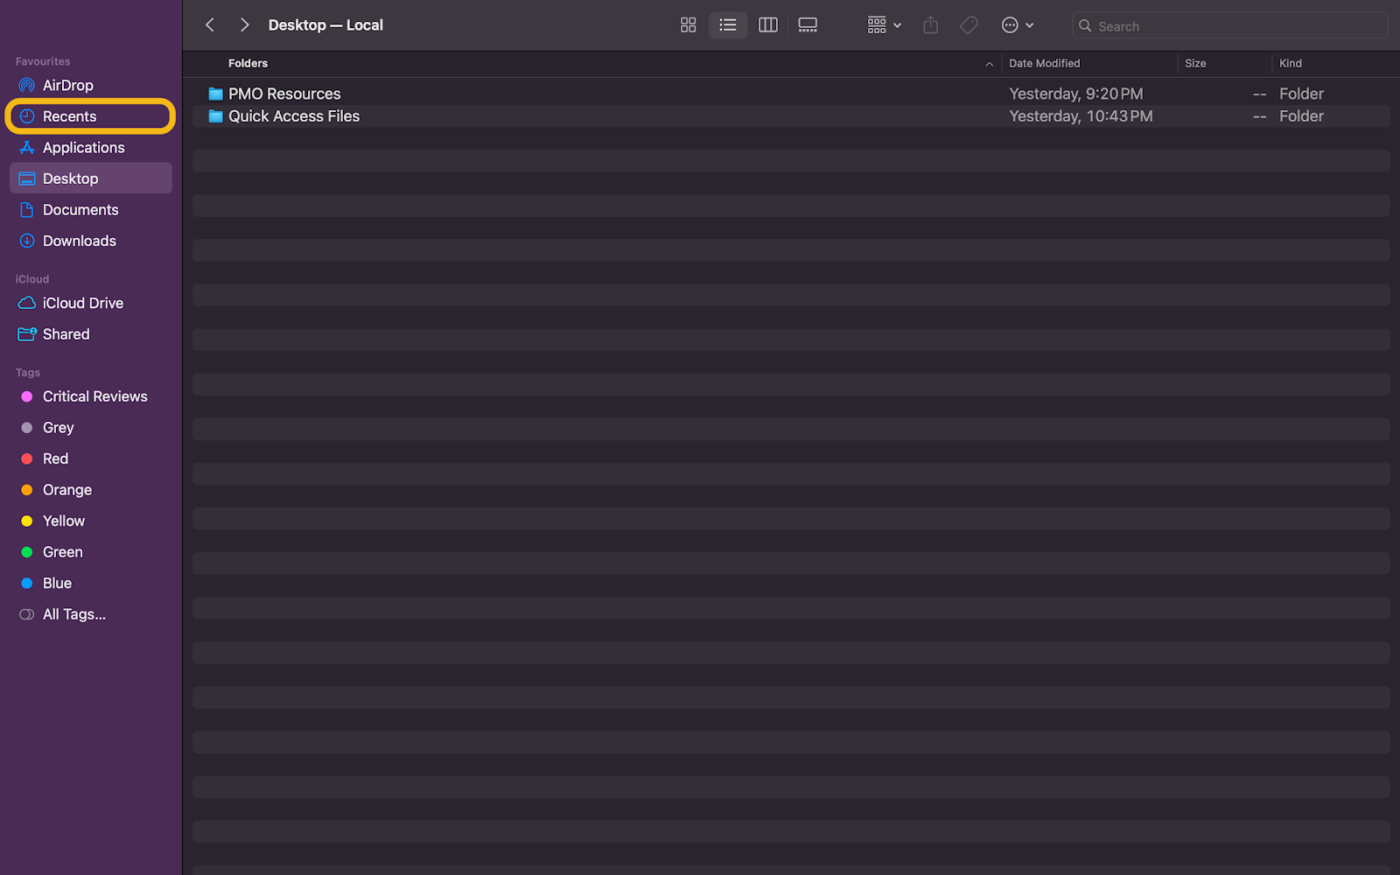
💡 Pro Tip: If you know where to look, Finder lets you search the entire Mac, the current folder, or specific networks. Plus, there’s a sidebar for quick access to default folders like the Documents, Desktop, and Downloads folders.
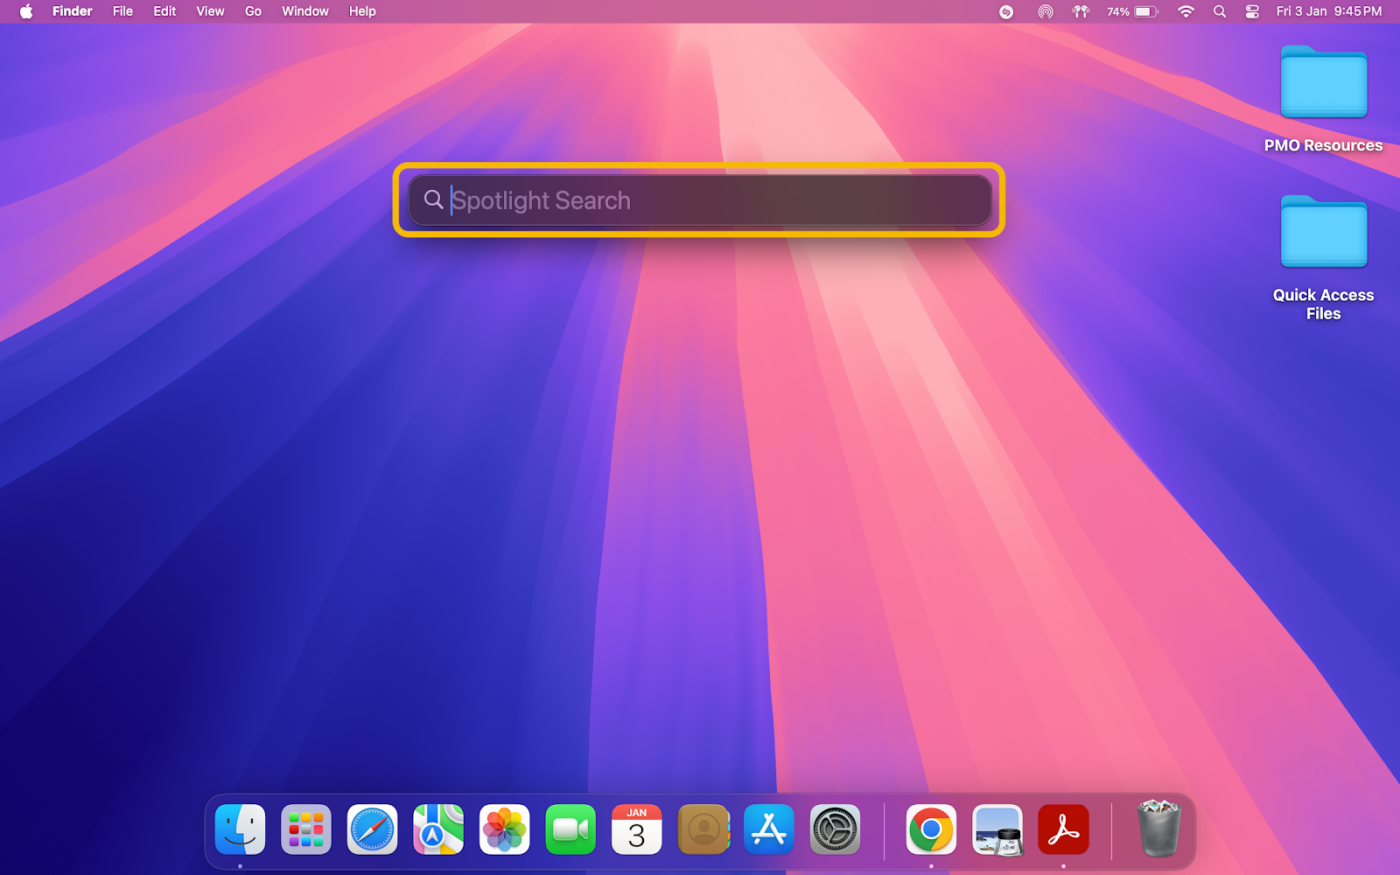
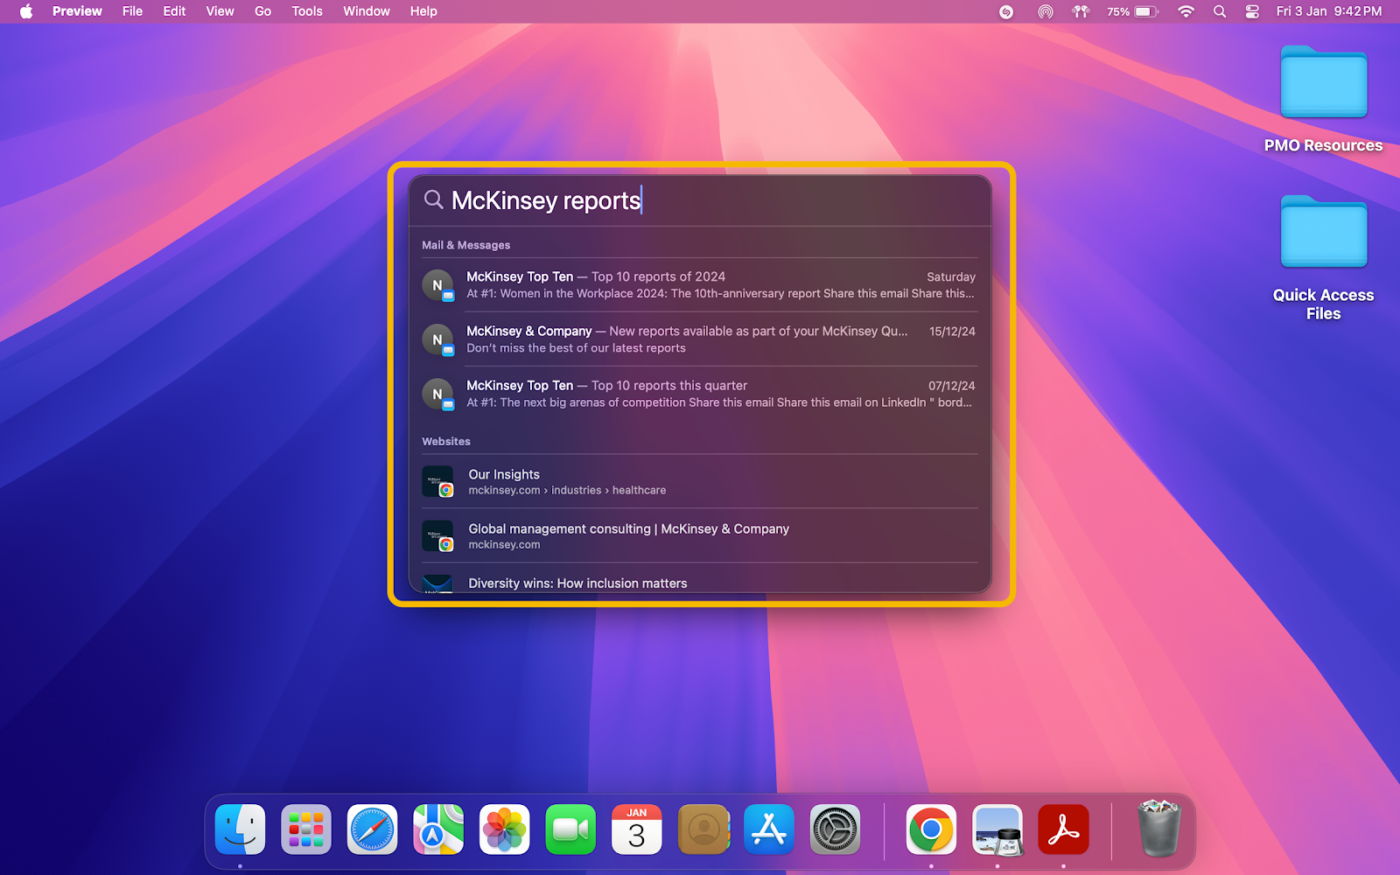
Another standout feature on Mac devices is Spotlight Search. This built-in function retrieves anything from files to online search results. Here’s a breakdown of how it works:
💡 Pro Tip: Some users have found Spotlight Search unreliable and may want alternatives. Look at the four spotlight search alternatives and competitors for a faster, more trustworthy option.
🔍 Did You Know? Spotlight can even find contact details, open apps, and perform calculations. It’s a pretty handy tool.
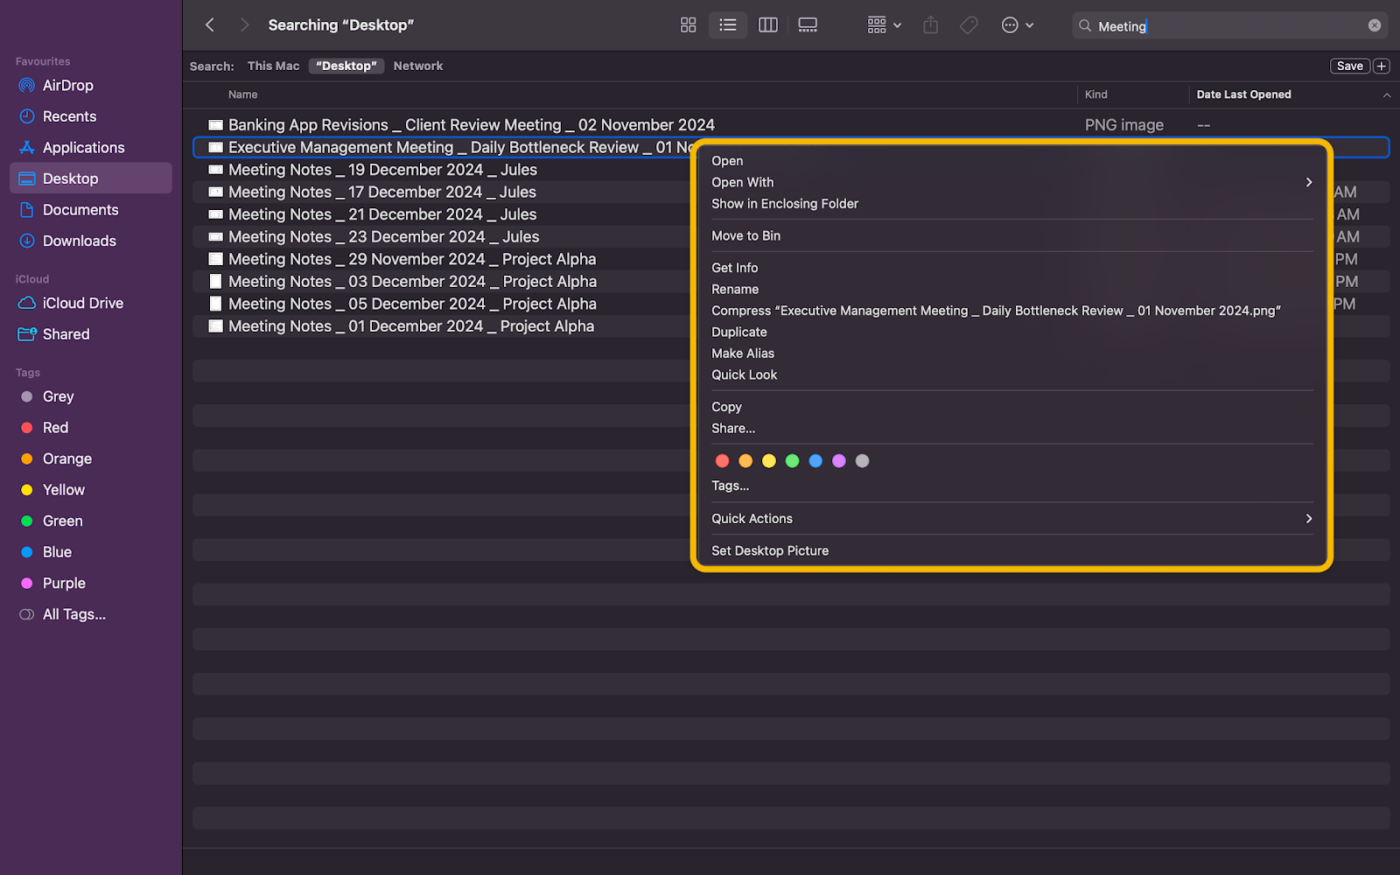
Mac devices also allow you to assign tags to each document. These are color-coded labels that make locating files easier.
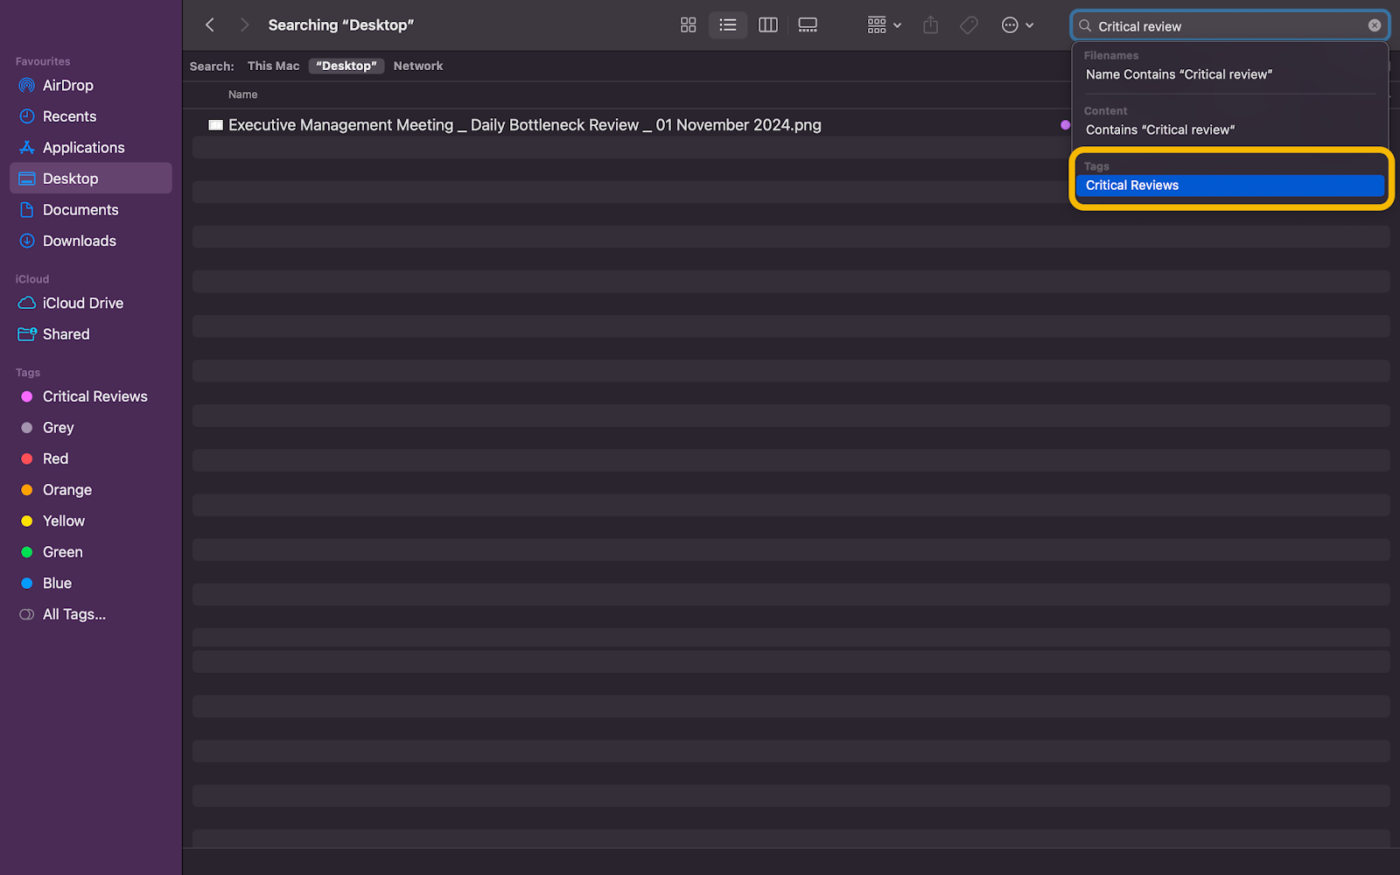
While tags help with the search, they also keep files organized. This is how it’s done:
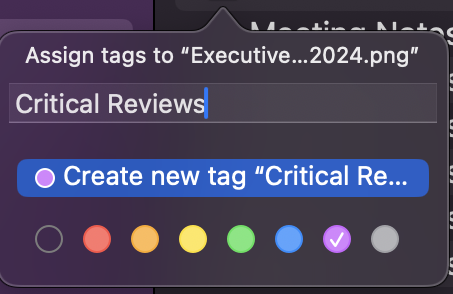
For this case, we’ve tagged the file as a part of “Critical Reviews”.
✨ Bonus Tip: Add multiple tags to files to categorize them further. Doing this prevents overlap when deciding the purpose of documents and increases the focus of your search.
➡️ Read More: How to Be More Organized at Work?
To get back to the report you were working on, Mac has a dedicated space to access any recently edited files. Access them in these two steps:
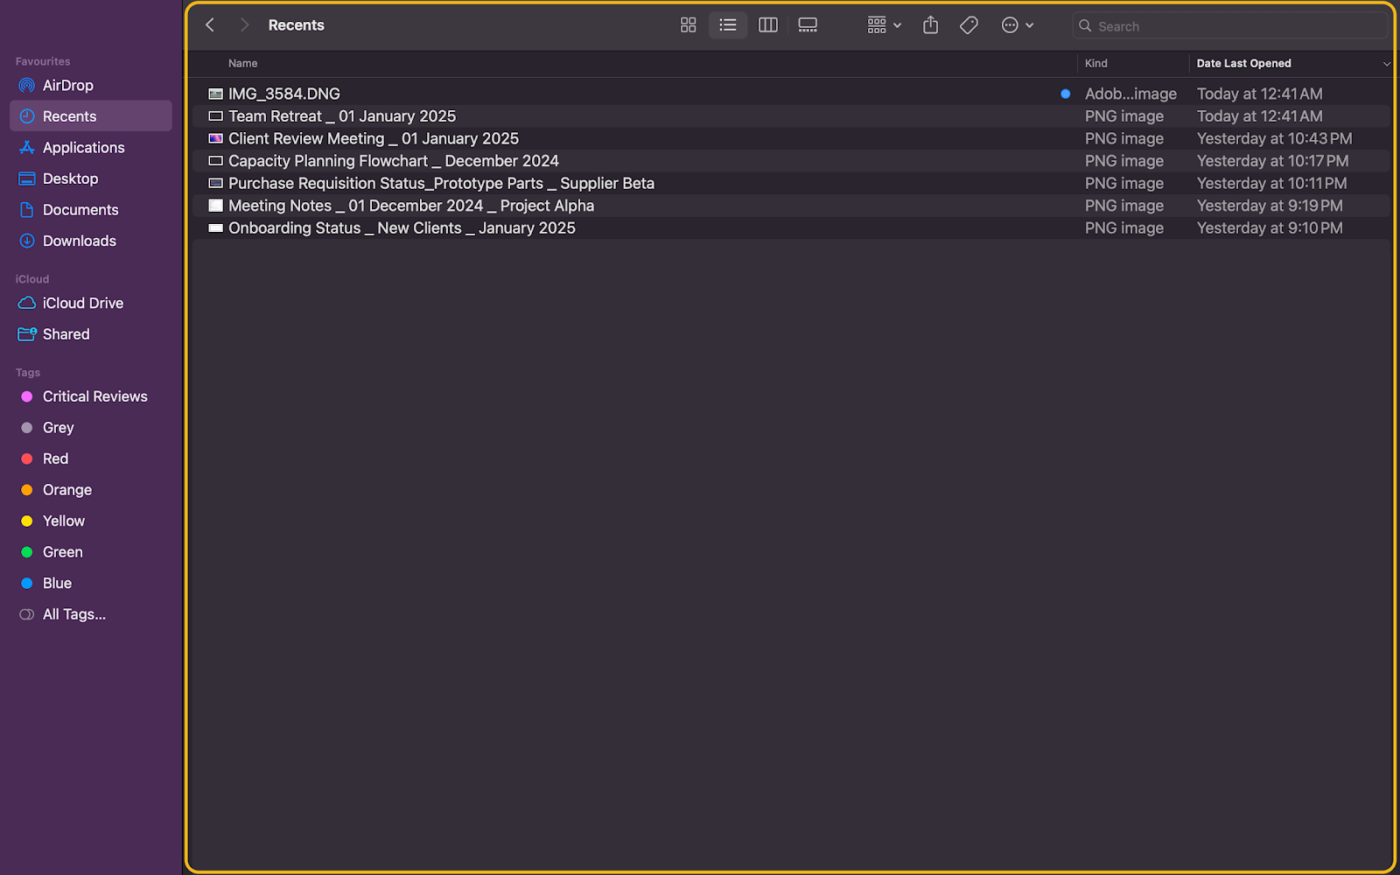
Accessing files through the recent folder is quick and updates in real time. That said, recently deleted files will not appear here.
➡️ Read More: 12 Ways to Organize Files and Folders on a Mac
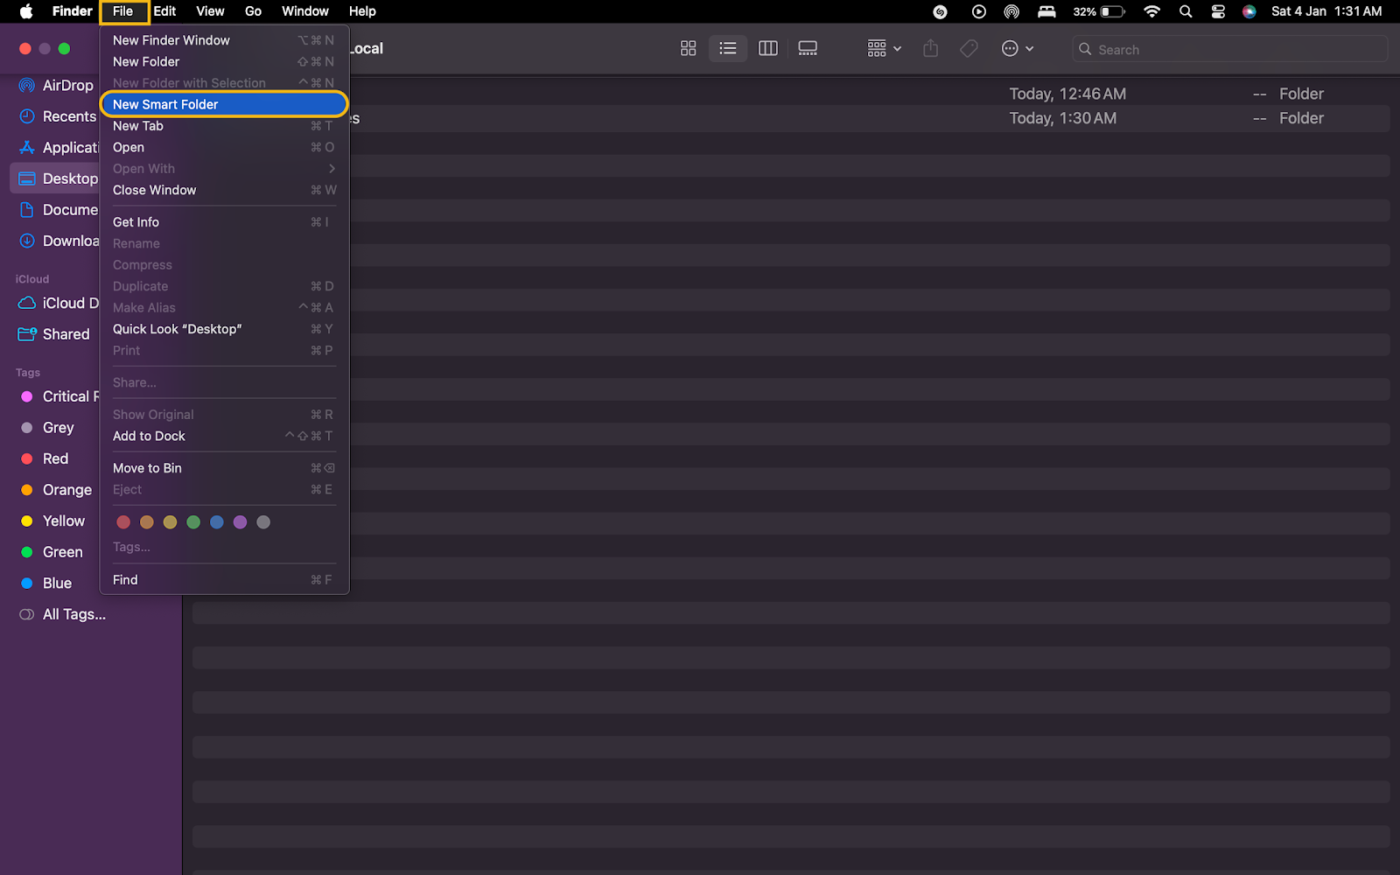
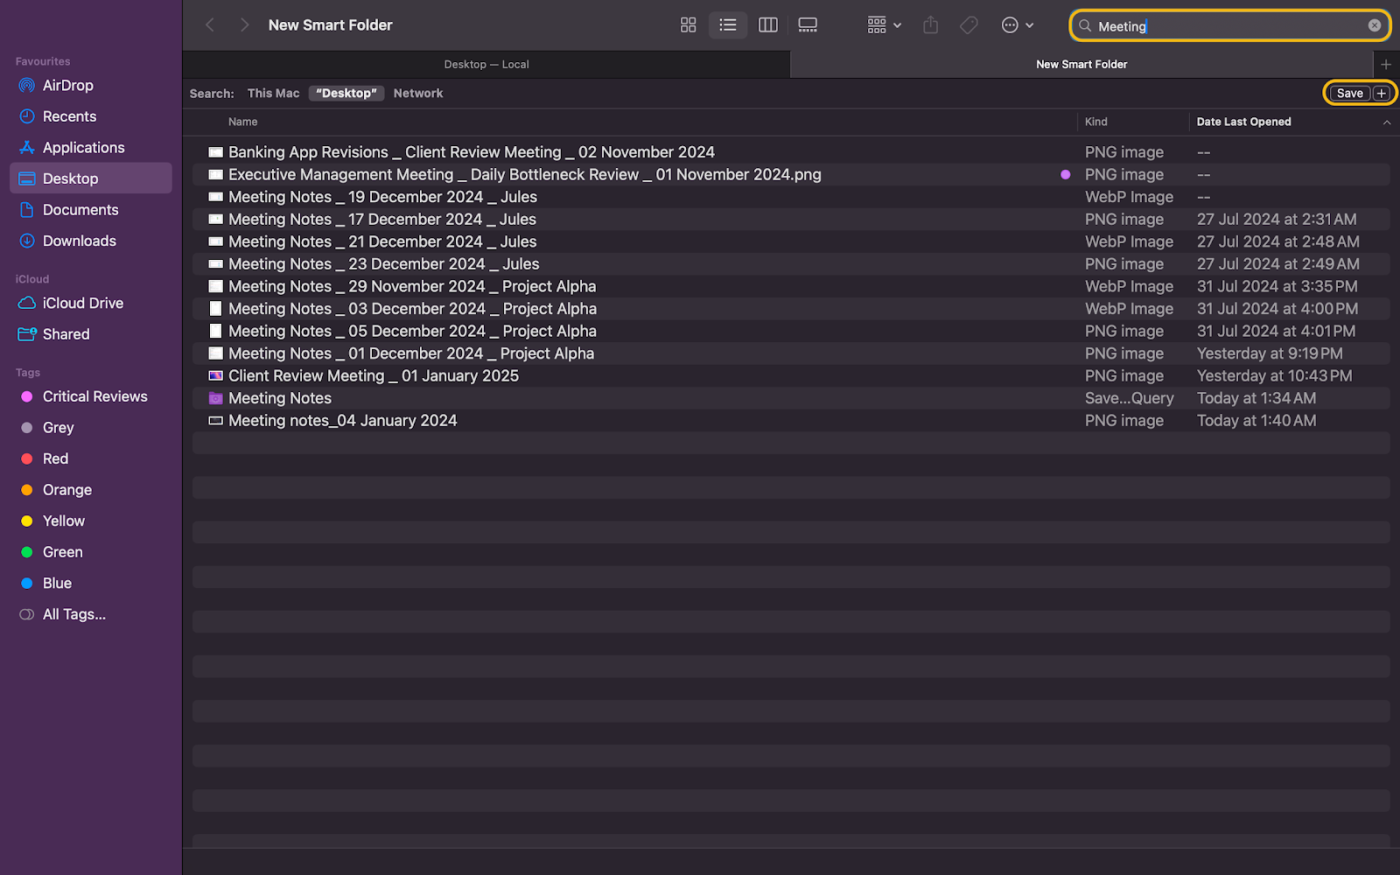
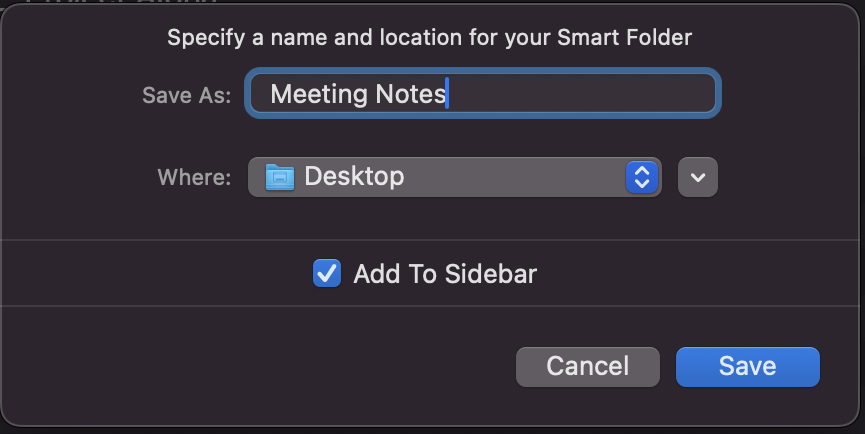
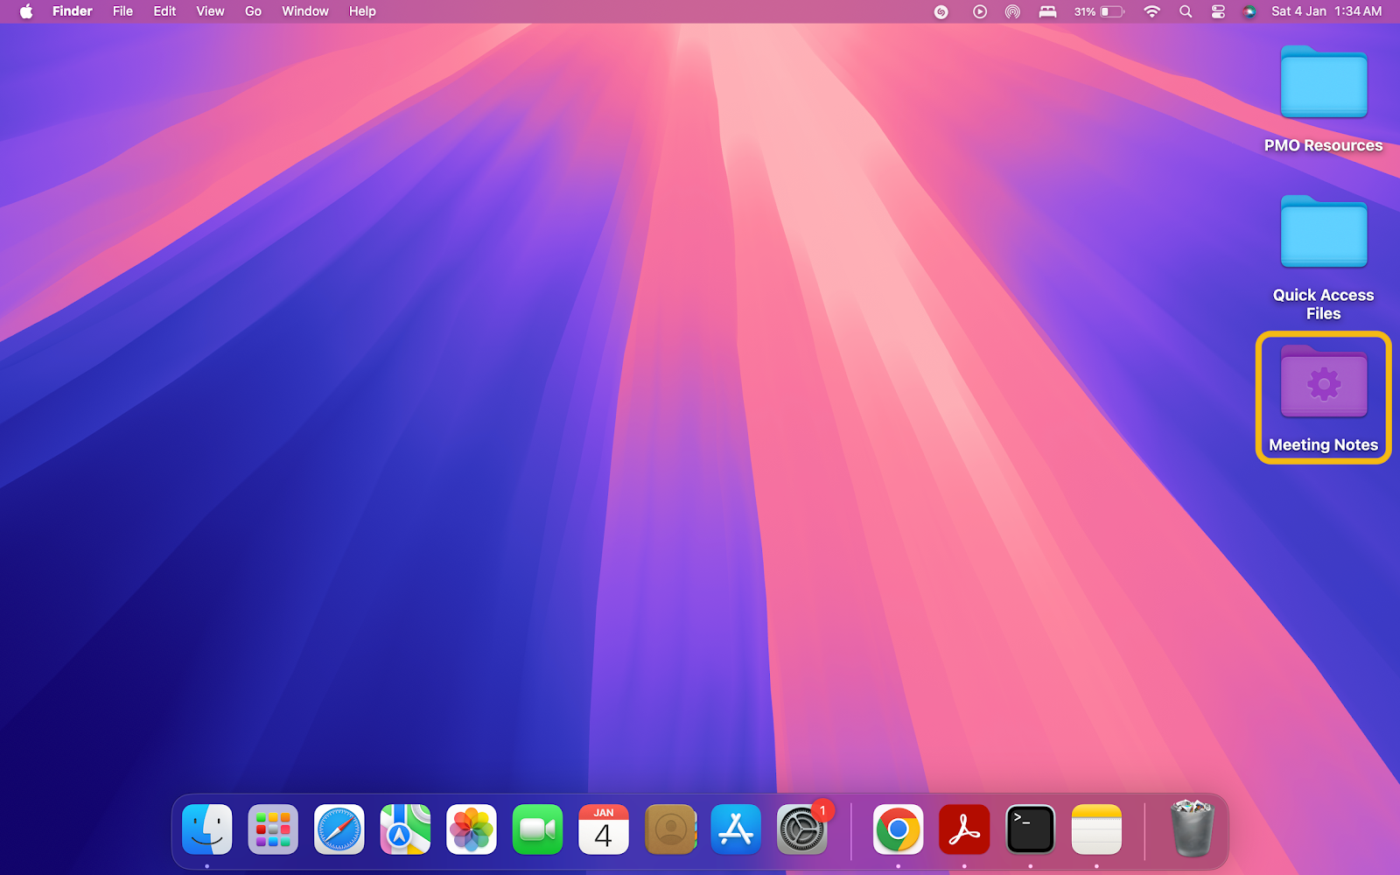
Hidden within Mac’s Finder app is the versatile Smart Folders feature.
This dynamic tool automatically organizes files based on predefined criteria. All the files you create that meet these criteria instantly pop up here. Here’s how you’ll put it to use:
➡️ Read More: 12 Ways to Organize Files and Folders on a Mac
For the more tech-savvy teams, Mac also allows you to access files through Terminal, its coding interface app. Searching for Terminal in the Spotlight Search is a quick shortcut to access it.
Here are a few things Terminal does related to file management:

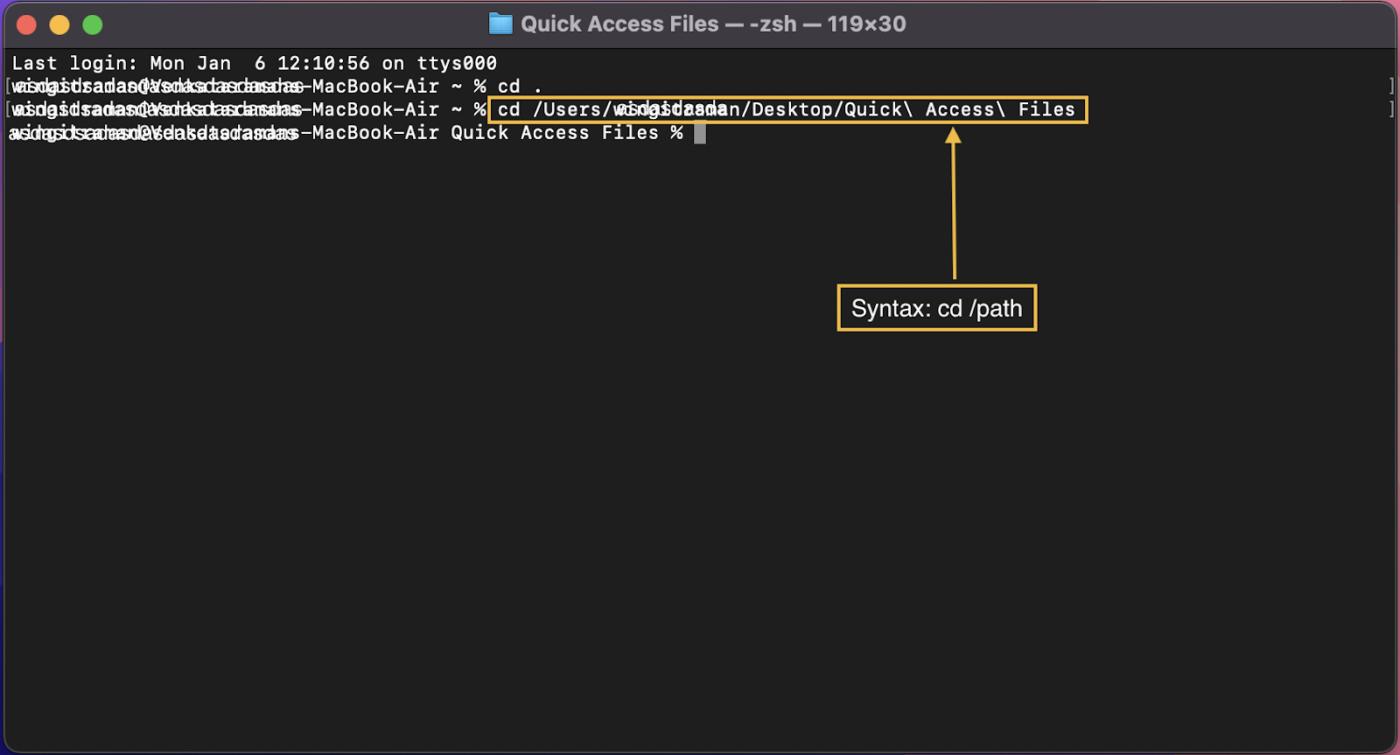
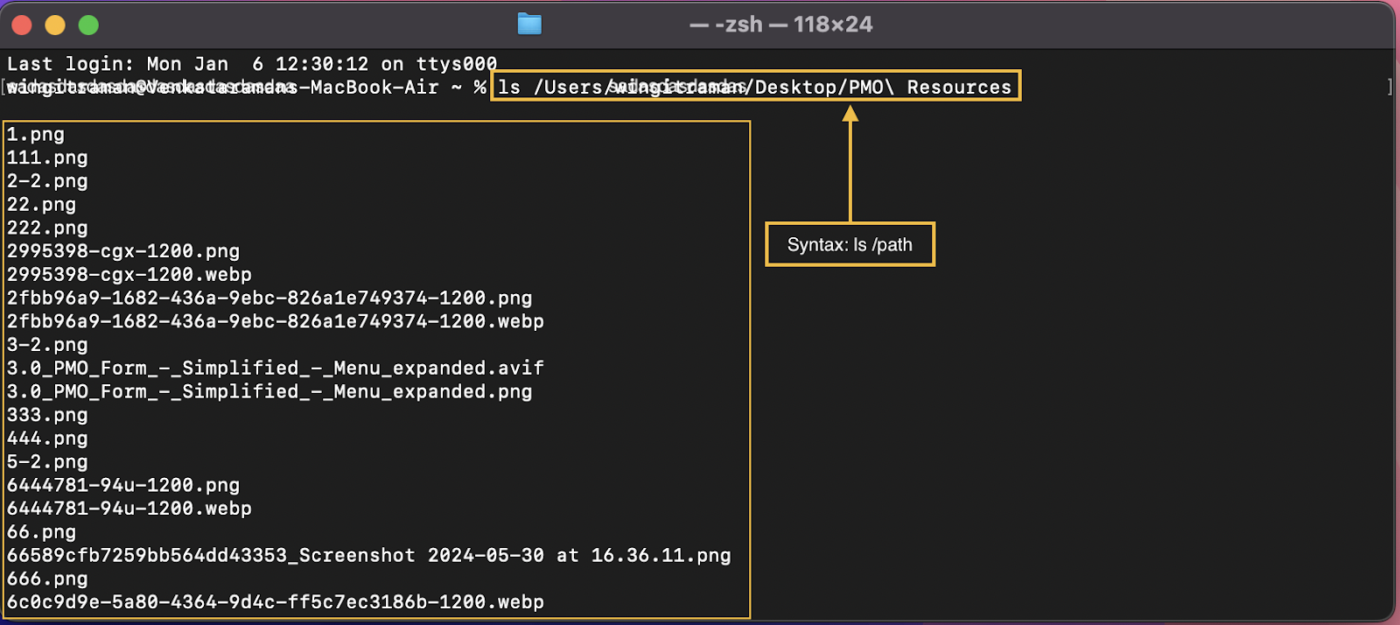
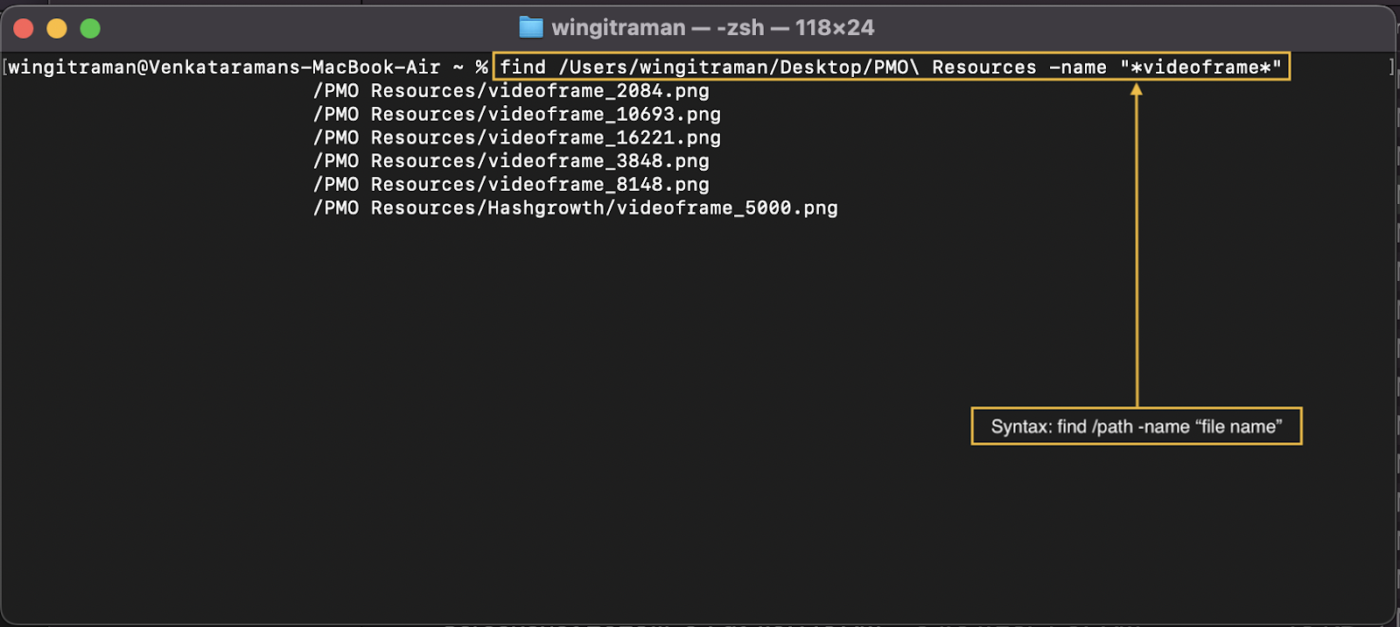
Remember to add the correct file path (location) in each syntax. You can also drag and drop files or folders into the terminal app.
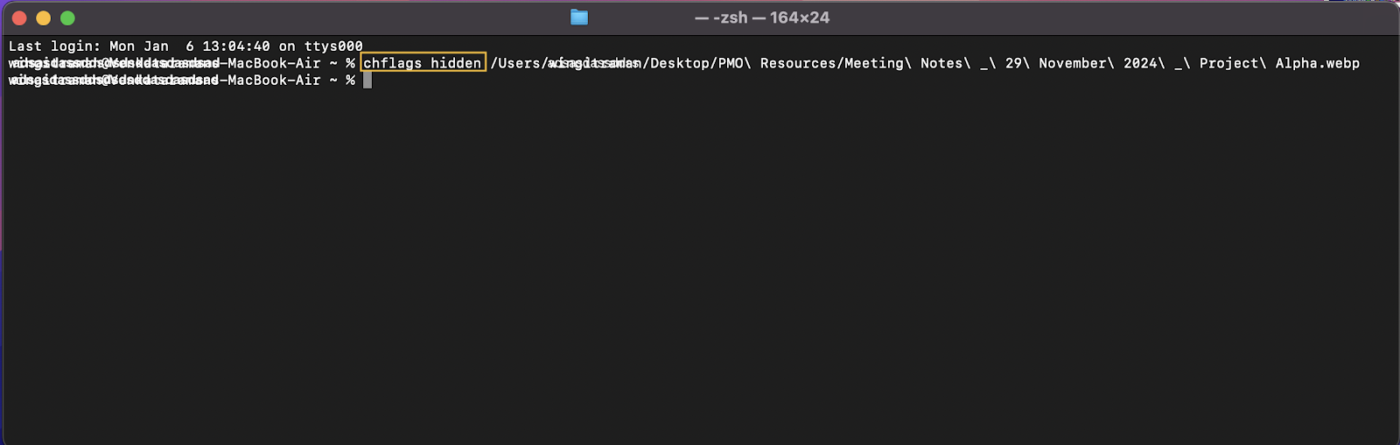
Effective file management is all about presenting relevant files. Certain files are sensitive and best kept out of reach rather than deleted. Here’s how to hide files with the terminal app:
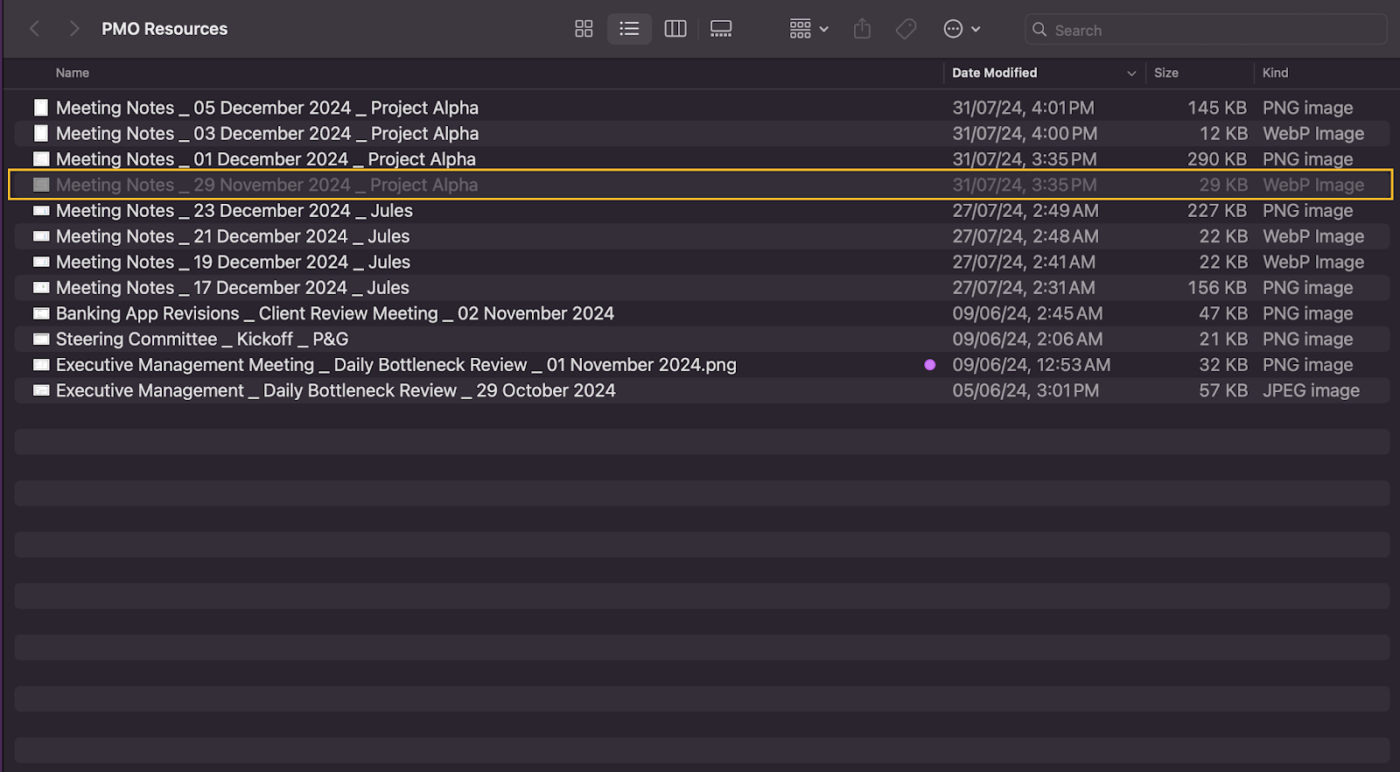
If you need to view them (so that they don’t become lost files), follow these steps:
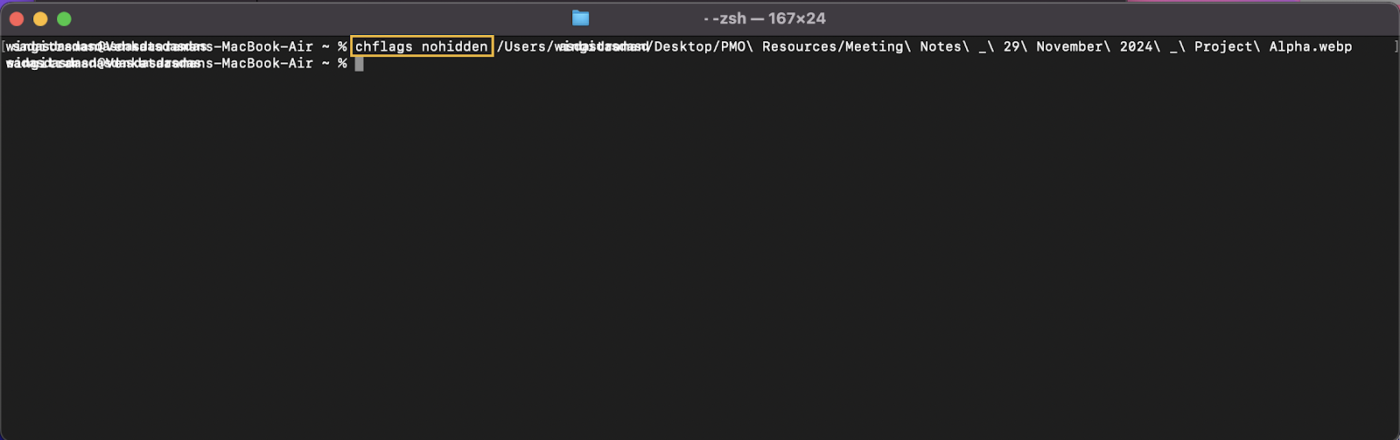
Finally, if you need them visible again:
💡 Pro Tip: Want to enhance your productivity? Look at the essential MacBook hacks for supercharged productivity to look at tricks and tips that will optimize your browsing experience.
While our steps make managing and organizing files on macOS a breeze, there are drawbacks. If you’re eyeing a Mac as your go-to file-handling sidekick, here are five limitations you might want to consider:
Mac offers a sleek interface, but its features and customization options lack depth.
This is where you need a powerful tool to step and supercharge your Mac.
When it comes to work, ClickUp is an excellent all-rounder. Let’s start with its 360-degree search feature!
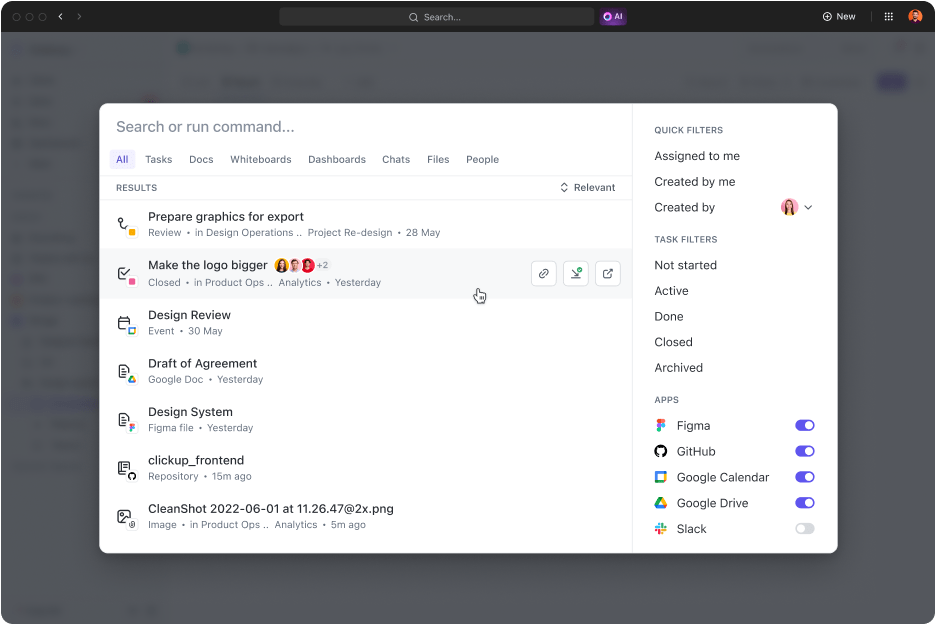
ClickUp Connected Search is another tool that transforms how your team searches for and manages information. Packed into a single search bar, it scans tasks, goals, connected third-party apps, and files stored on ClickUp.
Pulling data from every corner of your workspace means no more missing files or manual browsing.
It also offers intelligent filtering to refine results by keywords, file types, or team members. In short, Connected Search doesn’t just save time and boosts productivity; it makes everything effortless.
Now, let’s look at the documentation side of things!
Whether it’s to create or store information, ClickUp Docs keeps it engaging, rich, and comprehensive. This tool’s simple interface and rich markdown formatting help you draft and organize content in seconds. Plus, Docs allows you to create tasks from anything in the space.
It also has powerful file sharing, instant tagging, and commenting options for seamless collaboration. Is that document a crucial piece of info? Click the “Mark as Wiki” option and instantly add it to your knowledge base.
➡️ Read More: Free Knowledge Base Templates in Word & ClickUp
ClickUp is also a great file organization solution for those who need minimal navigation and maximum overview.

ClickUp Hierarchy is an integrated feature designed to structure and organize your files and workflow. It breaks information into Spaces, Folders, Lists, Tasks, and Subtasks.
Your projects gain a more traceable flow by moving from broad categories (Spaces) to in-depth organization buckets (Folders and Lists).
This segregation also helps avoid information overload when executing each Task and Subtask. Each space and folder has multiple custom views, such as Gantt charts, calendars, and even Kanban boards.
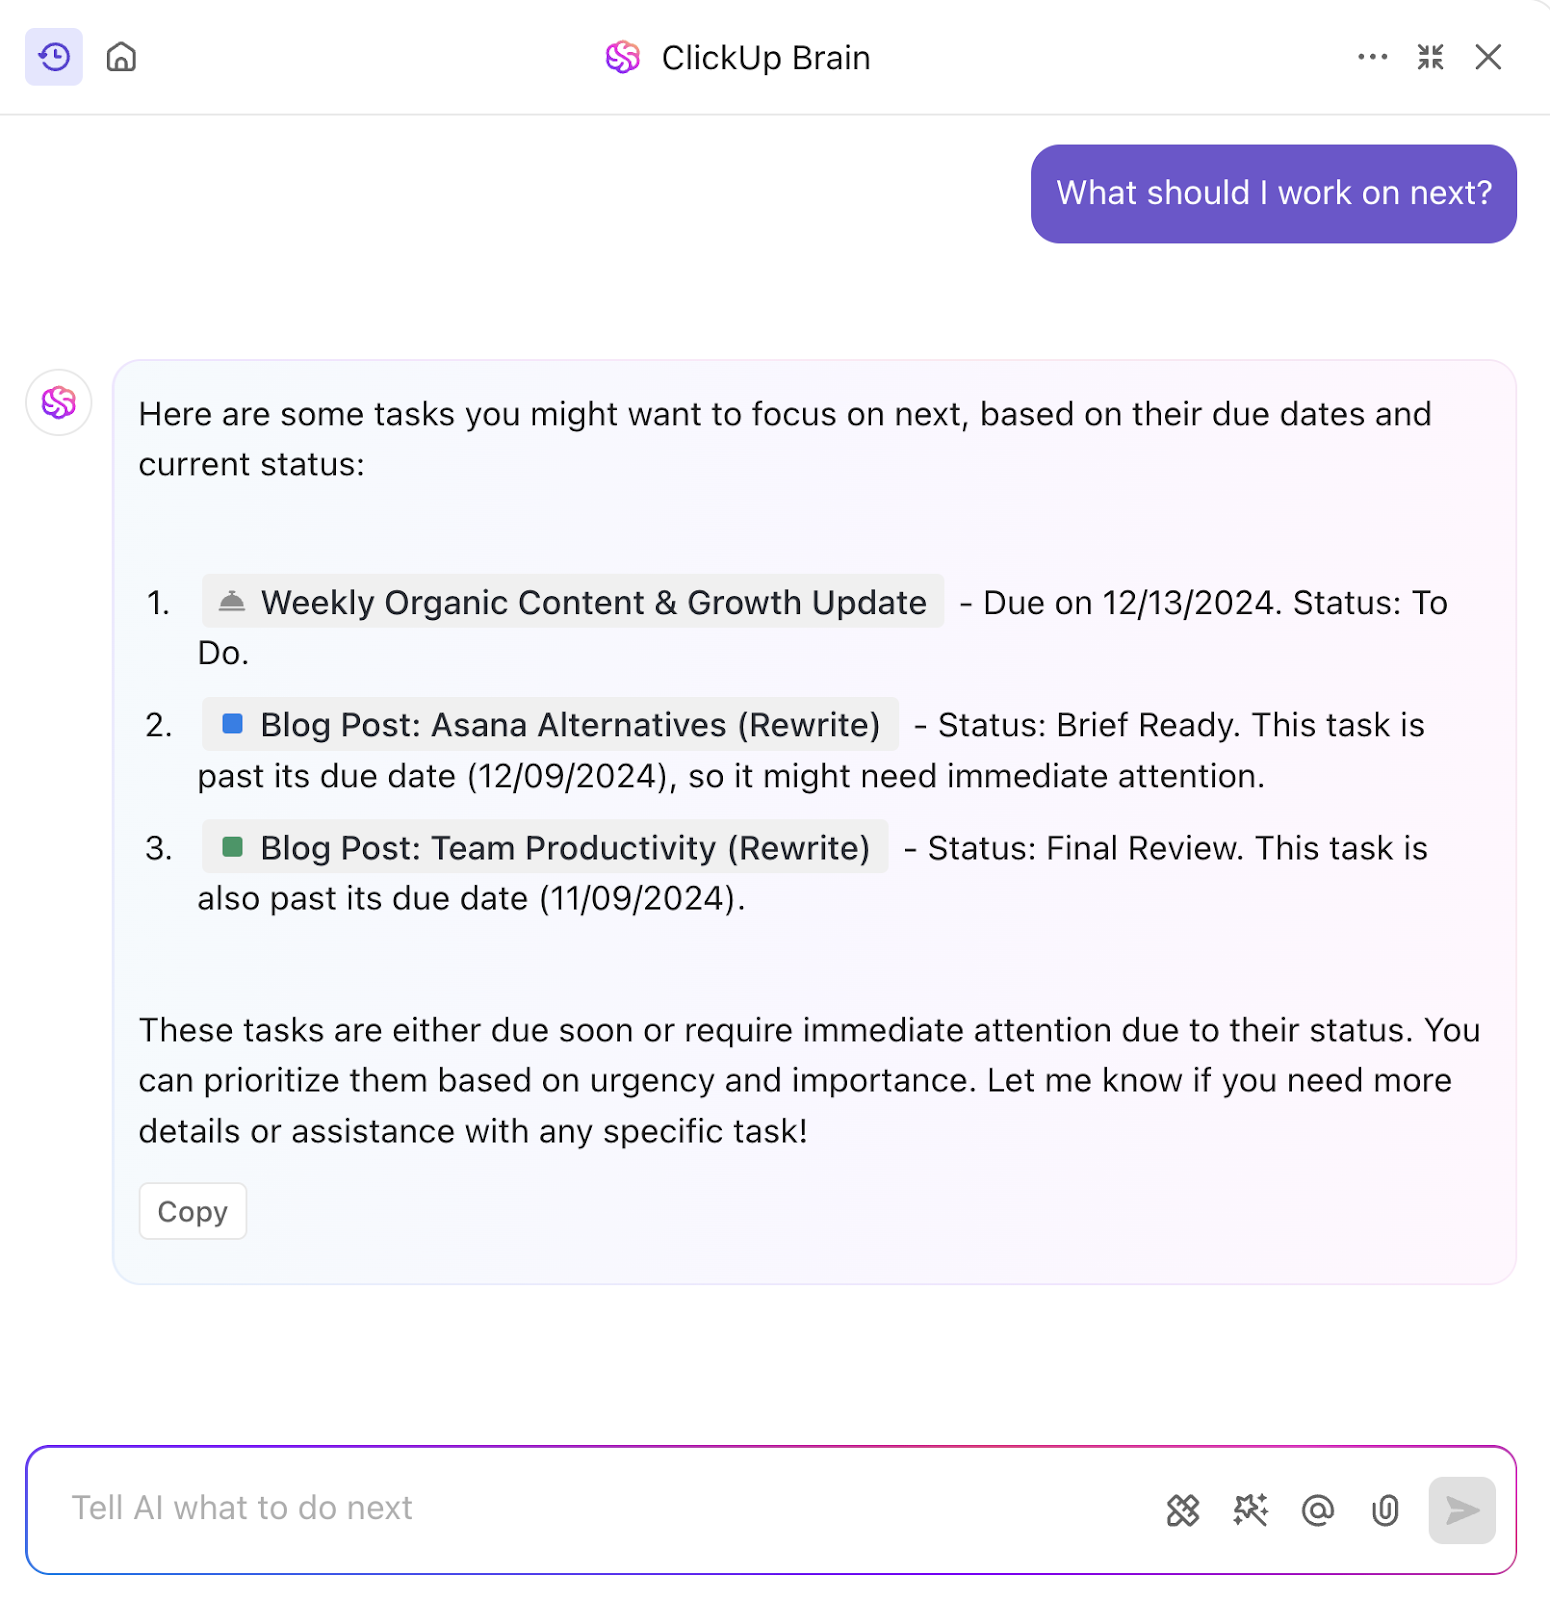
ClickUp also has an AI tool to fine-tune file management, maximize insights, and reduce manual effort.
ClickUp Brain’s AI Knowledge Manager functionality blends insights with data management excellence. It generates instant summaries, provides project updates, and even drafts emails and reports, to name a few.
This AI tool creates tasks and content from anywhere on the platform, including chat windows, comments, and documents. Plus, it effortlessly retrieves source links and files in each response. Like that, ClickUp Brain eliminates the hassle of tedious file searches and endless scrolling to find key insights.
ClickUp Brain Max with Talk to Text
Mac tools like Finder and Spotlight help you locate files, but they don’t make creating or organizing them any easier. That’s where ClickUp Brain MAX comes in. With Talk to Text, you can dictate directly into tasks, Docs, or comments, and AI instantly turns your voice into structured, polished content. No manual typing, no endless scrolling—just ideas captured, formatted, and stored where your work already lives.
When chasing the right insights, AI isn’t the only tool ClickUp uses to enhance file management and retrieval. Here’s why ClickUp is loved for managing files and tasks:
ClickUp is a fantastic tool for organizing tasks and priorities, team collaboration, and data management. The flexibility of spaces and lists makes it adaptable to almost any industry.
Want to make sure all these tools and steps end with the best results? Here are six tips that are key to efficient file management:
Also, document and standardize all these practices. A go-to file system helps new users adjust faster to effective file management.
💡 Pro Tip: Organizing and decluttering your digital space makes searching for files easy. Look at a digital decluttering guide to know how you can do this.
File management on a Mac is minimalistic and to the point. Do it right, and you’ll have phenomenal information flow and productivity.
The steps and tips we’ve covered are an excellent way to get the engine running. However, macOS has many limitations and may restrict your team’s freedom and flexibility. That’s where ClickUp comes in.
It comes with intuitive documentation, systematic organization, and AI-powered data retrieval. It’s easily several times more powerful than sticking to Mac defaults. Plus, ClickUp is compatible with Apple users, too!
Ready to level up your file management? Sign up for ClickUp today!

© 2026 ClickUp

There’s an easier way. Try a free AI Agent in ClickUp that actually does the work for you—set up in minutes, save hours every week.