How to Create a Template in Microsoft Word

Sorry, there were no results found for “”
Sorry, there were no results found for “”
Sorry, there were no results found for “”

Ever felt like you’re spending more time formatting than actually writing? Or maybe you’ve opened up a blank document and sighed, knowing you’d have to start from scratch—again?
If so, you are in the same boat as Mark. A project manager, Mark used to dread creating his weekly reports. Every time he’d sit down to get started, he’d lose 15 minutes trying to get the margins right, adjust fonts, and make sure everything looked consistent. By the time he finally started writing, he was already halfway frustrated.
Then he discovered templates in Microsoft Word, and everything changed.
Instead of staring at a blank page, he had a pre-designed document ready. Fonts? Already chosen. Margins? Perfectly set. Even the boilerplate text is there, waiting for him to fill in the details.
With templates, he could skip the endless formatting and get straight to the content.
Like Mark—let’s learn how to create effective document templates.
You can create a Word template by building a document once (with your preferred formatting and boilerplate sections) and saving it as a Word Template file type so it’s reusable. This reduces manual formatting work and keeps your documents consistent over time.
Microsoft Word offers a vast library of built-in templates that instantly transform your blank document into a well-structured, visually appealing report. Still, you may need a custom template in certain scenarios.
Custom templates are the solution if:
Whether you’re a teacher using the same grading rubric, a professional using a certain project management template, or a writer with a preferred article layout, custom Office templates improve your workflow.
Getting started with it is super easy, too.
Just follow these steps to create a Word template:
Start with a blank or existing Word document that resembles your desired template.

Customize the document with the desired text, styles, images, and other elements.
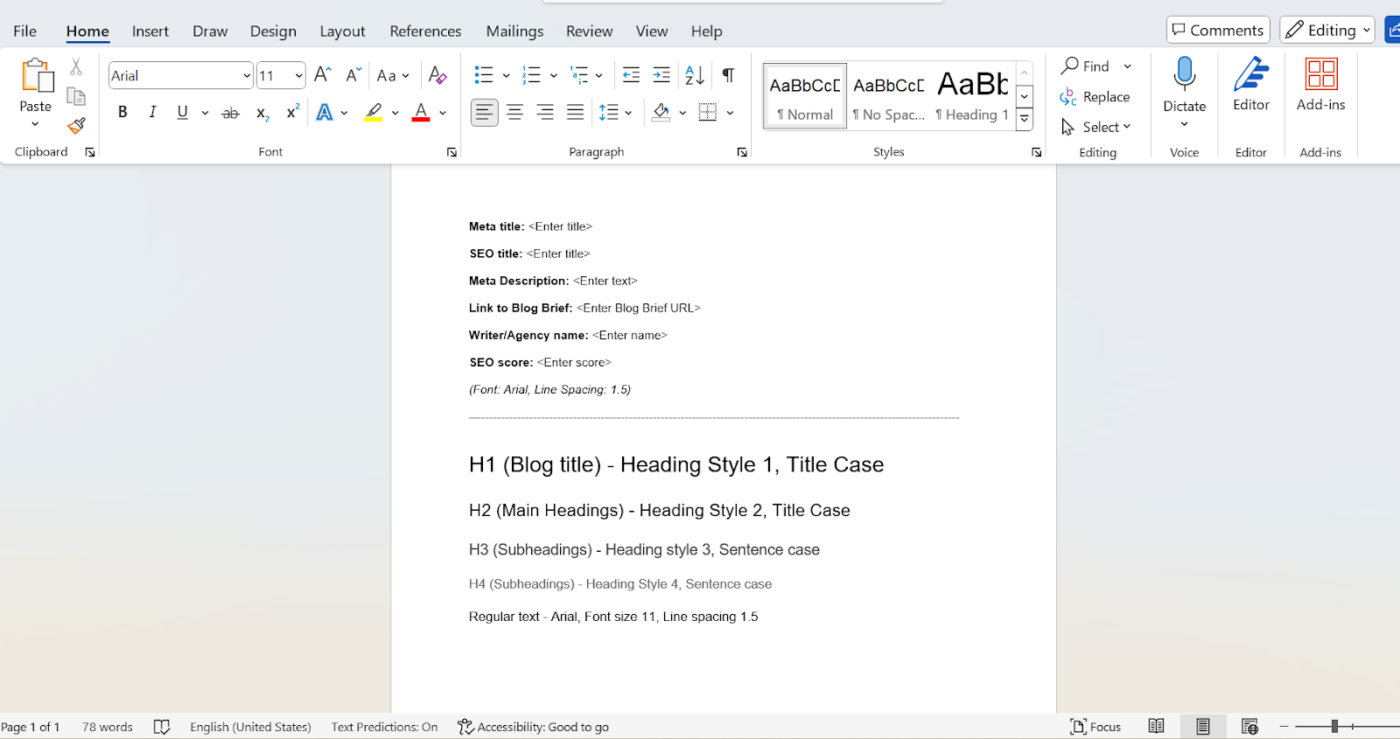
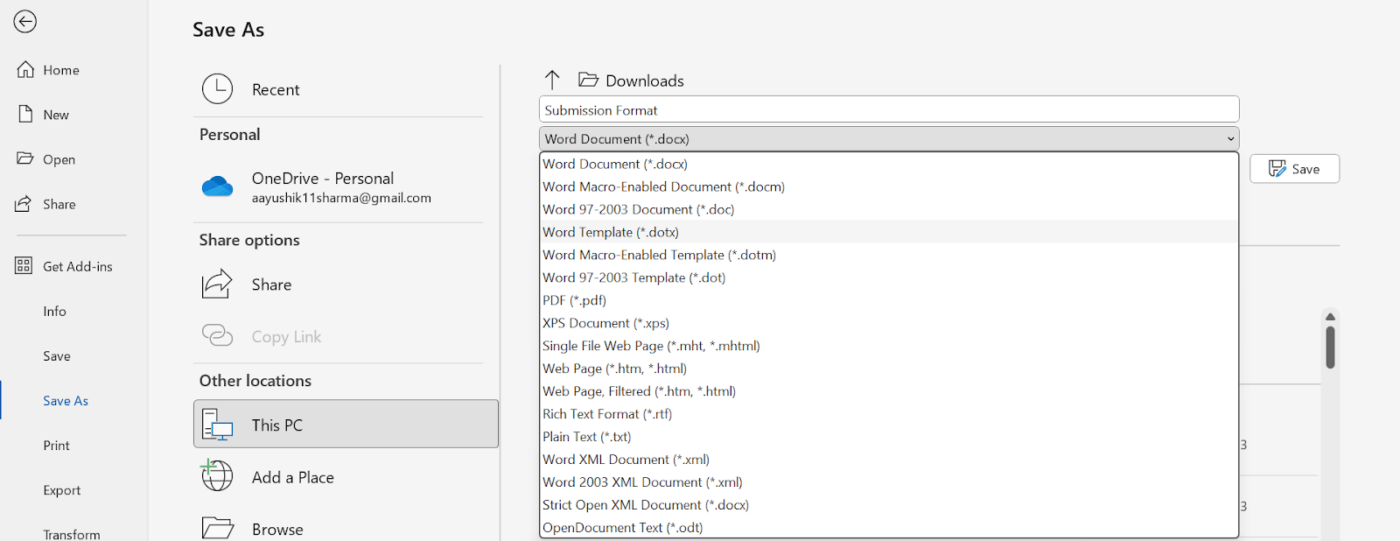
Go to File tab > Save As.

Select a location to store your template. Common locations include your computer’s Templates folder, OneDrive, or SharePoint.

Give your template a descriptive name and select Word Template from the Save As Type dropdown. This will ensure Word recognizes the template.
However, you should adjust the template as your needs or preferences evolve. You may need to add a new section, change the font, or update the company logo.
Here’s how you can edit your custom template to adapt it to your changing requirements:
🔹 Open the template
Go to File > Open and navigate to the location where you saved your template.
🔹 Make changes
Modify the template’s content, formatting, or other elements as needed.
🔹 Save your changes
Once you’re satisfied with the modifications, save the template. Any changes you make will be reflected in all future documents created from this template.
Keep these tips in mind for all your templates:
🎁Bonus: Check out these free mind map templates to get started!
While Word templates offer a convenient way to simplify document creation, they have certain limitations.
ClickUp makes template creation easier than Microsoft Word because Word templates can be rigid, hard to customize, and time-consuming to maintain—especially across evolving projects and teams.
Many Microsoft Word users face multiple limitations, such as a lack of customizability or insufficient template options. For example, many templates have rigid structures that require too many manual adjustments each time they are reused. Or, in some templates, you may find limited flexibility in organizing ideas, with fixed layouts that don’t accommodate complex thought processes or evolving projects.
These limitations can slow down processes and cause frustration, especially when managing multiple projects or personal tasks.
ClickUp is an all-in-one productivity and document collaboration software that addresses all these problems by offering extensive customizability, ease of use, and flexibility. ClickUp templates save time, improve workflows, and reduce the frustration of repeatedly adjusting settings, making project and work management smoother and more efficient.
Here’s how:
ClickUp allows you to customize documents to meet complex needs. You can create custom fields, automate processes, and integrate additional features beyond standard template options.
This flexibility allows for extensive modifications without manual adjustments or additional coding, making it easier to tailor documents to specific project requirements.
You can create dynamic content easily with ClickUp.
Instead of relying on basic data linking like Word, ClickUp integrates with various databases and tools through APIs and custom fields, enabling users to manage large datasets effectively.
Features like custom fields, automation, and task description templates support dynamic updates without the need for complex coding or macros.
Users can create tasks that automatically update based on changes in related data, improving workflow efficiency.
ClickUp provides a robust version control system that supports collaboration.
Unlike Word’s built-in tracking features, ClickUp offers a centralized platform where all team members can work together in real time. It includes a comprehensive history of changes, making it easy to revert to previous versions when needed.
The platform also allows task assignments and comments directly on documents or tasks, ensuring clear communication and conflict resolution among team members.
ClickUp is a cloud-based solution, meaning all users access the same version of the software, which avoids compatibility issues associated with different software versions. This consistency ensures that templates and documents are properly formatted for all users, regardless of their setups.
With ClickUp, organizations can standardize their workflows and templates, reducing the risk of errors arising from version discrepancies.
ClickUp provides customizable templates, allowing users to create, organize easily, and access templates within the platform.
Templates can be categorized and tagged for better organization, which helps reduce confusion and errors when selecting the right document format.
This organized approach to template management helps teams maintain consistency across projects while saving time on document creation.
You can even find specific templates like scope of work templates within these categories.
If you’re not ready to create a template from scratch, ClickUp Templates offers hundreds of ready-made options.
ClickUp has templates for creative and design projects, engineering and product teams, finance and accounting teams, HR and recruiting teams, IT teams, and more.
Finally, let’s compare template creation in ClickUp and Microsoft Word.
ClickUp is rated 4.7 on G2 and outperforms Word in over ten key parameters. This MS Word alternative offers a diverse suite of template creation options, ranging from simple task management structures to complex workflows and whiteboard templates.
| Feature | ClickUp | Microsoft Word |
| Collaboration | Real-time collaboration, multiple users can work simultaneously | Limited real-time collaboration. Sharing is possible but less efficient |
| Project management integration | Seamlessly integrates with project management features like tasks, Kanban boards, and Gantt charts | Templates are standalone documents, less integrated with project management |
| Customization | Highly customizable with custom fields, views, and automations | It offers some customization options but is less flexible |
| Version control | Robust version history and audit logs | Basic version control |
| Template usage | Templates can be directly linked to tasks, and you can use them to automate workflows | Templates are primarily used as standalone documents |
| Best suited for | Teams working on complex projects that require collaboration, automation, and integration | Individuals or small teams creating simple documents or templates |
We showed you how to create a Microsoft Word template from a blank new document. Let’s now see how to do the same in ClickUp.
Along with pre-created templates, ClickUp offers stellar template creation abilities that might surprise you. Read on to find more.
ClickUp helps you create templates faster by combining flexible, reusable docs with AI-assisted template generation—so you can standardize work without rebuilding formats from scratch.
ClickUp offers two powerful features that further enhance your ability to create templates: ClickUp Docs and ClickUp Brain.
ClickUp Docs can help you create document templates such as meeting notes, project charters, or SOPs.
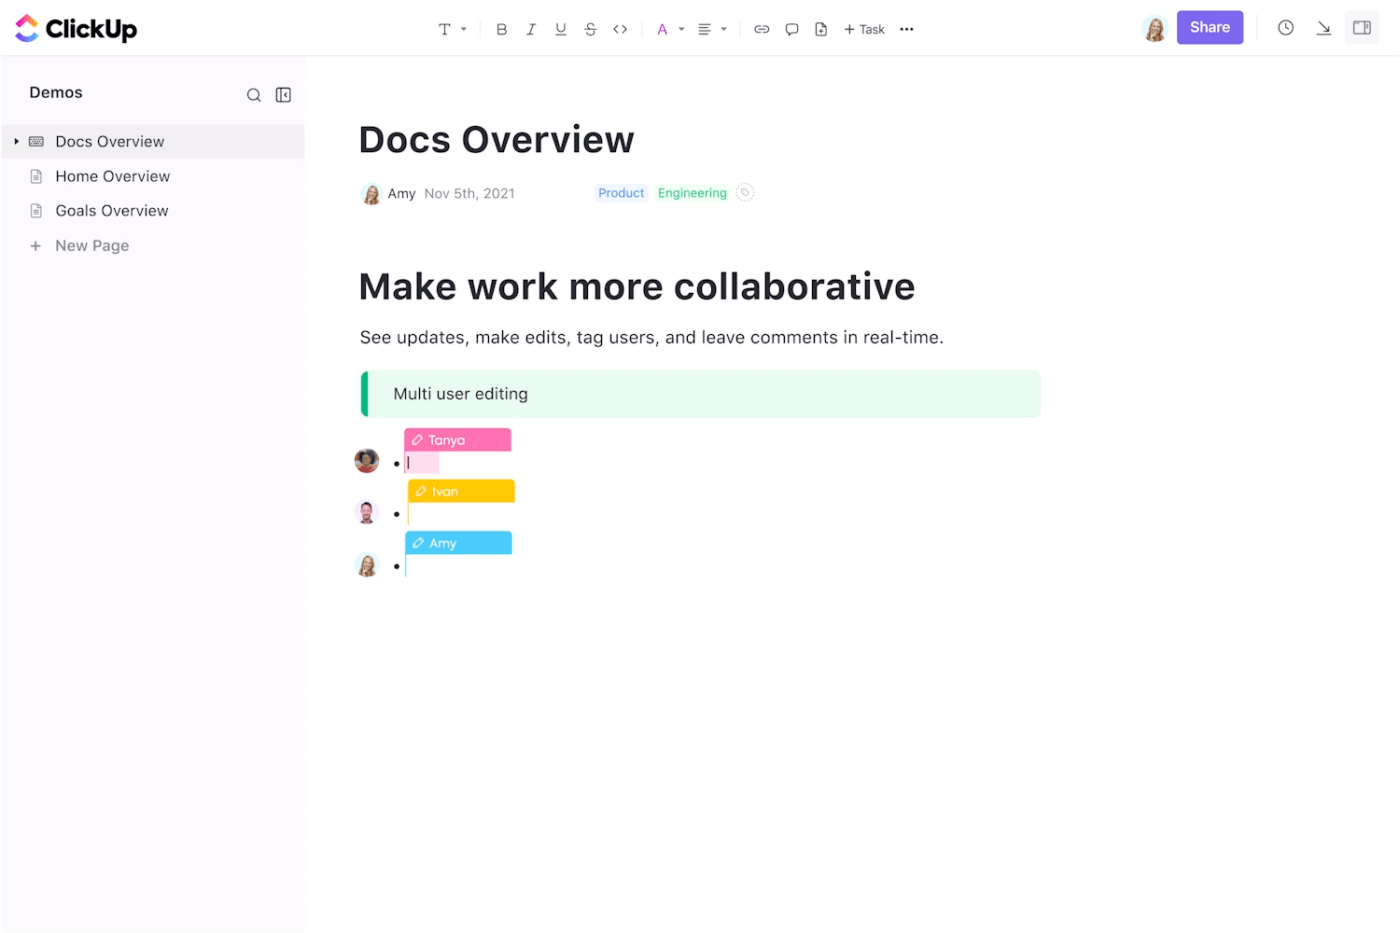
ClickUp Docs are highly customizable and you can link them to your tasks and projects. For example, you can create a project plan template within ClickUp Docs, which can be used across multiple teams or projects.
Docs is so good it makes me never want to use Word again for outlining process or taking notes.
ClickUp Brain is an AI-powered feature within the ClickUp platform designed to enhance task management and productivity through intelligent automation. This AI-powered writer helps you generate custom templates for any task, whether managing projects, drafting documentation, or organizing creative workflows.
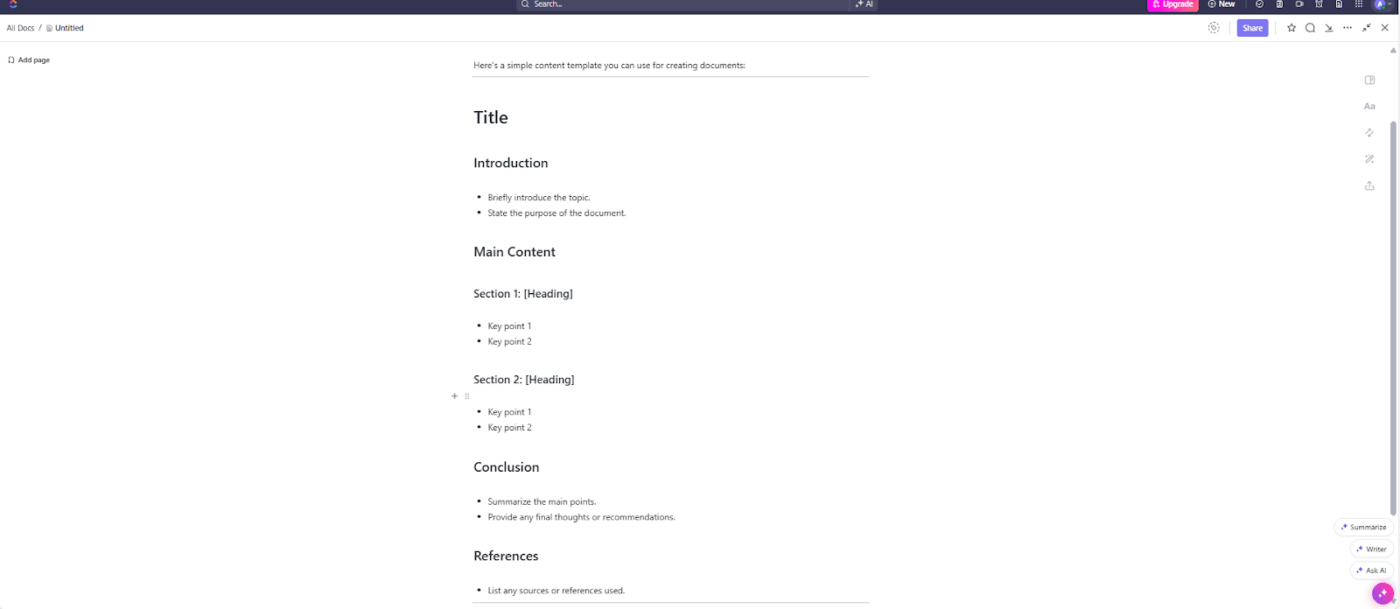
By understanding your specific needs through natural language processing, ClickUp Brain tailors templates that fit your requirements, ensuring consistency and reducing manual effort.
If you want to standardize repeatable work in ClickUp, you can turn a task, doc, list, or even a whole space into a reusable template in just a few steps.
Here’s how you can easily create a template within ClickUp:
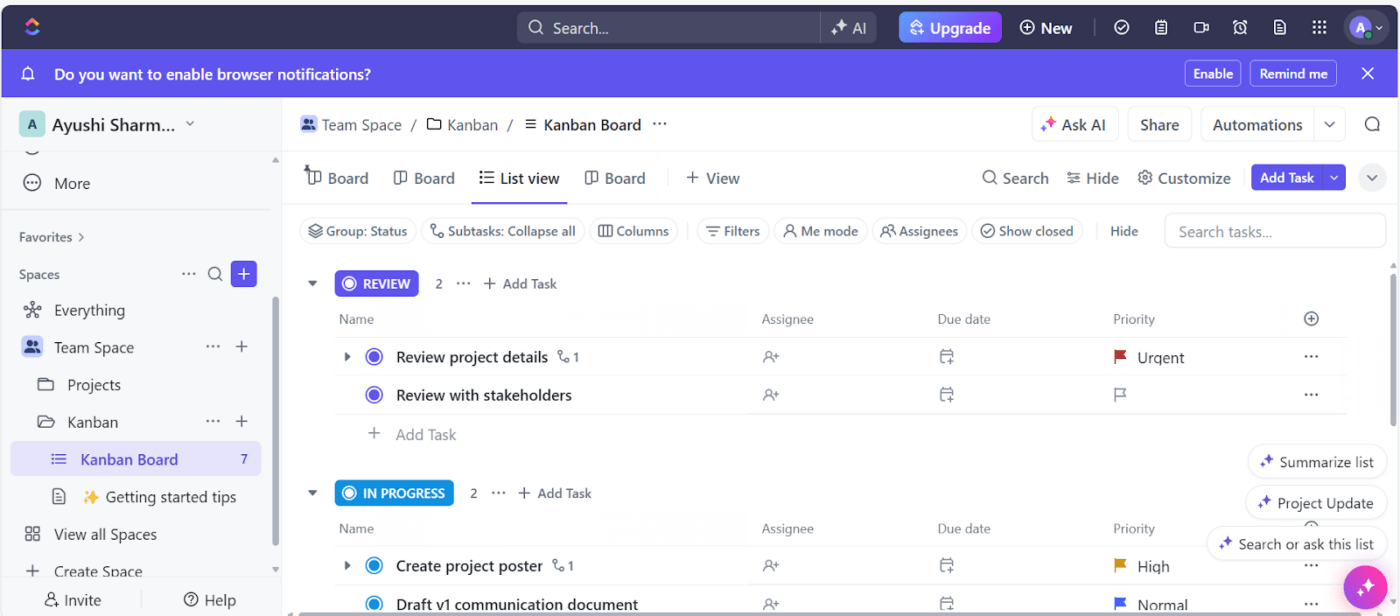

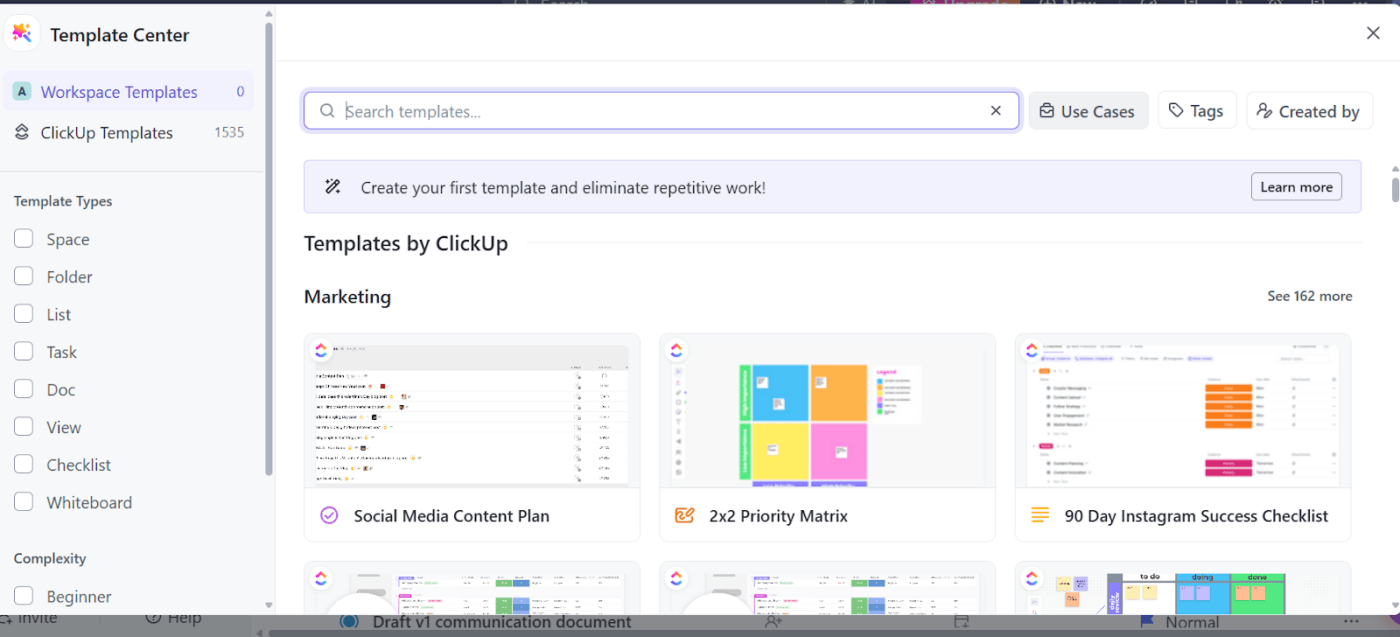
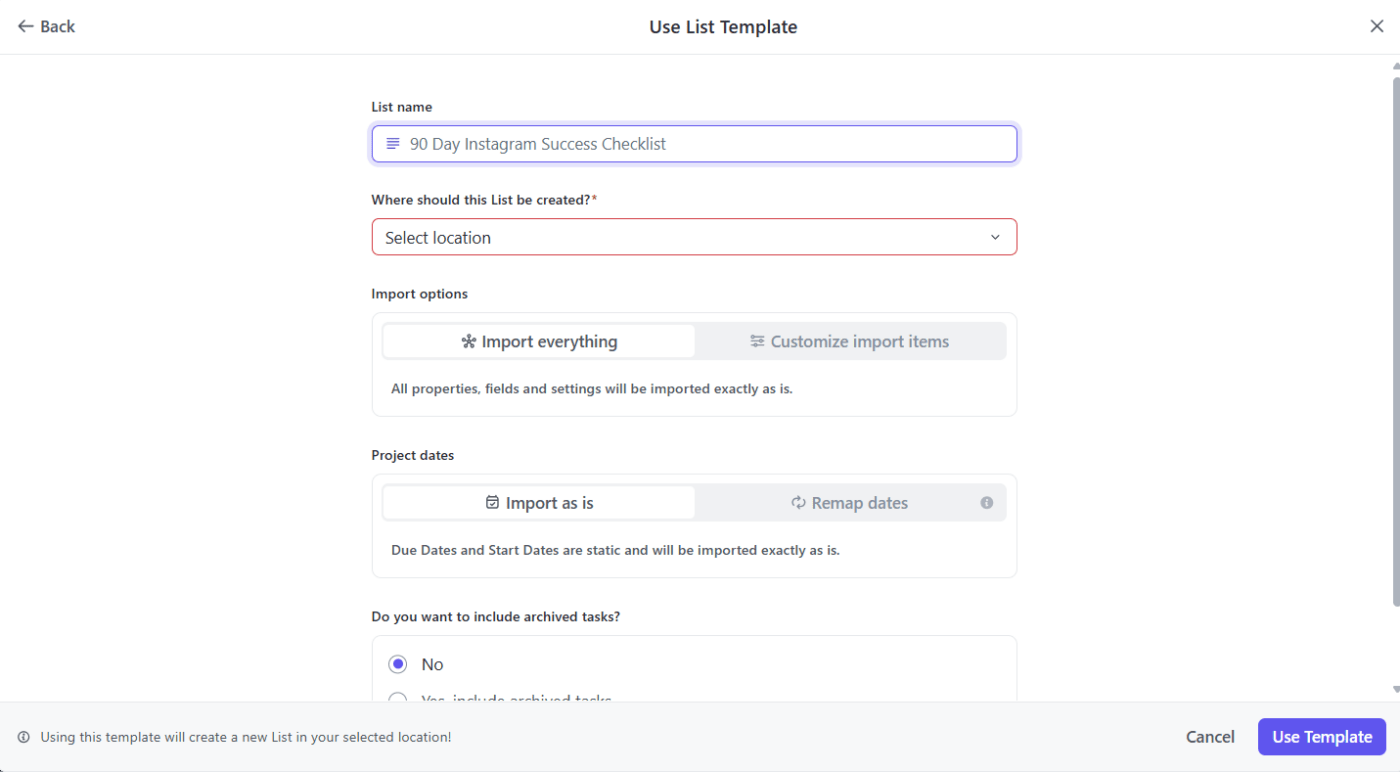
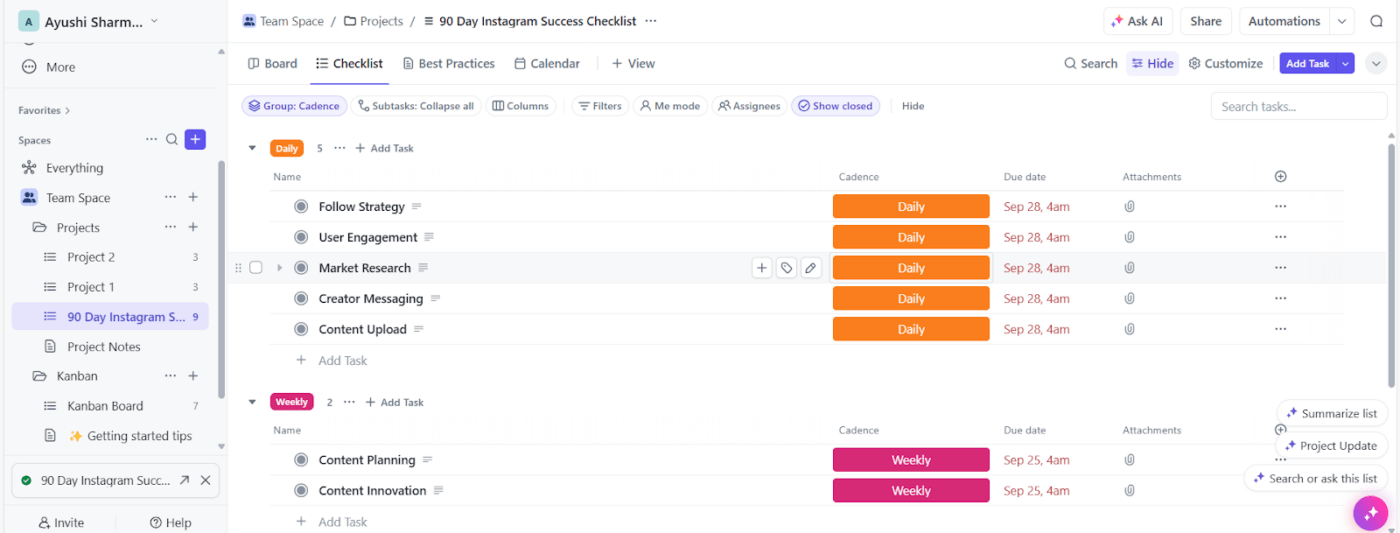
Note: Why reinvent the wheel? ClickUp already features a humongous library of templates—hundreds of them. Before you create one, check out what’s already available. You might find exactly what you were looking for.
Templates can help you maintain consistency, efficiency, and productivity, but only if you can overcome traditional template management’s clunky interface.
While Microsoft Word has been a staple in document creation for decades, its template management capabilities can feel outdated to some in today’s fast-paced, collaborative work environments.
With its template bank, intuitive interface, and seamless team collaboration, ClickUp can change how you create, manage, and share templates. It also ensures your templates are always accessible, easily customizable, and effortlessly shared with your team.
Give ClickUp a try and experience the difference for yourself.
© 2026 ClickUp