


Still downloading templates?
There’s an easier way. Try a free AI Agent in ClickUp that actually does the work for you—set up in minutes, save hours every week.
Sorry, there were no results found for “”
Sorry, there were no results found for “”
Sorry, there were no results found for “”

The meeting just ended, and you realize you missed a crucial detail. Maybe it was a key decision, an insightful comment, or an action item.
You message your peer immediately, ‘Did you catch that?’ But they have no idea what you’re talking about.
Recording audio on Zoom can prevent these frustrating moments in a critical client discussion, a fast-paced lecture, or a brainstorming session full of ideas.
Let’s learn how to record audio on Zoom effectively. 🎯
Zoom recordings allow users to capture meetings for future reference, enabling easy review, documentation, and collaboration.
Depending on your needs, you can choose between local and cloud Zoom meeting recordings. Let’s break down what each recording type offers and how to pick the best one. 📄
This is the go-to option to save recordings directly to your computer. It’s available on all Zoom accounts and keeps your files within reach—no internet is required after the meeting.
Here are the file formats it saves your recordings in:
Here’s why you might like it:
❌ Some drawbacks of this method are:
🔍 Did You Know? The term ‘Zoom fatigue’ entered popular vocabulary and has even been recognized in dictionaries. It describes the tiredness people feel after prolonged video calls.
If you have a paid Zoom plan, cloud recording saves your files to Zoom’s servers instead of your computer. You can access them from anywhere, share them easily, and avoid cluttering your hard drive.
Here are the file formats it saves your recordings in:
Here’s why to try it:
❌ Cloud recording is a convenient option, but it has a few drawbacks
🧠 Fun Fact: Zoom has a set of reactions, like clapping and thumbs up, but many users don’t know there’s also a hidden set of emojis in the chat feature. These can be activated using simple Zoom shortcuts like typing ‘:)’ or ‘:D.’
📖 Also Read: Best AI Screen Recorders: A Professional’s Guide
Now that you know your recording options, let’s get into the how. Whether you’re using local or cloud recording, setting it up is straightforward—as long as you know where to look.
Here’s a step-by-step guide to using the screen recording software. 📽️
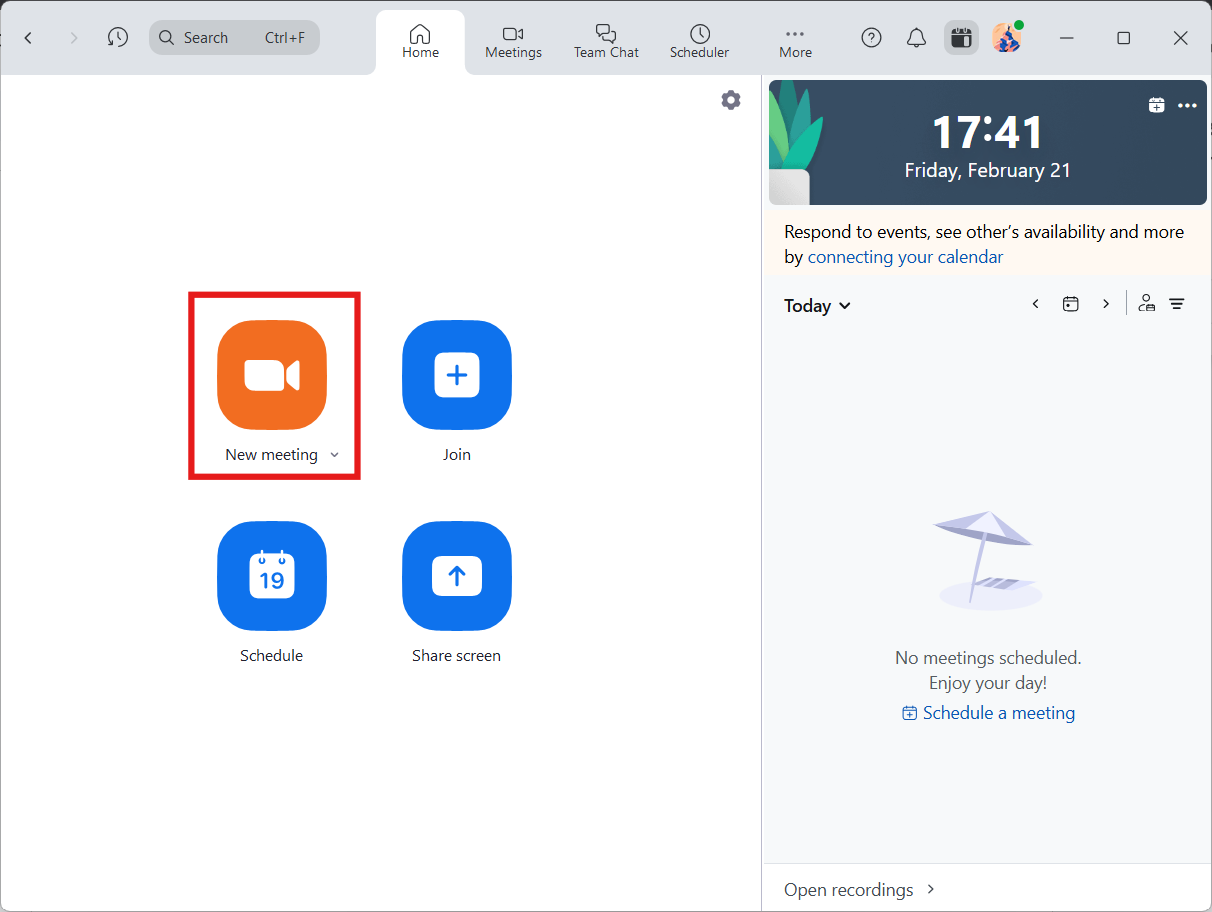
Launch the Zoom application on your computer or mobile device and log into it if you haven’t already.
Click New Meeting to start a session right away. If you’re planning, hit Schedule, fill in the details, and lock in your meeting time.
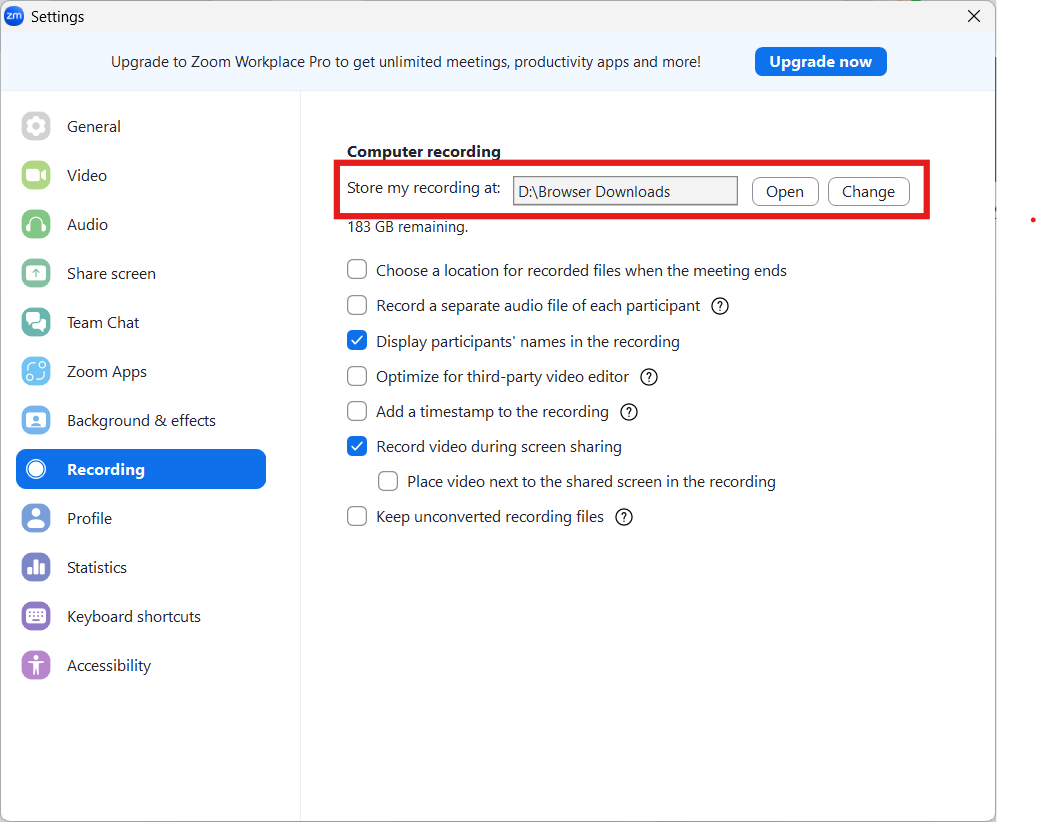
Before your meeting starts, click on your profile picture in Zoom and head to Settings. Select where to save your local recordings in the Recording tab.
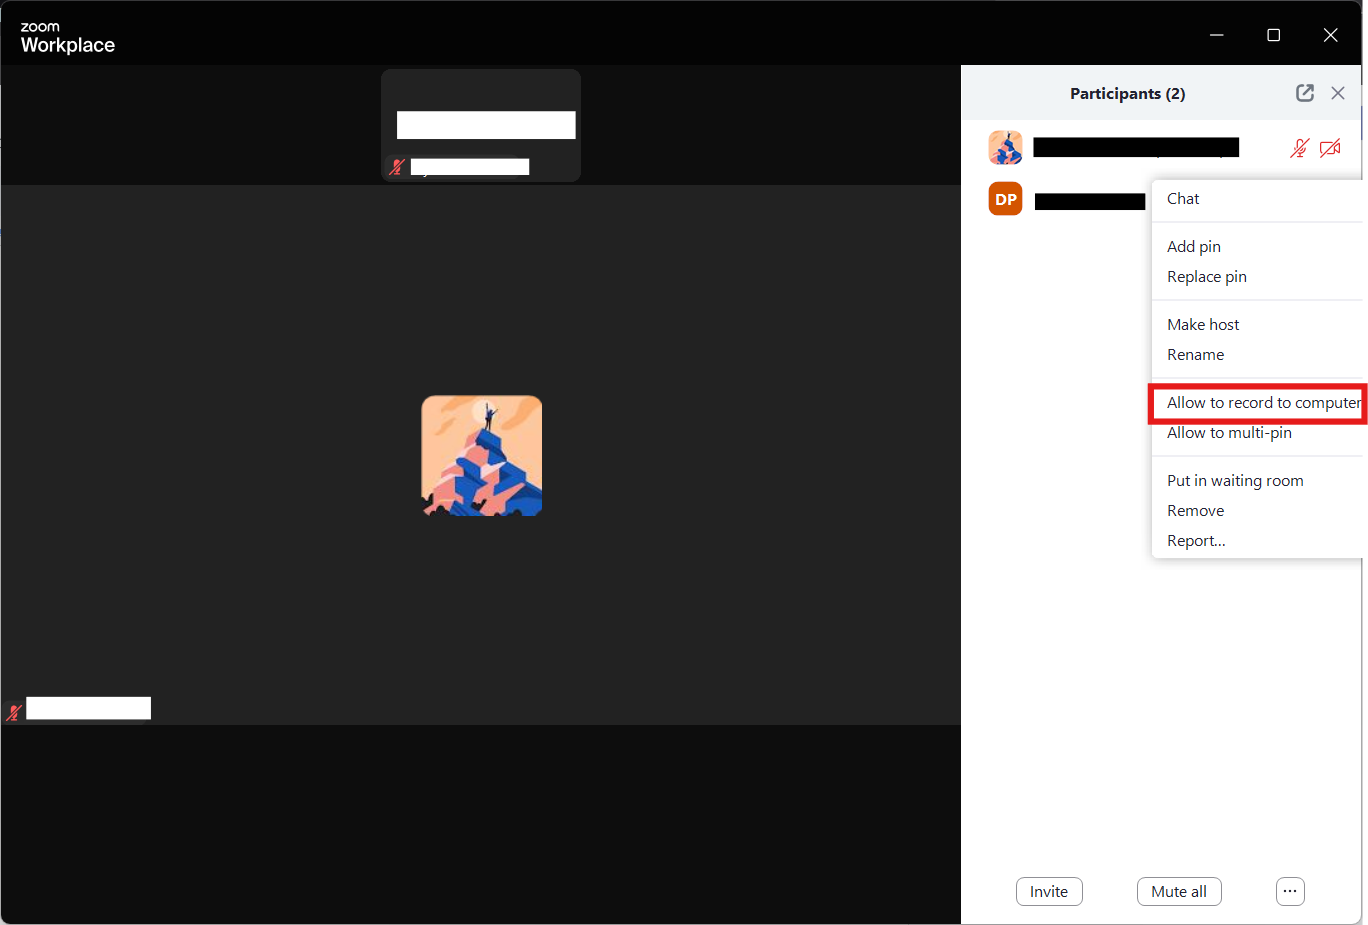
If you’re the host, you’re all set to record. But if someone else needs to record, you must give them access. Just click Participants, hover over their name, click More, and select Allow to Record Local Files.
🔍 Did You Know? Zoom was founded in 2011 by Eric Yuan, who previously worked as an engineer at Cisco Webex. Yuan wanted to create a video conferencing tool that was simpler and more user-friendly than what existed.
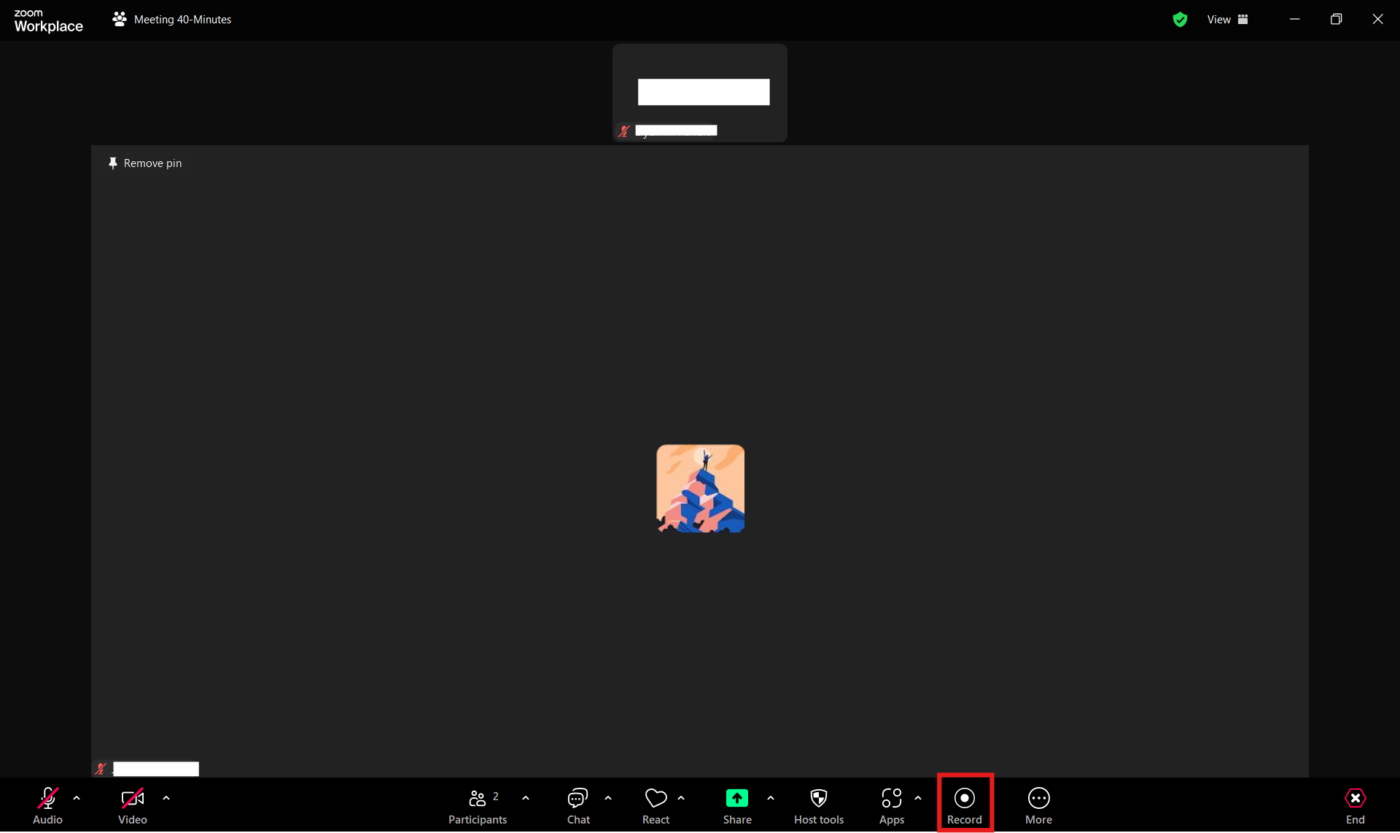
Once your meeting begins, click the Record button in the toolbar at the bottom of your screen. Zoom may ask if you prefer recording locally or in the cloud.
Pick Record on this Computer if you want to save it locally.
💡 Pro Tip: Use shortcut keys, like Alt + R, to start/stop recording and streamline meeting management.
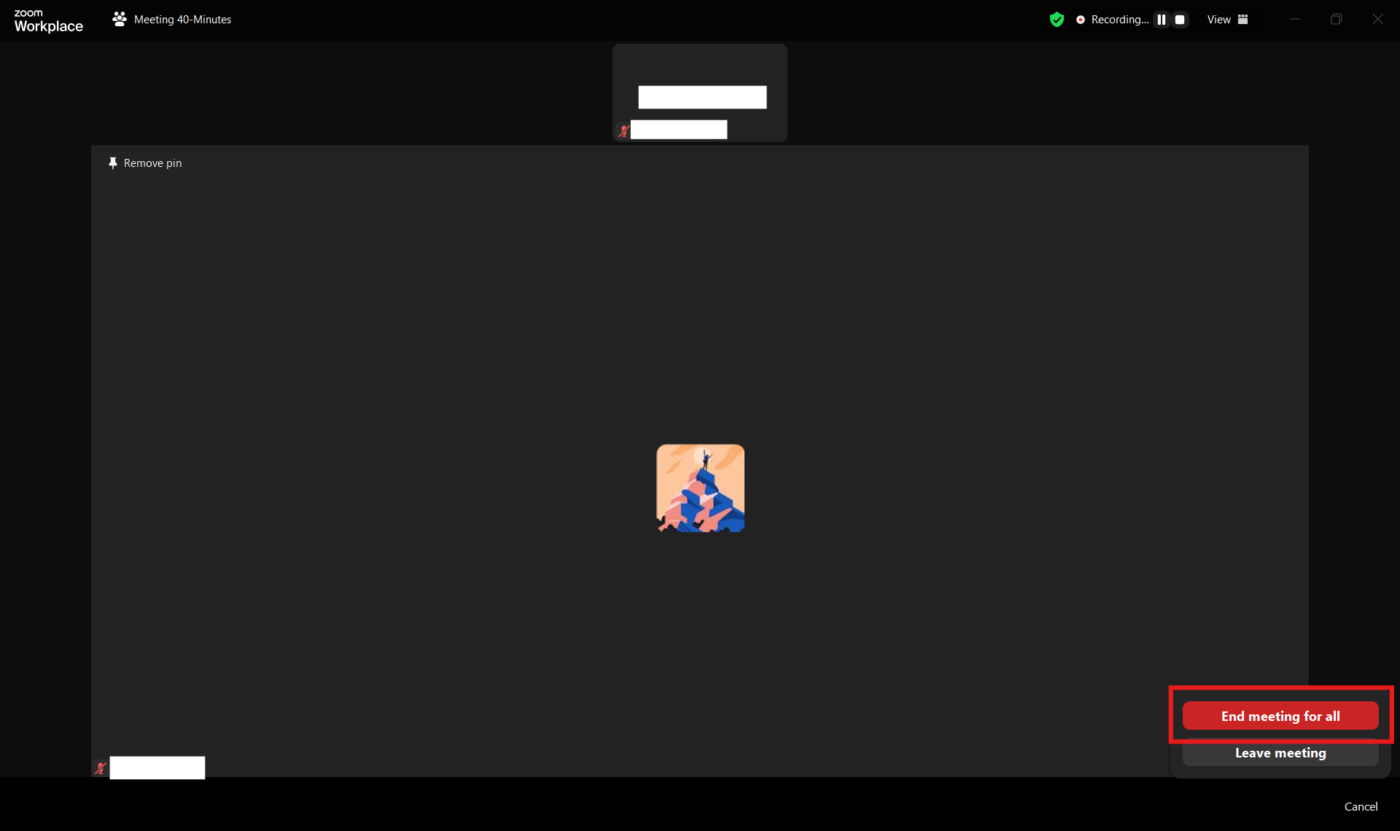
Once your meeting is over, simply click End Meeting, and Zoom will automatically start processing your recording.
If you choose local recording, your file will be saved directly to your computer.
On Windows, you’ll typically find it in the Documents > Zoom folder, while Mac users can check /Users/[YourName]/Documents/Zoom.
If you opt for cloud recording, your file won’t be on your device. Instead, log into the Zoom web portal and navigate to the Recordings section to access and manage your saved meetings. Either way, your recording will be ready whenever you need it.

🧠 Fun Fact: The Guinness World Record for the largest Zoom meeting ever was set in July 2024, with over 20,000 participants joining a single call for an online event.
💡Pro Tip: Organize your files with a structured folder system and naming conventions. It’s also a good idea to back up important files to external storage or another cloud service for security.
Once your recording is processed, you can find the local file in the location mentioned earlier.
If you need to make adjustments, use file-sharing software to export the audio and edit it with software like Audacity or an online tool to clean up the recording.
Simply import the audio file, trim out any unnecessary parts, enhance the sound quality, or make any other necessary modifications. When you’re happy with the edits, save the file in your preferred format and location. Now, your recording is polished and ready to use.
🤝 Friendly Reminder: Communicate recording policies to participants for transparency and compliance. Clearly outline how the recordings will be used, who will have access and any security measures to protect the content. Organizations should consider implementing a standardized recording policy to ensure adherence to privacy regulations.
📖 Also Read: How To Get Sound On Screen Recording
A recording isn’t much use if you can’t find it when you need it. Whether you’re organizing files for future reference, sharing them with your team, or uploading them for easy access, keeping your recordings well-managed saves time and frustration.
Let’s go over how to store, share, and make the most of your Zoom audio files. 💁
Keeping your recordings organized makes them easier to work with. Zoom allows you to:
If your recording is saved to the cloud, Zoom offers a built-in trimming tool:
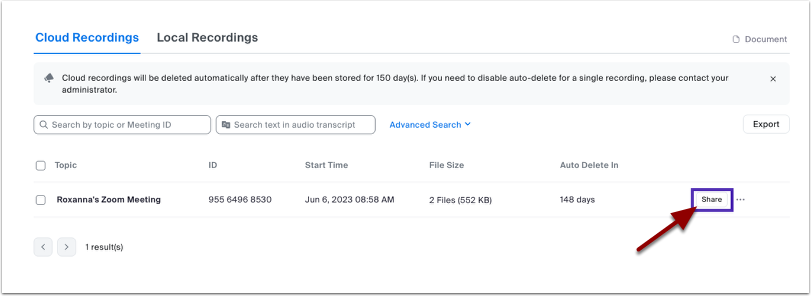
Need to send a recording to colleagues or clients? Sharing a screen recording is simple:
📖 Also Read: How to Screen Record on Mac with Audio Effortlessly
Nothing’s worse than realizing your important meeting didn’t record properly (or at all). Recording issues can pop up when you least expect them, from missing files to audio glitches.
The good news? Most problems have simple fixes. Here’s how to troubleshoot the most common Zoom recording hiccups. 📹
💡 Pro Tip: If issues arise mid-meeting, pause the recording while you fix the problem to avoid disruptions. You must also keep your Zoom app current to ensure you have the latest bug fixes and improvements.
Zoom’s recording feature is great, but it’s not perfect. There are storage limits, permission restrictions, and a few quirks that might make you want to use a Zoom alternative.
Before relying on it for all your audio recording needs, it’s worth knowing where it falls short. 👀
🧠 Fun Fact: Thomas Edison invented the phonograph in 1877, marking the first time audio could be recorded and played back. His first recorded words were, ‘Mary had a little lamb.’
ClickUp is the everything app for work that combines project management, documents, and team communication, all in one platform—accelerated by next-generation AI automation and search.
ClickUp tools like ClickUp Clips and ClickUp AI Notetaker make it easy to record, transcribe, and manage audio for collaboration and productivity.
Let’s look at some ClickUp features to record and manage audio. 🎤
ClickUp Clips makes communication faster, clearer, and more engaging. Simply record your screen, voice, or both to explain ideas, give feedback, or share updates.
No more misunderstandings, just effective communication with ClickUp Clip Screen Recordings.
What makes Clips stand out? It’s built right into ClickUp, meaning you can record, attach videos to tasks, and keep everything organized in one place without needing external tools like Loom.
For instance, educators can create bite-sized lesson recaps, answer student questions with video responses, or give assignment feedback. They can then use AI for meeting notes.
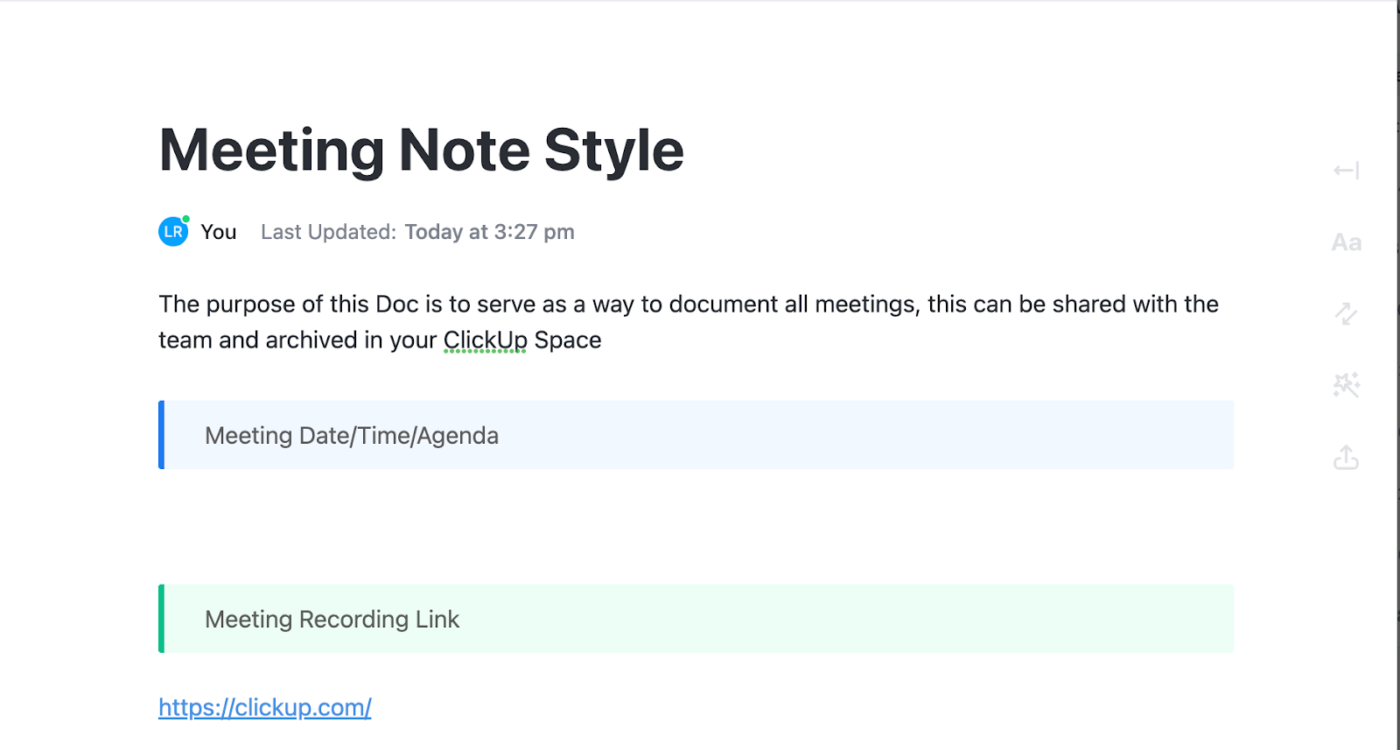
It’s also convenient to keep your team discussions on track with meeting guidelines using the ClickUp Meeting Notes Template.
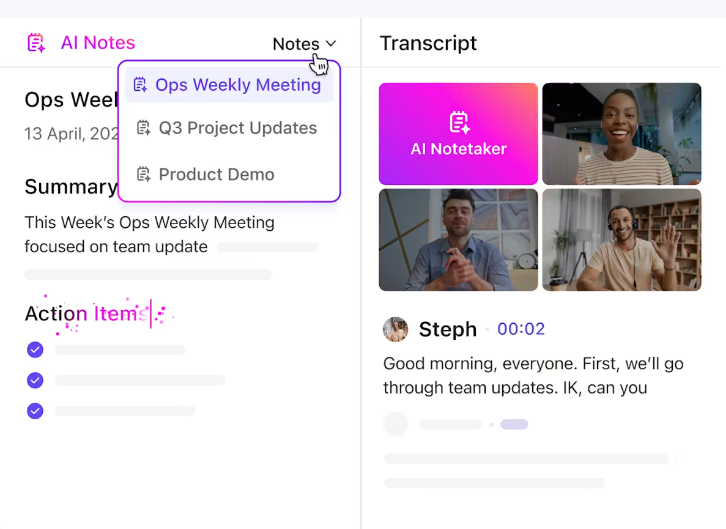
Tired of scrambling to take notes while trying to stay engaged in meetings? The ClickUp AI Notetaker has your back.
This AI-powered tool automatically records, transcribes, and summarizes discussions so you can focus on the conversation instead of jotting things down. It even identifies action items and turns them into ClickUp Tasks, ensuring you don’t miss anything.
Need a quick recap? ClickUp Brain summarizes transcripts, pulls key insights, and even answers questions based on your project data so you don’t waste time digging through notes.
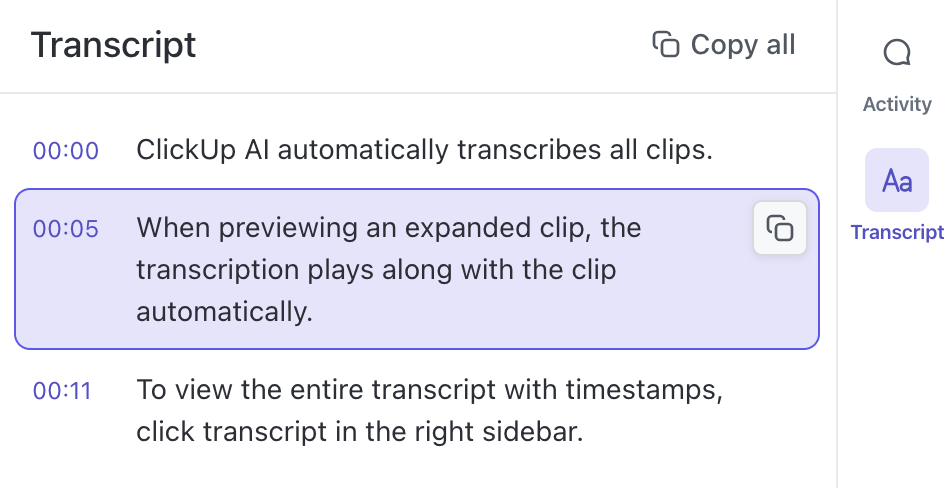
For instance, you can record classroom discussions or online lessons and then let the AI transcription tool transcribe and summarize them.
ClickUp Meetings makes team collaboration effortless, integrating meeting management directly into your workflow. It brings meeting agendas, notes, action items, and follow-ups into one centralized platform.
Plus, ClickUp Integrations seamlessly connects you with video conferencing tools like Microsoft Teams and Google Meet, allowing users to schedule, join, and track meetings directly within the platform. Don’t want to switch platforms?
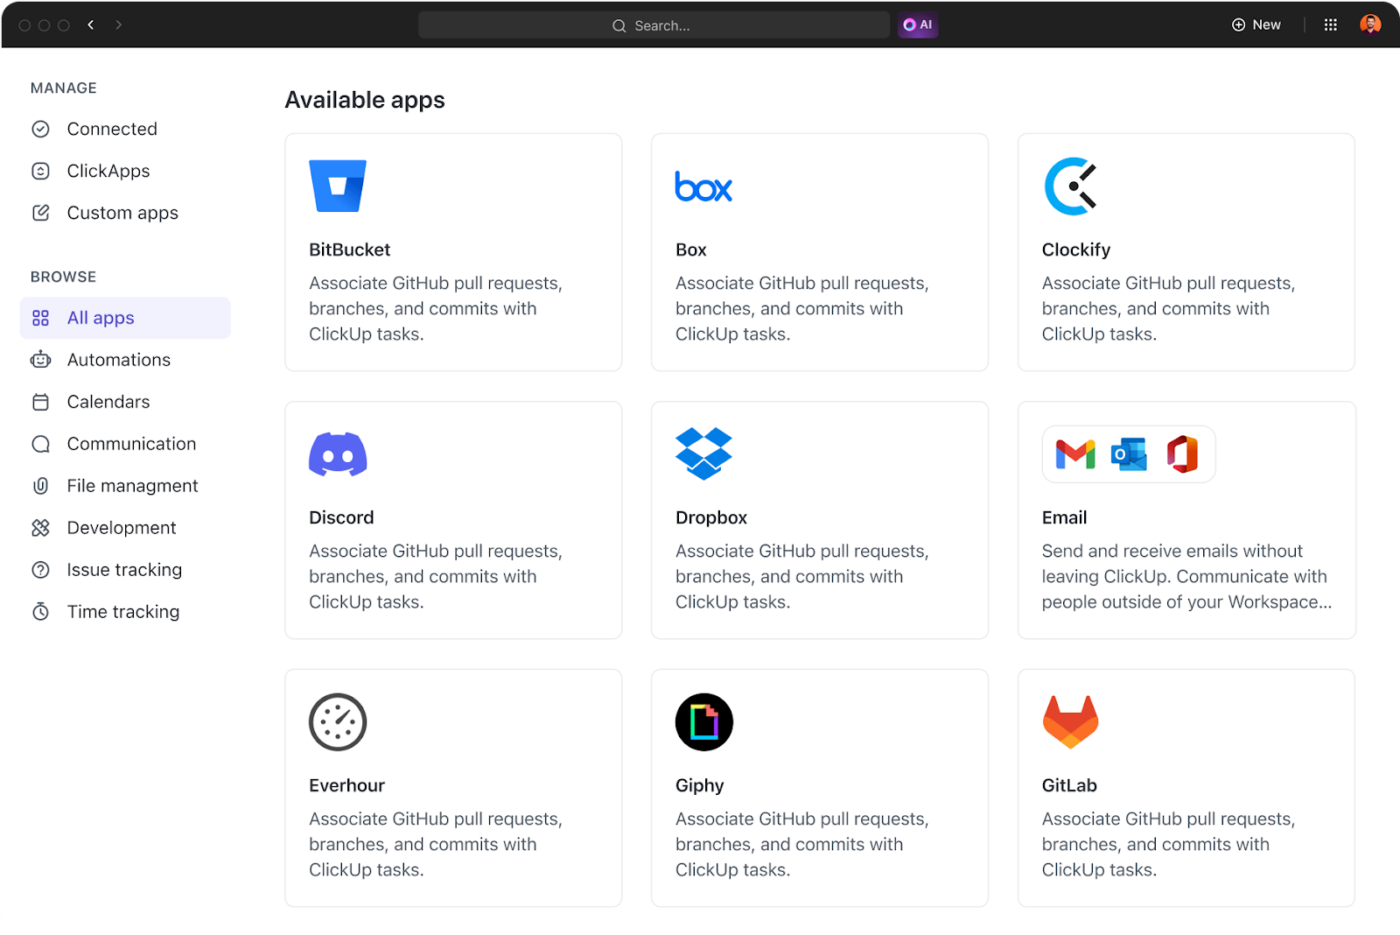
ClickUp Zoom Integration helps you take notes on the platform.
💡 Pro Tip: Try the ClickUp Meetings Template, which makes running productive meetings a breeze. It has pre-built structures for organizing tasks, tracking goals, and collaborating seamlessly.
Recording audio on Zoom gets the job done, but let’s be honest—it’s not the most flexible or efficient solution. Limited controls, storage constraints, and quality issues can turn a simple task into a frustrating experience.
If you’re looking for a smarter way to capture, organize, and actually use your meeting recordings, ClickUp has your back.
With ClickUp Clips, you can instantly record, share, and store audio and video files without downloading them. ClickUp Brain takes it further by converting your recordings into searchable transcripts, actionable insights, and smarter workflows.
What’s more, the ClickUp AI Notetaker automatically captures your meetings, ensuring nothing gets missed.
Sign up to ClickUp for free today! ✅

© 2026 ClickUp

There’s an easier way. Try a free AI Agent in ClickUp that actually does the work for you—set up in minutes, save hours every week.