

You lead the marketing team at a digital agency, and you’ve just rolled out a new onboarding process for eCommerce clients. It’s detailed and involves multiple steps, from initial contact to final approval, with key decision points along the way.
Instead of overwhelming your team with a long explanation or a bullet-point list, you decide to illustrate the process with a flowchart in PowerPoint.
Your process flow diagram is immaculate. The entire process is clearly laid out in neatly labeled steps, and your team members find it simple and easy to understand and implement.
This is the true power of PowerPoint—going beyond slides to create visuals that communicate complex ideas simply.
Did you know that 37.15% of people use PowerPoint for work or personal projects? Its versatility makes it the ideal tool for creating engaging visuals like flowcharts.
In this guide, we’ll show you how to create effective flowcharts in PowerPoint, helping you turn a complex process into a clear, easy-to-follow diagram.
Let’s start making better flowcharts.
How to Create a Flowchart in PowerPoint (Templates & Examples)
How to Make a Flowchart in PowerPoint
PowerPoint offers you two main ways to create flowcharts: using a SmartArt Flowchart or working with the PowerPoint Shape Library.
We’ll walk you through both methods so you can choose the one that works best for you.
Method 1: The quick and easy way with a SmartArt Flowchart

SmartArt flowchart is a pre-made collection of shapes that serve as basic, fixed diagram templates. It’s ideal for creating a quick and simple diagram but may not be suitable for more complex flowchart options.
Step 1: Open PowerPoint and navigate to the slide where you want to add your diagram

Step 2: Click the Insert tab in the top menu

Step 3: Click SmartArt from the options

Step 4: Hover over Process in the dropdown list to see various flowchart options

Step 5: Click your preferred PowerPoint flowchart template style to insert it into your slide

How to add text and shapes to your flowchart
- To add text to the existing shape in your SmartArt graphic, simply click the center of each shape outline and start typing
- To add new shapes, select the entire SmartArt graphic and click Add Shape in the toolbar’s upper left corner
- To rearrange all the necessary shapes, click and drag them. The connecting arrows will automatically adjust
How to customize your flowchart
- With your SmartArt graphic selected, two new tabs will appear in the toolbar: SmartArt Design and Format (or the Shape Format tab)
- The SmartArt Design tab allows you to change the diagram type, choose from preset color schemes, and add shapes
- The Format tab offers more specific customizations, including individual shape outlines, text color, shape color, text boxes, and font options
Pros and cons of using SmartArt Flowchart
Pros
- Quick and easy to use
- Automatically adjusts layout and connections
- Comes with pre-designed styles
Cons
- Limited customization options
- Can be restrictive for complex flowcharts
- May not suit all types of flowcharts
Method 2: The flexible way with the PowerPoint Shape Library
While this method requires more manual work, it offers greater flexibility and lets you create standard flowcharts with process and decision boxes.
Here’s how it works:
Step 1: Go to the Insert tab and click Shapes

Step 2: Scroll down to the Flowchart section in the dropdown menu

Step 3: Select the shape you need (e.g., process box, decision diamond, oval shape)
Step 4: Click and drag on your slide to draw the shape

Step 5: Repeat this process to add all the necessary shapes to your flowchart

💡 Pro Tip: To save time when creating flowcharts in PowerPoint, add a shape that you’ll use multiple times, then copy-paste it as needed.
How to add connecting lines
Before you can complete your flowchart, you’ll need to connect the shapes to show the flow of steps or decisions.
Step 1: Return to the Insert tab and click on Shapes

Step 2: In the Lines section, choose the line type you prefer

Step 3: Click and drag from one shape to another to draw a connecting line

Step 4: Repeat this process to connect all your shapes in the proper sequence

How to label your shapes and lines
- To add text to a shape, select it and start typing
- To label connecting lines, you’ll need to use text boxes. Go to Insert > Text Box
- To draw a text box near the line you want to label, click and drag, then type your text
How to customize your flowchart
- Double-click any shape or line to open the format shape pane
- Edit visual elements such as colors, line weight, opacity, etc. here
- Experiment with different styles to create a cohesive and visually appealing flowchart
Pros and cons of using the Shape Library
Pros
- Greater flexibility and control over design
- Ability to create complex diagrams and customized flowcharts
- Capability to produce any type of flowchart
Cons
- More time-consuming than SmartArt
- Requires manual adjustment of connections
- May be overwhelming for beginners
Expert tips for crafting the perfect PowerPoint flowchart
Now that you know how to create a flowchart in PowerPoint, here are some expert tips for you to design effective flowcharts:
- Keep it simple: Aim for 7–10 blocks in a single flowchart
- Go with the flow: Stick to a consistent direction, usually top-to-bottom or left-to-right. It’s how most people naturally read
- Use color wisely: A pop of color can highlight important steps but stay moderate. Stick to 3–4 complementary colors for a clean, professional look
- Connect the dots: Use elbow connectors instead of straight lines when connecting blocks across different levels. It’ll keep things easy to follow in the process
- Line it up: Use PowerPoint’s alignment and distribution tools to keep everything tidy. A well-organized PowerPoint flowchart is easier to understand and more aesthetically pleasing
- Be consistent with symbols: Use the same shapes for actions or decisions throughout your flowchart. It’ll help your audience follow along more quickly
- Keep text short and sweet: Stick to short keywords or phrases in your flowchart blocks. If you need more detail, consider adding notes or a separate document
- Use white space effectively: Leave some breathing room between elements to make it easier to read
Limitations of Making a Flowchart in PowerPoint
While PowerPoint is a versatile tool for creating flowcharts, it does have some limitations:
- Limited connectivity options: PowerPoint’s connectors can be hard to use. Sometimes they don’t attach correctly to other shapes or need manual adjustments when shapes are moved
- Lack of advanced flowchart shapes: While PowerPoint offers basic diagram shapes, it lacks some of the more specialized symbols found in dedicated flowchart software
- Limited collaboration features: Real-time collaboration on PowerPoint flowcharts can be challenging, especially when compared to cloud-based alternatives
- Version control issues: Keeping track of different versions of a flow chart can be problematic, particularly in team environments where multiple people may make changes
- Export limitations: Exporting flowcharts from PowerPoint to other formats or platforms may result in loss of formatting or interactivity
Alternative to PowerPoint for Creating Flowcharts
While PowerPoint remains popular for designing flowcharts, modern workplace productivity tools offer more robust and flexible solutions. These tools are part of a broader trend toward visual project management, which can significantly enhance team collaboration and project clarity.
ClickUp, an all-in-one productivity and project management tool, has some incredibly effective flowchart tools, starting with ClickUp Whiteboards.
ClickUp Whiteboards: A Superior Flowchart Solution
ClickUp’s Whiteboards provide a dynamic, collaborative space for creating flowcharts and other visual diagrams. It bridges the gap between ideation and execution by offering a space for teams to visualize concepts and turn them into coordinated actions within the ClickUp platform. Here’s how:
- Intuitive: Add shapes, connect them, and move things around easily
- Real-time collaboration: Work on your flowchart with your team, no matter where they are
- Infinite canvas: Avoid cramming everything onto one PowerPoint slide
- Integration with tasks: Link your flowchart directly to your project tasks
- Version history: Track changes easily and revert if needed
- Free templates: Start with a pre-made diagram and customize these free templates to your needs. Check out this data flow diagram template by ClickUp for a quick start
- Easy sharing: Share your flow chart with a simple link
- Workflow automation: Automate the workflow to simplify your processes

Here are some top features of this tool:
- Drag-and-drop interface: Easily create flowcharts by dragging and dropping shapes and connectors onto a zoomable canvas, allowing for intuitive design and arrangement of flowchart elements
- Customizable elements: You can customize shapes, colors, and text within the flowchart. This flexibility allows you to create visually appealing and informative diagrams that suit your specific needs
- Collaboration tools: Have multiple team members work on the same whiteboard simultaneously, making it easy to brainstorm and refine flowchart ideas in real time
- Integration with tasks: Link the flowchart elements to tasks and convert ideas and steps directly into actionable tasks. This integration helps streamline project management by connecting visual planning with task execution
Also Read: 10 Free Data Flow Diagram Templates
Here’s how to use ClickUp Whiteboards to create superlative flowcharts:
How to add a whiteboard
Step 1: Click the + View button at the top of your desired location in ClickUp

Step 2: Select Whiteboards from the options

Step 3: Choose the pre-designed Flow Chart Template or Start from Scratch

Step 4: And there you have it, your whiteboard is ready!

How to navigate the whiteboard
- Use the hand tool (press the M key) to move around the canvas without selecting objects
- Press the V key to switch back to the cursor for adding and manipulating objects
- Zoom in and out using pinch gestures on a trackpad or the plus and minus icons
How to create flowchart elements
- Use the shape tool in the left toolbar to add various diagram shapes
- Click the connector tool to draw lines between shapes, creating the flow of your diagram
- Add sticky notes for additional information or annotations
How to customize your flowchart
- Click any shape or connector to access the object menu for customization options
- Change colors, styles, and sizes to create a visually appealing and clear flowchart
Check out the handy tutorial below for all you need to know about ClickUp Whiteboards.
ClickUp Mind Maps: Rapid Flowchart Creation
For quicker, more informal diagram creation, ClickUp Mind Maps offers an intuitive solution. It allows you to visually represent tasks and concepts, making it easier to brainstorm (alone or with a team) and manage and organize information.
Its key functionalities include:
- Visual representation: Illustrate complex projects simply through mind maps
- Editing capabilities: Edit, delete, or reorganize ideas as needed
- Cascading views: Connect related ideas and tasks efficiently in a simplified manner
- Advanced sorting options: Sort ideas and tasks based on various criteria
- Custom colors: Personalize mind maps with colors for better visual distinction
- Collaboration: Share mind maps with team members for easy collaboration
Overall, ClickUp’s Mind Maps enhance productivity by making project management more intuitive and visually engaging.
How to create mind maps
Step 1: Select any space, folder, or a list of tasks you want to visualize

Step 2: Click Add View and select Mind Maps

Step 3: Your work is instantly mapped into a beautiful mind map that you can expand, collapse, or build upon

This feature allows you to transform existing task structures into visual flowcharts with minimal effort, saving time and ensuring consistency across your project documentation.
If you’re new to mind mapping or want to explore different mind mapping software options, ClickUp is a great place to start. Check out these mind map examples for various use cases. And watch the video below to see ClickUp’s Mind Maps in action.
Quickly create flowcharts with ClickUp templates
If you don’t want to start from scratch, try out process map templates. They’re a great starting point that you can customize to fit your specific needs.
ClickUp’s Process Flow Chart Template is an excellent option here.
Here are this template’s key features:
- Custom Statuses: Create tasks with Custom Statuses (e.g., Open, Complete), which helps track the progress of each step in the flowchart
- Custom Fields: Categorize tasks and add attributes to manage them efficiently, aiding in the visualization of each step
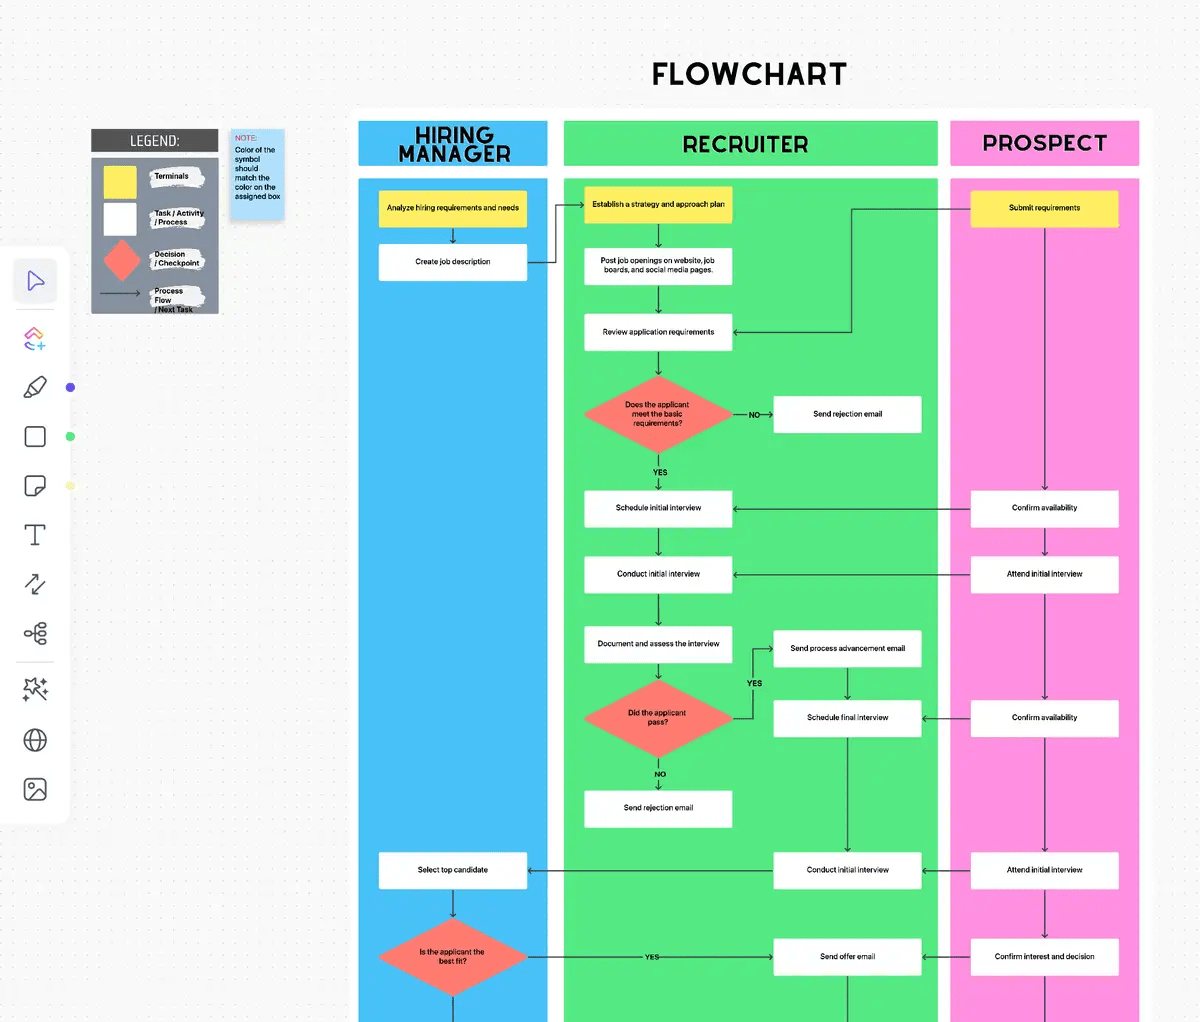
- Multiple views: Tailor the flowchart to specific processes by using different views, such as the Hiring Flowchart and Getting Started Guide
- Project management features: Track and manage tasks with tagging, nested subtasks, multiple assignees, and priority labels
You can also try ClickUp’s Data Flow Diagram Template to simplify the creation of flowcharts.

You can create tasks with Custom Statuses like Open and Complete to track the progress of each step in the data flow process, making it easier to visualize where each element stands.
The template supports multiple views, including List, Gantt, Workload, and Calendar, enabling you to visualize your data flow in a way that best suits your needs
Using this template, you can simplify the creation of a flowchart by:
- Assessing the project scope and identifying necessary data points
- Drawing the diagram with symbols and arrows to represent entities and data flow visually
- Labeling and organizing the diagram for better readability
- Validating the diagram for accuracy by checking for inconsistencies
When to use PowerPoint vs. ClickUp for flowcharts
Deciding between PowerPoint and ClickUp for flowcharts depends on your specific needs and the features each tool offers. Here’s a quick guide on when to use each:
Use PowerPoint when:
- You need to create a simple flowchart quickly
- Your flowchart is part of a larger PowerPoint presentation
- You’re working in an environment where everyone uses Microsoft Office
- You don’t need real-time collaboration features
Use ClickUp when:
- You’re creating complex, detailed flowcharts
- You need to collaborate with a team in real time
- You want to integrate your flow chart with project management tools
- You need advanced features like version history and smart drawing
- You’re working on a large-scale project with multiple interconnected processes
Feel free to experiment with both to see what works best for you and your team.
Your Flowchart Journey Starts with ClickUp
The steps and tips in this guide will help you create an effective PowerPoint flowchart that breaks down complex processes, enhances communication, and streamlines decision-making. However, for those seeking more robust, collaborative, and customizable solutions, ClickUp’s Whiteboards and Mind Maps, along with its other advanced features, can enhance your flowchart creation experience.
Remember, the key to a successful flowchart lies not just in the tool you use but also in your ability to distill complex information into clear, visually appealing diagrams.
Whether you choose Microsoft PowerPoint or a more specialized platform, focus on clarity, consistency, and user-friendliness to create flowcharts that do justice to your ideas and processes.
Frequently Asked Questions (FAQs)
1. What is the best flowchart for PowerPoint?
The best flowchart for PowerPoint depends on your specific needs. However, we recommend using SmartArt for flowcharts due to its ease of use and variety of styles.
2. Is there a flowchart template in PowerPoint?
Yes, PowerPoint offers built-in flowchart templates. You can find them under the SmartArt graphics in the Process category. You might want to explore other options for a wider variety of customizable flowchart templates.
3. Does PowerPoint have workflow templates?
Yes, PowerPoint includes workflow templates. You can find various workflow templates in the SmartArt graphics and download additional templates from online resources.
4. Does Microsoft have workflow templates?
Yes, Microsoft offers workflow templates across various products. In addition to PowerPoint’s options, you can find workflow templates in Microsoft Visio, which is specifically designed for creating diagrams and flowcharts. However, if you’re looking for more modern and versatile workflow templates, you might want to explore options beyond Microsoft’s offerings.
5. Is it easier to create a flowchart in Word, Excel, or PowerPoint?
Most users find that creating a flowchart is generally easier in PowerPoint due to its intuitive interface and the availability of SmartArt graphics specifically designed for flowcharts. Word and Excel also support flowchart creation but may require more manual adjustments.

Everything you need to stay organized and get work done.
