

Sorry, there were no results found for “”
Sorry, there were no results found for “”
Sorry, there were no results found for “”
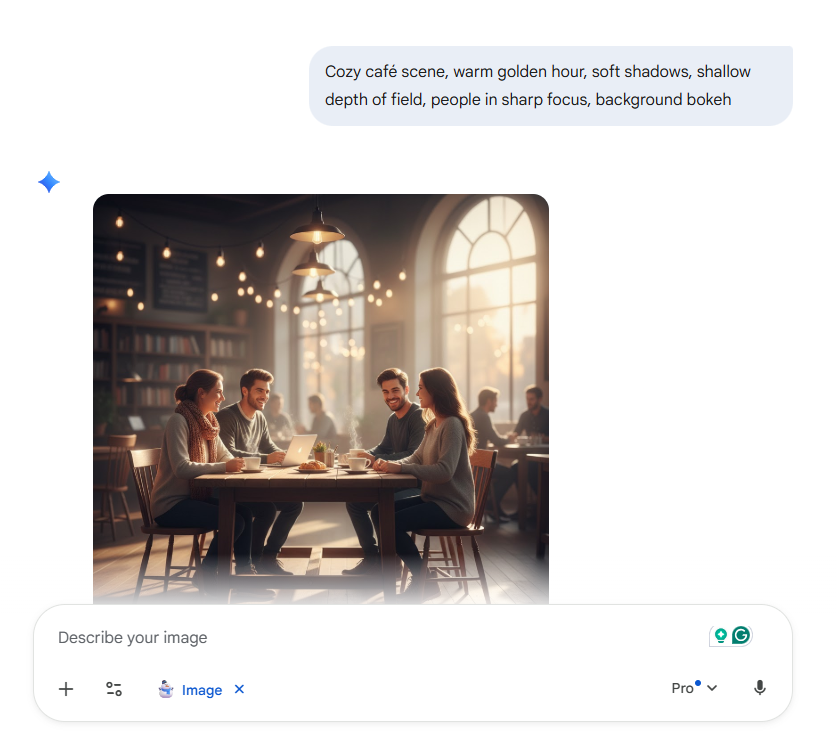
You know the moment: you have a clear visual in mind, you type a prompt, and the first result is almost right.
Then you tweak it, and the camera angle changes, the facial features drift, and the “same” character suddenly looks like a different person. If you create visuals for stories, lessons, thumbnails, or posts, that back-and-forth can get old pretty quickly.
That’s where Nano Banana prompts help. They’re short, focused instructions for Nano Banana that lock in the few details that matter most.
This is especially important, as 83% of creative professionals already use generative AI tools in design and creative work.
In this guide, you’ll learn what Nano Banana prompts are and how to write the best ones. You’ll also get 50 copy-ready prompts, prompt variations, team workshop ideas, and a ClickUp AI workflow to take you from concept to content execution.
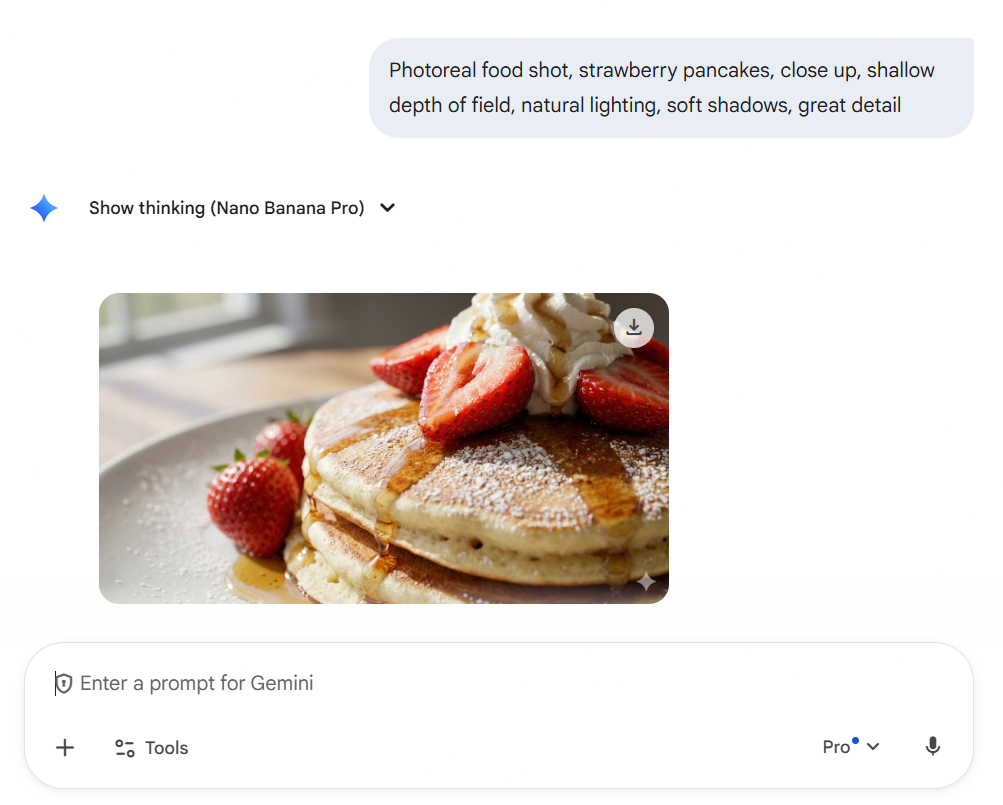
Nano Banana prompts are short, specific instructions you give Nano Banana (and Nano Banana Pro) to generate a new image or edit an existing one.
Think of them as a mini spec: what you want to create, what the camera should do (close-up vs. low-angle shot), what the lighting should look like (natural daylight vs. studio lighting), and what must stay the same (facial features, natural skin texture, overall style).
Google describes Nano Banana as Gemini’s native image generation capability, where you can work with text, images, or both to create and refine visuals in a conversational flow.
Nano Banana is the faster “Flash Image” model for quick iterations, while Nano Banana Pro is the “Pro Image” model aimed at higher-fidelity outputs, especially when text rendering needs to be clean and legible.
✅ Most people use Nano Banana prompts in two ways:
📖 Also Read: Free Task Management Templates
If you write, teach, design, or ship content on a deadline, you don’t need a 200-word prompt. You need a prompt that tells the model what to hold steady.
Nano prompts work because they force you to pick the few details that actually change the output. Some of these are:
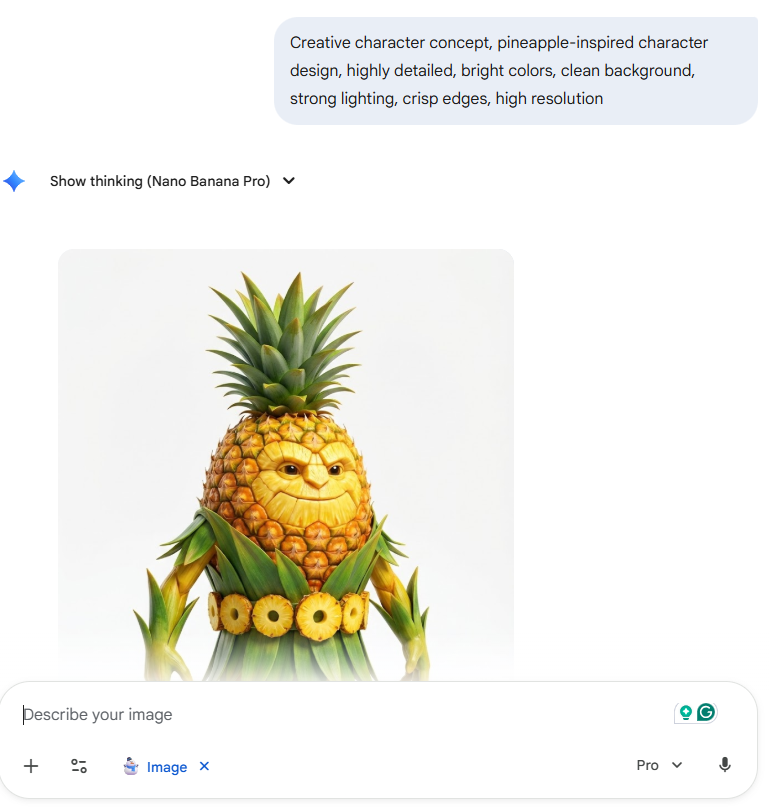
They also work because Nano Banana is built for fast iteration and targeted edits. Google explicitly highlights capabilities like character consistency, combining photos, and local edits for Nano Banana.
You can also access more precise controls in Nano Banana Pro, including advanced text rendering, camera angle and aspect ratio controls, and 2K resolution.
For writers and educators, that “starter spark” effect is real.
A large experiment on short story writing found that access to generative AI ideas improved how stories were evaluated (especially for less creative writers), even though it also made outputs more similar to each other.
That is a good trade when you need a quick starting point, and then you make it yours.
📮 ClickUp Insight: Our AI maturity survey revealed that 33% of individuals resist adopting new tools, while only 19% implement and scale AI rapidly. When each new capability is introduced as an additional application, login, or workflow to master, teams quickly experience tool fatigue.
ClickUp Brain addresses this gap by operating within a unified, integrated workspace where teams already organize and communicate. It integrates multiple AI models, image generation, and advanced reasoning directly into the environment where work is conducted.
Nano Banana prompts let you create realistic, high-resolution images with just a prompt. Let’s check out each step of how to make the most use of these prompts:
You’ll get cleaner results when you choose one path upfront:
📖 Also Read: Best AI Productivity Tools
Start with one short line that includes
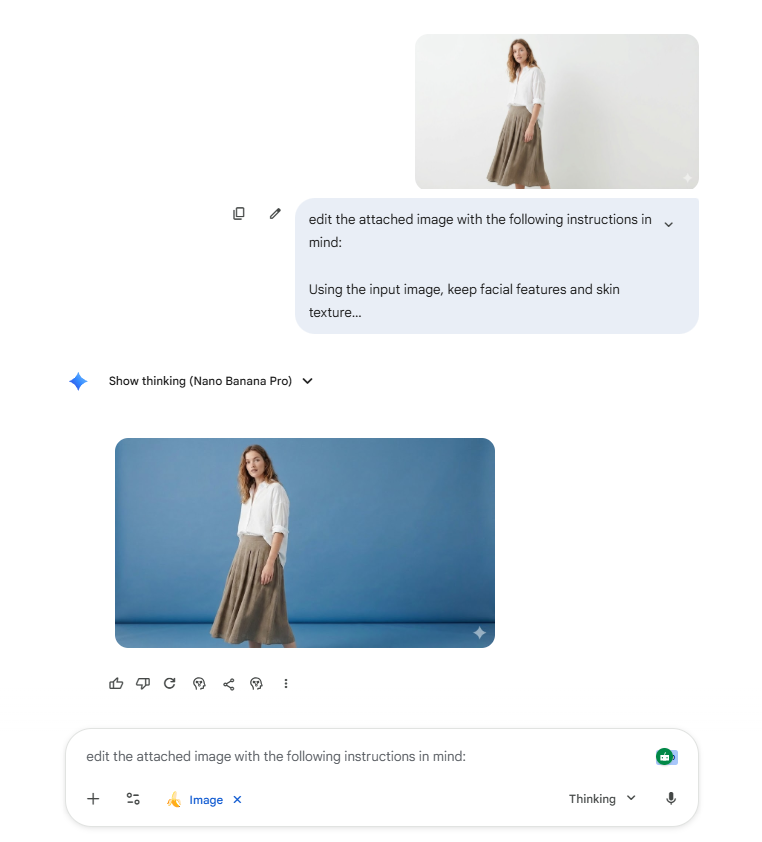
If you are creating a series, don’t rely on text alone. Attach a reference image and tell the model what should not change, such as:
Google’s own guidance emphasizes using the model for character consistency and iterative edits, exactly what a reference image helps you do.
📖 Also Read: How to Write a Marketing Creative Brief
Here’s an example of a reliable format that keeps edits clean:
📖 Also Read: Free Marketing Calendar Templates for Content
If your output drifts, you are probably changing too much at once.
Tighten the loop by trying this order:
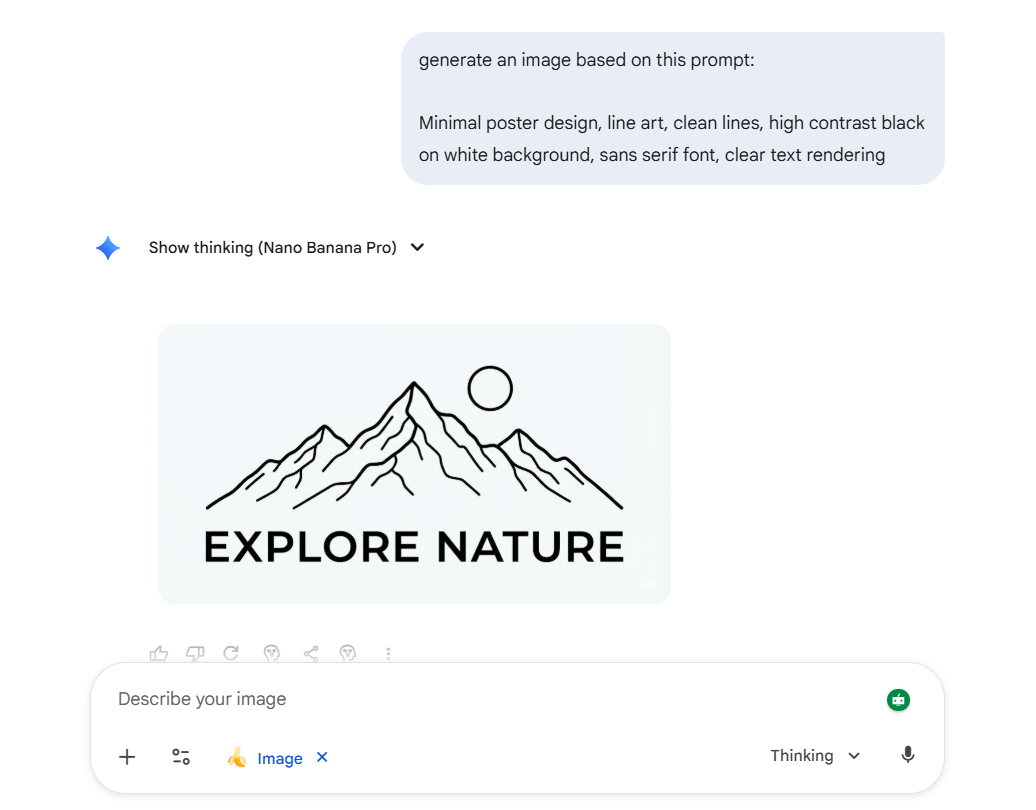
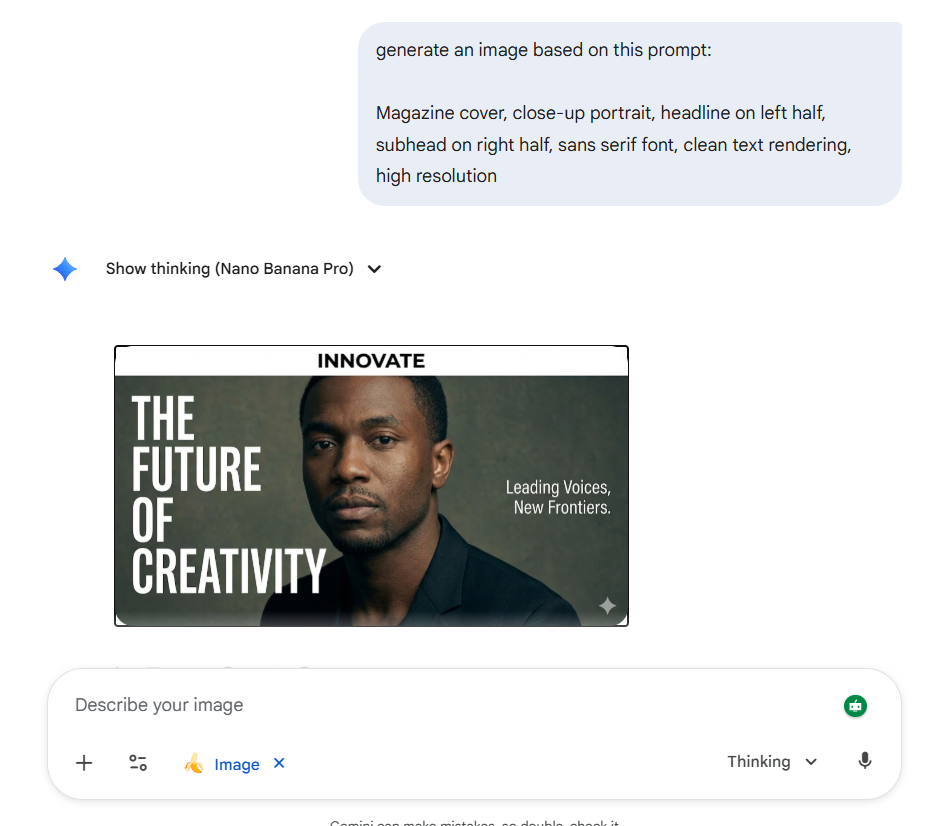
Nano Banana Pro is designed for more accurate text and precise controls. If text matters, ask for it plainly and specify placement (left or right half), font style (sans serif), and contrast (high-contrast black on white background).
The more specific and detailed your prompts are, the better image you will receive. Here are 50 Nano Banana prompts you can use to improve your images:
48. Using the reference image, create a monochrome version with high-contrast black tones, keep sharp focus, and keep a clean background
49. Using the input image, change the surrounding environment to a modern office, keep the same camera angle, keep realistic lighting, keep facial features consistent
50. Using the uploaded image, adjust color grading to a warm film scene look, keep skin texture, keep sharp focus, keep overall style consistent
📖 Also Read: Free Content Calendar Templates
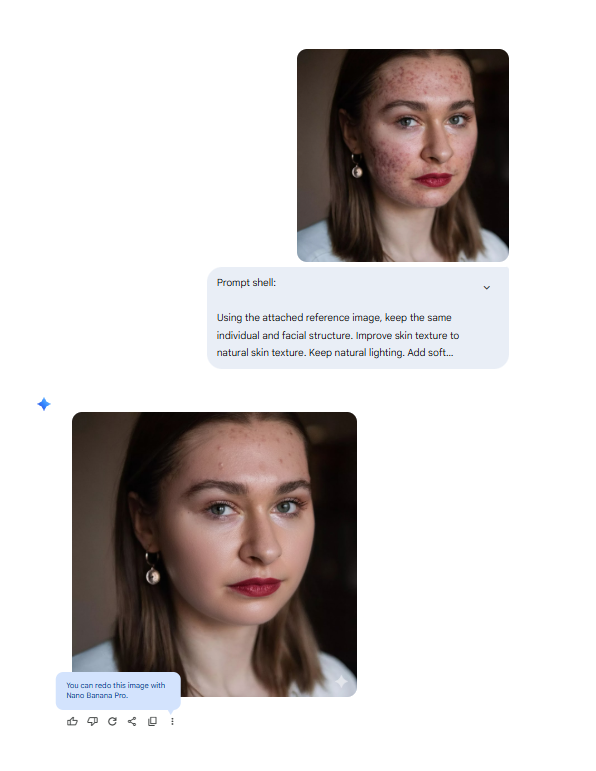
Nano Banana prompts get easier when you stop rewriting from scratch and start reusing “prompt shells.” You keep the structure and then swap one variable at a time.
Use when you want real photos with consistent facial features:
Quick swaps for added effects:
Use when character consistency matters (series and consistent avatars):
Use when the subject is right, but the background is wrong:
Use when the image feels flat:
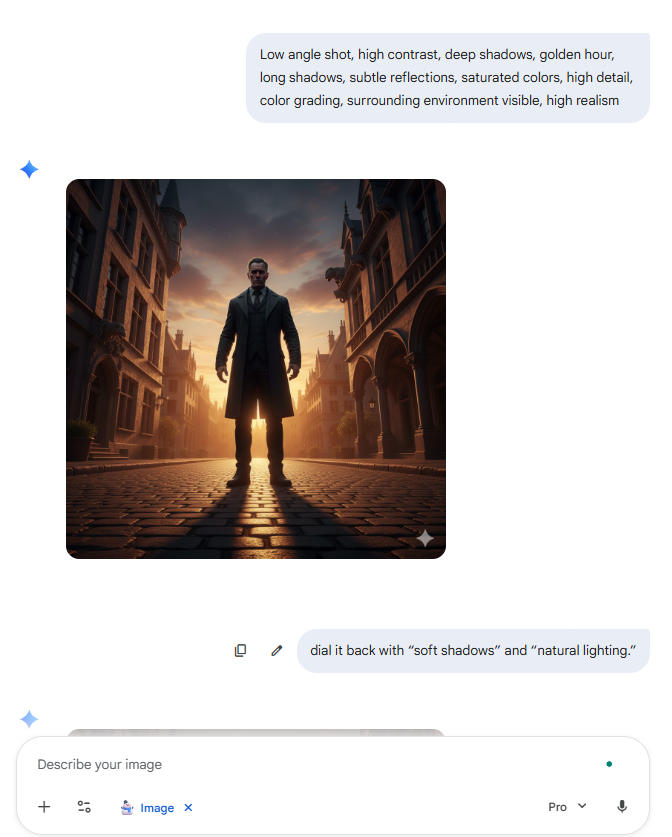
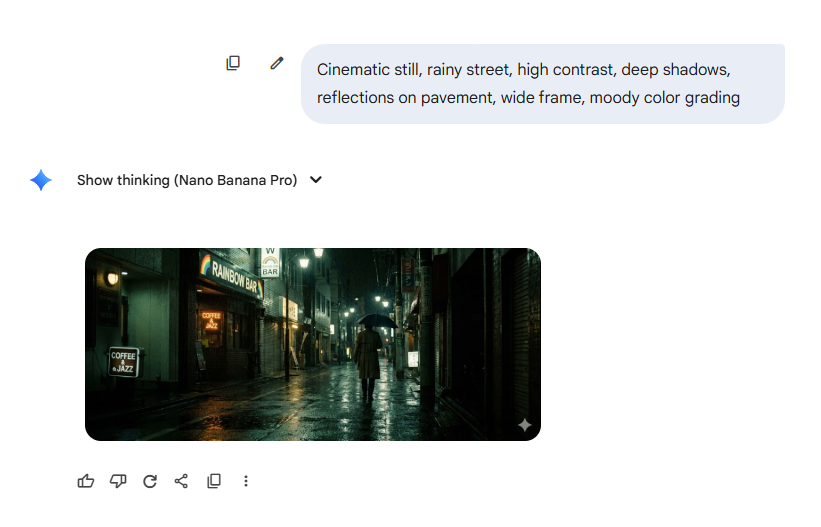
Use this when you want a mood that reads like a film scene:
Low angle shot, high contrast, deep shadows, golden hour, long shadows, subtle reflections, saturated colors, high detail, color grading, surrounding environment visible, high realism
If the look turns too harsh, dial it back with “soft shadows” and “natural lighting.”
📖 Also Read: Marketing Templates to Try Out

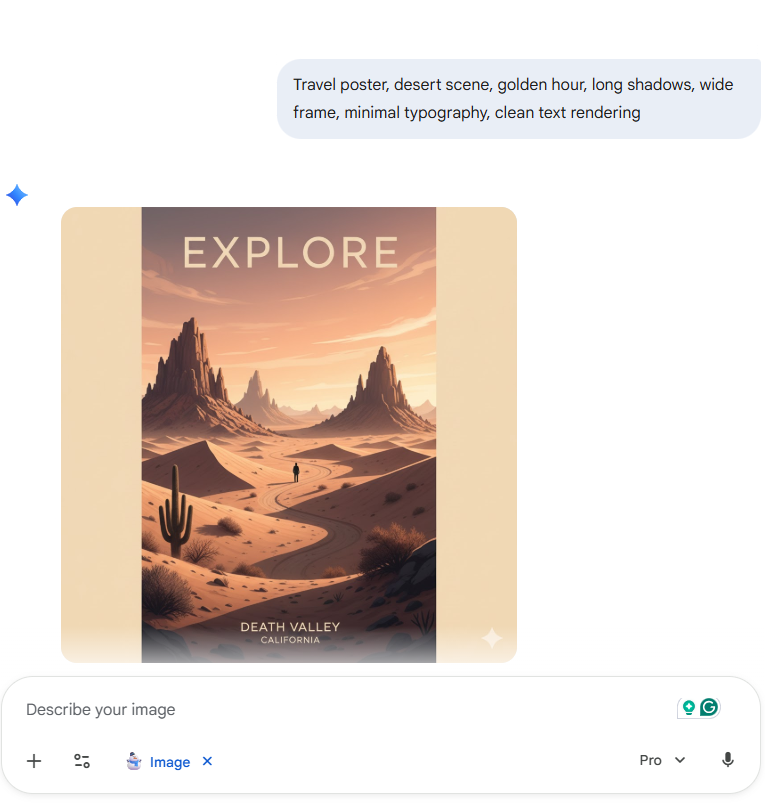
Use this when you need legible typography and composition rules:
White background, clean lines, sans serif font, English text “believe,” clear text rendering, headline on left half, subhead on right half, evenly spaced, high resolution, bright red accent, minimal overall aesthetic
If you want a stronger graphic look, use high-contrast black and simplify the color scheme.
📖 Also Read: AI Content Tools for Creators
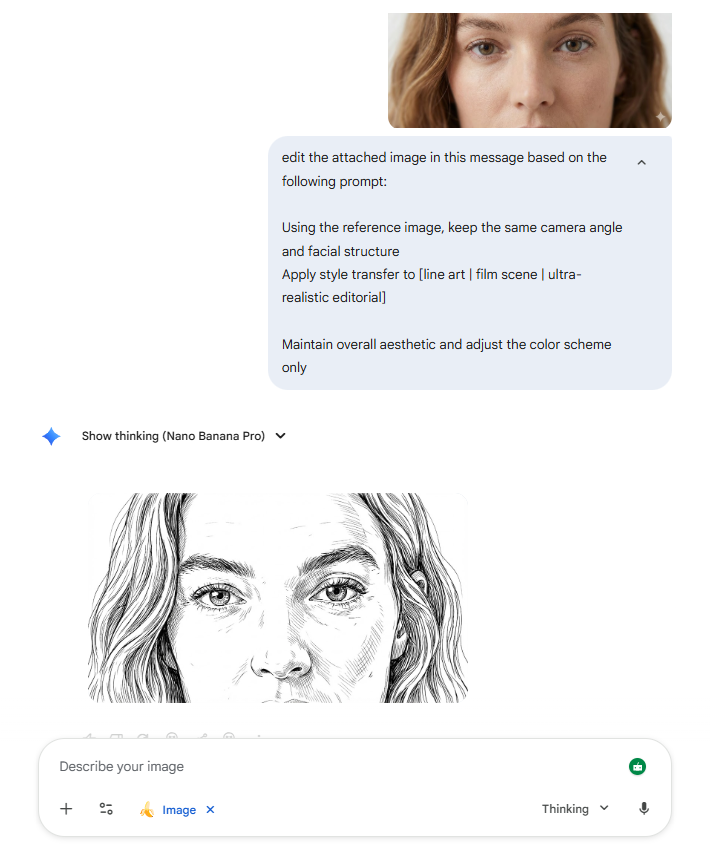
Use when you like the composition but want a new vibe:
Google calls out style changes from a reference image as a supported workflow (take texture, color, or style from a reference photo and apply it), so this is a practical process to keep in mind.
📖 Also Read: Writing Prompts for Creators
Nano prompts work well in groups because everyone starts from the same constraint. You spend less time discussing blank-page ideas and get more time to react to new ideas and expressions.
✅ Here are practical ways to run it (along with some useful ClickUp features):
Keep the warm-up prompt simple. Control just the camera angle, lighting, and background. Let the model fill the rest.
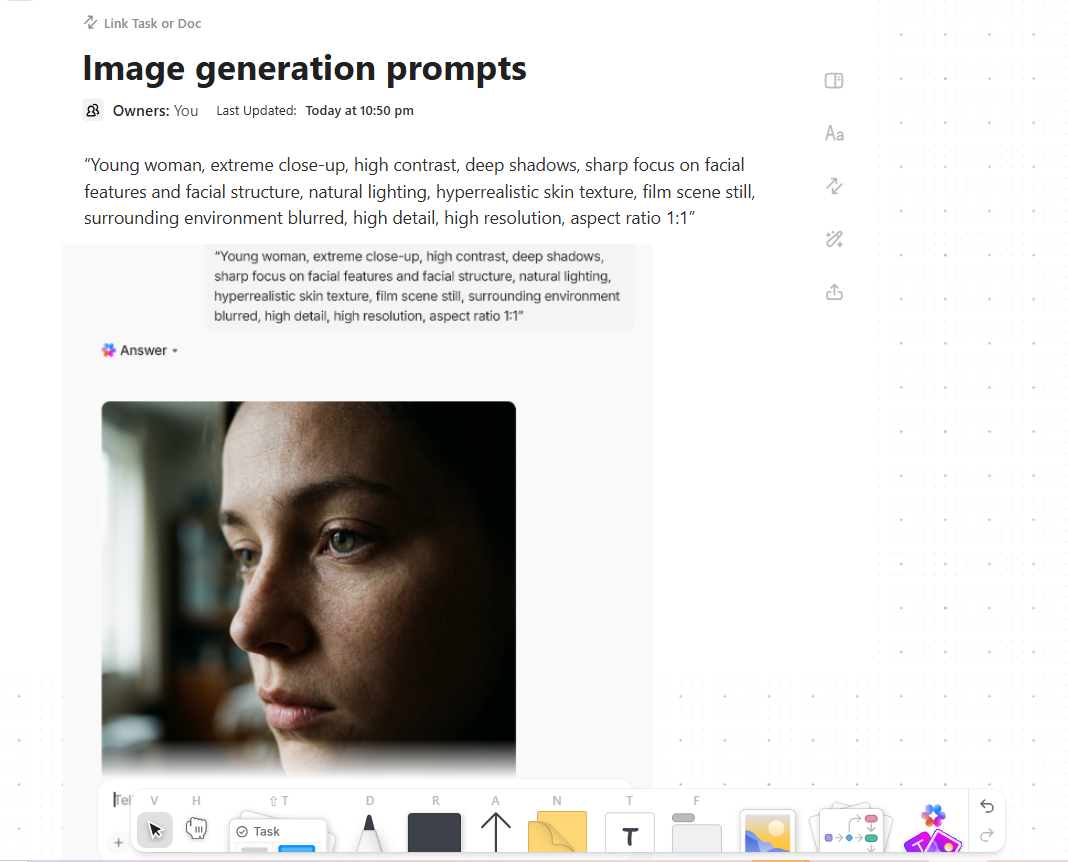
💡 Pro Tip: Put the warm-up prompt at the top of a ClickUp Doc, then link that Doc on a ClickUp Whiteboard next to the outputs so the “prompt + image” stays paired.
You can also store your prompt library in ClickUp’s Docs Hub, the centralized place where all your Docs and wikis live. This can help your team search and open the right prompt Doc without going through multiple Docs and Workspaces.
This is where tight phrasing helps. If you want consistency, ask people to use the same reference image or the same attached reference image.
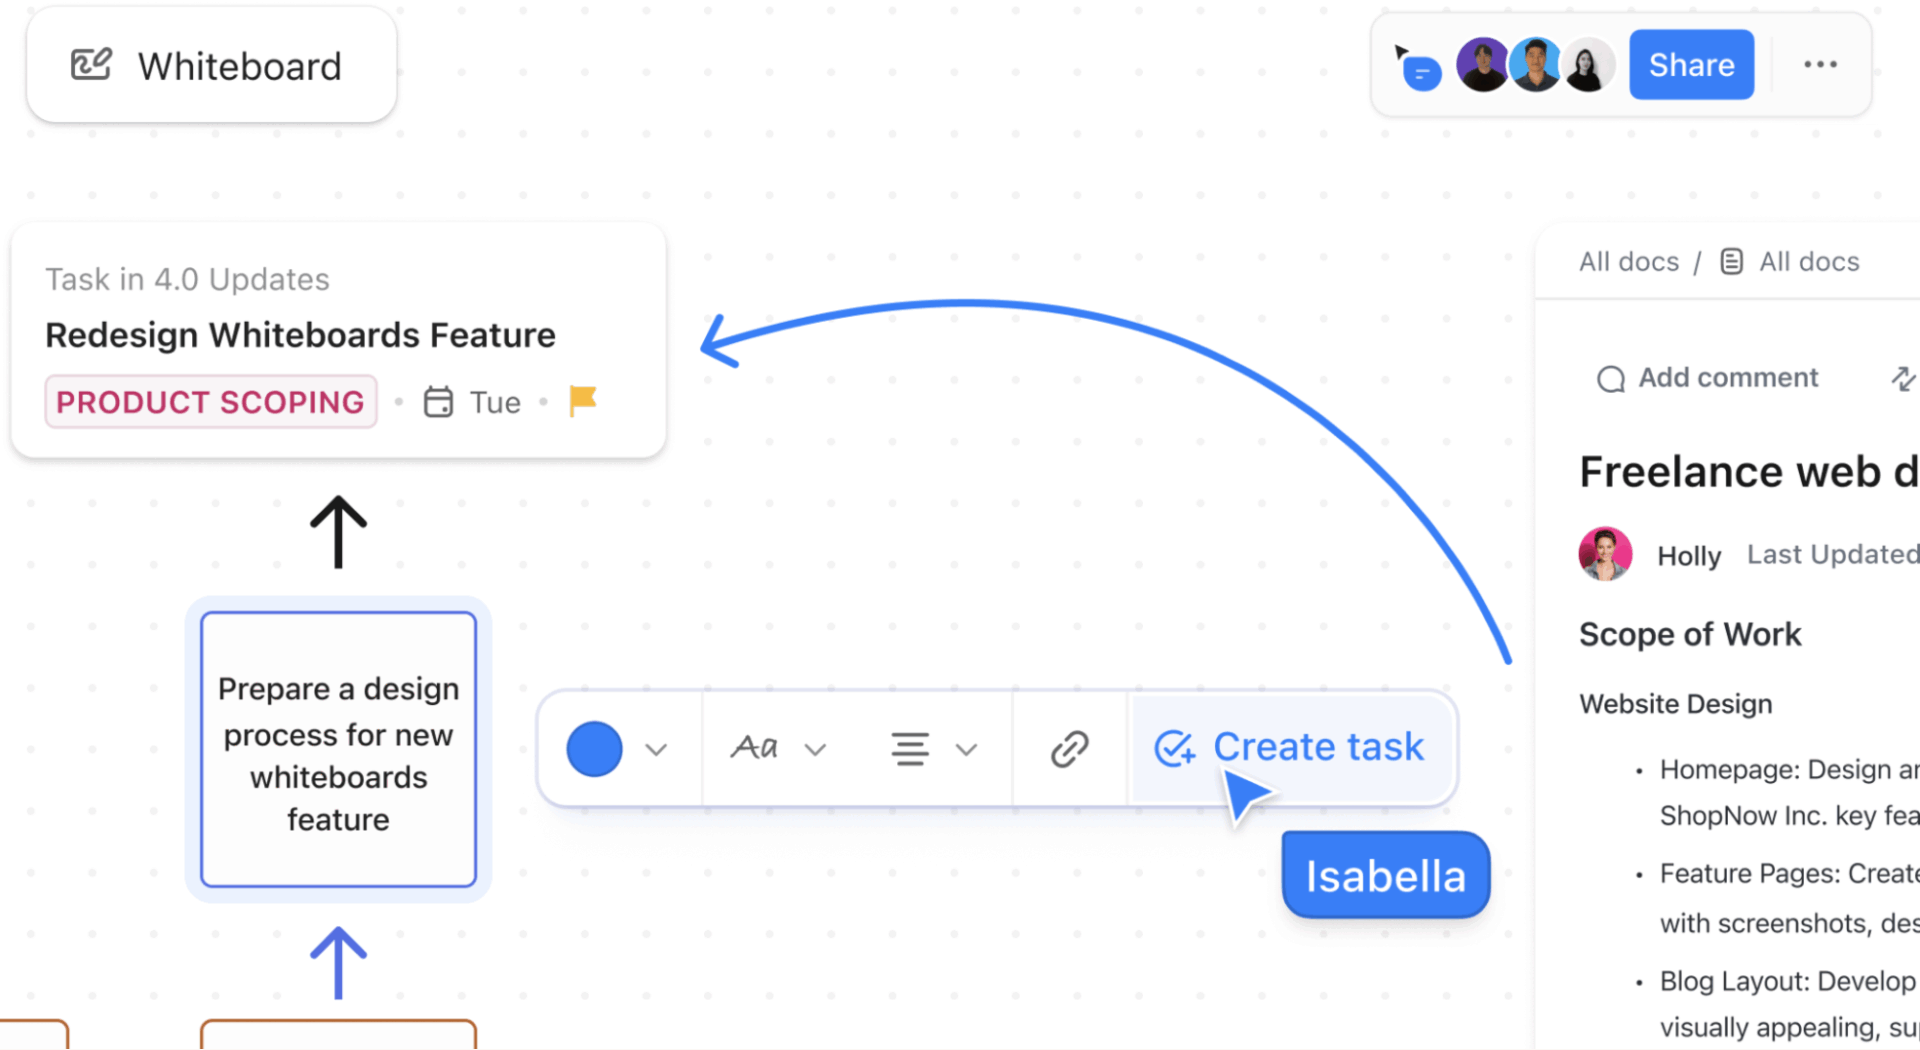
💡 Pro Tip: Drop each person’s output onto a ClickUp Whiteboard, add a sticky note with the exact prompt used, then convert the winning sticky note into a ClickUp Task for follow-through.
In longer sessions, use Nano prompts to explore directions quickly, then converge.
You can assign one person to watch for prompt drift. They keep the baseline prompt stable so your images don’t wander.
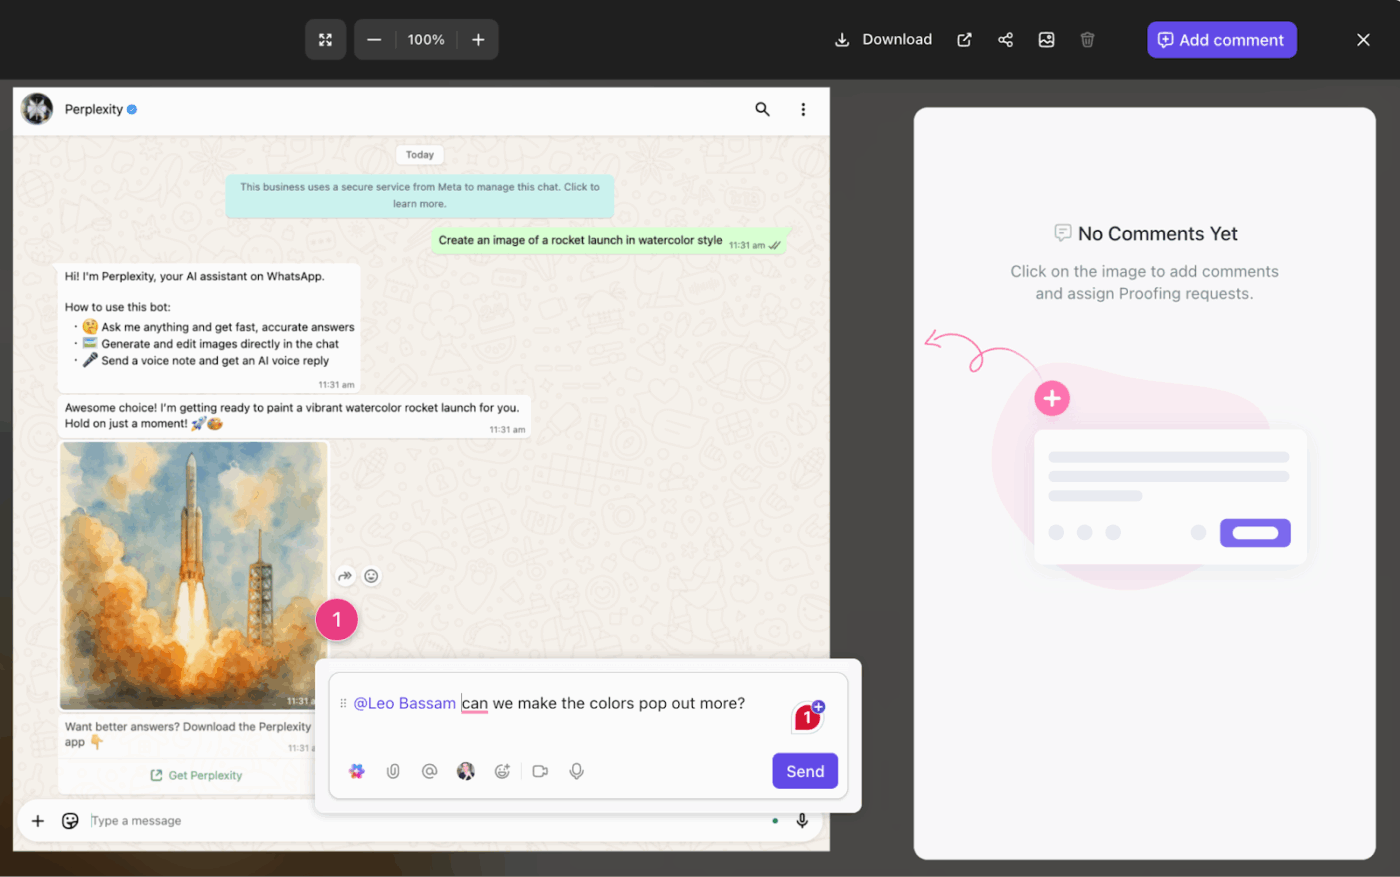
💡 Pro Tip: Keep your prompt rules in a ClickUp Doc, then highlight the action line and create a task from it, for example, “Create 5 variations with a blue background and clean text rendering.” If the review gets detailed, attach the images to the task and use ClickUp’s Proofing feature to pin feedback directly on the visual, assign comments, and resolve them when fixed.
If you storyboard content, prompts become your shot list.
💡 Pro Tip: You can build the storyboard on a ClickUp Whiteboard, add each frame as a tile, and then drop in the related task and the prompt Doc right next to it.
ClickUp lets you add Tasks and Docs to a Whiteboard and edit them from the canvas, so the storyboard, prompts, and assignments stay connected.
📽️ Watch a video: Are you still performing manual copy-paste, task creation, or scheduling? This video explains how to utilize AI automation tools to eliminate monotonous tasks.
When you’re testing visual ideas, the hardest part is rarely the first image. It’s everything around it: switching between tools to generate, revise, approve, and ship, then losing the thread of what you already decided.
That “work sprawl” gets even worse with AI sprawl, where the creative work is split across different AI models and tools.
ClickUp solves this by being a converged AI workspace for teams, where you can generate visuals, turn decisions into tasks, and keep execution moving in the same place.
🧠Did You Know: Research linked to “toggle tax” reported that workers toggled between apps roughly 1,200 times per day, which added up to nearly four hours a week spent reorienting.
📖 Also Read: AI Writing Software for Teams
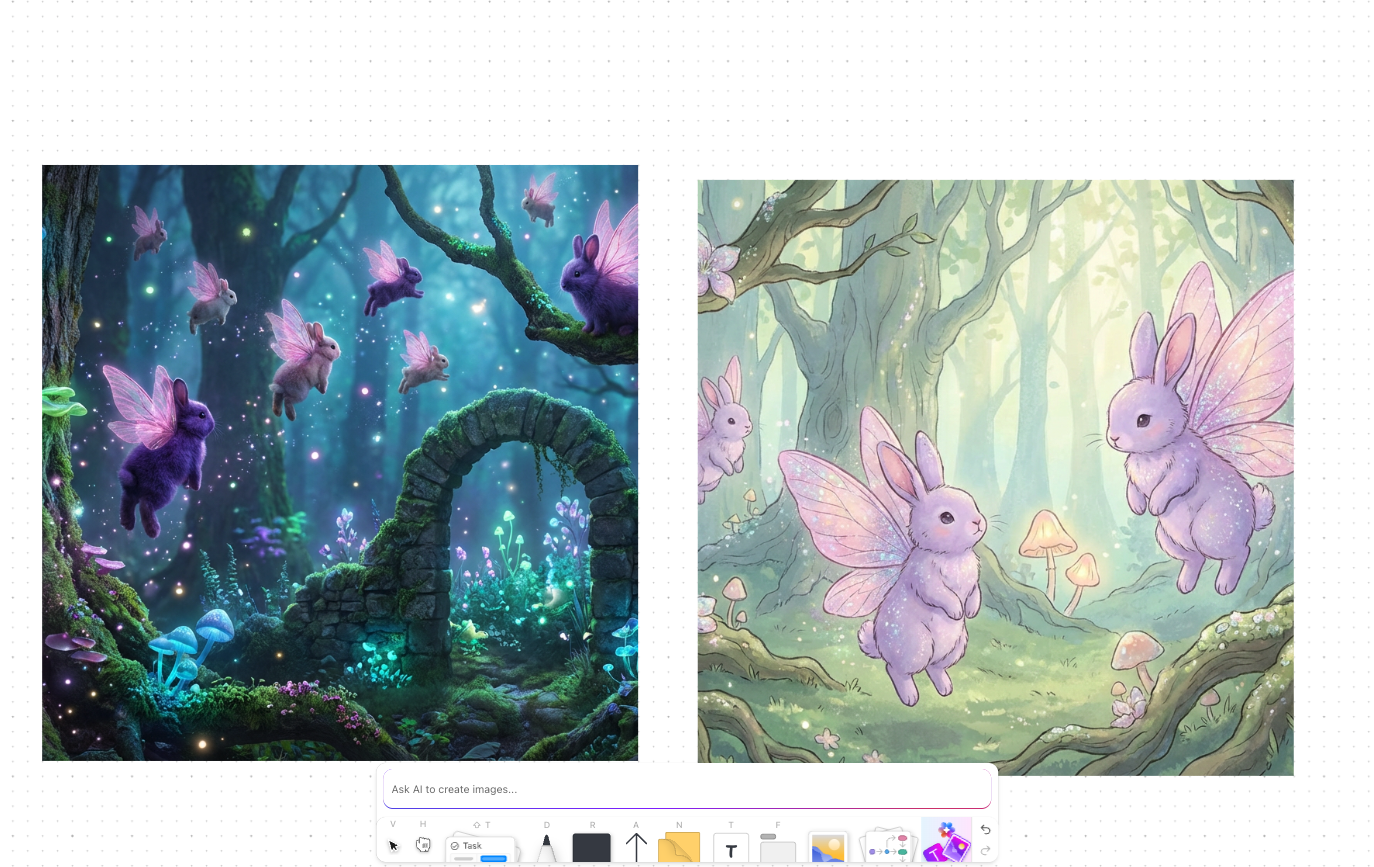
ClickUp Brain includes an AI Image generator you can run right where work happens (for example, from task comments or other ClickUp surfaces where AI tools are available).
Add your prompt, generate multiple options, and then keep the best one to move into review and delivery without copying context across tools. You can generate up to 10 images from a single prompt, making quick iteration feel much less painful.
Here are complete prompts you can paste into ClickUp Brain’s image generator (swap only 1–2 variables per iteration to avoid drift):
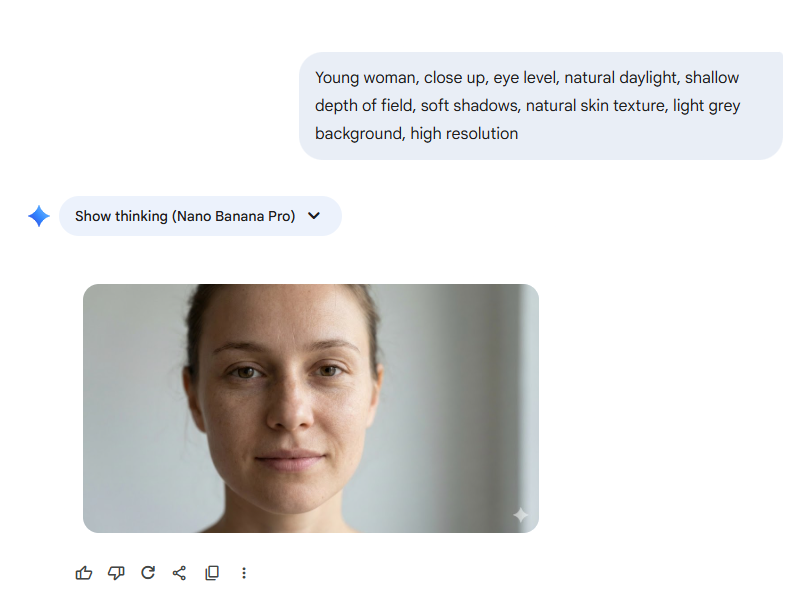
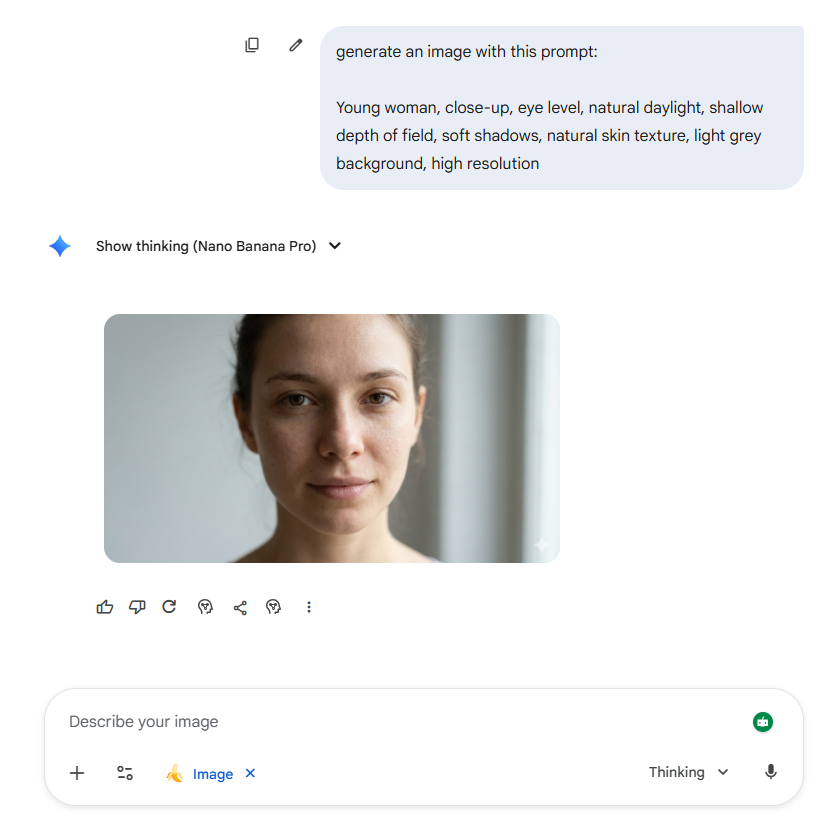
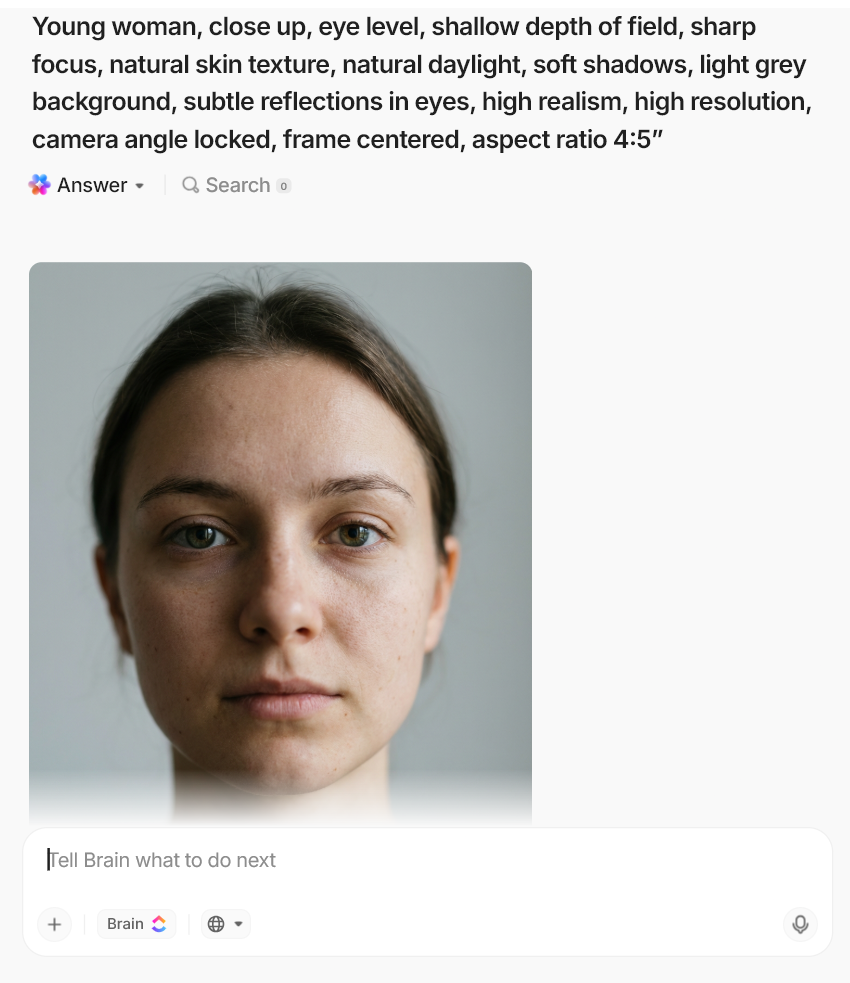
1. Portrait (clean, editorial)
“Young woman, close up, eye level, shallow depth of field, sharp focus, natural skin texture, natural daylight, soft shadows, light grey background, subtle reflections in eyes, high realism, high resolution, camera angle locked, frame centered, aspect ratio 4:5”
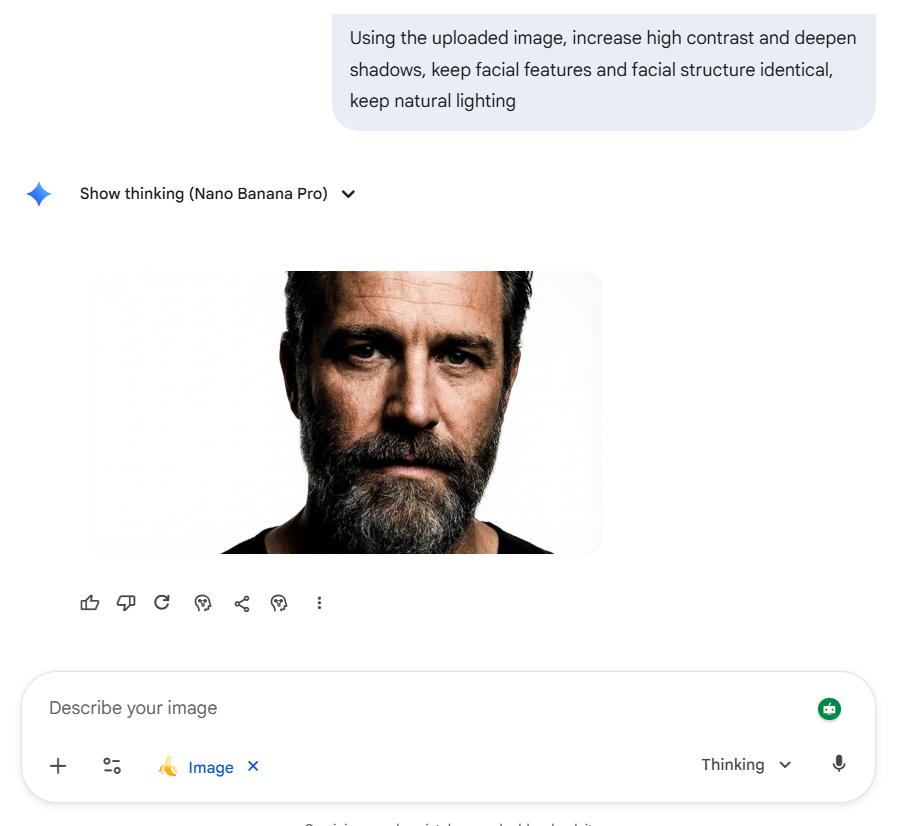
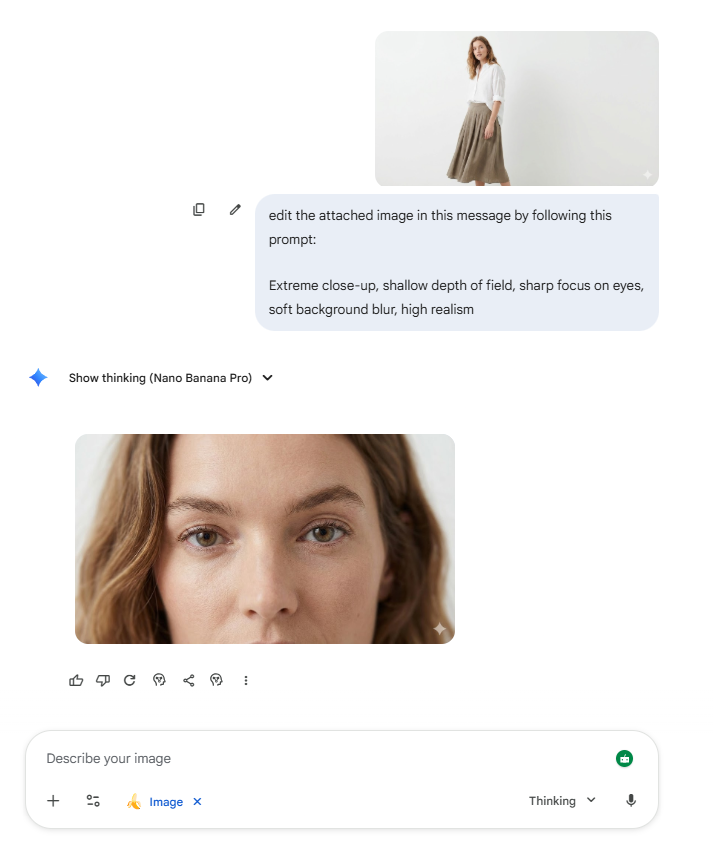
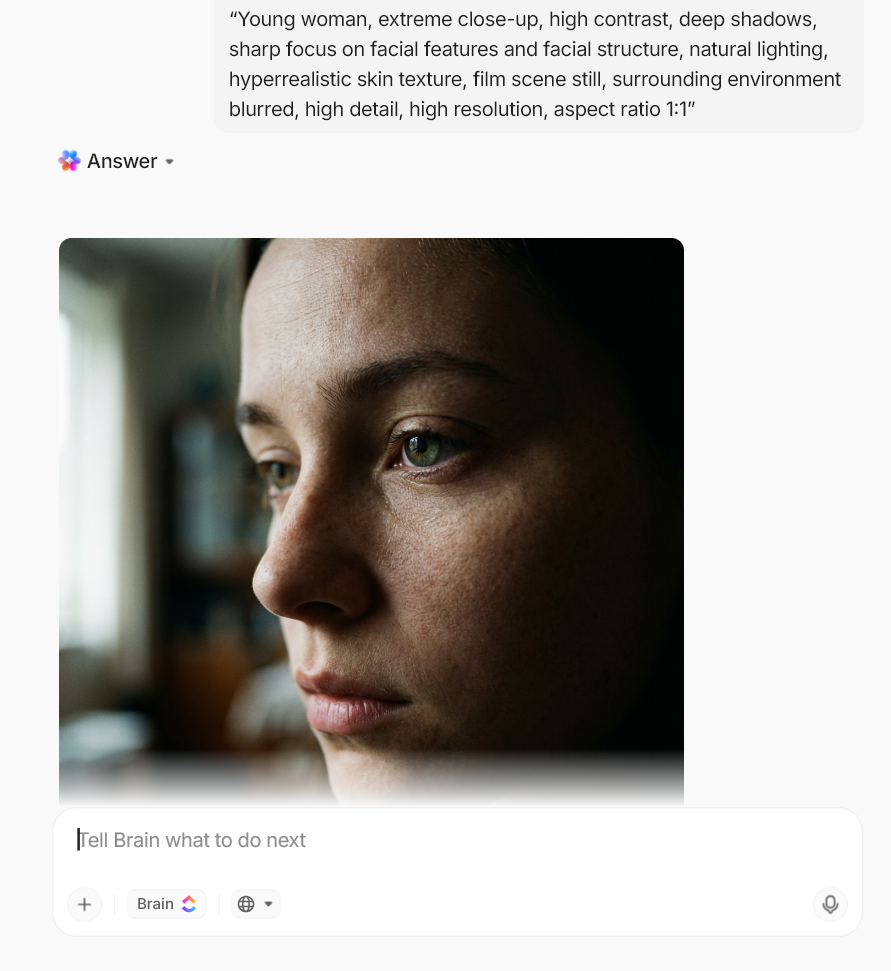
2. Portrait (dramatic, cinematic)
“Young woman, extreme close-up, high contrast, deep shadows, sharp focus on facial features and facial structure, natural lighting, hyperrealistic skin texture, film scene still, surrounding environment blurred, high detail, high resolution, aspect ratio 1:1”
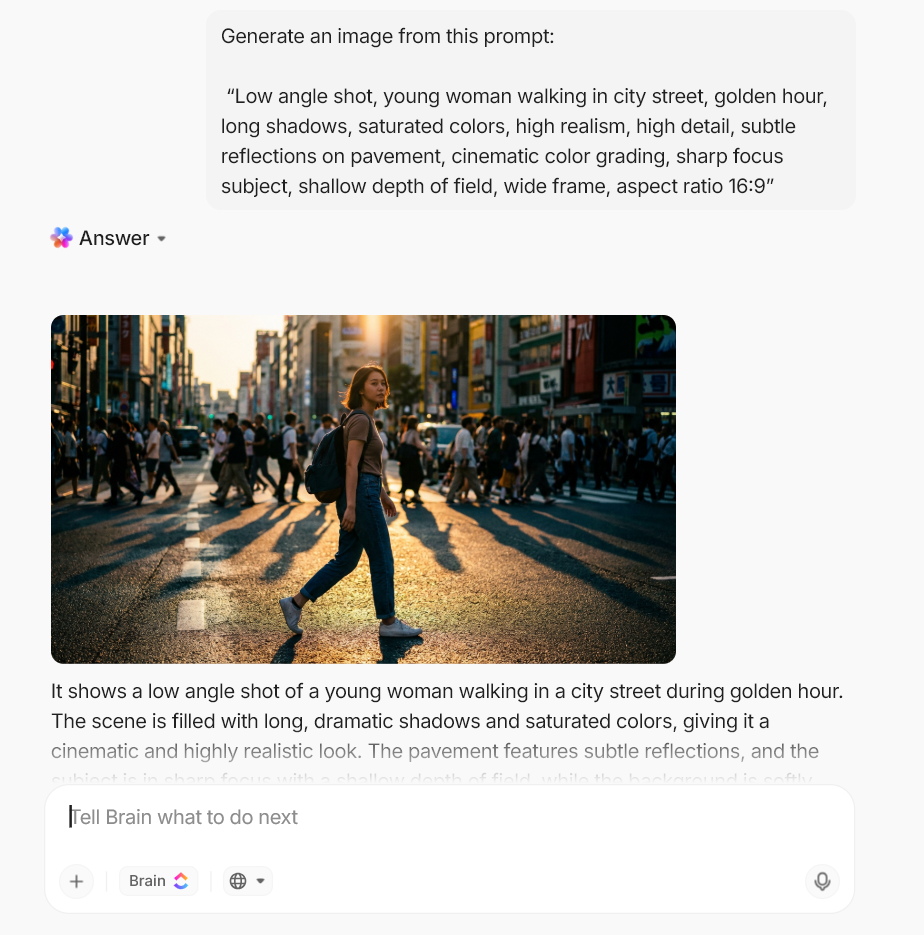
3. Golden hour street still
“Low angle shot, young woman walking in city street, golden hour, long shadows, saturated colors, high realism, high detail, subtle reflections on pavement, cinematic color grading, sharp focus subject, shallow depth of field, wide frame, aspect ratio 16:9”
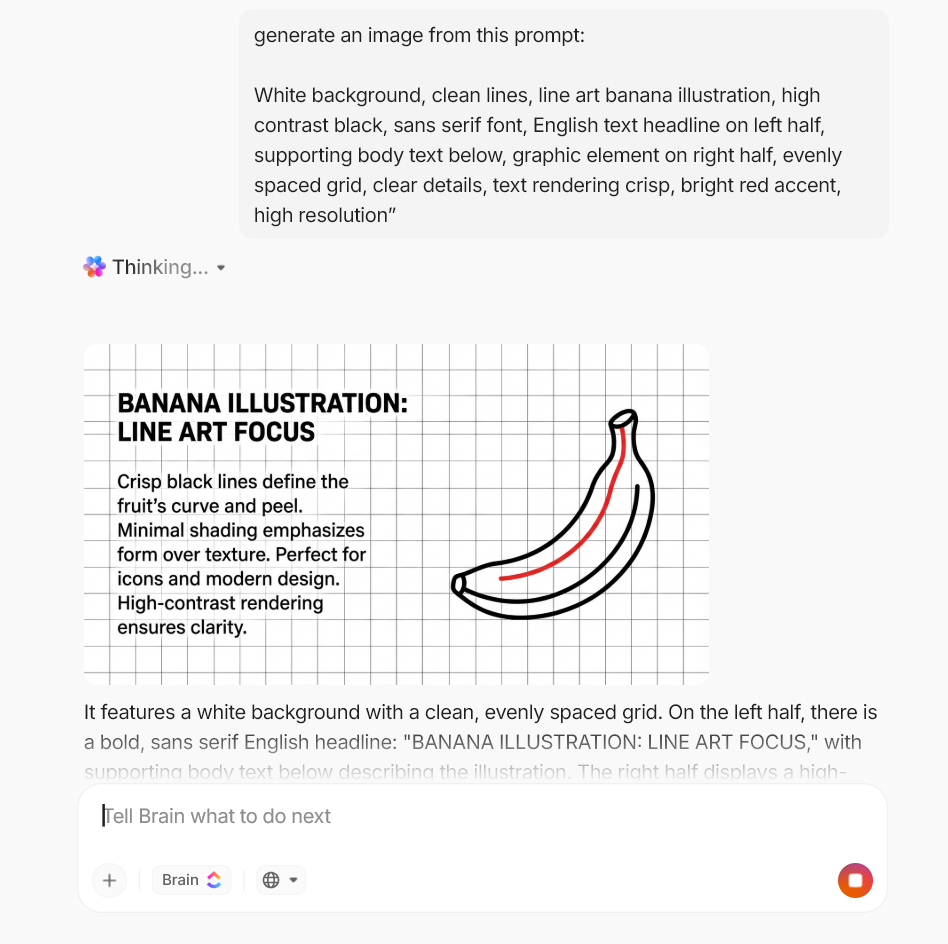
4. Minimal poster (typography + layout)
“White background, clean lines, line art banana illustration, high contrast black, sans serif font, English text headline on left half, supporting body text below, graphic element on right half, evenly spaced grid, clear details, text rendering crisp, bright red accent, high resolution”
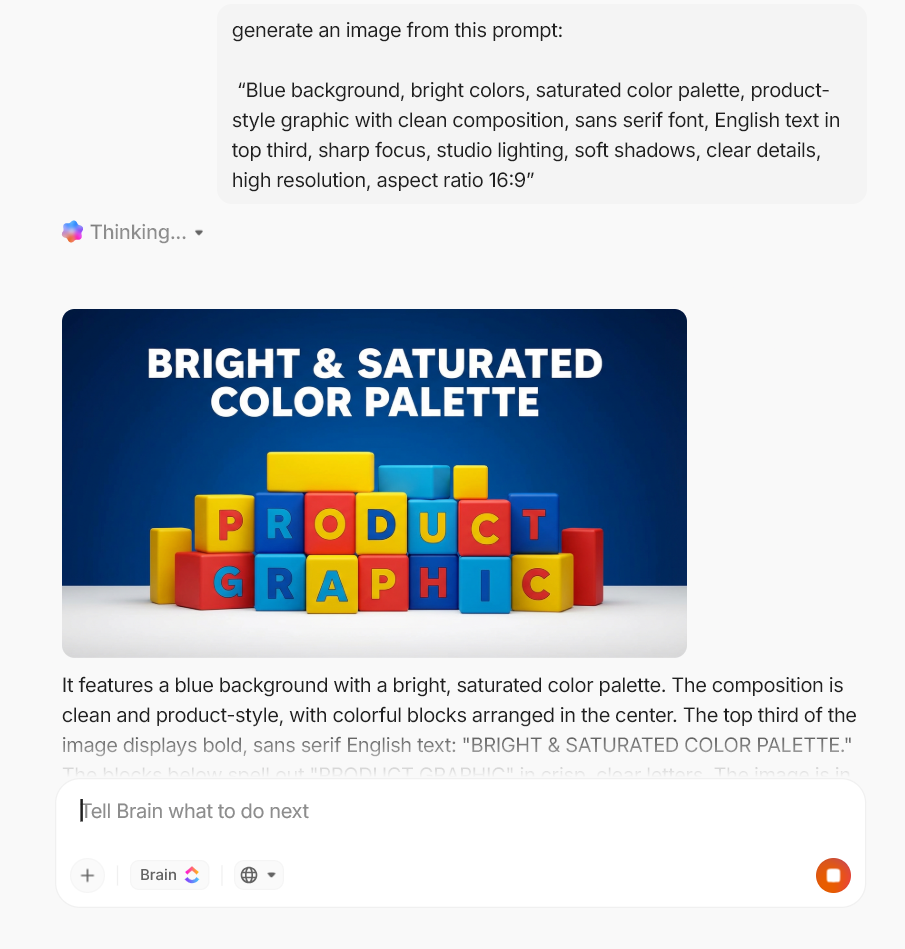
5. Modern banner (bold color)
“Blue background, bright colors, saturated color palette, product-style graphic with clean composition, sans serif font, English text in top third, sharp focus, studio lighting, soft shadows, clear details, high resolution, aspect ratio 16:9”
6. Icon set (simple + consistent)
“Line art icon set, strawberry theme, clean lines, evenly spaced, white background, high contrast black, consistent stroke weight, minimal shading, clear details, high resolution”
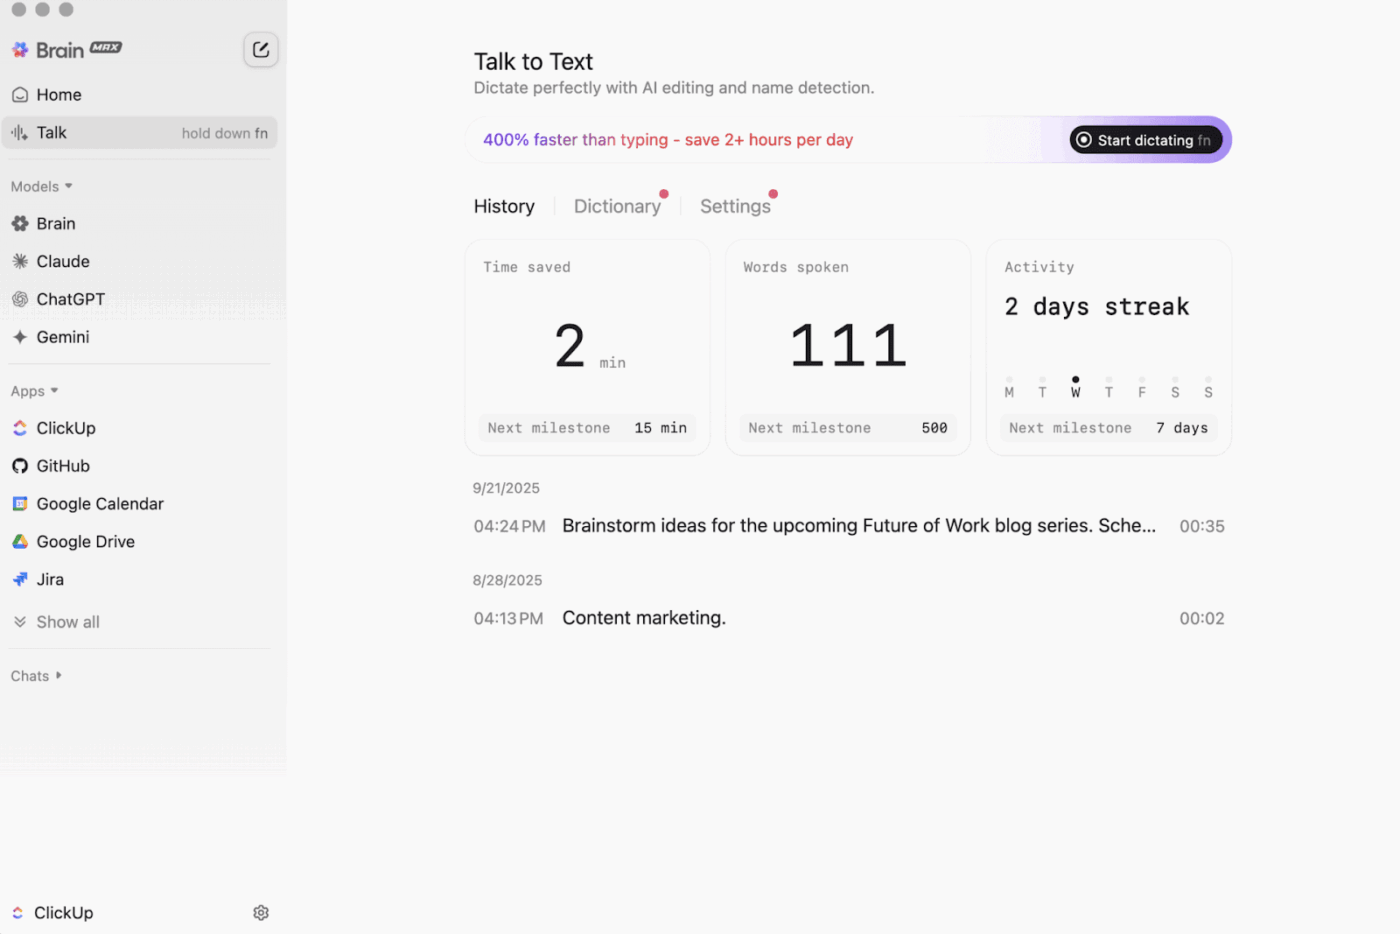
If you want to improve your prompting quickly, consistency beats long sessions. ClickUp BrainGPT supports Talk to Text (so you can speak a rough idea and turn it into usable text) and search across ClickUp, the web, and connected apps when you need to pull past context or references.
Here’s a simple routine that fits writers, creators, and educators:
💡 Pro Tip: Use ClickUp Agents to keep creative output moving across your team.
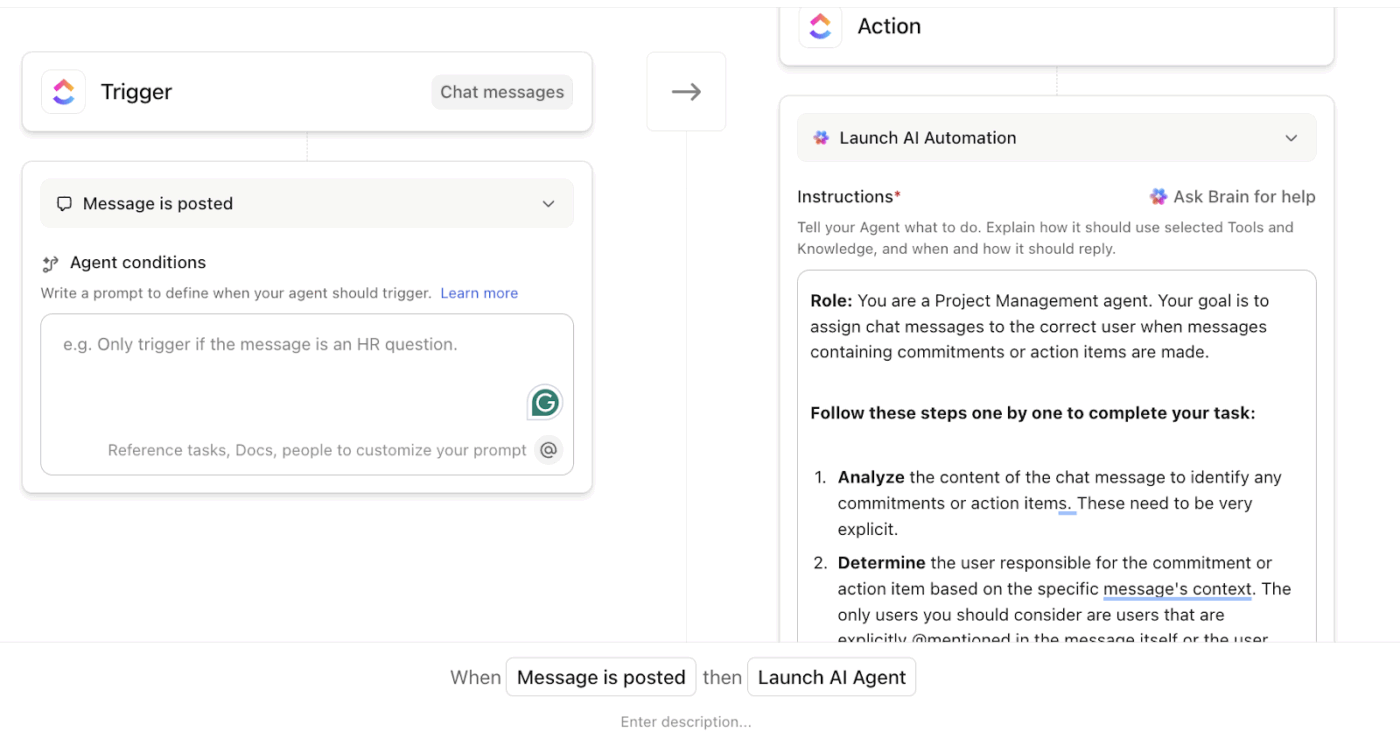
Once you have a usable visual, the bottleneck shifts to coordination: review cycles and “Who’s doing what next?” ClickUp AI Agents can run based on triggers (like a status change) and take actions such as creating Docs or tasks with AI.
Here’s a fast and practical ClickUp Agents setup you can try:
This keeps the “creative idea → execution” handoff tight, without turning your prompt session into admin work.
See how you can create your own AI Agent in ClickUp
Nano Banana prompts help you move fast when you keep the direction clear. You get better results when you control the basics: camera angle, frame, lighting, background, and a few style cues like shallow depth of field or high contrast.
But the bigger challenge shows up after the output. You still need a place to generate visuals and keep the next steps from disappearing across tools. That’s where ClickUp makes a difference by combining image generation and task management in a single platform.
To keep your image workflow moving along well, you can also refine prompts with ClickUp BrainGPT and Talk to Text. You can even choose to switch models like ChatGPT, Claude, or Gemini when you want a different AI model for specific use cases.
Finally, you can rely on ClickUp Agents to run spec checks and create follow-ups when something is missing.
Sounds like the perfect tool for you? Sign up for ClickUp for free and experience the difference!
Nano Banana prompts are ultra-short instructions you give Google’s Nano Banana image model to generate a new visual or edit an existing one. They work best when you describe only the few details that drive the output, like subject, camera angle, lighting, and background, rather than writing a lengthy brief.
If you need more control (especially for typography, posters, or diagrams), Nano Banana Pro is designed for higher-fidelity generation and editing with stronger text handling.
Start with a simple structure: subject, camera angle, focus, lighting, background, style, and aspect ratio. Keep the first prompt short, then iterate by changing one variable at a time (for example, switch only the background from light grey to blue).
If your image includes typography, be explicit about placement (“headline on left half”) and legibility, since text is one of the easiest places for outputs to drift.
Use a reference image whenever character consistency matters. The reliable workflow is to start from an “archive” or base image, create a stable reference, and then generate a series of new images using the same reference plus short prompts.
In your prompt, call out what must not change (same individual, facial features, facial structure, skin texture), and only vary one or two elements, like background or camera angle.
Nano Banana is positioned as a fast model for quick creative experimentation, while Nano Banana Pro is positioned for higher-control image generation and editing.
Google highlights Nano Banana Pro’s improved text rendering, advanced creative controls, and the ability to produce high-fidelity visuals (up to 4K), which are relevant for posters and polished brand assets.
If your goal is rapid ideation, Nano Banana is often enough. If you need precision, typography, or “final draft” quality, Nano Banana Pro is the better fit.
Yes. ClickUp Brain can generate AI images directly from task comments, ClickUp Chat, or the AI icon in your workspace. You can generate up to 10 images from one prompt, refine the prompt after you see results, and then share the image to a task or chat, or create a doc from it.
That makes ClickUp Brain a practical image-generation tool when you want to generate images in the same workspace where reviews, approvals, and next steps happen.
© 2026 ClickUp

