How to Change Background on Teams for Virtual Meetings

Sorry, there were no results found for “”
Sorry, there were no results found for “”
Sorry, there were no results found for “”

One good thing about Microsoft Teams meetings? The vibrant virtual backgrounds!
You don’t have to worry about finding the perfect spot at home or rush to hide clutter at the last minute. Just blur the background or choose a scenic landscape, and you’re good to join the meeting.
But applying these backgrounds can be tricky, especially if you’re joining the meeting from a browser. In this guide, we’ll explain how to change your background in Microsoft Teams.
Sneakpeek: Want to build a better understanding of meeting controls in Teams? or learn how to add a brand new image to your background? It’s all in here!
Here is a step-by-step guide on how to change your background on Teams:
You can change your background on the pre-join screen by opening Background filters, picking an effect (Blur or an image), previewing it, then applying it before you enter the call.
To begin, open the Microsoft Teams application on your computer or mobile device. If you aren’t already signed in, enter your Microsoft account credentials to access the platform.

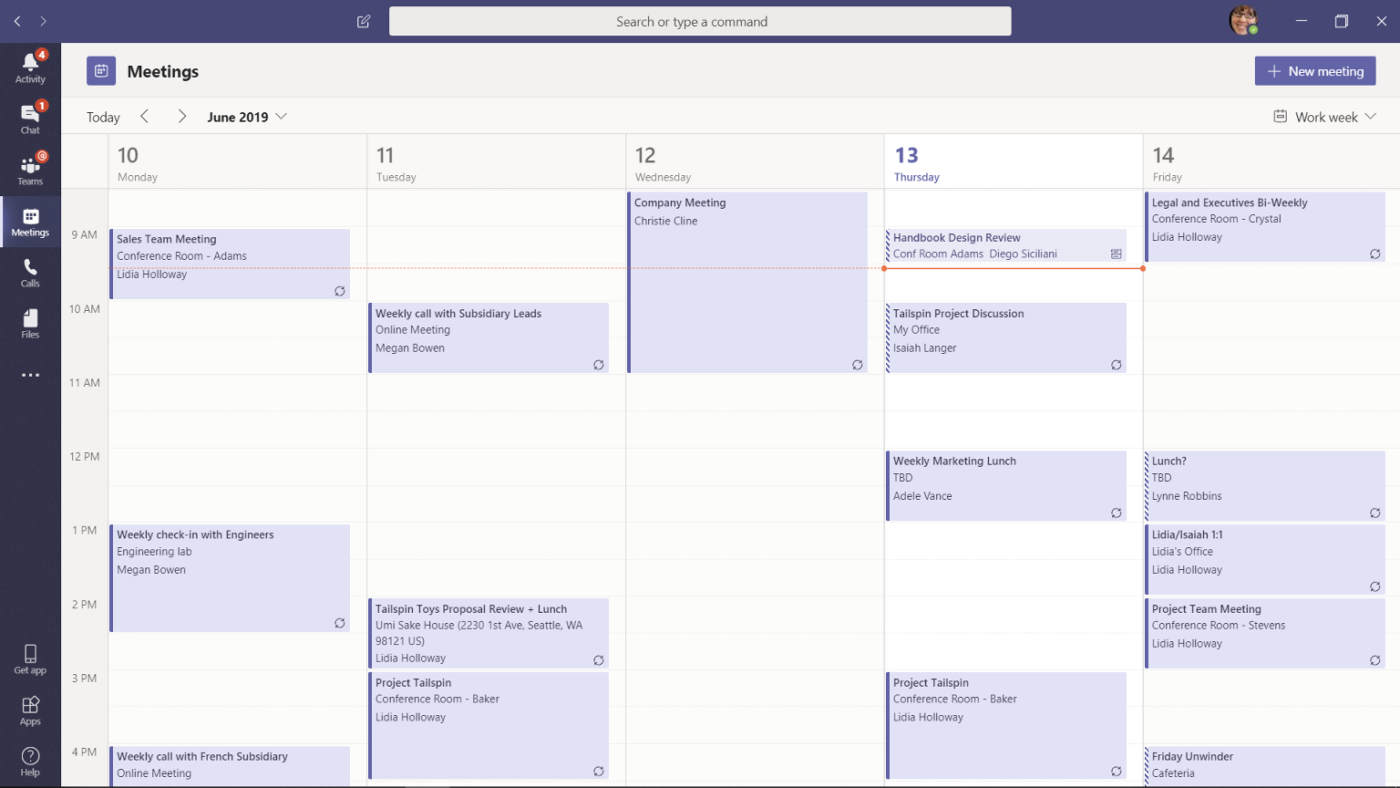
Now navigate to the Calendar tab, select a scheduled meeting, and click Join. If you want to start a meeting instantly, click New Meeting in the top-right corner.

You’ll notice a pre-join screen before you join the meeting. Click on the Background filters icon to explore different background images.

📮ClickUp Insight: We found that 27% of survey respondents use digital notepads for meetings, while only 12% use AI note-takers. This gap is striking because 64% of respondents struggle with unclear next steps in nearly half their meetings.
ClickUp AI Notetaker transforms meeting follow-up! Automatically capture every important detail, clearly identify action items, and instantly assign tasks to team members—eliminating those frustrating “What did we decide?” follow-ups.
💫 Real Results: Teams using ClickUp’s meeting management features report a whopping 50% reduction in unnecessary conversations and meetings!
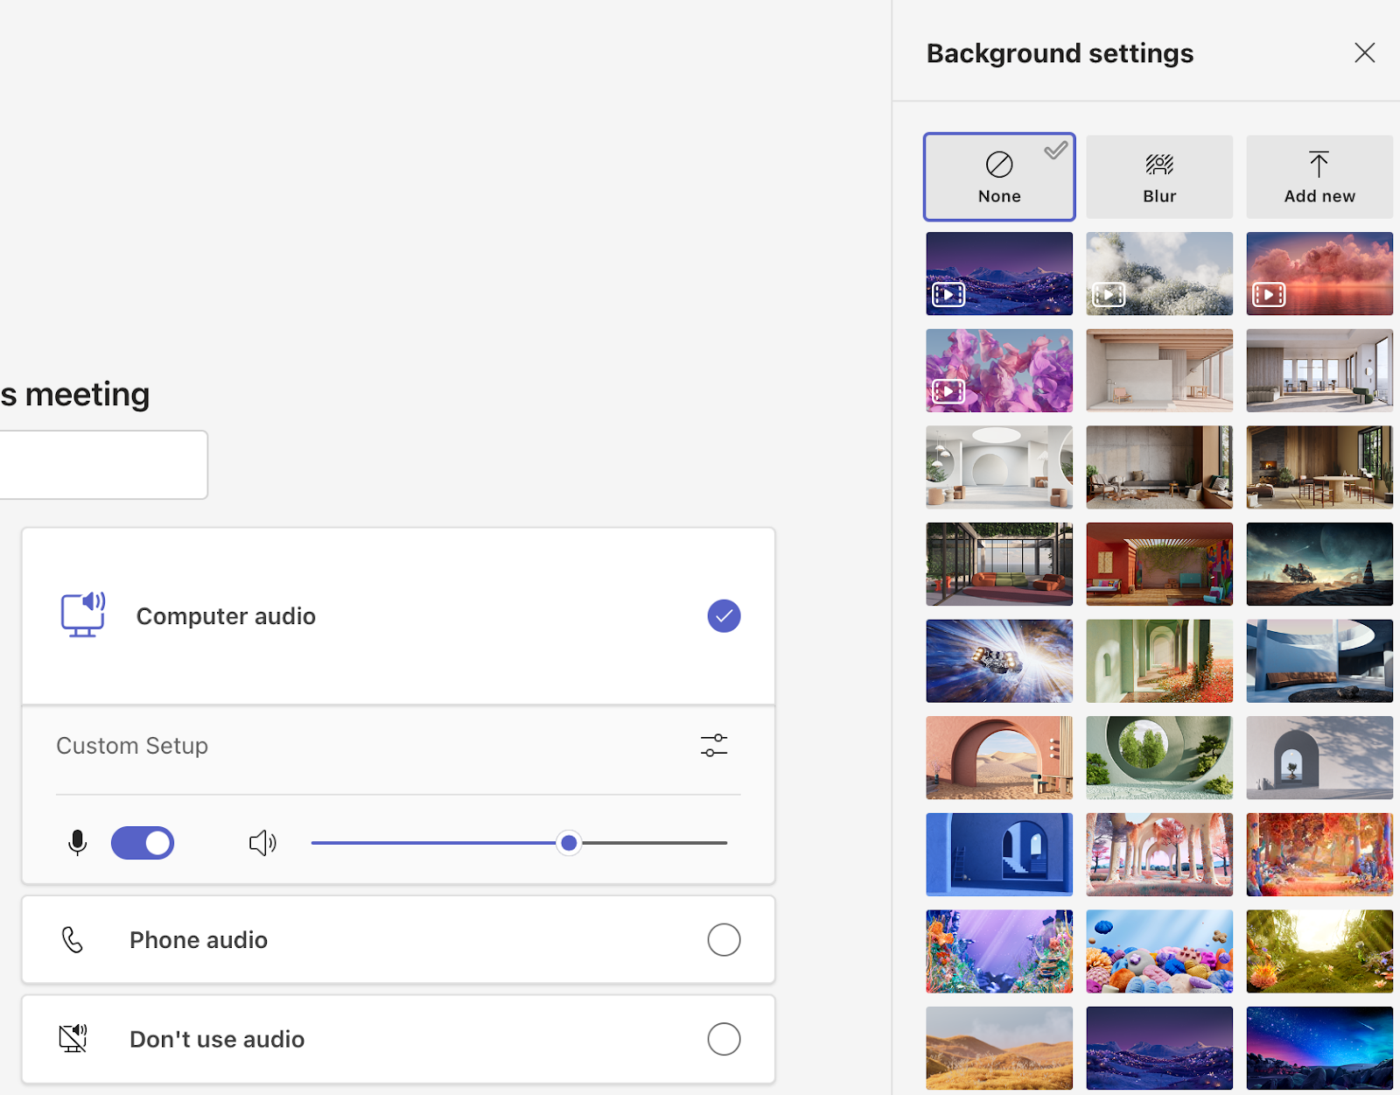
When you click on background filters, a side panel with multiple background images will pop up. You can select Blur if you want to keep your background but hide any distractions.
If you want a new background, you can choose from plenty of preloaded options, like cozy home offices, abstract designs, and scenic views. In the festive mood? Pick a celebratory or seasonal background to match your mood!

📖 Read More: Pros and Cons of Microsoft Teams
After selecting a background image, click Preview to see how it appears behind you. This allows you to adjust your positioning and ensure the background looks right before you join the meeting.

Once you are satisfied with the background, click Apply to add the custom background. Now click Join now to enter the meeting.
💡Pro Tip: If you want to remove your background and go back to your normal surroundings, click on the first image (with a circle and a diagonal line through it). It will turn off any background effects.
To change your Microsoft Teams background during a live meeting, you can switch effects in a few clicks without leaving the call.
Here are the steps to set different backgrounds in Teams after joining the meeting.👇
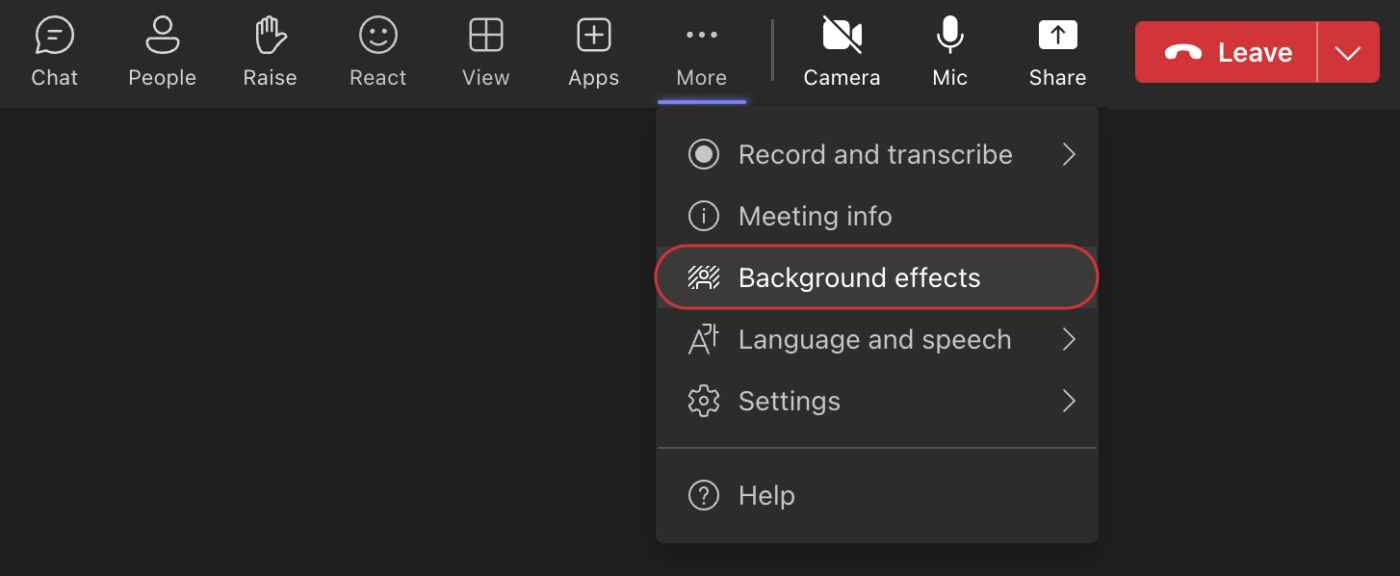
Go to the top menu, locate the ellipsis (…) icon, and click More. Select Background effects.

From the pop-up menu, select an appropriate background. You can choose from the default options, blur your background, or upload your own image. Make sure your background is suitable for the meeting agenda.
Want to test how the background looks? Click Preview to check the background out before making it visible to everyone.

Happy with your choice? Just hit Apply, and you’re all set!

🔍 Did you know? Microsoft Teams lets you add custom backgrounds. Go to the Add new button in the background panel and upload your company logo, team photograph, or an image of your favorite holiday destination.
Here are some tips to keep in mind while choosing your background for a Teams meeting:
Think about the vibe you want to create. Casual team chat? Go for something vibrant or fun to keep it light. Meeting with senior executives or clients? Stick with clean, minimalist backgrounds in neutral tones. Your background can subtly set the tone for the meeting—use it to your advantage!
Lighting can make all the difference. Always preview your background before the meeting starts. A bright face with harsh shadows or an overly dim background can be distracting. Adjust your lighting to complement the background—it’s a quick fix that makes you look polished and professional.
Why not let your background say a little something about you? A cozy bookshelf, a stunning cityscape, or even a subtle nod to your favorite hobby can add a personal touch. It’s a great way to make conversations more engaging and help people connect with you.
Avoid choosing backgrounds that scream for attention. Busy patterns or animated backgrounds might seem fun but can take the focus away from you. A clean, uncluttered design emphasizes what you’re saying and not what’s happening behind you.
What you wear should complement, not clash with, your background. If your background is colorful, stick to solid, neutral tones in your clothing. Wearing similar colors to your background can make you blend in (and not in a good way). Take a moment to check the combination—it’s a small step that goes a long way in making you look sharp.
📖 Read More: How to Schedule Messages on Teams
Microsoft Teams works well for video calls, but it can fall short when you need structured meeting workflows and reliable follow-through.
Microsoft Teams is great, but it comes with limitations. Here are some of the challenges you might encounter:
The built-in ‘Meeting Notes’ feature feels basic and offers minimal text formatting, such as bullet points and plain text. There’s no support for rich-text editing, making it hard to organize complex meeting details effectively.
Plus, notes are only visible to meeting participants. This means you’ll need to take extra steps to share notes with other stakeholders. And if you want to create follow-up tasks from your notes, there’s no built-in task management, forcing you to switch to another tool and disrupting your workflow for online meetings.
Using custom backgrounds and effects in Microsoft Teams can enhance your on-screen appearance, but also strain your device. Background effects consume a lot of system resources, which may cause lag or even freezing during meetings, especially on older computers.
Internet speed also plays a big role in running effective meetings. Teams may automatically disable background video effects used to maintain call quality if your connection is unstable or has low bandwidth. This can be inconvenient when you want to keep a professional look but face technical limitations.
Microsoft Teams’ features fall short when it comes to managing meetings beyond basic video calls. There’s no built-in feature for creating detailed meeting agendas or tracking tasks directly within the platform. You’ll need to rely on external tools or manual methods to keep meetings organized.
Assigning action items or following up on tasks after a meeting is also a hassle. Since Teams lacks integrated task management, you have to switch to another app to assign and monitor tasks. This interrupts your workflow and makes it harder to stay on top of important action items.
Another downside of Microsoft Teams is that while you can record meetings, it doesn’t automatically generate summaries, notes, or action items for you. You’ll need to manually jot down key points or rely on third-party tools to keep track of decisions and action steps.
Without built-in automation, it’s easy to miss out on important details, which can make post-meeting follow-ups a bit more tedious and time-consuming.
Here’s what a Reddit user said about MS Teams:
Microsoft Teams feels like a business-focused version of Discord trying to be a super app, integrating tools like Word, Excel, and Outlook. However, its complexity can cause glitches, especially when joining voice chats, which often fail to appear reliably.
ClickUp helps teams go beyond Microsoft Teams meetings by turning every discussion into clear notes, action items, and follow-ups—without switching tools.
While Microsoft Teams is great for hosting online meetings, it falls short when managing action items and follow-ups.
That’s where ClickUp Meetings comes in. It is a powerful meeting assistant designed to help you stay organized with meetings and enable real-time collaboration. You can use it to quickly schedule meetings, send out invites, and add all the details like the date, time, and location (or a virtual link).
It also allows you to set up agendas ahead of time so everyone knows what’s on the table. During the meeting, a dedicated ClickUp Doc is available to jot down notes, track action items, and capture key decisions. Any follow-ups can be assigned right then and there, making sure nothing gets forgotten (more on this later!).
Need some more ammo for your meetings? Try ClickUp’s AI Notetaker! Let AI capture meeting highlights and key action items while you get to be an active participant. 💁🏽♂️
We use ClickUp daily to provide the backdrop for organizing all Project Meetings with customers, internal project planning meetings, internal project progress meetings, and resource scheduling sessions. We also use it to foster ownership of tasks with end customers which in turn helps to clarify responsibilities.
Meetings can often run long, making it difficult to keep track of every detail or action point. This is where ClickUp Brain becomes invaluable. Instead of manually sifting through pages to read meeting minutes, you can input your notes directly into ClickUp Brain.
The AI-powered assistant will analyze the meeting content, identify key points, and generate a clear, concise summary. It highlights important takeaways, action items, and next steps, saving time and ensuring nothing important gets overlooked.
Or, if you’re already using ClickUp’s AI Notetaker, simply hand over the meeting summary Doc to ClickUp Brain, and it’ll generate tasks based on action items for you! Yep, one seamless meeting workflow end to end. No external notetakers needed!
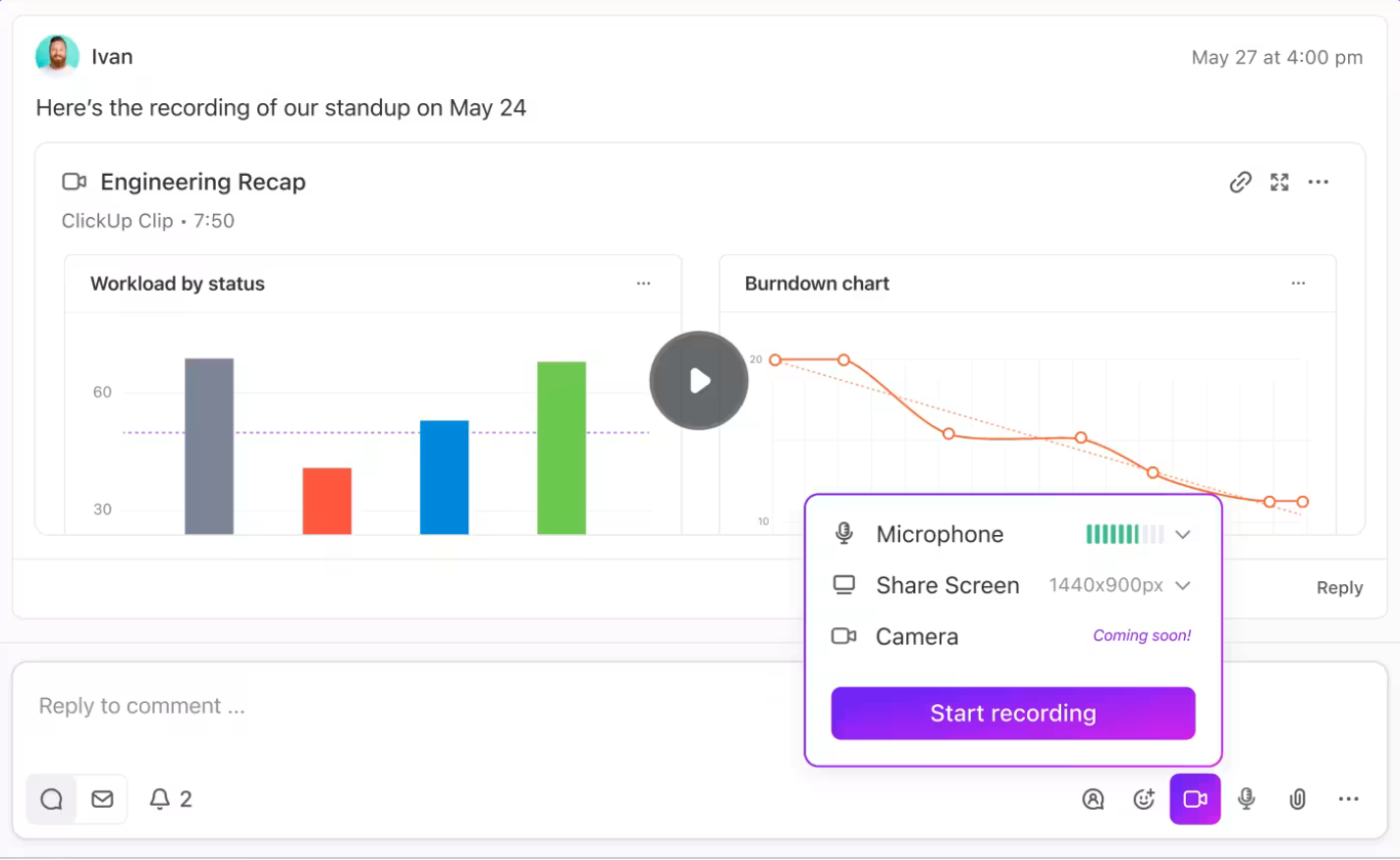
Sure, Microsoft Teams lets you record virtual meetings—but who has time to review hours of footage? Sometimes, you just need to capture the important bits. That’s where ClickUp Clips comes in.
With Clips, you can record what matters, whether it’s a key discussion point, a quick walkthrough, or an important task explanation. No more scrubbing through long recordings; just hit record when something important comes up, and share it instantly with your team. It’s simple, fast, and effective.

📖 Read More: Top Team Collaboration Software
We often end meetings with a bunch of notes, but turning them into tasks is a whole different hassle. With its Assign Comments and Tasks features, ClickUp Meetings turns meeting discussions into actionable steps in seconds.
Instead of leaving notes scattered across documents, you can highlight key points and assign them as tasks directly from your meeting notes. Use the feature to delegate specific action items to team members—complete with deadlines and priorities.
For more complex tasks, create dedicated ClickUp Tasks, link them to relevant projects, and track progress in real time. This way, you do not have to switch between tools or lose track of responsibilities.

With ClickUp, you also get Microsoft Teams integration, so your meetings become action-driven, ensuring every important point is followed up efficiently. You can also seamlessly integrate Zoom and Google Meet, along with popular calendar tools such as Google Calendar and Outlook, directly within ClickUp. This makes it easier to manage your meetings and turn discussions into actionable tasks, ensuring nothing important gets overlooked.
📖 Read More: Best Screen Share Software and Apps
Changing your meeting background in Microsoft Teams is straightforward. Simply navigate to the background filters, select your desired background, and apply it. While Teams is great for visuals, it lacks effective tools for taking meeting notes or assigning action items.
This is where ClickUp comes in as an excellent meeting assistant.
It can easily schedule meetings, capture notes, assign tasks, and track progress, ensuring that your meetings are professional and productive. With tools for task tracking, real-time communication, and integrations, ClickUp provides everything your team needs to stay on track and work efficiently.
Ready to improve how your team works together? Sign up for ClickUp today. It’s free to get started and built to support teams of all sizes.
© 2026 ClickUp