How to Add Voice-Over to PowerPoint in a Few Easy Steps
Sorry, there were no results found for “”
Sorry, there were no results found for “”
Sorry, there were no results found for “”

Slides can only say so much. Presentations become far more engaging when you, the presenter, guide your audience through them, explaining, elaborating, and adding a personal touch that static text and images can’t provide. ✨
Adding a voiceover to your PowerPoint allows you to deliver that experience, even when you’re not presenting live. It transforms a passive slideshow into an engaging, narrated experience.
In this blog post, we’ll explore how to add voiceover to PowerPoint in just a few simple steps. Follow along! 📽️
Adding a voiceover to your PowerPoint can make presentations more engaging and professional. Whether for training, pitches, or tutorials, here’s a step-by-step guide:
Recording voiceovers on PowerPoint presents challenges, such as re-recording for mistakes, large file sizes slowing presentations, inconsistent playback across devices, and limited real-time collaboration.
Consider using advanced tools like ClickUp, with extensive screen recording features like ClickUp Clips, to create engaging video presentations with voiceovers. It supports real-time collaboration, simplifies communication, boosts productivity, and streamlines your presentation workflow.
Adding a voiceover to your PowerPoint can transform a static presentation into a more interactive and engaging experience. Whether you share instructions, present data, or narrate a story, a voiceover adds a personal touch, enhances clarity, and helps guide your audience through the content.
Let’s walk through the step-by-step process of adding voiceovers to your PowerPoint presentation. 💁
Before you press Record, take a moment to finalize your slides. Make sure:
Also, consider what you’ll say for each slide. If you’re unsure, jot down a short script or key points to stay on track and keep your narration within the slide timings. A little preparation now will save you time later when recording.
💡Pro Tip: PowerPoint allows you to add speaker notes to help guide your narration. Use the Notes section beneath each slide and type in your key points. When presenting, use Presenter View (under the Slide Show tab) to see your notes while your audience only sees the slides. This way, you can stay on track without memorizing everything!
👀 Alternatively, use ClickUp’s AI to generate a short script based on your topic and add it to Notes. Try it for free and find out yourself.
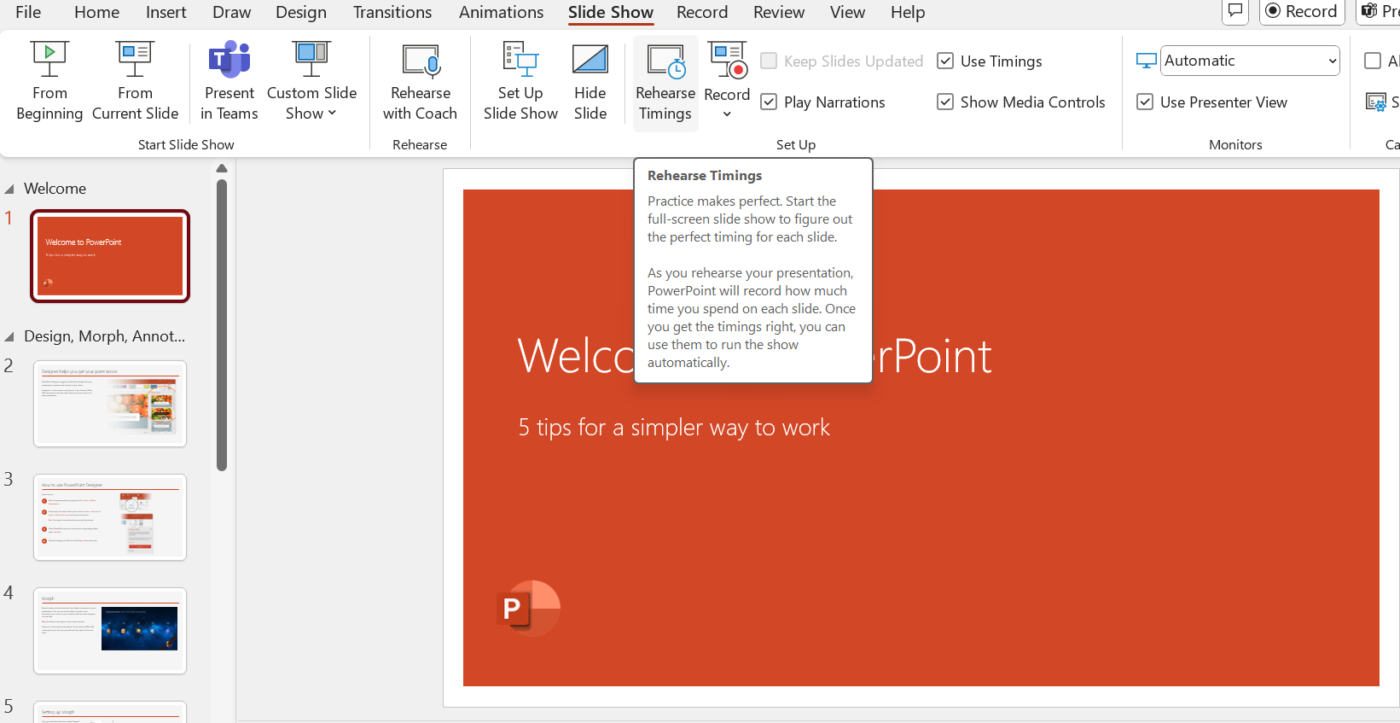
You can use the Rehearse Timings feature under Slide Show to practice your delivery, while PowerPoint records the ideal timing for each slide.
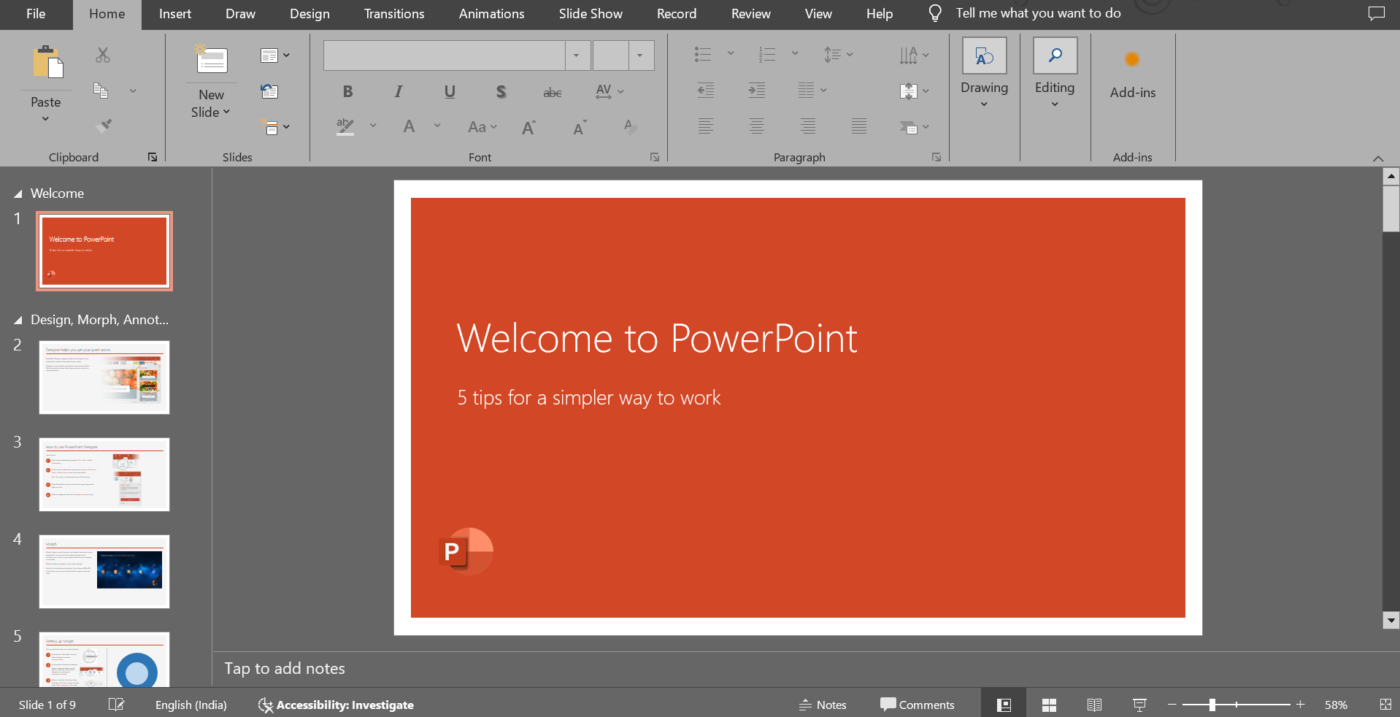
Once you feel prepared and confident about recording, start with the slide where you’d like to add your narration. In the left-hand slide pane, click on the slide you want to focus on. This is especially useful for presentations with many slides.
⚡ Productivity Hack: Want to control the flow of your presentation? You can manually set slide timings in PowerPoint to ensure smooth transitions.
📖 Also Read: How to Create Whiteboard Animation Videos?
Now, you’re ready to record. Go to the Insert tab in the PowerPoint toolbar. Click on Audio from the options. Choose the Record Audio.
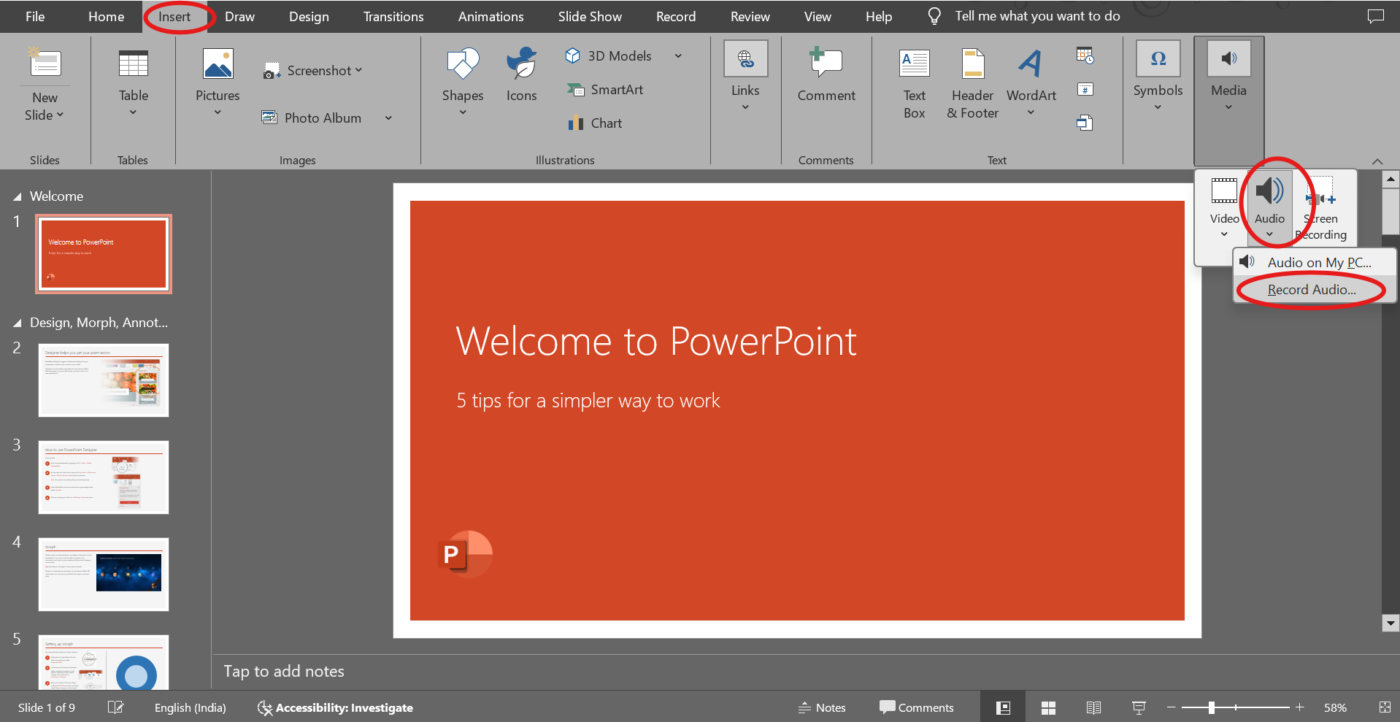
A dialog box will pop up, asking you to name your recording. Use a simple naming system, like ‘Slide 1 Audio clip,’ to quickly identify recordings later. You can also record yourself while presenting with external tools.
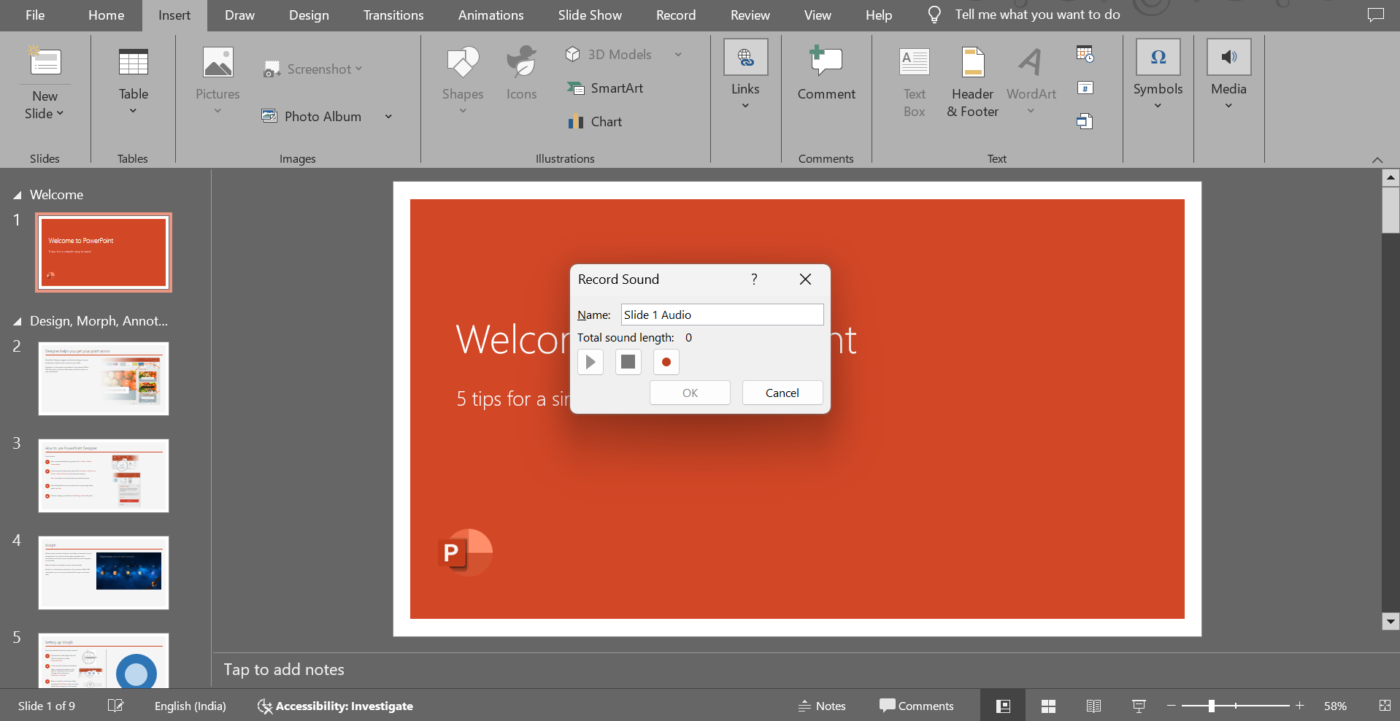
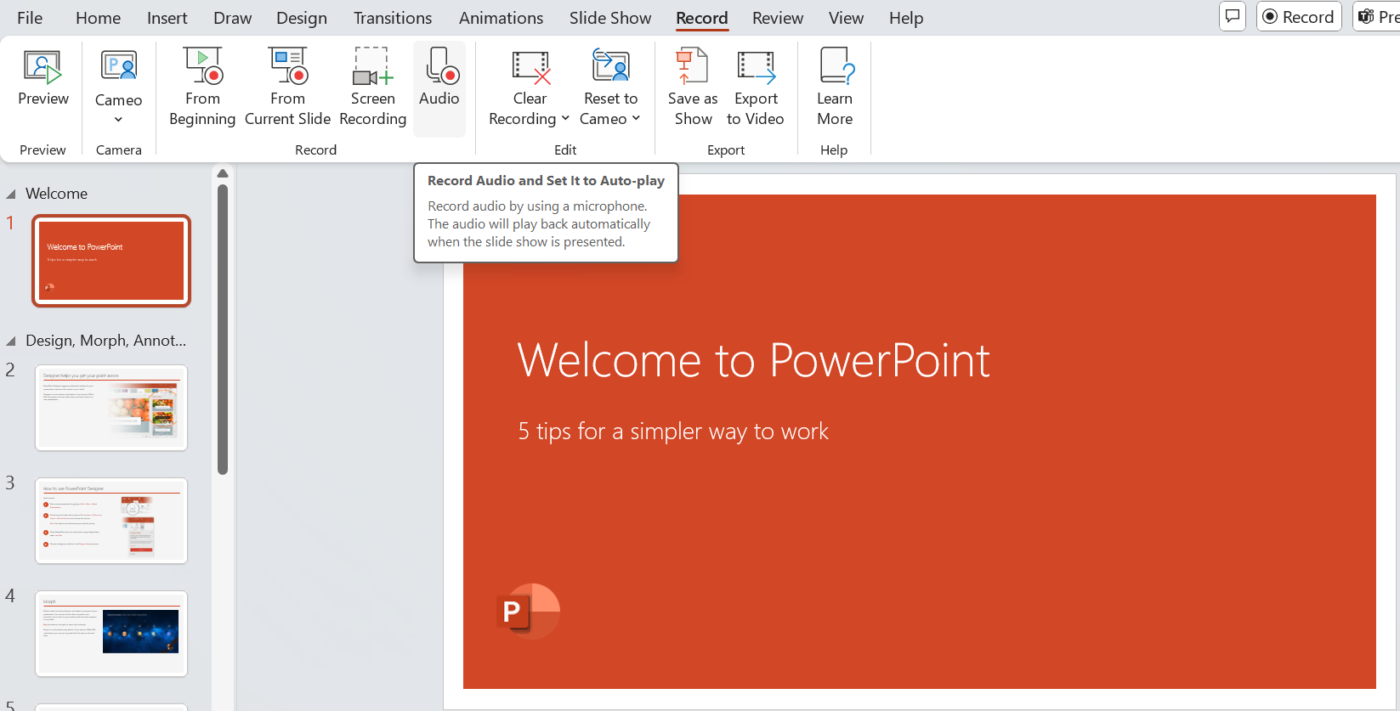
Alternatively, click on Record > Audio to get the same dialog box as above. From there, simply select Record Audio to begin your narration setup.
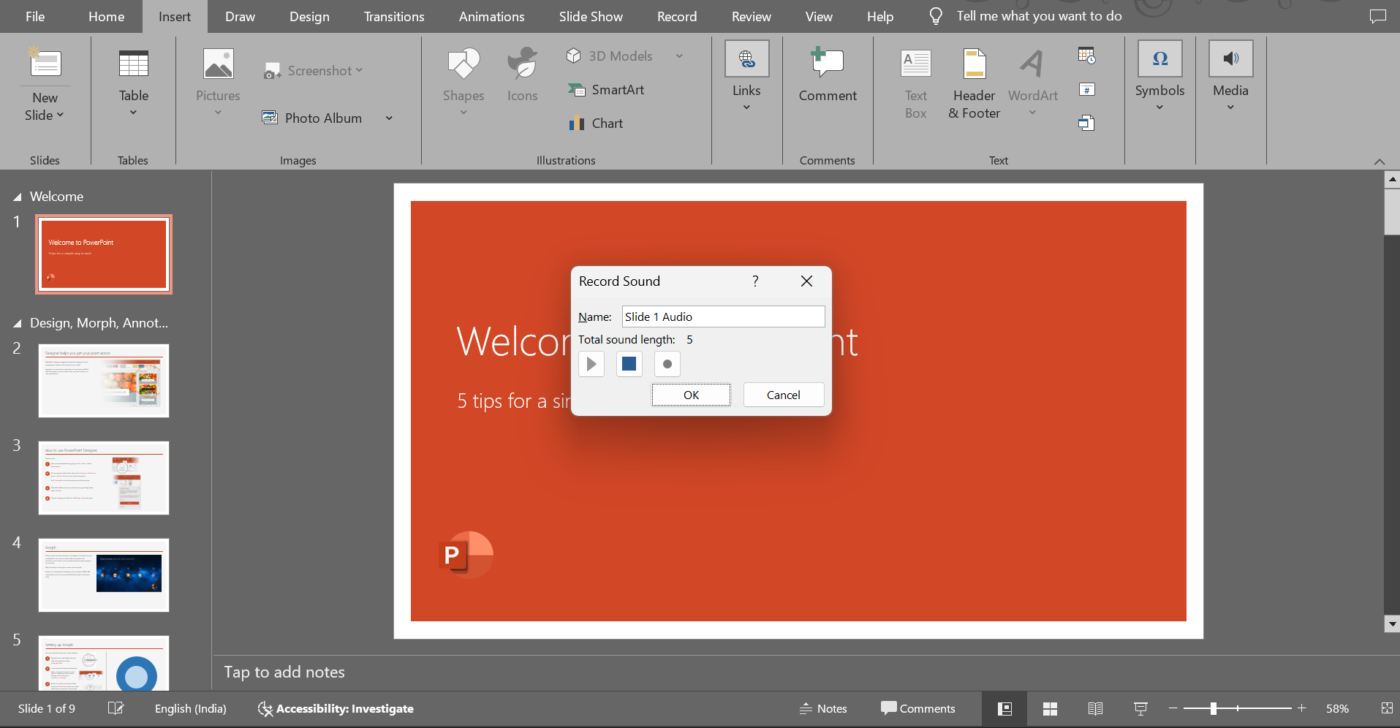
In the dialog box, you’ll see a red record button. Click it, and start speaking into your microphone. While recording, speak clearly and at a steady pace.
To do this effectively:
💡Pro Tip: A USB microphone is an excellent investment if you want crisp, clear audio when using presentation tools. Built-in microphones can pick up a lot of background noise or sound tinny, distracting your audience. Find a quiet spot to record. Turn off fans, close windows, and silence your phone. Often, even minor background noises, like typing or chair squeaks, can be noticeable.
When you’re done talking, hit the Stop button. You’ll see options to review your recording. Click Play to listen to it and check for clarity, volume, and pacing.
Not happy with the recording? No worries—you can re-record the audio or video for the same slide as many times as you need. Once you’re satisfied, just click anywhere outside the playback box, and the audio will automatically attach to the slide. You’ll see an audio icon appear, which you can move around to keep it out of the way.
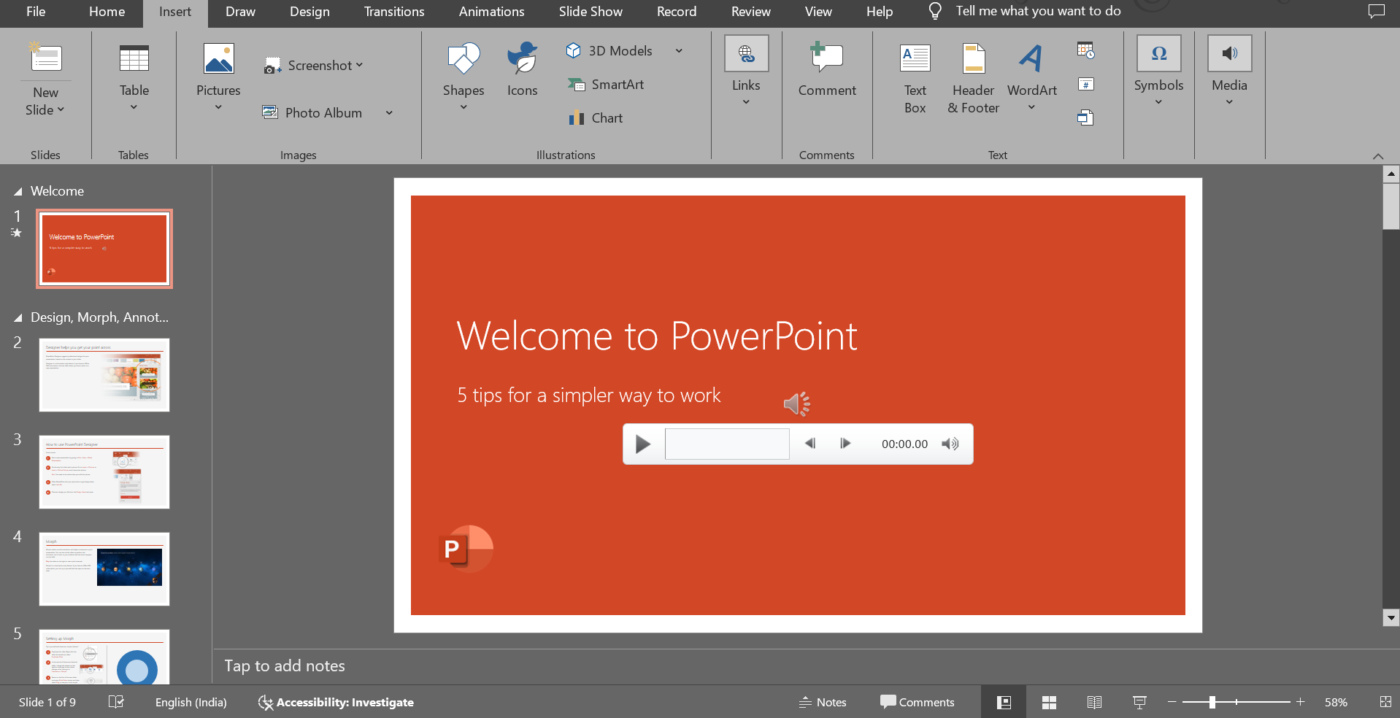
Repeat the process for all other slides that need narration. You can manually set slide timings in PowerPoint to ensure smooth transitions. This lets you tackle your presentation in smaller, manageable chunks rather than recording everything at once.
🔍 Did You Know? According to the Glance Test, your audience should be able to understand what you’re showcasing in just three seconds. If you pass the test, you can convey your message and keep their attention.
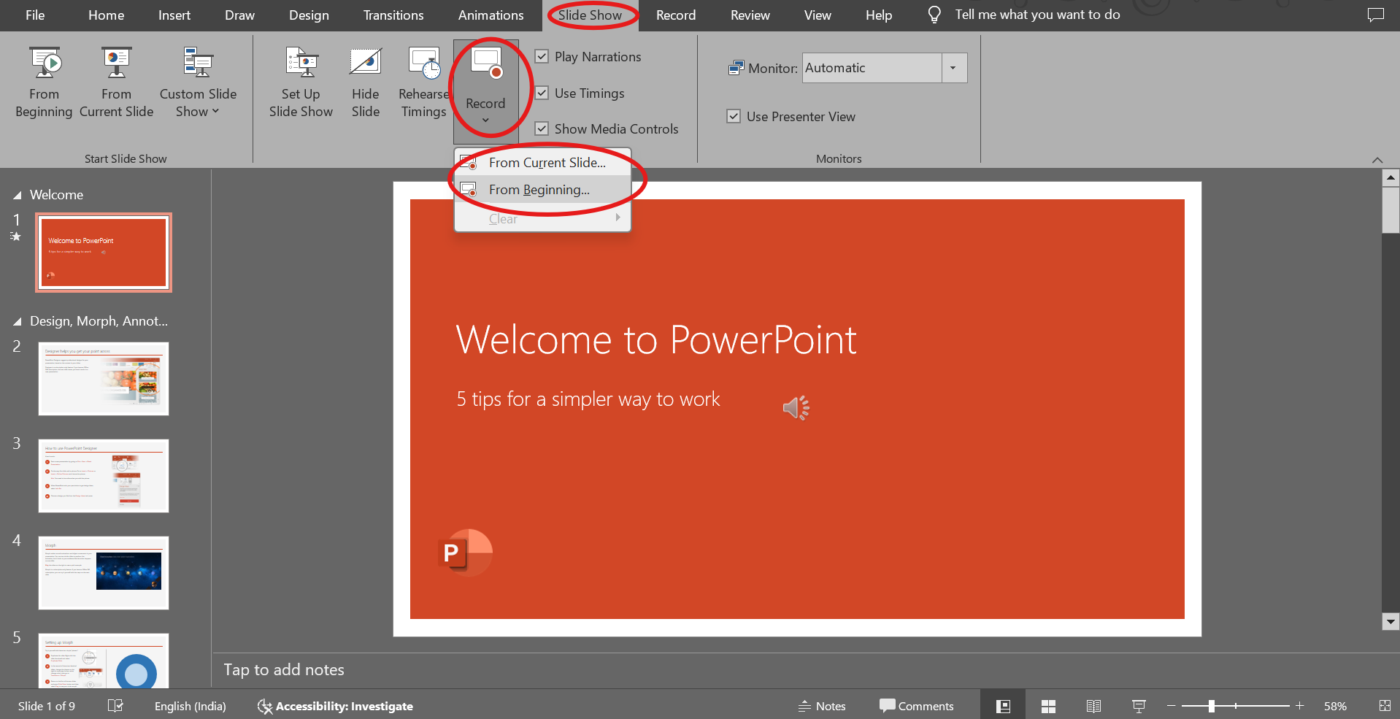
If you want to record all slides in one session, here are the steps:
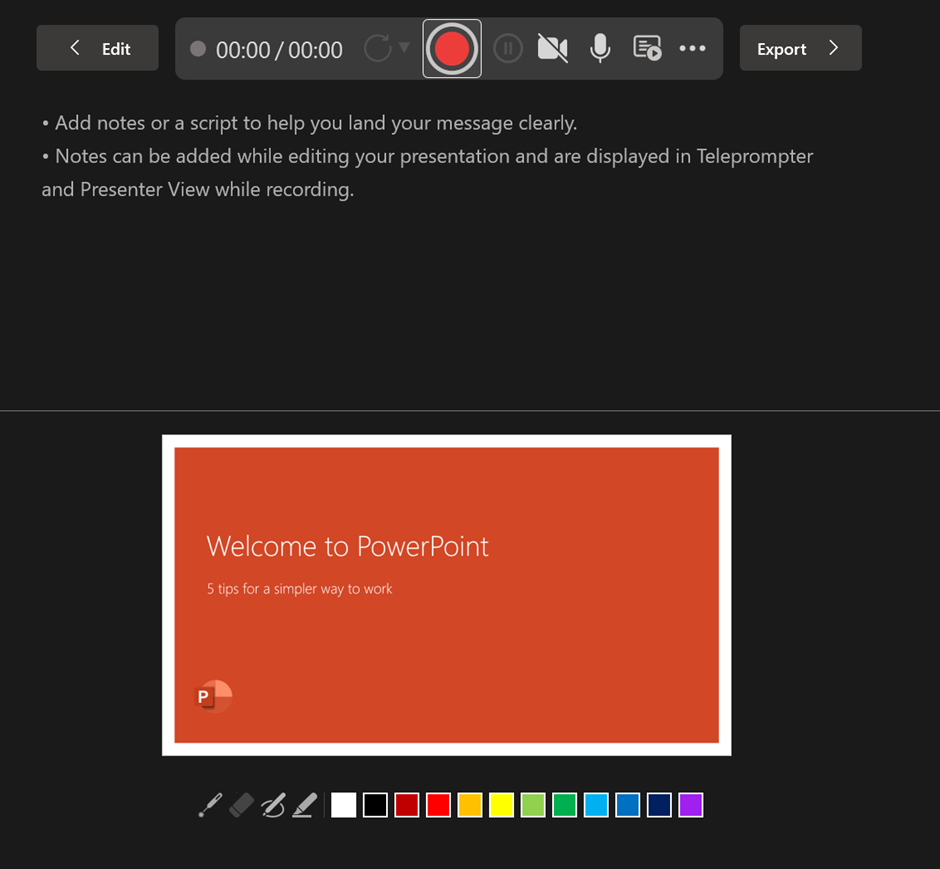
After this, you should see the recording controls and your speaker notes on the screen, which you can reference while narrating.
Press the video button on the panel to keep your video on or off. Ensure that you are not on mute before hitting record. Once you press Record, you will also get a 3-second countdown to prepare yourself better.
Follow the script and narrative as you advance through your slides. PowerPoint will save the recordings with each slide and play automatically when needed.
💡 Pro Tip: To engage your audience, your tone should match the mood of your presentation. Serious topics call for a calm, steady delivery, while lighter subjects can benefit from a more upbeat tone.
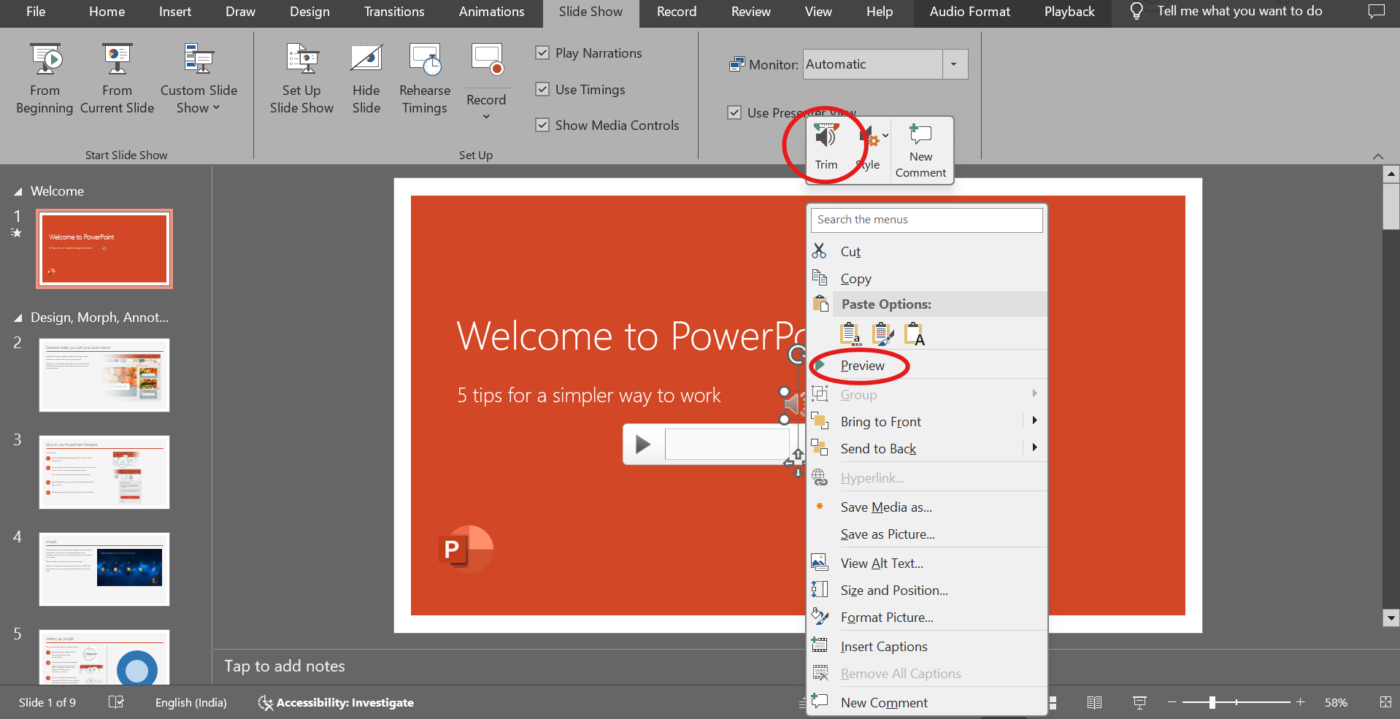
Once all your slides have audio, go through the entire presentation. Keep these in mind:
🚨 Quick Tip: A presentation slide must contain around 40 words or even fewer to allow the audience to focus on only key phrases.
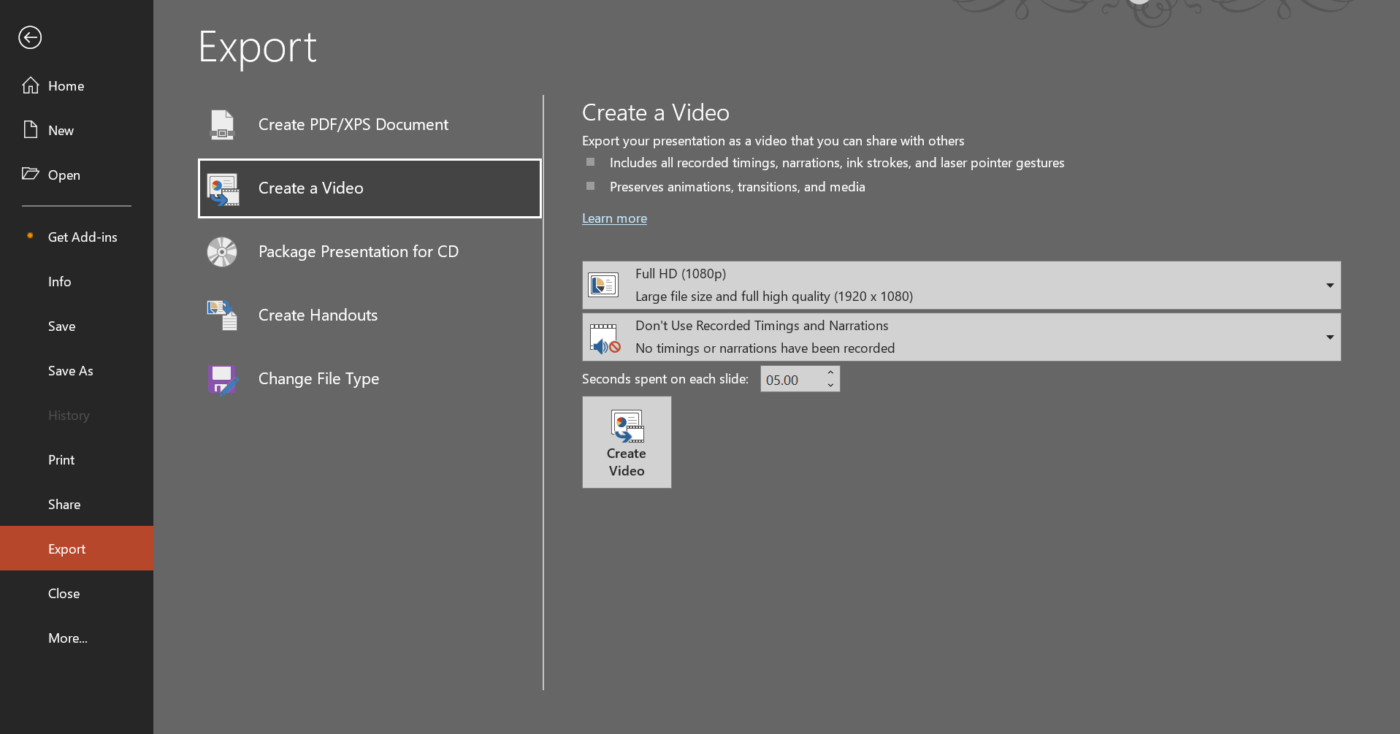
Once everything looks and sounds great, save your PowerPoint file.
Voiceovers can make PowerPoint presentations more impactful, but you might encounter technical, logistical, or practical challenges.
Let’s take a look at some of them. 📂
🧠 Fun Fact: The concept of presentations dates back to the 17th century when images were projected using early devices like the magic lantern. Christiaan Huygens, a Dutch scientist, invented it.
ClickUp, the everything app for work, is designed to help individuals and teams manage their work effectively. Whether you’re juggling tasks, planning projects, or collaborating with a team, it offers a suite of powerful tools to streamline your workflow.
📮ClickUp Insight: 37% of our respondents use AI for content creation, including writing, editing, and emails. However, this process usually involves switching between different tools, such as a content generation tool and your workspace. With ClickUp, you get AI-powered writing assistance across the workspace, including emails, comments, chats, Docs, and more—all while maintaining context from your entire workspace.
Let’s walk through the steps to create a presentation with voiceover using ClickUp:
ClickUp Whiteboards give you a virtual canvas to collaborate on real-time presentation ideas and content. With shapes and connectors, creating flowcharts and defining relationships between ideas is easy. You can add text boxes to expand on preliminary ideas and connect with relevant ClickUp Docs to provide extra context.
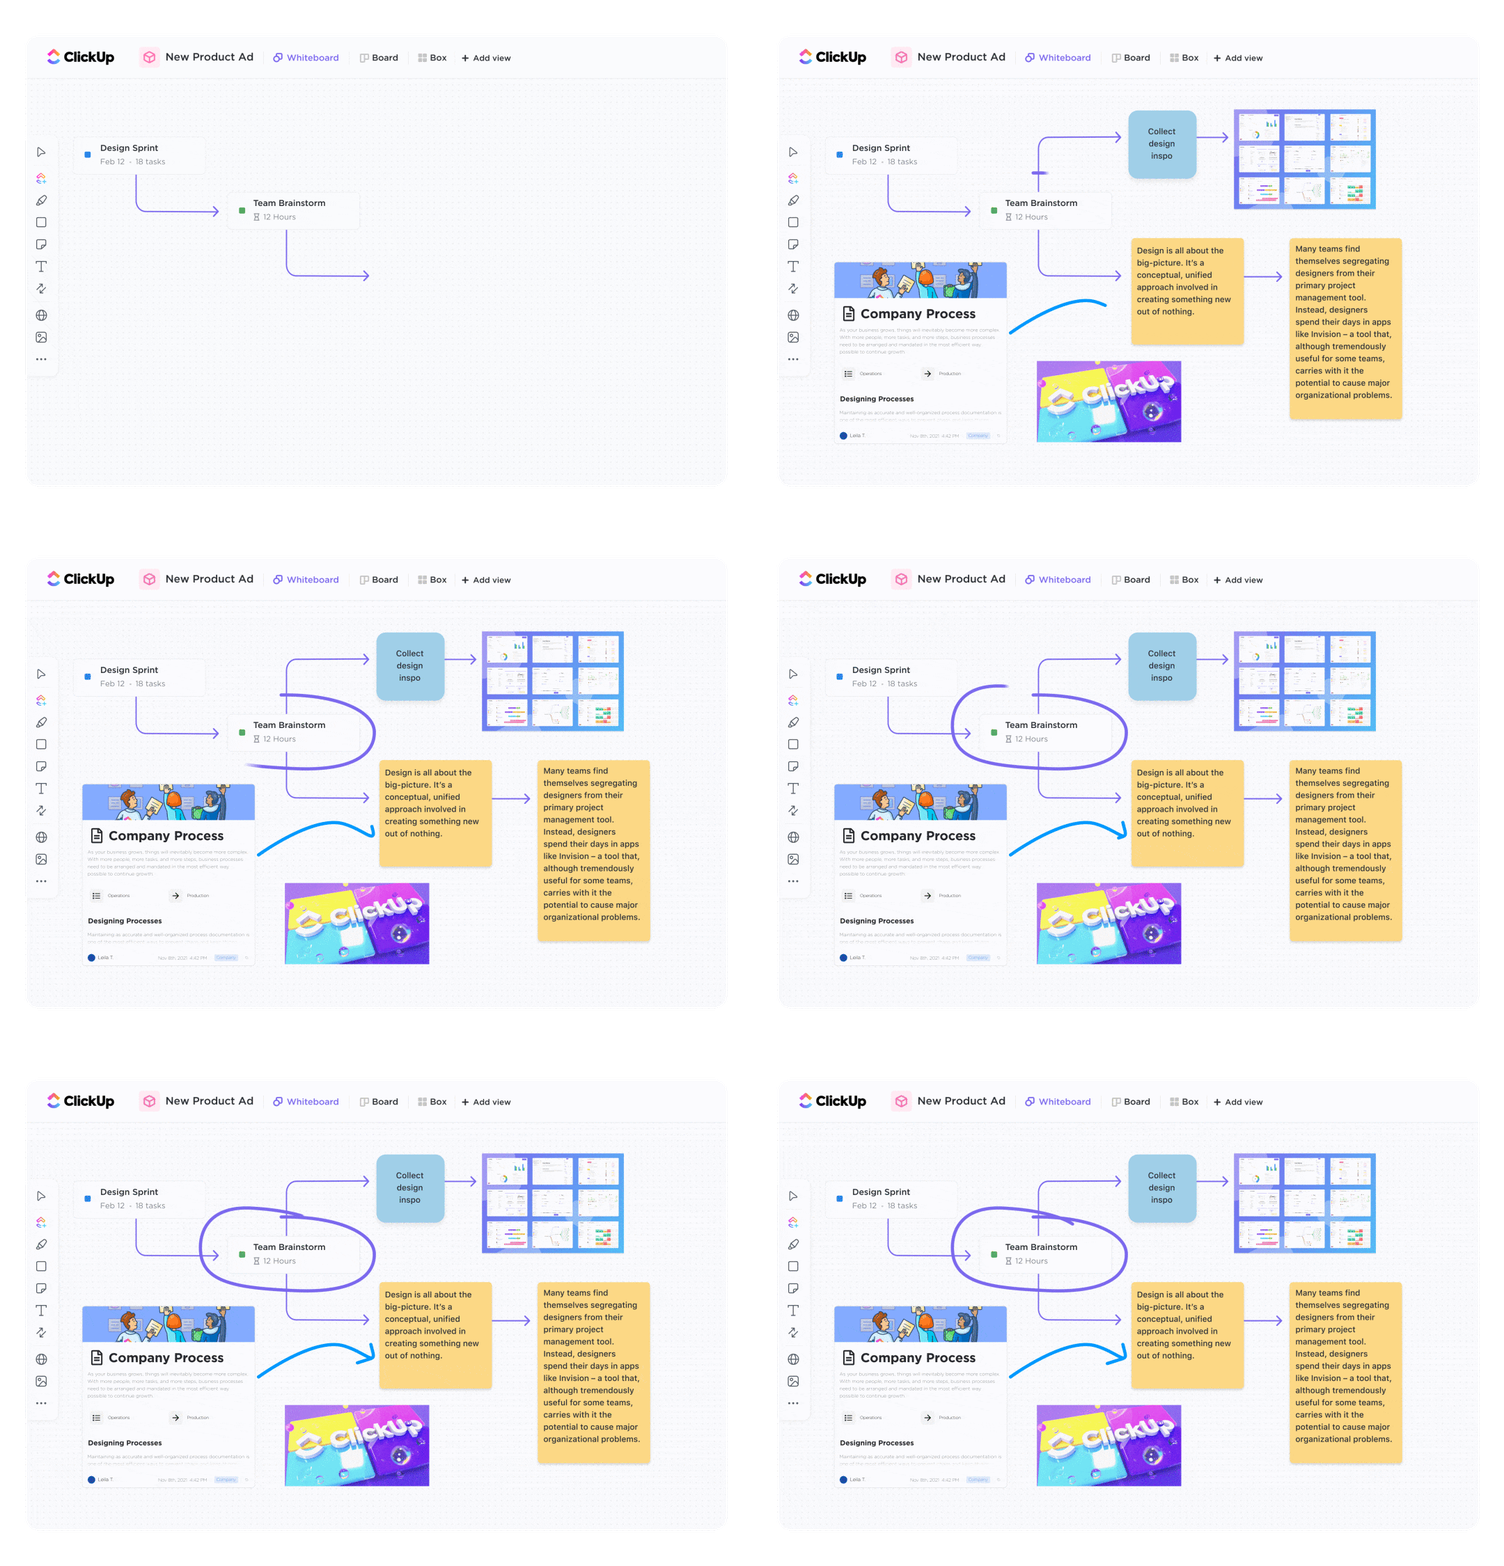
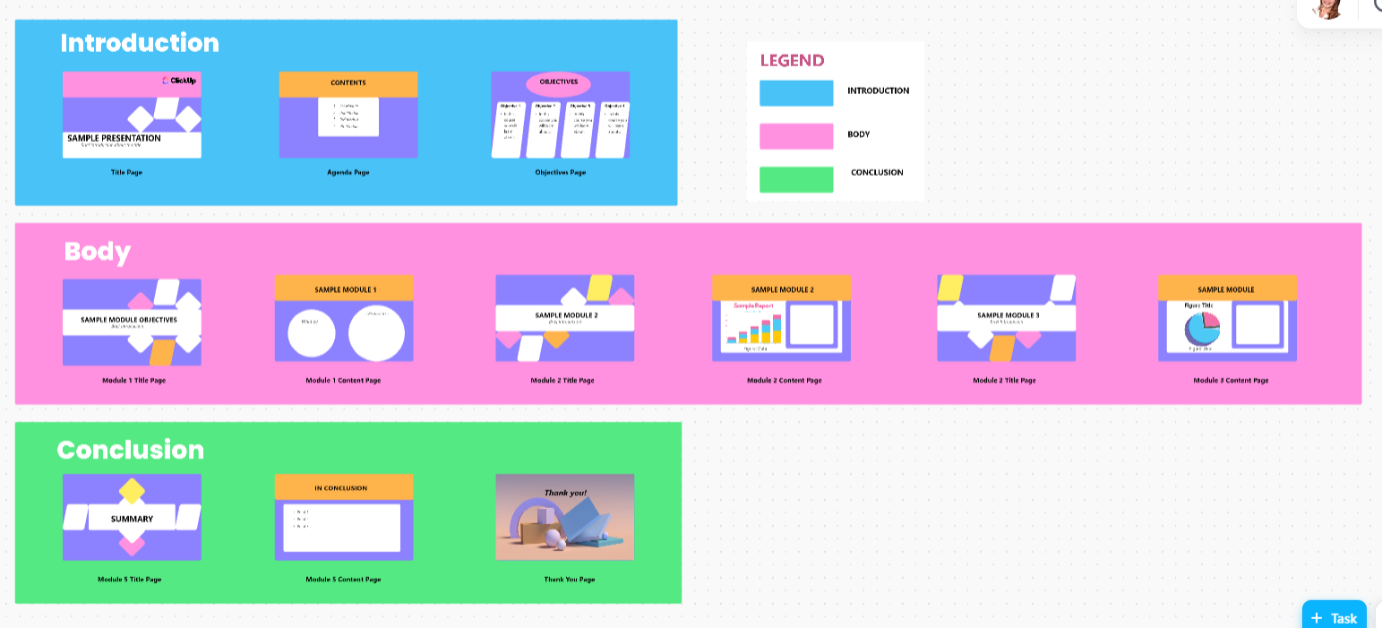
ClickUp offers presentation templates that let you quickly build slides with a structured framework. Pick a template that suits your needs and add your content.
ClickUp Presentation Template helps you design visually engaging presentations while keeping everything organized. From the initial structure to final feedback from stakeholders, you can manage it all in one place, ensuring consistency across different presentations.
The template helps you:
🚨 Quick Tip: Play ‘PowerPoint Karaoke’ with your team during presentations! It’s a fun challenge where participants present random slides without prior knowledge, encouraging improvisation and engaging the audience.
ClickUp Clips is a solid screen recording software that lets you record engaging voiceover videos to share ideas, offer feedback, or explain complex topics—making communication more personal, clear, and effective.
Look for the camera icon in the upper-right corner of your workspace, or navigate to the Clips option in the Quick Action menu. Click on it to open the screen recording interface. This is your gateway to creating professional voiceover content.
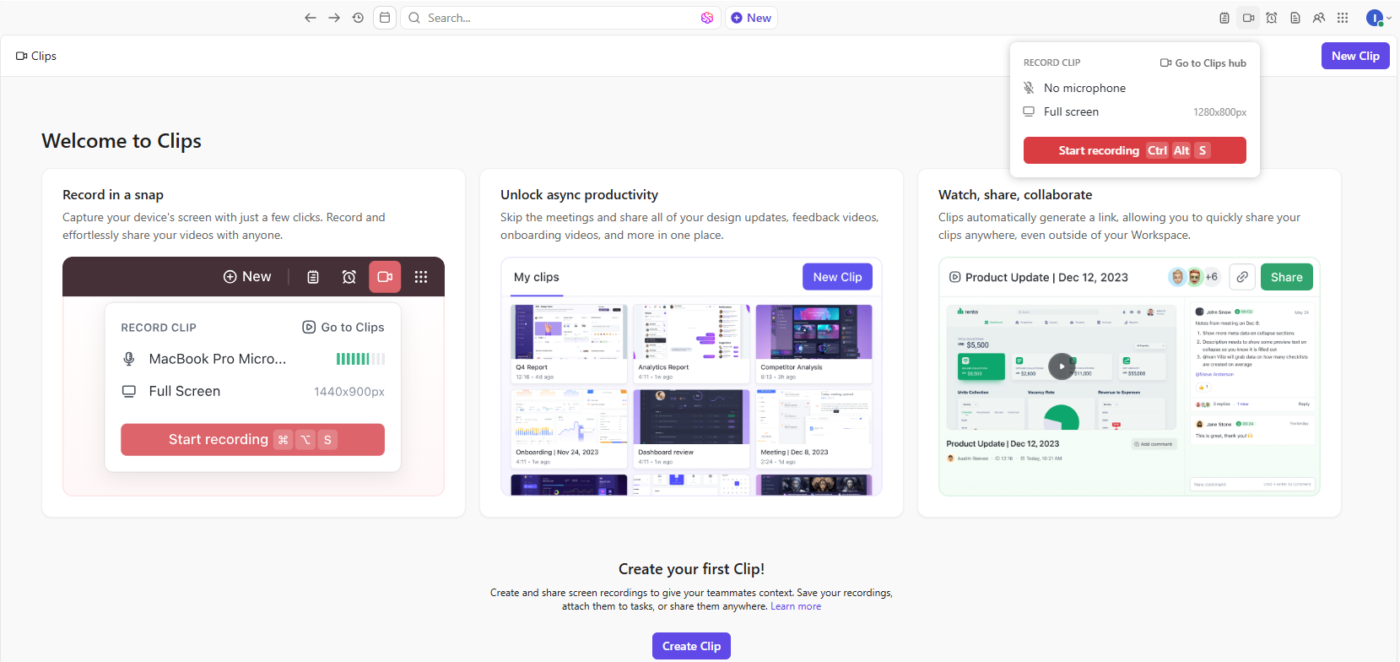
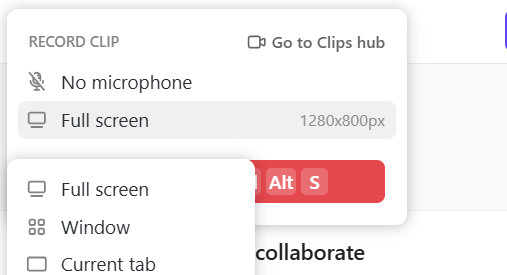
You can decide what part of your screen you want to record.
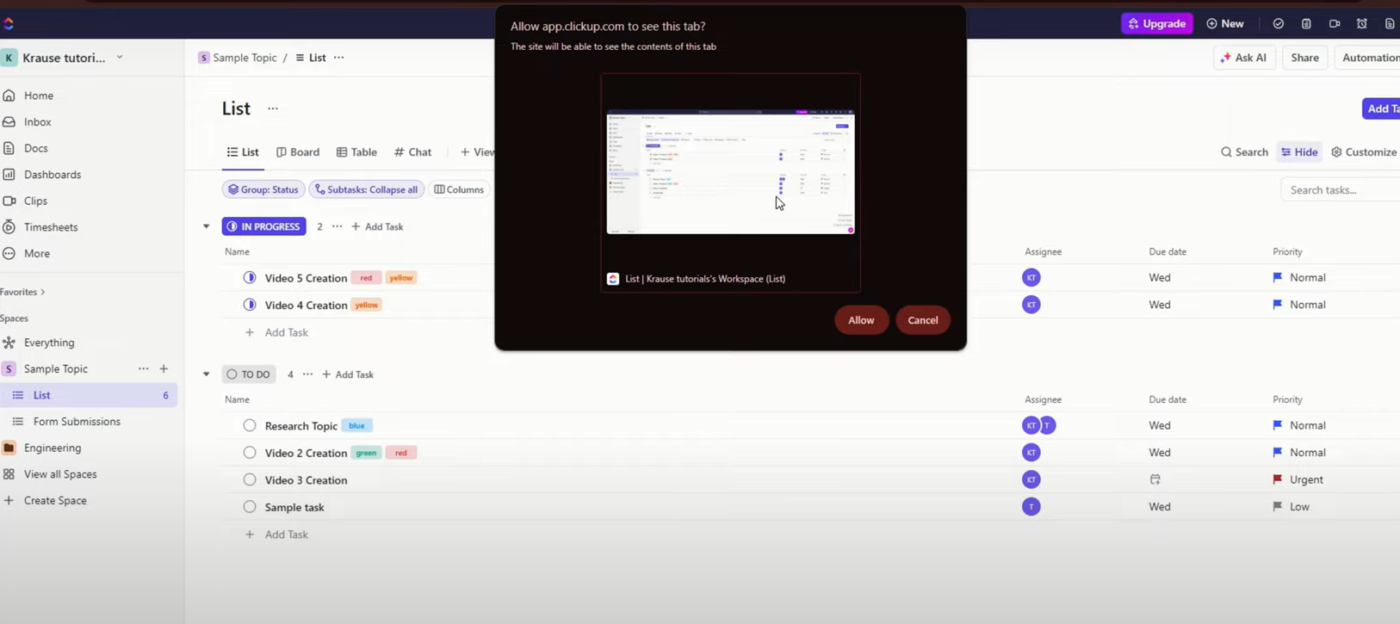
Pick the option that fits your presentation needs and double-check that everything is ready on your screen before you begin recording.
📖 Also Read: We Tested the Best Tutorial Video Software
Press the Record button to begin. If needed, you can pause or stop the recording at any point without losing your progress. As the recording runs, guide your audience through your slides or content. Keep your tone steady and draw attention to what matters most.
Once you’re done recording, ClickUp will process your clip, and you’ll have the option to copy the link or embed it within the platform. Copy the link to share it instantly via email, chat, or within ClickUp Tasks. Embed the clip directly into projects, so your team can access it without digging around.
Read More: Top Transcription Software Solutions
Adding voiceovers to PowerPoint is a great way to enhance your presentations. Follow the simple steps we discussed to make your slides clearer, more engaging, and easier to follow.
But if you’re looking for something even more versatile, why stop at PowerPoint? With ClickUp, you get more than just voiceover capabilities. It simplifies real-time collaboration and boosts productivity, from screen recording with voiceovers to AI-powered transcriptions and interactive commenting.
Sign up to ClickUp for free today! ✅
© 2026 ClickUp