


Still downloading templates?
There’s an easier way. Try a free AI Agent in ClickUp that actually does the work for you—set up in minutes, save hours every week.
Sorry, there were no results found for “”
Sorry, there were no results found for “”
Sorry, there were no results found for “”

Screen recording is one of the most valuable tools for modern content creation. How else would you explain how an app works to your tech-challenged friends or guide your newly onboarded team through a tool’s features?
Text instructions often fall short, and hopping on a video call every 10 minutes is impractical for anyone.
Consider this Reddit user’s dilemma:
I’m playing a game and want to record my gameplay (around 15 minutes), then review it later. I’m just looking for a simple, no-frills, low-impact way to record videos quickly and easily. I don’t need amazing quality or tons of customization—I’ll watch the video once and delete it.
Their request is straightforward: a reliable screen recording tool that captures content effortlessly.
But that’s the thing—whether you’re capturing gameplay, creating tutorials, or explaining processes, you deserve a screen recording tool that allows you to adjust video speed, customize playback, and enjoy premium features like video editing.
To help you, we’ve curated all the steps to speed up a screen recording effectively. Let’s get started! 🎥
Before diving into how to speed up a screen recording, it’s crucial to understand why it matters. Here are scenarios where slow-paced video and audio clips negatively impact your audience:
🚩 Without speeding up your video clips, lengthy tutorials become monotonous, causing viewers to lose interest or skip important steps entirely
🚩 Long gameplay screen recordings drag on, prompting viewers to abandon your content. Remember: gaming highlights should always be punchy and easily shareable
🚩 Recorded meetings or presentations played at normal speed waste viewers’ time, diluting key messages and leading to disengagement
Instead, when you speed up or slow down your screen recordings, you enjoy the following benefits:
✅ Improves viewer engagement: Speeds up repetitive or unnecessary actions, keeping viewers interested without losing critical context
✅ Saves storage space: Reduces photo and video file size, simplifying storage, sharing, and uploads
✅ Enhances editing efficiency: Speeds up editing by quickly skipping through repetitive or slow-motion portions, creating a polished edited video faster
✅ Highlights essential content: Directs viewers’ attention to key features, processes, or moments, ensuring important information isn’t overlooked
✅ Adds entertainment value: Creates humor or comedic timing by adjusting the playback speed, enhancing the overall viewing experience
💡 Pro Tip: Struggling to explain complex steps over a call? Learn how to visually demonstrate solutions by following our guide on How to Record Your Browser Screen for seamless async troubleshooting!
Let’s explore different methods so you can find one that suits your convenience and workflow.
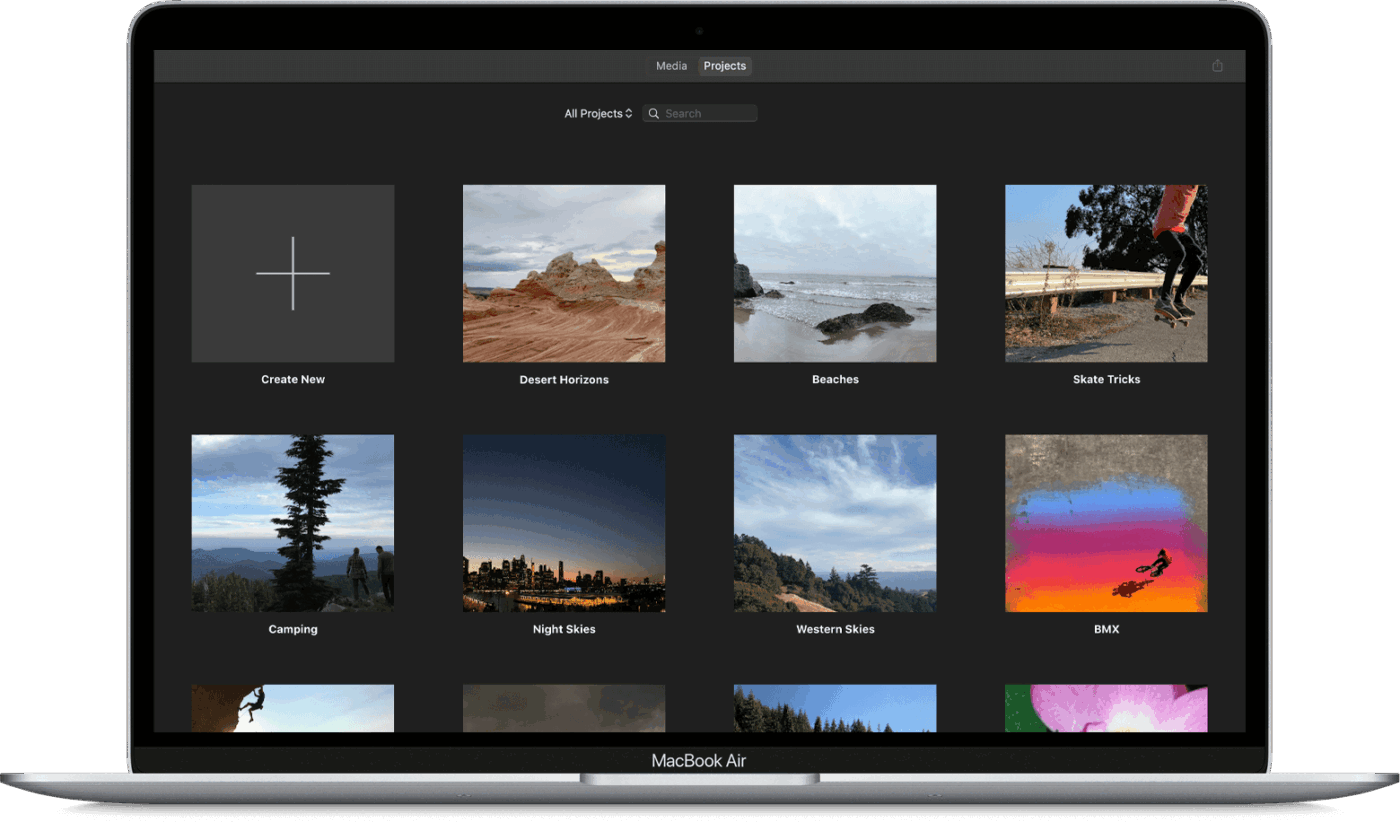
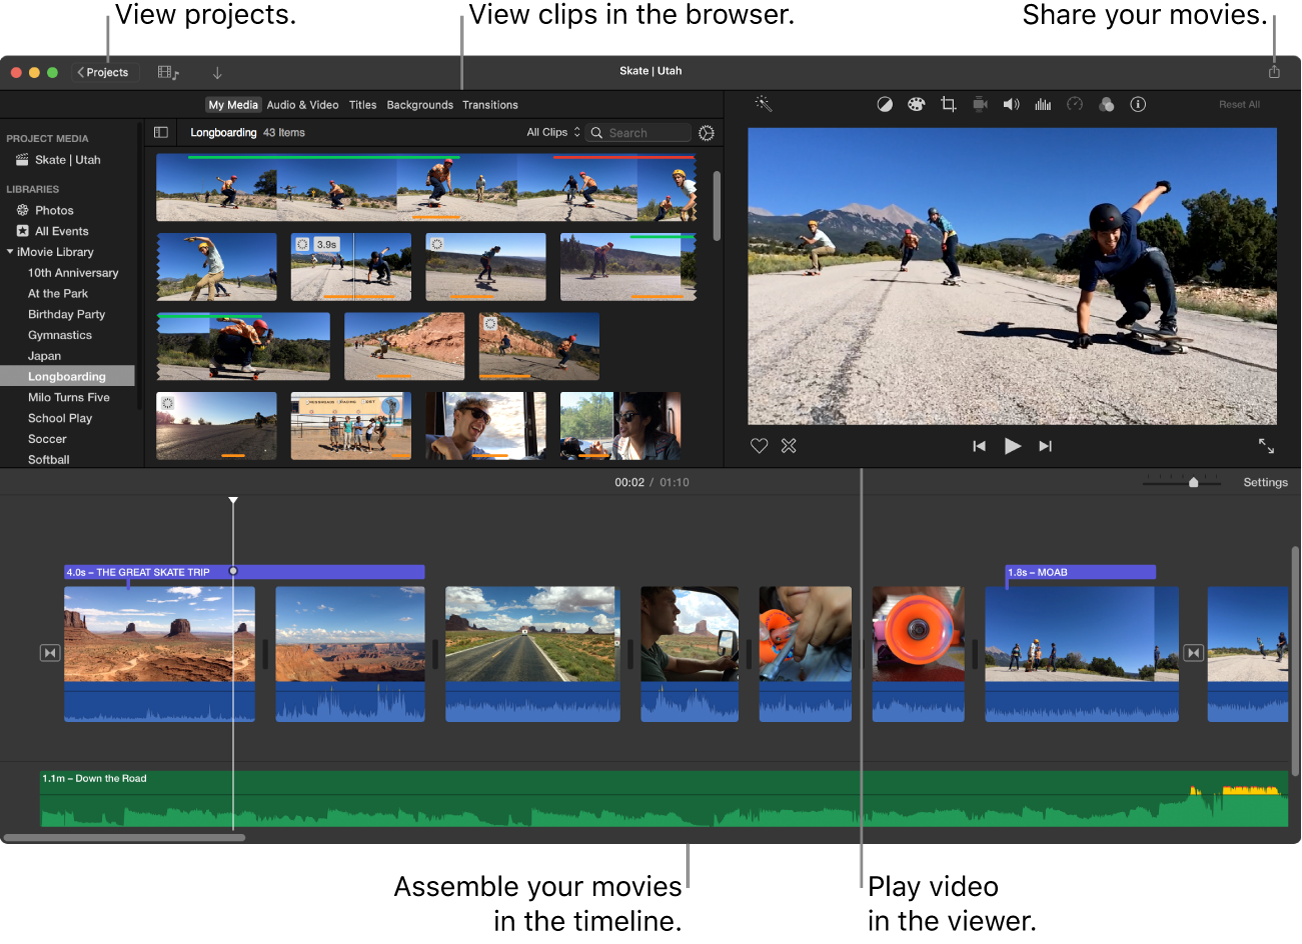
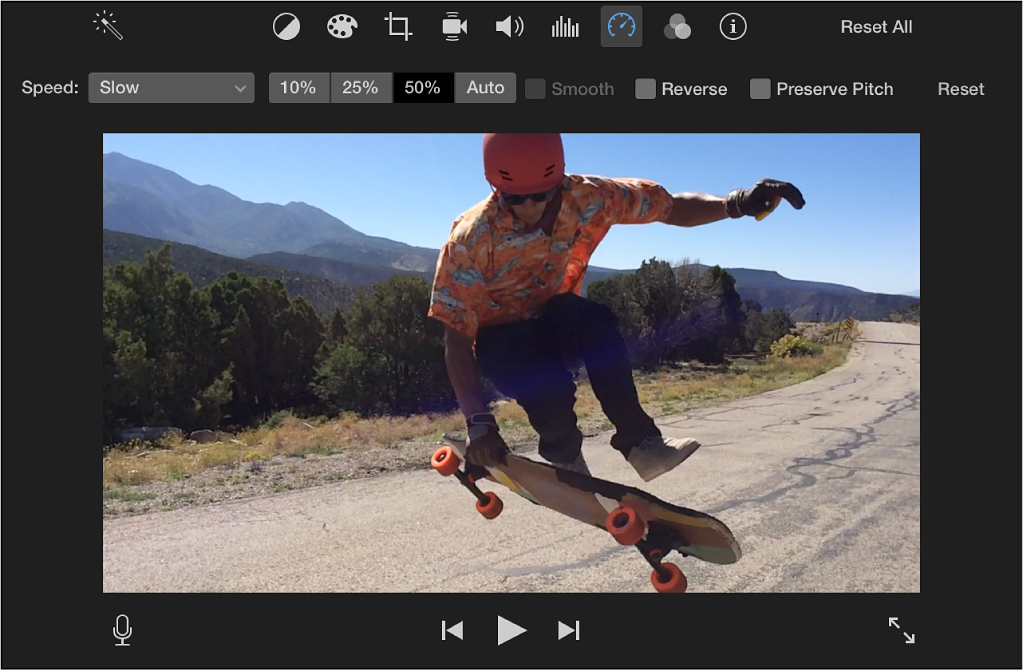
Your device likely includes built-in video editors, making it convenient to record and edit your screen recordings. To speed up a screen recording with built-in editors, follow these simple steps:
💡 Pro Tip: Avoid the frustration of silent audio recordings! Follow our guide on How to Screen Record on Mac with Audio Effortlessly—to capture both system and microphone sound seamlessly.
💡 Pro Tip: Want to make your tutorials look clean and professional? Refer to our guide, “How to Crop a Screen Recording for Better Video Quality,” to easily remove distractions and sharpen your videos.
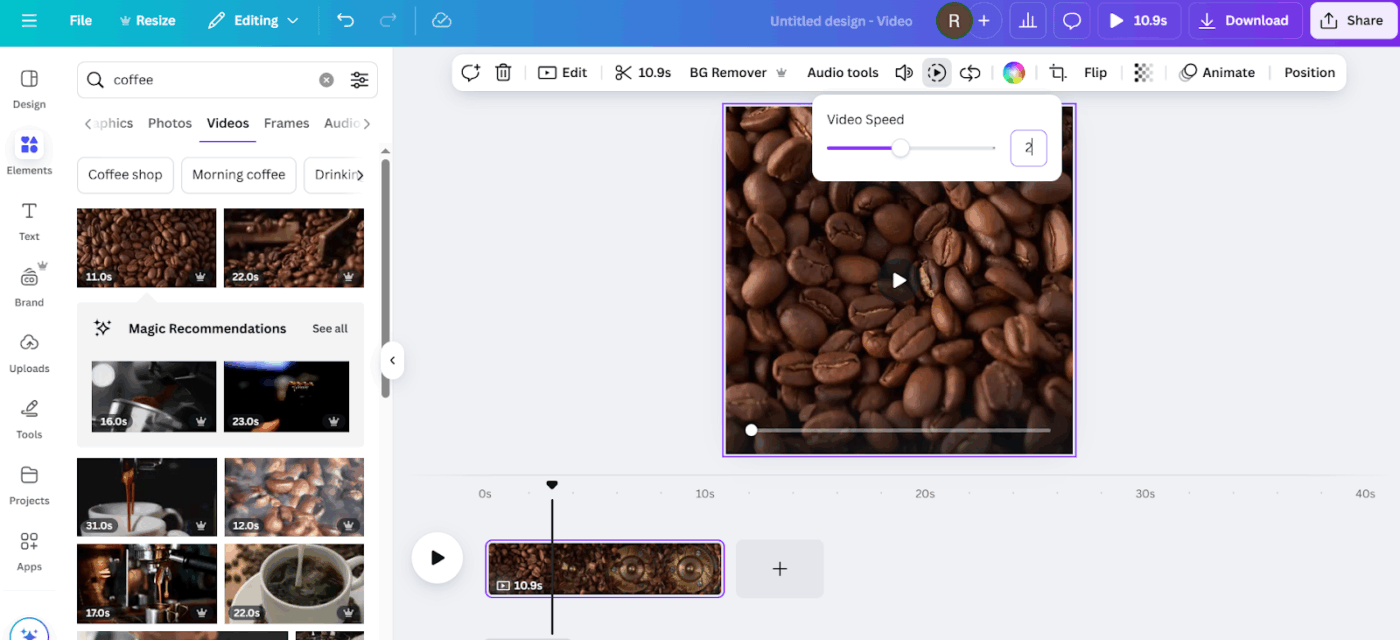
Another effective way to speed up a screen recording is by using an online tool. Here’s how you can easily achieve this using Canva:
Visit Canva and either select a video template or start a blank video project.
Click on ’Upload,’ choose your screen recording or timeline, or simply drag and drop your images and video content into Canva’s workspace.

Select the clip on the timeline, click ‘Playback,’ and use the provided speed slider to easily speed up or slow down your video.
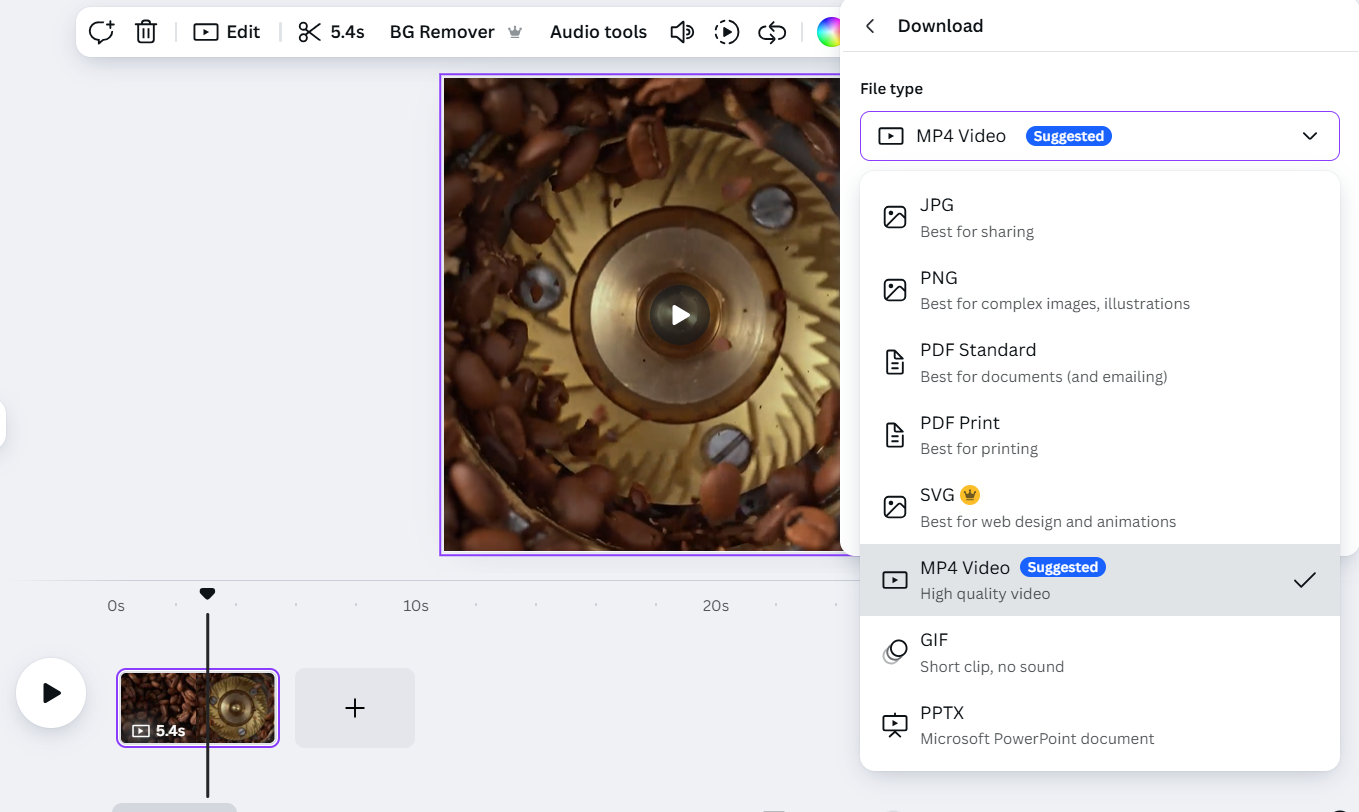
Optionally, polish your edited video by trimming unnecessary sections, adding text or images, applying filters, or incorporating background music from Canva’s media library.
📖 Also Read: Best Screen Recording Software for Windows PC
Once satisfied, export your sped-up video as a watermark-free MP4 file, ready to be shared directly to platforms like YouTube or your social media channels.
Platforms such as Filmora provide versatile options to easily speed up your screen recordings, allowing dynamic adjustments directly within your timeline.
Here’s a step-by-step breakdown of Filmora’s key methods:
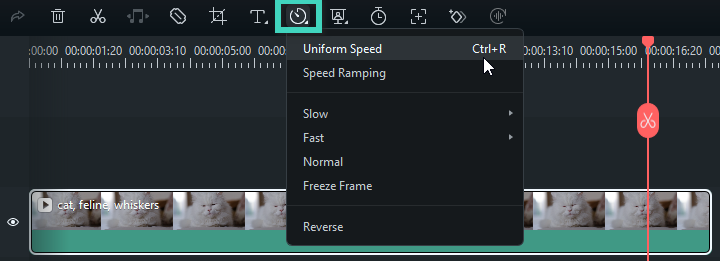
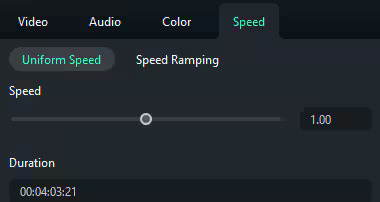
Step 1: Open the Uniform Speed panel
Double-click your video clip in the timeline, select ‘Speed,’ and then choose ‘Uniform Speed.’ Alternatively, right-click your clip and pick Uniform Speed directly.
Step 2: Adjust video speed
Drag the speed slider right to speed up your footage or left to slow down your clip. You can also manually set your preferred duration for precision.
🧠 Fun Fact: Technicolor, introduced in movies in 1932, revolutionized filmmaking by adding vibrant color to movies. Iconic films like The Wizard of Oz and Fantasia used this technology in the late 1930s, giving us unforgettable visuals.
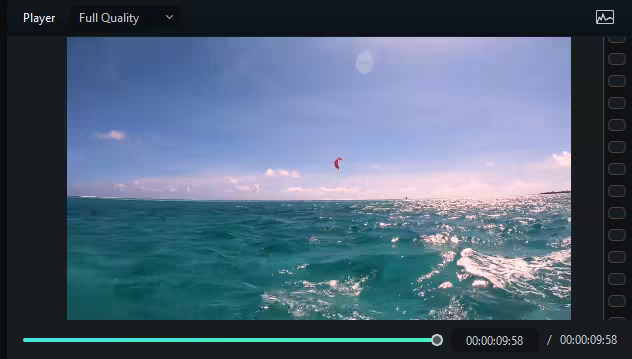
Step 3: Preview and save
Press ‘Play’ or the Spacebar to preview your changes. When satisfied, click OK to apply.
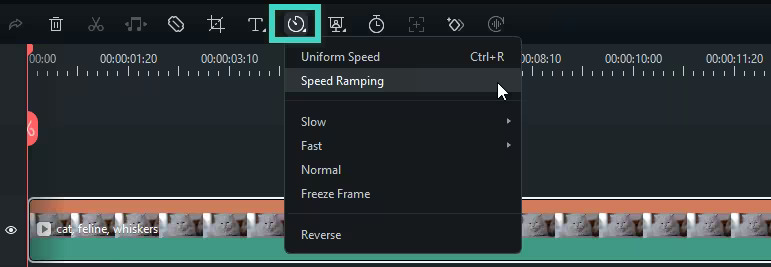
Step 1: Open the Speed Ramping panel
Select your video clip on the timeline, click the Speed icon, and choose ‘Speed Ramping.’
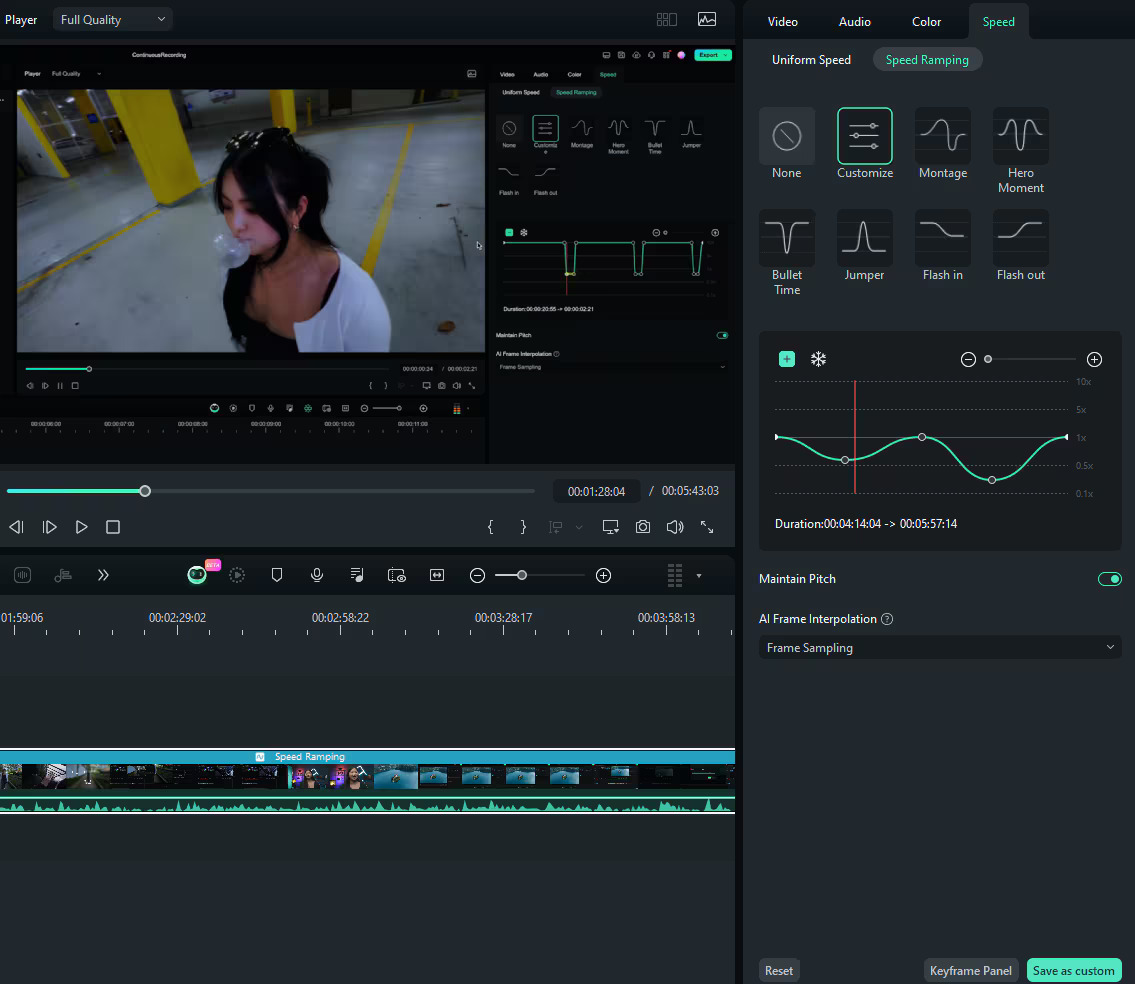
Step 2: Choose and customize presets
Select from presets like Montage, Hero Moment, or Bullet Time. Customize speeds by dragging points on the timeline or adding new speed points to create precise speed changes.
💡 Pro Tip: Want to make your presentations more engaging? Learn How to Draw While You Are Screen Recording to explain complex ideas visually and keep your audience hooked.
Step 3: Preview and save
Preview your video clip by pressing ‘Play’ or the Spacebar. Click ‘Save as Custom’ if you’d like to reuse these settings later.
📮 ClickUp Insight: The average professional spends 30+ minutes a day searching for work-related information—that’s over 120 hours a year lost to digging through emails, Slack threads, and scattered files. An intelligent AI assistant embedded in your workspace can change that. Enter ClickUp Brain. It delivers instant insights and answers by surfacing the right documents, conversations, and task details in seconds—so you can stop searching and start working.
💫 Real Results: Teams like QubicaAMF reclaimed 5+ hours weekly using ClickUp—that’s over 250 hours annually per person—by eliminating outdated knowledge management processes. Imagine what your team could create with an extra week of productivity every quarter!
We’ve explored several effective methods to speed up a screen recording, but are they productive?
Relying on external tools often creates workflow gaps, making it challenging for cross-functional teams to collaborate effectively. Without a unified platform, sharing feedback, managing edits, and tracking progress can quickly become cumbersome.
ClickUp addresses these challenges by providing an integrated, AI-powered workspace where you can seamlessly record, edit, and share your screen recordings directly with stakeholders.
Instead of scattering content across multiple apps, ClickUp centralizes your video editing workflows, allowing team members to collaborate effortlessly in one location.
Let’s understand how exactly this phenomenon works.
Loom is great—but it’s not the only option out there. Whether you’re looking for free screen recorders, more storage, stronger collaboration tools, or a cheaper plan, there are plenty of Loom alternatives worth trying! 🎥
This video shows you how ClickUp Clips compares to top screen-recording alternatives and why keeping everything in ClickUp just makes sense.
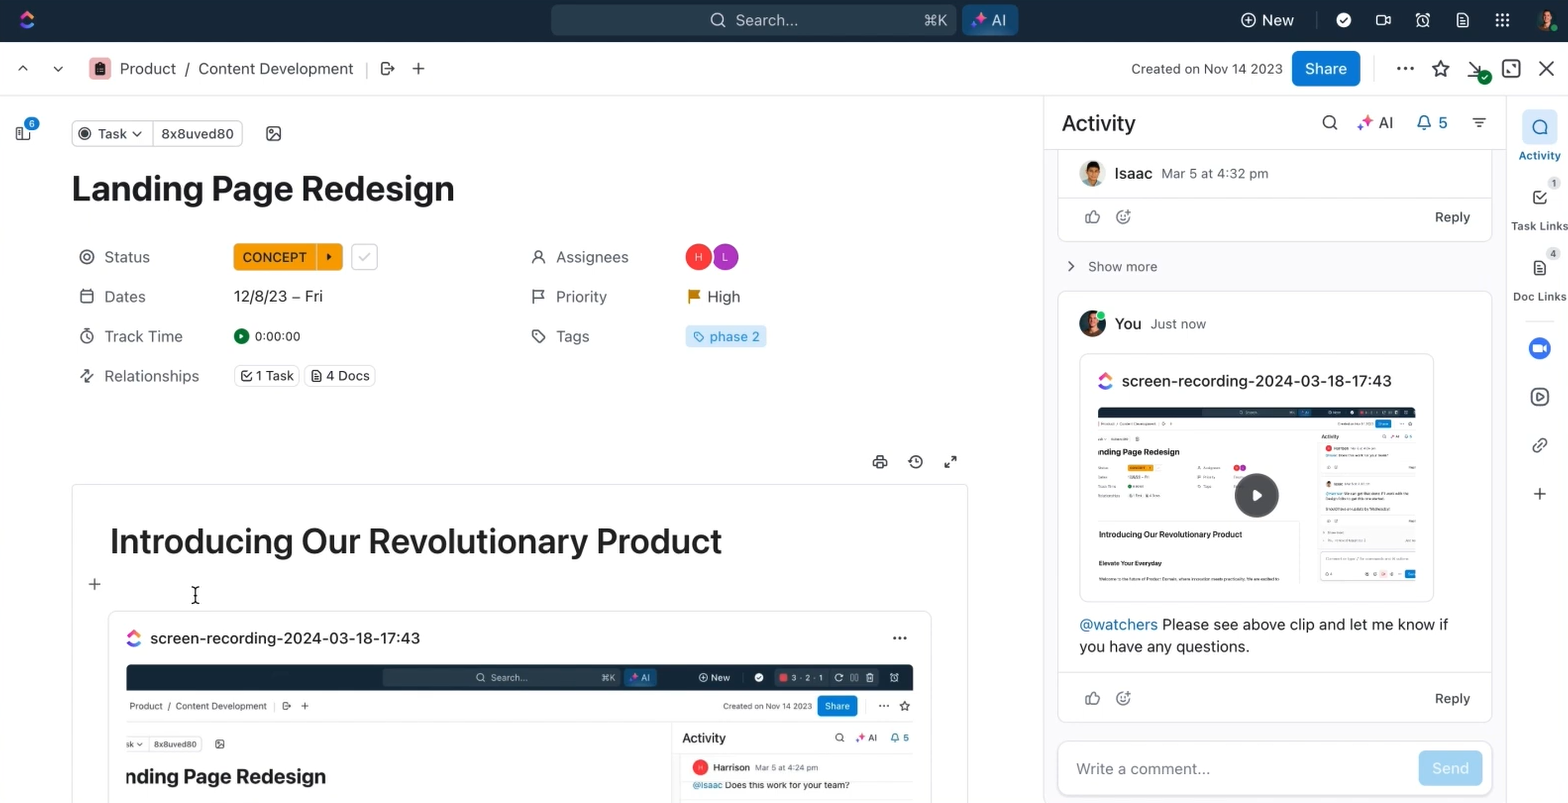
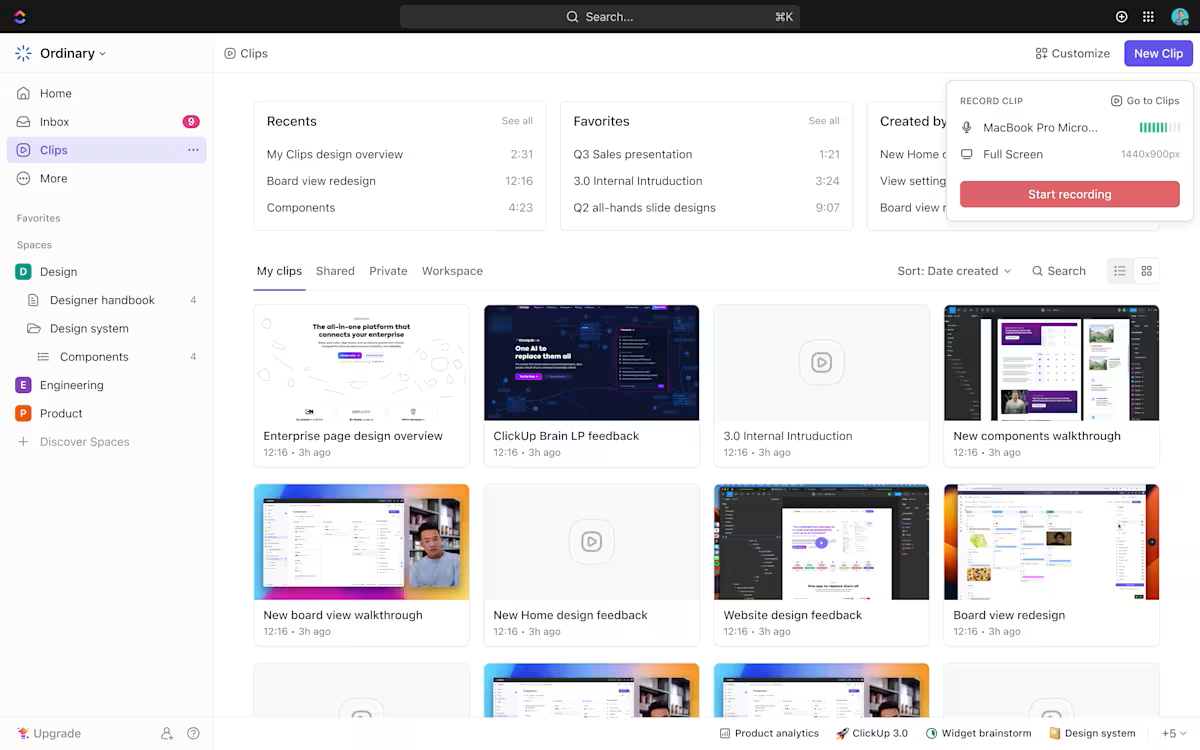
First of all, the best part of working on ClickUp is its native Clips feature.
ClickUp Clips allows you to easily record, edit, create videos, and collaborate on your screen recordings—all within the same app. Better yet, these clips can be instantly embedded into tasks, documents, and chats, providing an intuitive workflow. Here’s how it helps:
✅ Centralize your entire screen recording workflow within ClickUp, eliminating the chaos of switching between separate recording and collaboration apps
✅ Capture ideas, provide precise project feedback, and visually demonstrate complex processes without lengthy text explanations
✅ Enable seamless collaboration in the workplace with multiple sharing options—embed clips directly into tasks and documents, generate public links, or download for external use
✅ Improve clarity and reduce communication friction with pinpoint-accurate comments anchored by timestamp and exact video location
✅ Reduce unnecessary meetings, lengthy emails, and repetitive explanations to save your team valuable time and resources
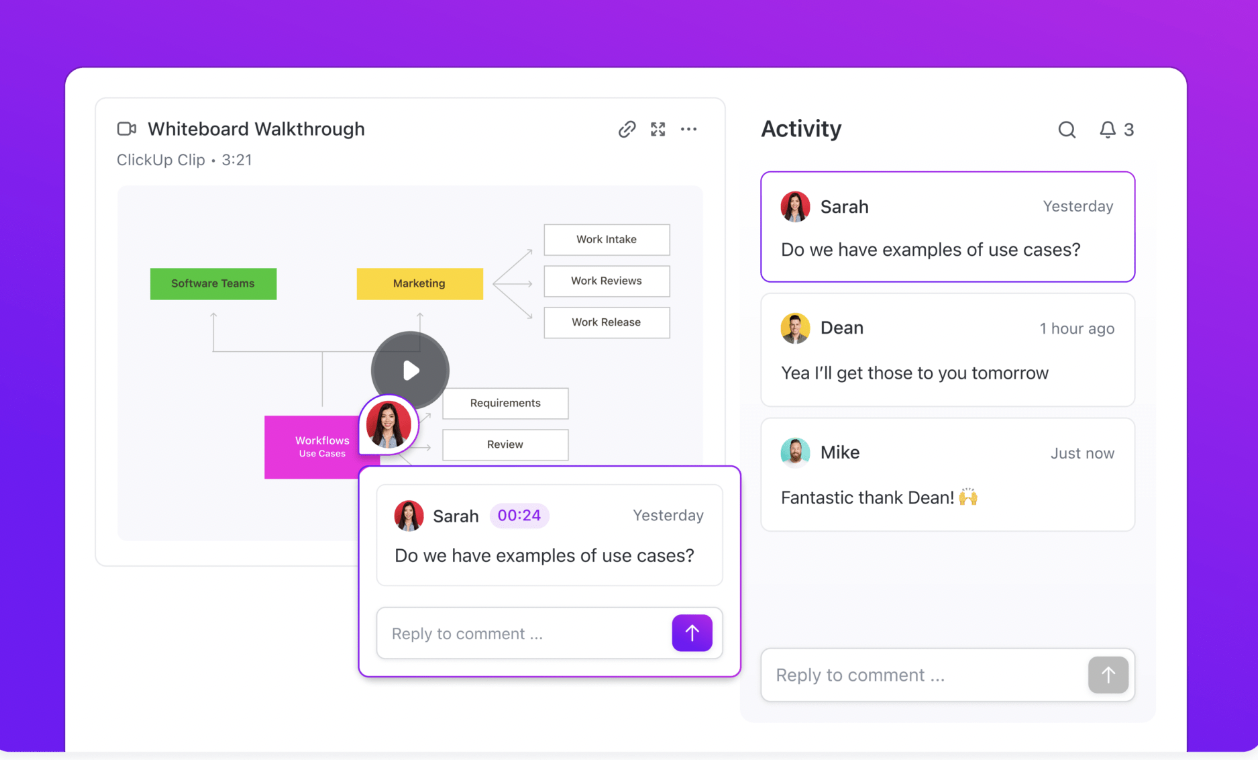
See how ClickUp Clips lets you record, explain, and collaborate on video feedback without ever leaving your workspace.
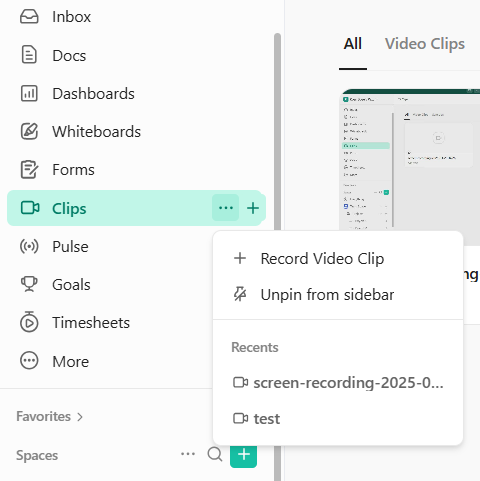
Here’s a step-by-step guide on how to get started:
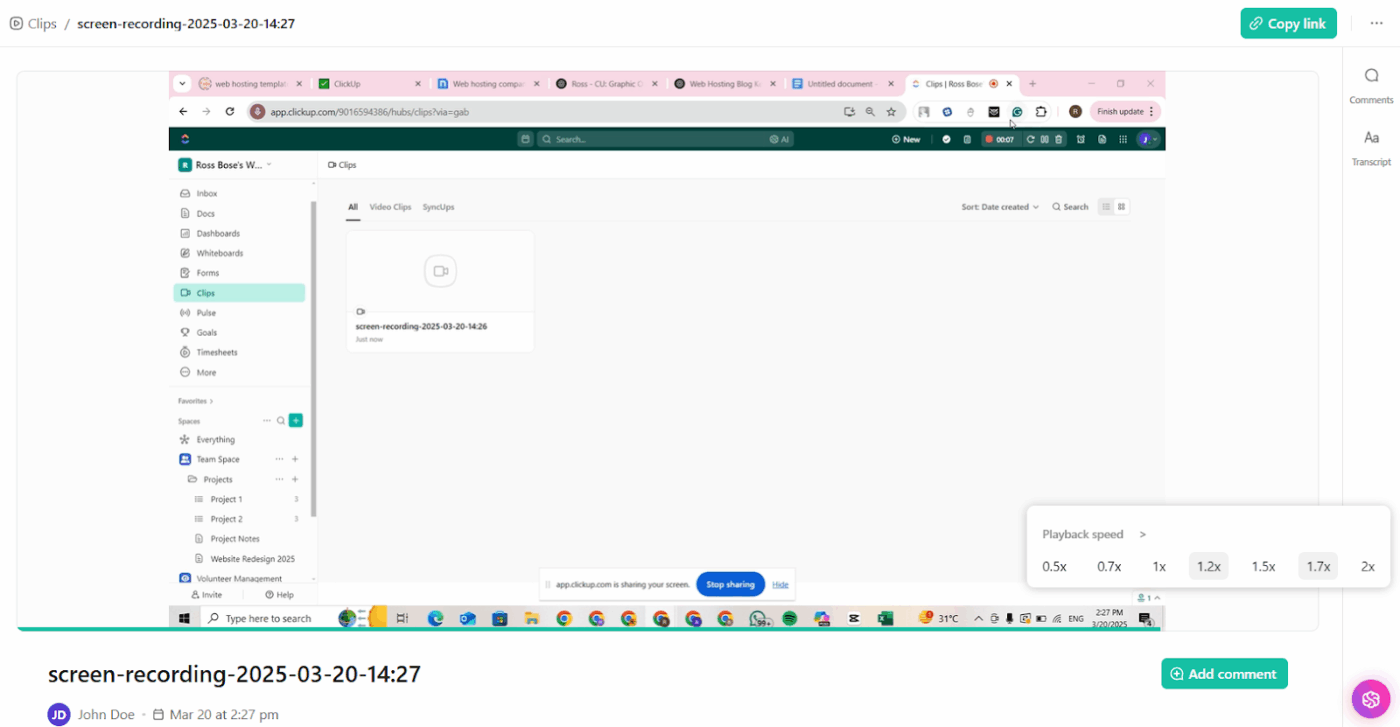
Reviewing lengthy recordings can quickly become tedious, making it easy to miss critical insights and lose valuable productivity.
ClickUp solves this dilemma by offering adjustable playback speeds directly within Clips. This allows your team to skim through videos swiftly and move tasks forward efficiently.
Your team can now rapidly scan videos faster, identify relevant points, and focus only on critical discussions.
🧠 Fun Fact: ScreenCam, developed in the early 1990s, was one of the first screencasting tools, allowing users to create software demos and tutorials by capturing Video Procedure Calls (VPCs) on Windows 95.
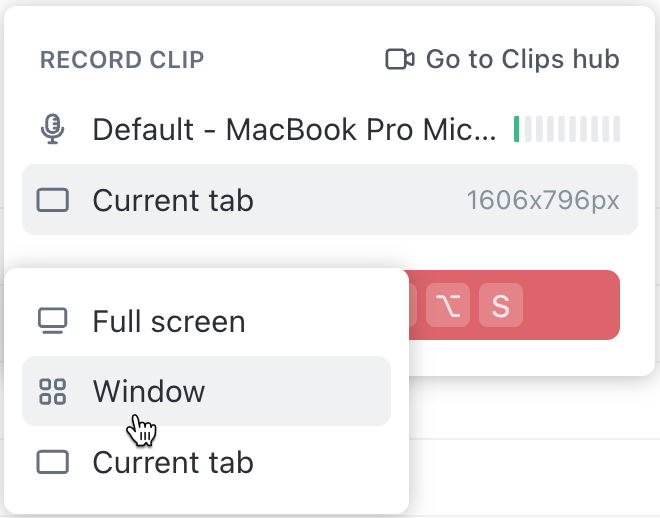
How to adjust playback speed in ClickUp Clips:
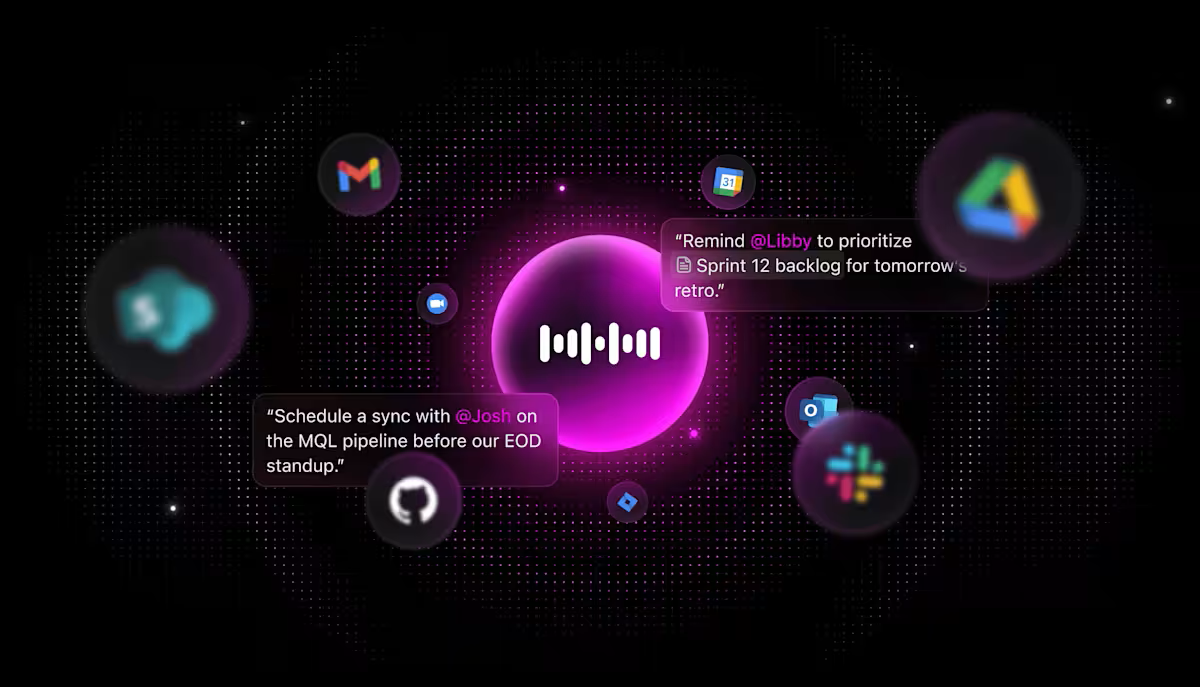
⭐️ Bonus: Want to add a line of commentary or a quick note to your video before sharing? With the ClickUp Brain MAX Chrome extension or desktop app, you can use the AI-powered Talk to Text feature to quickly convert your voice notes or spoken summaries into text—completely hands-free.
After recording your screen, simply narrate key points or instructions, and Brain MAX will transcribe and polish your speech into clear, shareable text. This is perfect for creating quick summaries, writing briefs, or drafting follow-up emails right after a screen recording—saving you time and boosting productivity.
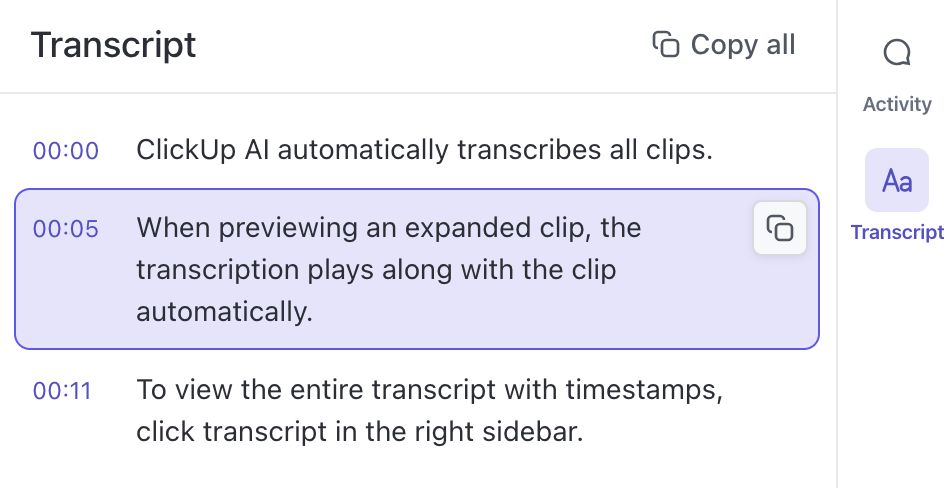
ClickUp takes your screen recordings beyond simple visuals by incorporating AI-powered automatic transcriptions and summaries.
Powered by ClickUp Brain, Clips automatically transcribes your videos, turning them into searchable, instantly actionable content.
This feature enables you and your team to quickly scan through long videos without having to replay them in full, dramatically improving productivity. Transcriptions also serve as valuable project resources, ensuring no critical points are overlooked.
Pro Tip: With ClickUp’s AI-powered Enterprise Search, you can instantly retrieve key insights, tasks, or summaries across your entire workspace and connected apps like Google Drive, Notion, etc. The result is an organized and intelligent knowledge base at your fingertips, empowering your team to capture, retain, and act on essential information.
How to utilize ClickUp AI transcriptions:
Another gem for busy teams stuck on virtual meeting platforms doing back-to-back meetings is the ClickUp AI Notetaker.
It automatically transcribes conversations, generates smart summaries, and converts action items into trackable tasks.
ClickUp documents everything in the background, allowing teams to stay focused on the conversation rather than frantically taking notes or trying to remember important decisions.
Plus, the auto-generated summaries offer a quick TL;DR for those who missed the call.
Pro Tip: Automate your post-recording workflows with ClickUp’s AI Agents. After you finish a screen recording, an AI agent can automatically detect when a new recording file is saved to a specific folder (like your project folder). The agent can then:
This eliminates manual steps, speeds up sharing, and ensures your recordings are instantly accessible and actionable for your team.
It is a fact that speeding up your screen recordings can greatly enhance efficiency. However, before you accelerate your video or audio clips for convenience, it’s essential to consider some potential drawbacks.
To get the most value from adjusted audio playback speeds, keep the following points in mind:
💡 Quick Hack: Learn How to Get Sound on Screen Recording to create clearer, more engaging content effortlessly.
ClickUp Clips offers users a unique way of keeping visual information centralized for company-wide access.
However, the real power lies in ClickUp’s ability to bring everything together—combining project management, knowledge sharing, task tracking, and seamless collaboration into one platform. As Trevor Bekolay, Senior Research Scientist and Co-Founder at Applied Brain Research, shared:
We switched from Jira to ClickUp and have been very happy with the switch as we are able to do more of our processes directly in ClickUp, like maintaining an internal knowledge base, running and recording the results of Scrum events, and goal and time tracking. ClickUp is also significantly faster and more responsive than Jira.
With AI-powered transcription, smart summaries, and seamless task management, ClickUp empowers teams to work smarter, faster, and more efficiently—all within a single ecosystem. Try it out; create a free account on ClickUp today!

© 2026 ClickUp

There’s an easier way. Try a free AI Agent in ClickUp that actually does the work for you—set up in minutes, save hours every week.