Sorry, there were no results found for “”
Sorry, there were no results found for “”
Sorry, there were no results found for “”
You open your Google Doc, and something’s off. A section is missing, or worse, key details have changed. But no one remembers making the edit.
Before panic sets in, take a breath. Google Docs’ version history lets you see exactly what changed, who changed it, and when.
No more guesswork, no more lost content.
In this blog post, we’ll explore how to see edit history in Google Docs to ensure your documents stay in your control. 🎯
Spoiler alert: We’ll also introduce you to a better alternative that pairs well with Google apps!
Google Docs’ Version History feature helps track edits, restore previous versions, and improve collaboration by showing who made changes and when.
Version history in Google Docs records every edit made to a document. It lets users view past versions and track who made changes and when.
The document’s edit history provides comprehensive insights into the nature and timing of each modification, which is beneficial for monitoring progression over time.
Every time you tweak a doc, Docs quietly saves a new version of the same document, keeping a record of every change.
📖 Also Read: How to Customize and Format Google Docs
Keeping track of edits in a shared document can get messy fast. Version history helps teams stay aligned, prevents important updates from getting lost, and even lets you roll back to an earlier draft if needed.
Here are the benefits of using the document version control software. 💁
⚙️ Bonus: Learn how to add a new page on Google Docs for efficient document management.
The edit history lets you track changes in Google Docs and restore previous versions if necessary. Knowing how to access and navigate version history can prevent mistakes, whether collaborating on a project or reviewing past revisions.
Here’s how to view and change document version control effectively. ⛏️
First things first, head over to Google Docs and open the document you want to review. You can do this from Google Drive or directly from your organized Google Docs homepage.
If your document is already open, you’re good to go!

🔍 Did You Know? The first publicly shared Google Docs file was a product announcement for its launch in 2006, introducing real-time collaboration.
Now that your document is open, it’s time to access its version history. There are two ways to do this.

🔍 Did You Know? Google Docs has a library of 900+ fonts, but only a fraction appear by default. You can access more by clicking More fonts in the font menu.
Once you open version history, a sidebar will appear on the right, showing a list of saved versions. Here’s what you’ll see:
Click on any version to preview how the document looked at that point. Changes will be highlighted so you can spot edits quickly.

🔍 Did You Know? Typing doc.new in your browser instantly creates a new Google Doc.
Using version history is a smart way to keep your documents organized and your team on the same page. But to get the most out of it, a few simple habits can make a big difference.
Here are some best practices to use the document editing software more effectively. 🗂️
🔍 Did You Know? Google Docs was originally a web-based word processor called Writely, created by Upstartle before Google acquired it in 2006.
⚙️ Bonus: Learn how to strikethrough in Google Docs for better formatting and clarity.
While Google Docs has great collaboration tools, it doesn’t offer unlimited flexibility.
These are some limitations that will make you consider using a Google Docs alternative. 👇
If you’re looking for a comprehensive solution that combines document creation with project management, ClickUp, the everything app for work, might be just what you need.
Unlike Google Docs, ClickUp Docs integrates seamlessly with tasks, allowing you to link documents directly to specific projects or tasks.
You can create detailed documents, wikis, or knowledge bases and connect them to your workflows. Moreover, it offers real-time collaboration, enabling your team to edit documents simultaneously. Within the same platform, you can @mention team members, assign action items, and convert content into actionable tasks.
Here’s how to control version history and track changes in ClickUp Docs for seamless document workflow management. 📄
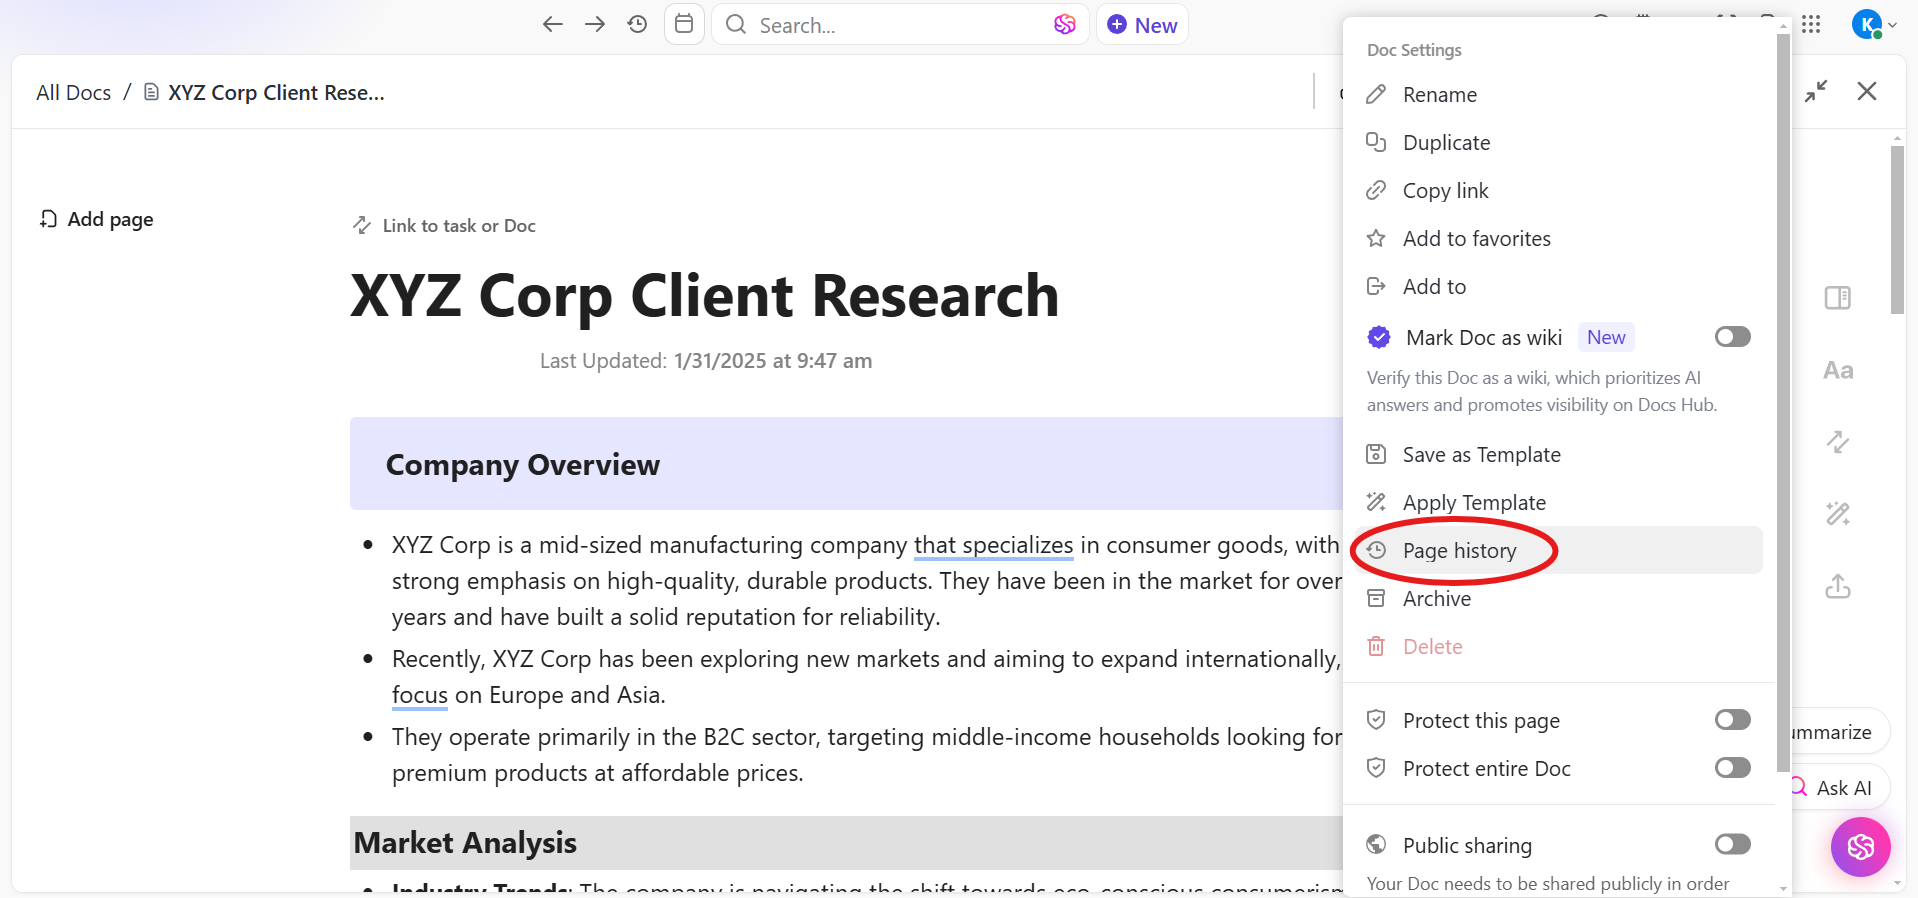
Start by opening the document you want to review. Head to the upper-right corner and click the ellipsis… menu. Select Page history from the options. This will open a detailed history panel where you can view all the changes made to the document.
🧠 Fun Fact: The most expensive document sold was a handwritten copy of Leonardo da Vinci’s ‘Codex Leicester.’ Bill Gates purchased it in 1994 for $30.8 million.
In the history panel, you can preview the changes that were made. You’ll also see who made each change and the date and time. This is super helpful for tracking progress or pinpointing when something specific was updated.

🔍 Did You Know? The first digital text was the U.S. Declaration of Independence, transcribed into digital format in 1971 as part of Project Gutenberg.
If you need to roll back to an earlier version, you can use the history feature to restore the document to its previous state. This ensures that you can go back if any unwanted changes are made.

🔍 Did You Know? The ARPANET, predecessor to the internet, transmitted a simple text message in 1969—a document that crashed the system after sending just two letters.
ClickUp Docs allows you to easily manage the permissions of those who can access and edit your documents. You can also control whether to share documents internally within your organization or with external parties.
Want to share just a part of your document? Click the ellipsis… next to any page or subpage on the left sidebar, then click Share to get the link.

You can even share specific blocks of text within your document. Click the drag handle next to any block, and select Copy Block link to share that snippet with others.
🧠 Fun Fact: Mark Twain’s The Adventures of Tom Sawyer (1876) was the first novel submitted as a typed manuscript.
You also have control over access and permissions:
To add an owner or contributor, open the document, click on the respective avatar at the top, and use the Add new option to select a person from your team.

Learn how to write anything with AI in seconds. See how! 👇🏼
Now that you know how to view and manage edit history in Google Docs, you can easily track changes, review past versions, and keep your collaboration on point.
For better control, efficiency, and project management, use ClickUp. It brings everything together—tasks, documents, and feedback—so teams can collaborate and keep projects on track from start to finish.
Plus, ClickUp Docs allows you to create, edit, and share documents seamlessly within your workspace and external stakeholders.
Sign up to ClickUp for free today! ✅
© 2025 ClickUp