

Whether renovating your bathroom or embarking on a journey across the world, you need a roadmap outlining your plan in detail. This roadmap guides you toward your goals and accounts for any potential issues you may come across. It also serves as a reference point—you’ll turn to it now and then to see how far you’ve come. 🗺️
In project management, this roadmap is called a project baseline. It’s the basis for making informed decisions, managing expectations, and gauging the project’s success against the initial objectives and goals.
In this article, we’ll explain what a project baseline is and why it’s so important for successful project management. We’ll also provide step-by-step instructions for creating a performance measurement baseline to set your entire project up for success.
Project Baseline Crash Course: What It Is and How to Set One
What is a Project Baseline?
A project baseline is a reference point you use to measure the success of your project. You typically set the baseline early on during the project planning phase and focus on three key elements:
- Scope: Outlines the tasks, activities, resources, and deliverables within your project
- Cost: Represents the project’s budget
- Schedule: Defines start and due dates for your project and outlines milestones to track performance
Project baselines are often confused with project goals. While the two terms are similar in many aspects, the critical difference is that baselines focus on analyzing a project’s performance at a specific moment, while goals focus on outcomes. You could say that project baselines contain information that empowers you to accomplish your project goals.
Advantages of Having a Project Baseline
Setting a project baseline has a wide array of benefits, such as:
- Monitoring performance: A project baseline provides the groundwork for comparison and understanding whether your project is under or overperforming in specific areas
- Improved cost management: It allows you to understand, oversee, and manage project budgets
- Calculating earned value: It helps you measure actual performance against the plans to analyze trends and issues
- More accurate future estimates: The more experience you have with project baselines, the more accurate you’ll be in determining a project’s performance and potential risks
- Motivation: It allows you to track your project’s progress over time and see how far you’ve come. It also keeps your team motivated and fuels productivity and efficiency
- Improved communication with stakeholders: A project baseline gives the project manager and stakeholders a clear idea of the project’s path right from the start, boosting transparency and minimizing the risk of misunderstandings along the way
Can You Change a Project Baseline?
As setting a project baseline happens early in the project planning phase, you may wonder whether you can update it later to reflect specific changes. Technically, you can—but remember that changing your project baseline can lead to losing direction, leaving you without a clear point of reference for measuring performance. 🧭
The standard practice is to update a project baseline only when significant changes happen. For example, if there are additions to the project scope, it may be necessary to update schedules and costs as well.
If you decide to change your approved project baseline, save the old version. That way, you can compare baselines and accurately determine the project’s performance.
How to Set a Project Baseline and Determine Your Project’s Path in 4 Steps
Setting a baseline may sound easy at first—you estimate the project’s scope, costs, and schedule and cross your fingers, hoping your predictions are accurate enough to serve the purpose. The reality is different—you must consider numerous factors and use various tools to set a realistic and helpful project baseline.
We’ll walk you through the process and show how ClickUp, an all-in-one productivity and project management platform, can help you establish highly practical project baselines. 💪
Step 1: Determine your project’s scope
Your journey toward creating a project baseline starts with determining your project’s scope. This means defining everything your project entails, including tasks, subtasks, deliverables, potential risks, and constraints. In some cases, you may also address exclusions, i.e., specify what your project doesn’t include.
By outlining the project’s scope, you’ll set clear boundaries, keep the project on the right track, catch potential risks early on, and manage stakeholder expectations like a pro. 🤓
The best way to determine your project’s scope is to write a scope statement. This valuable document will serve as the basis for your project plan. It should be comprehensive and concise, leaving no room for misunderstandings and what-ifs.
In terms of formatting, many project managers opt to keep their scope statement bulleted for readability and easier navigation, but you and your team may prefer a different layout that aligns with your working style and needs.
Explore project scoping with ClickUp
To make the entire scoping process more manageable, you can use some of ClickUp’s fantastic tools for tailoring top-notch scope statements.
Creating a scope statement is a team effort, so you need first-class collaboration options. Luckily, ClickUp has more than a few under its belt. For example, you can use ClickUp Whiteboards, digital canvases designed to take real-time collaboration to new levels.
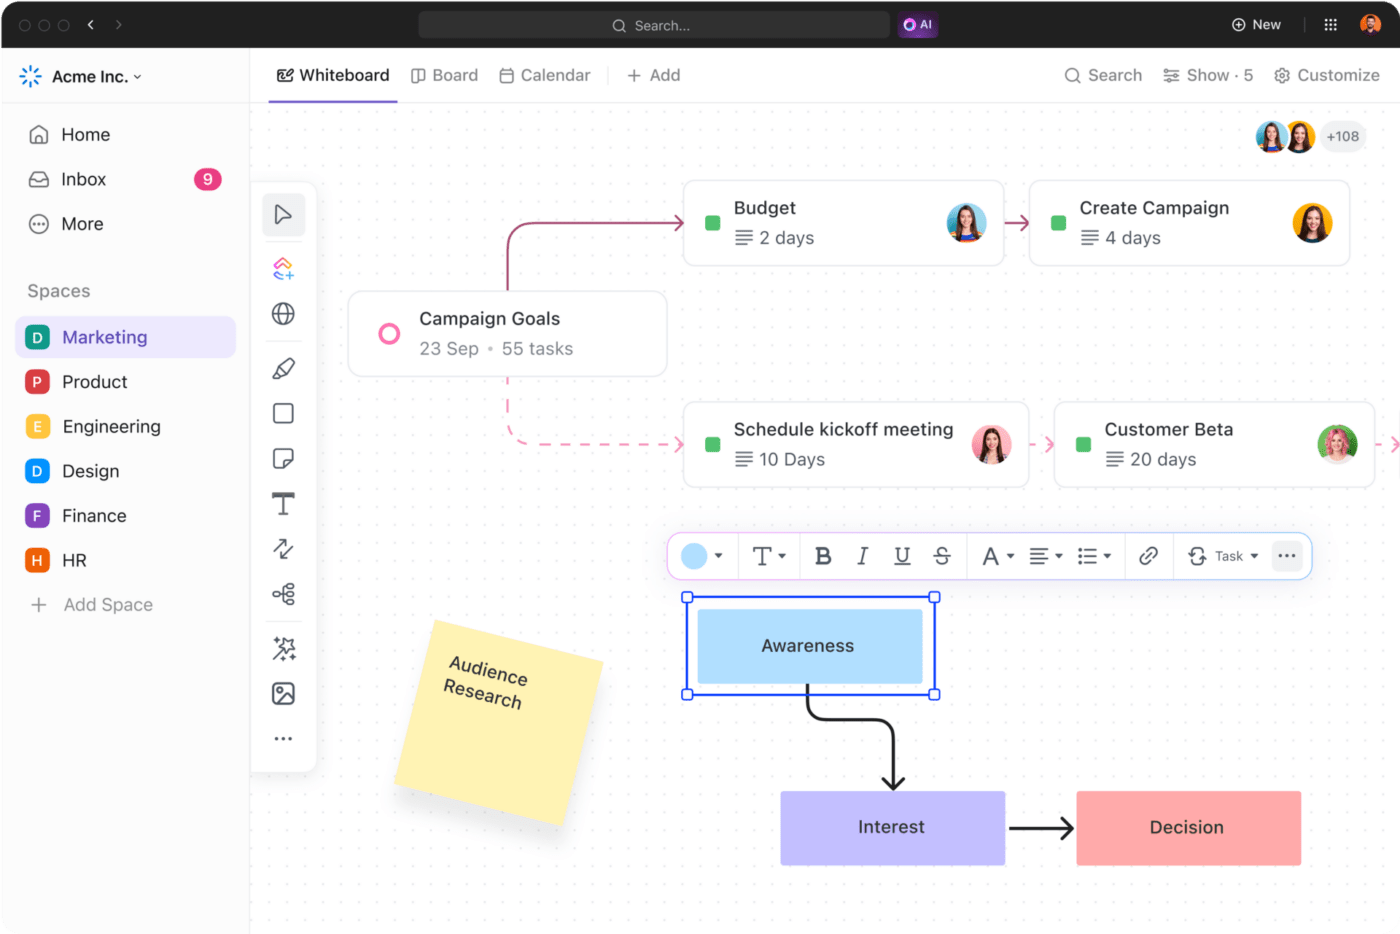
Whiteboards are perfect for brainstorming and breathing life into your ideas. Thanks to live editing, everyone is on the same page and can actively participate in the project scoping process. Invite relevant team members to a ClickUp Whiteboard and discuss what your scope statement should look like after considering relevant factors.
Keep your core project documents streamlined within ClickUp Docs
Done brainstorming? It’s time to put your decisions into writing with ClickUp Docs, the platform’s unique text editor and document management platform. Use it to create, share, edit, and store important documents.

A ClickUp Doc is the perfect home for your project scope. Add your team to a Doc and start tailoring your scope statement. Every person added to a Doc gets a cursor with their name, so tracking who’s doing what is effortless. Use formatting and styling options to customize your scope statement and give it a personal touch.
If you want to speed up the writing process and minimize the risk of mistakes, take advantage of ClickUp AI, the platform’s native AI-based writing assistant that enhances the functionalities of ClickUp Docs. It can help you brainstorm and generate ideas, write the scope statement, and edit it to perfection while ensuring consistent formatting. ✨

If you want to avoid writing your scope statement from scratch altogether, use ClickUp’s project scope templates to save time, enjoy consistency, and set your project on the right path.
Step 2: Map out your project schedule
In the previous step, you outlined all the work that needs to be done to complete the project. It’s time to visualize this work on a time axis and determine start and due dates, final deadlines, and key milestones (think of them as pitstops for measuring performance).
When it comes to mapping out project schedules, ClickUp has a few aces up its sleeve. 🃏
We’ll check out the following three views (or layouts) within the platform that can make scheduling easier:
- List view
- Gantt Chart view
- Calendar View
List view
For the kind of scheduling we’re talking about, you must first define project phases and set their duration and deadlines. Do this in ClickUp’s List view—it offers plenty of sorting and filtering options to help you define and navigate the info. Use ClickUp Custom Fields to provide contextual details about every task and subtask. Set deadlines and priorities, track progress, add labels, and make creating your project’s schedule a breeze.

Gantt Chart view
The List view is fantastic, but it’s not the only one. Many project managers agree that a Gantt Chart view is the ultimate tool for visualizing a project’s planned schedule. This view lets you create dynamic timelines, set and manage deadlines, pinpoint bottlenecks, handle task dependencies, and schedule tasks in only a few clicks.

With comprehensive coloring options, you can clearly distinguish different tasks and keep an eagle eye on everything going on.
ClickUp Gantt views also lets you choose the sorting criteria for easier navigation. For example, if you want to know what important task is coming up next, use the due date as a sorting criterion.
With the view’s drag-and-drop design, you can quickly update your project’s schedule. All changes happen in real-time, so every team member is updated instantly.

ClickUp Gantt Charts are an excellent way to get into the nitty-gritty of your project and obtain a detailed breakdown of tasks, dependencies, priorities, milestones, and progress. If you’re looking for a tool that gives you a more general overview of your tasks and deadlines, use the ClickUp Timeline view. This simple linear outline displays tasks chronologically and lets you watch for due dates without digging into the specifics.
Calendar view
Another view project managers love is the ClickUp Calendar view. It presents tasks in a calendar, helping you optimize workloads and plan ahead. This view also features a drag-and-drop design, so it’s easy to set up and update. You choose what to display in the view—sort your entries by priority or project and show different task details (like assignees or time tracked).

You can further simplify mapping out your project’s schedule by relying on ClickUp’s impressive collection of over 1,000 templates. Simply pick a project schedule template that aligns with your project’s needs and customize it to your preferences.
Step 3: Define costs
In this stage, you define costs and plan the project budget to track expenditures. 💸
This is where you’ll include all estimated project-related costs, including labor, materials, equipment, utilities, and rent. Depending on the nature of your project, you may need to create categories to represent your overheads in more detail. For example, if you’re setting a baseline for a construction project, you’ll probably have numerous subcategories under materials and labor.
ClickUp’s List view can help you create a detailed overview of projected costs. Create a new task for every cost category and estimate the budget using the Money Custom Field. Other Custom Fields like Numbers and Files can come in handy for providing more info about each cost category.
Then, you can create subtasks to show how your project budget is distributed.
If you want a shortcut to defining project costs, use one of ClickUp’s high-quality project budget templates. They’ll help you represent relevant information in an organized manner, which can enhance team-wide resource management decisions.
Defining costs is typically a team effort—we recommend getting insights from your finance or accounting teams to sketch out more accurate estimates. Luckily, ClickUp makes cross-team collaboration and communication easy. Use ClickUp Whiteboards or the Chat view to discuss your project’s budget and financial standing with in-house professionals.
Step 4: Present your project baseline to key stakeholders
Your project baseline is complete, but before you officially adopt it, you need to run it by your stakeholders and ensure they give you the green light.
Go over the details, discuss every aspect of the baseline, including its design and content, and be ready to address any questions and concerns to ensure everyone’s on the same page.
ClickUp helps you streamline communication with external stakeholders by allowing you to add third-party users to your Workspace. Choose the items you want to share with them and customize controls and permissions. ClickUp automatically puts a small orange square at the bottom-left corner of all guest avatars, so your teammates would have no trouble distinguishing them. 🟧
Thanks to customizable settings, you can update a guest’s role and access status at any time to allow them to actively contribute to updating the baseline.
Creating a Project Baseline with ClickUp: Example
Let’s say you’re a marketing project manager and must set a project baseline for a new social media campaign. This is what the process would look like, according to the steps we outlined earlier:
1. Determine your project’s scope
The first thing on your agenda is to define the project’s scope. Add your team to a ClickUp Whiteboard and start brainstorming!
You’ll start by establishing goals. Let’s say your goal is to increase brand awareness and make 200 direct sales.
Since this is a social media campaign, you’ll need to define your social media platforms. For example, that could be Facebook, Instagram, and TikTok.
Then, you’ll outline what type of content you’ll use—in this case, videos, reels, and posts.
It would be best if you also defined your target audience. For example, it could be viewers between 18 and 30.
Finally, you’ll outline the project’s duration—that’s 10 weeks.
Use ClickUp Docs to write the scope statement and include these aspects. Add relevant team members to the doc so that they stay in the loop.
Then, use ClickUp’s List view to list all tasks and subtasks needed to achieve your goals.
2. Outline the project’s schedule
Define how and when you’ll achieve your objectives by outlining the schedule in the ClickUp List and Gantt Chart views. You can create a weekly schedule for your campaign. For example:
- Weeks 1 & 2: Researching audience and competitors
- Weeks 3, 4, 5 & 6: Creating content and getting approvals
- Weeks 7 & 8: Launching the campaign on social media
- Weeks 9 & 10: Monitoring performance
This is just a rough outline of a schedule. You’ll provide more details to every section by creating subtasks. On top of that, you’ll set precise start and due dates for each task and subtask and create Milestones that help you track the project’s progress and ensure you’re on the right track. 🛣️
Switch between different ClickUp views to see your schedule from various perspectives and, if necessary, add more details to make it as transparent as possible. As ClickUp offers 15+ views, you can see the big picture and zoom in on the details.
3. Define costs
Go back to your ClickUp List view, where you provided details about your project’s scope and schedule, and add the Money Custom Field to define the budget for each task.
In this example, you may have PPC (pay-per-click) costs, subscription fees for keyword research tools, and content creation costs.
4. Consult stakeholders
Add stakeholders to your ClickUp Workspace to show them your project baseline. Use the ClickUp Chat view to communicate, answer questions, and resolve uncertainties.
As ClickUp integrates with platforms like Zoom, you can hold online meetings to present your finalized project baseline and streamline communication.
ClickUp: Your Go-to Project Baseline Tool
ClickUp offers a comprehensive solution for establishing a project baseline. From 15+ views to Whiteboards, Custom Fields, templates, and custom integrations, the platform provides you with all the tools you need to create tasks and documents, communicate, collaborate, and monitor progress. 🥰
Sign up for ClickUp and take project management to the next level!


Everything you need to stay organized and get work done.

Recent Articles
Claude Skills for Project Management: A Practical Guide 
Claude Skills for Project Management: A Practical Guide
How to Write a Scope of Work (+ Examples & Templates)
How to Write a Scope of Work (+ Examples & Templates)
What Are Project Goals? Definition, Examples & How To Write Them 
What Are Project Goals? Definition, Examples & How To Write Them
