How to Add Audio to Google Slides for Engaging Presentations

Start using ClickUp today

  • Manage all your work in one place
  • Collaborate with your team
  • Use ClickUp for FREE—forever

Text and videos elevate your presentations to the next level, but incorporating audio makes everything a little more intimate. 

Whether it’s instrumental tracks, narration, or sound effects, audio can make your Google Slides presentation stand out and feel personal.

The tricky part? Figuring out how to do it. Google Slides doesn’t make it super obvious, and let’s face it, wrestling with tech isn’t everyone’s favorite pastime. 

In this blog post, we’ll show you exactly how to add audio to your Google Slides in a step-by-step guide and share a few clever workarounds to make the process smoother. Time to roll!

Summarize this article with AI ClickUp Brain not only saves you precious time by instantly summarizing articles, it also leverages AI to connect your tasks, docs, people, and more, streamlining your workflow like never before.
ClickUp Brain
Avatar of person using AI Summarize this article for me please

⏰ 60-Second Summary

Here’s how to add audio to Google Slides: 

  • Add audio in various forms—your narration, YouTube videos, background tracks via URLs, or uploaded files
  • Add audio files to Google Slides using different steps
    • Upload the audio file to Google Drive and then Click Insert in the menu bar of Google Slides to upload the audio
    • Copy the link of the audio file from music platforms like Spotify or SoundCloud and add the file by clicking Insert and then Link
    • Click Insert and then choose Video to insert YouTube videos into the Google Slides presentation
    • Record your own narration of original content using online voice recorders and include them in Google Slides by clicking Insert and then Audio 
  • Record voiceovers easily with online recording platforms for professional audio
  • Audio elements in presentations help grab attention and keep readers engaged. More than that, they are likely to remember the text more with narration sounds
  • Streamline the entire presentation creation process with ClickUp. Use ClickUp Clips, Whiteboards, Brain, Docs, and templates to create excellent presentations in no-time
Summarize this article with AI ClickUp Brain not only saves you precious time by instantly summarizing articles, it also leverages AI to connect your tasks, docs, people, and more, streamlining your workflow like never before.
ClickUp Brain
Avatar of person using AI Summarize this article for me please

Why You Should Add Audio to Google Slides?

These days, text-only presentations are the bare minimum. Adding audio elements like background music, voiceovers, or sound effects makes your presentation worth watching. 

Here’s why it’s worth it:

  • Grab attention and keep it: Audio helps you hook your audience immediately. Whether it’s background music setting the mood or a voiceover guiding them through, it keeps them engaged from start to finish
  • Make it accessible: Audio narration opens your presentation to a broader audience. It’s great for those who prefer listening over reading or may have trouble with the language on your slides. Plus, it’s a thoughtful touch for people with reading challenges or visual impairments
  • Boost professional appeal: A presentation with audio elements looks and sounds professional. It’s the kind of upgrade that makes your work polished and impressive, whether it’s for a classroom, boardroom, or marketing pitch
Summarize this article with AI ClickUp Brain not only saves you precious time by instantly summarizing articles, it also leverages AI to connect your tasks, docs, people, and more, streamlining your workflow like never before.
ClickUp Brain
Avatar of person using AI Summarize this article for me please

Preparing Audio Files for Google Slides

Before you add music or voiceovers to Google Slides, here are two things you must get ready with: 

  • Google Slides supports limited audio formats, so stick to specific format options like MP3, MPEG, OGG, Opus, and WAV files
  • Also, keep your audio files under 100 MB to avoid performance issues on the platform

🔍 Did You Know?

 Google’s original name was BackRub? It might sound odd now, but it made sense at the time—the program analyzed the web’s ‘backlinks’ to figure out how important a website was and what it connected to. Pretty clever, right?

Summarize this article with AI ClickUp Brain not only saves you precious time by instantly summarizing articles, it also leverages AI to connect your tasks, docs, people, and more, streamlining your workflow like never before.
ClickUp Brain
Avatar of person using AI Summarize this article for me please

How to Add Audio to Google Slides? 

Alright, let’s get to the heart of the discussion—how to add sound to Google Slides! Regardless of the type of sound or music, there are a few ways to do it, depending on the vibe you’re going for.

Let’s have a look 👇

1. Uploading existing audio to Google Slides

If you’re ready with the audio or sound effects and just want to add them to Google Slides, then this method is for you: 

Step 1: Upload the audio to Google Drive 

If you want to add a new audio file to your Google Slides, the first step is uploading it to your Google Drive account. 

And you can easily upload files to Google Drive in two steps: 

  • Navigate to Google Drive and click on the New button located at the top left corner of the page
Google Drive : How to Add Audio to Google Slides
  • Select the File Upload button to upload relevant audio tracks from your mobile device or computer to Google Drive 
File Upload : How to Add Audio to Google Slides

Step 2: Insert the audio into Google Slides

Now it’s time to add music to Google Slides. Here’s what you must do: 

  • Go to the Google Slides tab and select the presentation in which you want to add audio 
  • Tap on the Insert button in the menu option given there
innsert : How to Add Audio to Google Slides
  • Select the Audio option in the dropdown menu to insert the uploaded audio file 
Audio : How to Add Audio to Google Slides
  • Navigate through the different folders and click on the audio file you want
different folders : How to Add Audio to Google Slides

2. Add audio to Google Slides using a URL 

What if you wanted to add a trending online audio file or insert music from external sites? Unfortunately, Google Slides doesn’t allow adding audio from external platforms. 

Instead, you can use a URL and create a clickable element to access this online audio content. Let’s look at how you can do that 👇

Step 1: Locate your audio 

  • Locate the relevant file you want to use from YouTube Music, Spotify, SoundCloud, or any other platform
Locate your audio : How to Add Audio to Google Slides
  • Note that the audio you choose must offer rights for the public to use the audio in your presentation

Step 2: Copy the audio URL 

  • Click Copy Link to copy the URL of the audio from the options given below the video 
Copy the audio URL : How to Add Audio to Google Slides

Step 3: Add the URL in Google Slides

  • Revisit the Google Slides’ existing presentation where you want to use the music file (or absolutely anything else)
  • Click Insert on the menu options and navigate to Link
Click Insert : How to Add Audio to Google Slides
  • Now, a dialog box will pop up. Paste the copied URL and click Apply
click Apply : How to Add Audio to Google Slides

You’re almost there! 

  • The next step is to create a text box and add the link. Give it a name like Click here to access audio or something that makes sense for your presentation. Just like that, you’re good to go
 Click here to access audio : How to Add Audio to Google Slides

With this method, you can click the link and access the audio content in a new browser tab. Remember that you can’t embed the audio directly into a single slide or across multiple slides.

💡Pro Tip: Before uploading audio files to Google Drive, compress them to MP3 format with a bitrate of around 128-192 kbps to get the best balance between audio quality and file size!

3. Add a YouTube video to Google Slides

Embedding a YouTube video is another option to add audio to your Google Slides. It’s a handy trick, and here’s how you can do it:

  • Go to YouTube, search for the video you need to use, and locate it 
YouTube : How to Add Audio to Google Slides
  • Jot down the start and end timestamps so you can include just the specific part you need in your presentation 
  • Click Share and then click Copy to copy the link to the YouTube video 
Click Share and then click Copy : How to Add Audio to Google Slides
  • Go to Google Slides and head to the existing presentation document where you want to embed the video
  • Choosing the slide, select Insert from the menu and click on Video 
click on Video : How to Add Audio to Google Slides
  • With YouTube as an option, you’ll see a dialog box stating Insert video. Paste the copied link over there
Insert video : How to Add Audio to Google Slides
  • Once you select the video, it’ll pop up again. All you need to do is click on it to insert it into your slide
pop up
  • Now you’ll see a thumbnail preview of the YouTube video
thumbnail preview
  •  You can either hide the video playback behind a picture, move it to a preferable location, or resize it to play audio with an enhanced view of the content 
video playback

4. Use original audio in Google Slides 

With relevant audio tracks, online content, and even YouTube videos, you can also add voiceovers and original audio files to Google Slides. Let’s take a quick walkthrough: 

Step 1: Get ready with the narration 

  • Record the audio clips using any online audio recorder platform 
Get ready with the narration

Step 2: Add the original audio to Google Slides

  • Upload the file to Google Drive, just like you did in the first method
  • Then, head to the slide where you want the audio, click on Insert, and select Audio
Add the original audio
  • Select the audio file from your Drive and then click Insert 
click Insert 
  • Now, a speaker icon will be visible to you, denoting that the voiceover has been added
voiceover has been added
  • Check if the voiceover gets played by clicking Slideshow
Summarize this article with AI ClickUp Brain not only saves you precious time by instantly summarizing articles, it also leverages AI to connect your tasks, docs, people, and more, streamlining your workflow like never before.
ClickUp Brain
Avatar of person using AI Summarize this article for me please

Recording Your Own Audio for Google Slides

We know how difficult it can be to record your own audio clips. Part of the reason is feeling overwhelmed—where do you even start?

But don’t worry; it’s easier than you think. With a little planning, you can record audio and add narration to your slides like a pro. Here’s how: 

1. Create a script 

Start by writing out your entire presentation script and breaking it down into sections like introduction, key points, and sub-ideas to keep ideas easy to follow.

Decide on the tone you want (formal or conversational), and prepare the script by jotting it down on paper or typing it on your desktop. This way, when it’s time to record your audio, you’ll have everything ready!

Use the Rule of 3 when writing your script. This classic structure makes it easier for you and your audience to follow along while keeping the flow smooth and engaging.

For example:

  • Introduction: Start with a hook, provide some context, and preview what’s coming
  • Body: Cover three main arguments or ideas
  • Conclusion: Wrap it up with a summary, a call to action, and a memorable closing

2. Choose the right recording platform 

Next, choose the right recording software to create high-quality audio files. Look for one that is easy to use, packed with recording features, integrates with your setup, and offers good access controls. 

Some recording platforms you can try⬇️

If you want to go a step further and schedule and track your recordings, use ClickUp.

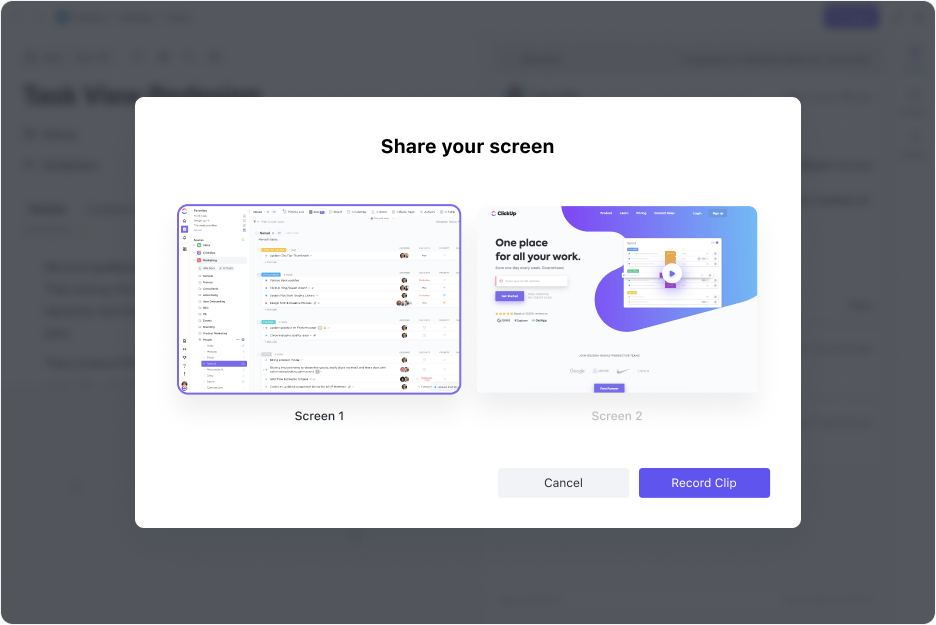
ClickUp Clips supports recording, scheduling, and tracking high-quality video files for your presentations through ClickUp Clips. You can video record yourself, embed clips on ClickUp, and share it with team members to provide feedback. 

Here’s how you can add narration to your slides using ClickUp:

Step 1: Record your presentation content using ClickUp 

  • Hit the video icon and start recording—it’s the easiest way to share your presentation content and ideas in a clear video 

Step 2: Download the file

  • Once done, embed the clip in ClickUp, grab a shareable link, or download the file to add it to your Google Slides 

Step 3: Turn your Clips into Tasks and organize them in a folder

  • Turn your clips into tasks, assign them to teammates, and move them to the right List, Folder, or Space 

Well, it doesn’t stop here. If you are having a hard time writing the script, ClickUp’s AI assistant does it for you in seconds. 
ClickUp Brain

ClickUp 3.0 Record Screen share from Task view
Record video clips for Google Slides and share your ideas clearly using ClickUp Clips 

To complete the package, let ClickUp Brain transcribe your clips on autopilot. You can quickly scan the highlights, click on timestamps to jump right to specific parts of the video, and copy content to use wherever you need. 

It is the best transcription software, and it comes at no extra cost!

⏰ Real-time application: Share your Clip with your teammates, and they can use ClickUp Brain to ask any question. It’ll instantly search your Clip transcripts, find the answer, and unlock the knowledge they need—no more manual searching!

Use ClickUp Brain within Clips to find any conversation, task, or feature within seconds

Use smartphones and dictation machines

Smartphones are super handy—they’re portable and come with high-quality microphones for quick, clear recordings. If you need something more precise, dictation machines capture detailed content and ensure accurate transcriptions. It’s all about finding what works best for you!

Record and edit your audio 

Now, it’s time to complete the recording process. Once done, use the numerous editing features to spice up your audio, cut the fluff, and clarify certain parts.

💡 Pro Tip: Practice using ‘silent pauses’ instead of filler words like ‘um,’ ‘uh,’ or ‘like.’ If you catch yourself using fillers while recording, make a note of where it happens and redo that part by taking small pauses in between.

Summarize this article with AI ClickUp Brain not only saves you precious time by instantly summarizing articles, it also leverages AI to connect your tasks, docs, people, and more, streamlining your workflow like never before.
ClickUp Brain
Avatar of person using AI Summarize this article for me please

Troubleshooting Audio Issues in Google Slides

Adding audio files to Google Slides is usually pretty straightforward, but sometimes, things don’t go as smoothly as planned. Here are some bottlenecks you can expect and solutions on how to go about it: 

❌ File format and size 

Are you having trouble uploading or playing audio files in your presentation?

Take a look at the format options of those files. The file size could be the issue if the audio gets stuck or takes forever to load. Smaller files usually play audio more smoothly, so it’s worth it to give that a quick look. 

Solution ⬇️

✅ Convert stereo audio to mono to cut down on unnecessary file weight

✅ Use tools like Online Audio Converter or Audio Compressor (no downloads needed)


❌ Internet connection 

If your file formats and sizes are all set, but the audio still won’t play, it’s time to check your internet connection. A stable connection is key since a Google Slides presentation relies on it for smooth playback during your presentation.

Solution ⬇️

✅ Close other apps or tabs that might be using bandwidth
✅ Connect to a reliable Wi-Fi network or use a wired connection for better stability


❌ Inconsistent volume levels 

Another common problem during the presentation is low and inconsistent audio volume levels. This can be due to embedding multiple audio files and using music from various sources. 

Solution ⬇️

✅ Check the settings in Google Slides and set the volume to high
✅ Test the audio on a different device to rule out hardware issues


❌ Access controls and permissions 

If you can hear the audio but your teammates can’t, it’s probably a permissions issue. Google Drive has sharing permissions that allow you to control who can hear, edit, or view the content. Make sure you’ve given your teammates the right access!

Solution ⬇️

✅ Decide if you want to share the audio publicly or only with specific users
✅ Then, open Google Drive, find your audio file, and click ‘Share.’ Add the people who need access, or set it to ‘Anyone with the link can view’ for public access

Summarize this article with AI ClickUp Brain not only saves you precious time by instantly summarizing articles, it also leverages AI to connect your tasks, docs, people, and more, streamlining your workflow like never before.
ClickUp Brain
Avatar of person using AI Summarize this article for me please

Additional Tips and Best Practices

Here are some additional tips and best practices you can use to make your presentations even better: 

📌 Use icons for smoother navigation

Google Slides makes it easy to tweak your audio with built-in settings. Just click on the audio icon, and a toolbar will appear—select format options to open the playback menu.

playback menu.

From there, you can choose whether the audio should play automatically, set it to an audio loop, adjust the volume, and fine-tune other settings to match your presentation needs. 

📌 Keep presentations interactive and engaging 

No one wants to sit through a dull presentation or pitch deck. The good news? 

There are plenty of ways to make yours fun, interactive, and unforgettable:

  • Get your audience involved: Add polls, quizzes, or live Q&A sessions to make them part of the conversation
  • Show, don’t just tell: Use visuals like charts, infographics, and videos to break up text and make your points easier to understand
  • Tell a story: Connect your ideas through a narrative that keeps your audience hooked from start to finish

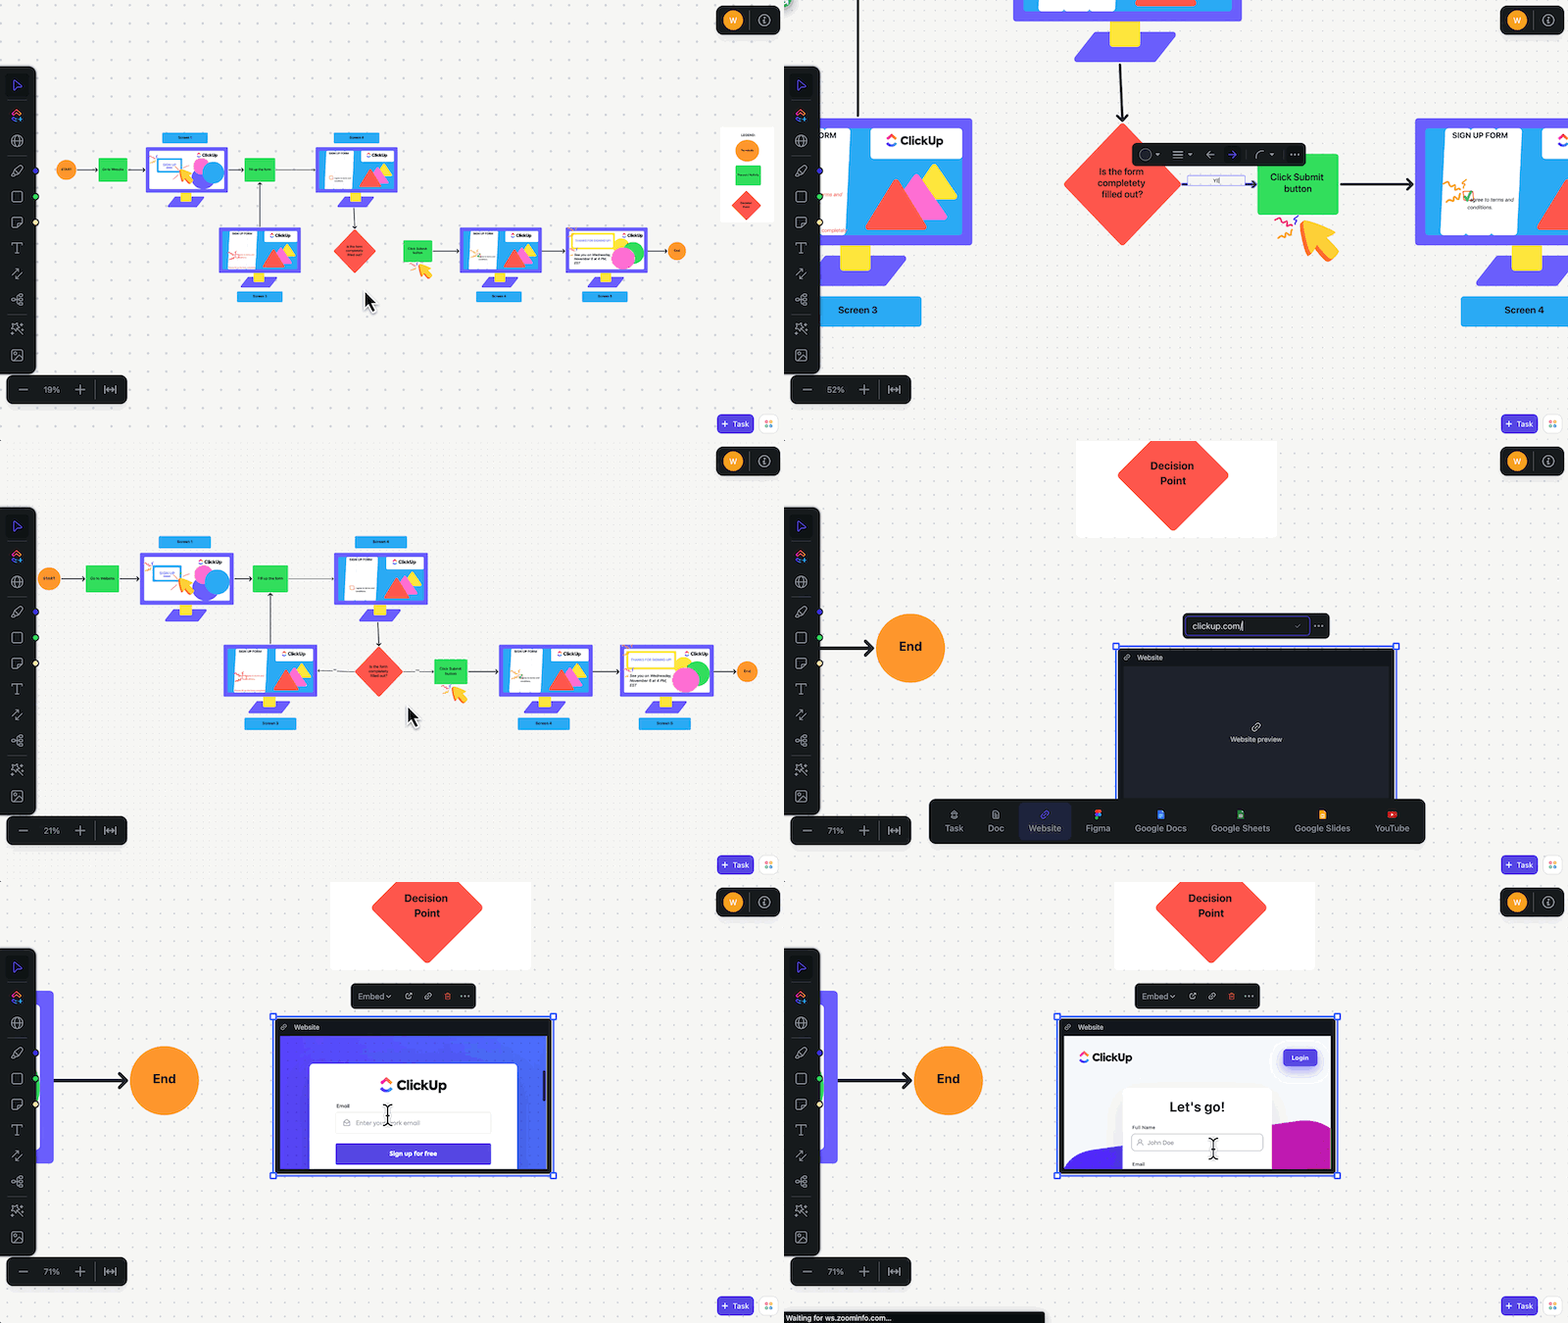
 And what better way to plan it all than with ClickUp Whiteboards

ClickUp User Mapping Flow Template Example
Create engaging presentations with dynamic visual elements using ClickUp Whiteboards 

To pull it all together, Whiteboards makes it easy to brainstorm ideas with your team, organize them, and turn them into ClickUp Tasks so nothing gets forgotten. 

Whether it’s deciding on visuals, quizzes, or the perfect story, you’ll have everything mapped out.

📌 Plan and create the perfect presentation 

By now, you’ve probably realized that creating an audio file for your presentation isn’t as simple as hitting the record button. There’s a lot of legwork involved—understanding your audience, drafting a script, and making sure everything flows seamlessly.

This is where ClickUp Docs saves the day. 

collaborative live editing in ClickUp Docs
Collaborate with your teammates and create presentation content using ClickUp Docs

With it, the possibilities are just endless. Here’s a glance👇

  • Bring together your teammates and collaborate on ideas, pain points, and objectives of the presentation document
  • Drop in images, links, or video ideas to map out your slides and multimedia elements 
  • Customize fonts, text colors, and formatting to align with your brand or presentation theme
  • Assign teammates specific action items and convert text into trackable tasks

Productivity Hack: Save time and boost focus with Focus Mode. It lets you block out distractions and zero in on one line or paragraph at a time—perfect if you’re easily distracted!

📌 Leverage online templates to organize presentations

Why waste time creating a presentation from scratch when templates are ready and waiting for you? All you need to do is drop your ideas in, organize your thoughts, and you’re good to go.

And what better way to do this than with ClickUp’s templates?

Among a library of 1000+ templates, the ClickUp Presentation Template is designed to help you structure your presentation effortlessly and create winning client presentations.

ClickUp Presentation Template 

With this template, you can easily organize each section, design your slides with images and visuals, add animations and transitions, and keep the formatting consistent. It’s all about creating a polished, professional presentation with less effort and more impact!

Develop a clear structure and keep track of all presentation tasks with ClickUp Presentation Template 

‘I can’t say enough good things about it. Between the automation, templates, and all the different sorts of tracking and views, there’s just no way to go wrong with ClickUp

Jodi SaliceCreative Director, United Way Suncoast

📌 Use AI tools to craft compelling presentations

Having a template is one thing, but doing all the manual work to fill it out is another. But what if you can use presentation tools, automate the process, and quickly craft a presentation outline just by providing some details? 

With ClickUp Brain, it’s possible. Just input the topic, purpose, key points, and desired structure to generate a well-organized outline tailored to your specific requirements. 

This AI tool for presentations uses advanced algorithms to understand your role and presentation objectives and input data to generate presentation outlines. 

🔖 Example Prompt: Develop a clear and concise outline for a sales presentation that organizes content logically and effectively. [Specify the key points or sections you want to cover].

ClickUp Brain
Get highly specific answers and create presentation outlines in seconds with ClickUp Brain
Summarize this article with AI ClickUp Brain not only saves you precious time by instantly summarizing articles, it also leverages AI to connect your tasks, docs, people, and more, streamlining your workflow like never before.
ClickUp Brain
Avatar of person using AI Summarize this article for me please

Create Dynamic Presentations With ClickUp 

Creating Google Slides presentations with audio might seem simple at first. Still, it can spiral out of control when you mix brainstorming, sharing feedback, managing tasks, and looping endless conversation threads.

That’s where ClickUp steps in.

Use Clickup Whiteboards to brainstorm, ClickUp Docs to outline and collaborate, ClickUp Clips for quick feedback, and ClickUp Brain to keep generating content on the go. 

Sounds impressive, right? Sign up for ClickUp today and create stunning presentations. 

Everything you need to stay organized and get work done.
clickup product image
Sign up for FREE and start using ClickUp in seconds!
Please enter valid email address