How to Permanently Delete Your Evernote Account

Sorry, there were no results found for “”
Sorry, there were no results found for “”
Sorry, there were no results found for “”
Evernote, at one point in time, was the definitive note-taking app available in the market. Launched in 2008, it garnered around half a million users that year. Its popularity peaked in 2013 when it had over 75 million active users.
Since then, a slew of problems combined with a rise in competition have led to its steady decline in popularity.
If you are one of those Evernote users looking to migrate to a better alternative and are wondering how to delete an Evernote account, this blog is for you.
If you have decided to move on from Evernote, you have two options. You can either deactivate your Evernote account or delete it altogether. But what is the difference between them, and which one should you choose?
The deactivate account option will temporarily turn off your Evernote service. You will, however, have the option to reactivate your account at a later date if the need arises.
If you delete your account, you will effectively erase all your information permanently. After four weeks, even Evernote’s customer service cannot access your account information. So, keep in mind that account deletion is a one-way street.
A few key takeaways:
If you have decided to delete your Evernote account, follow the steps below.
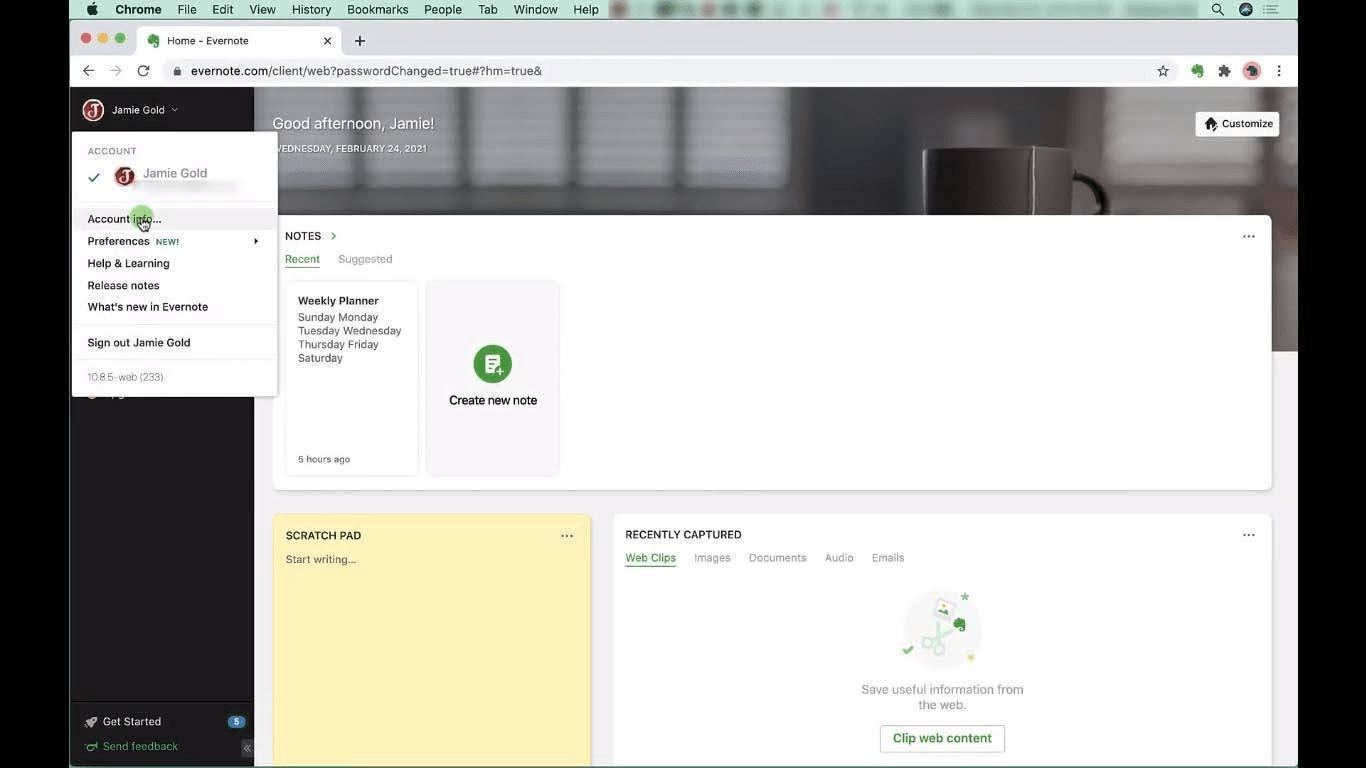
The first step to deleting your Evernote account is to log into it. Once logged in, click on the ‘Account Info’ menu option, which will appear when you click on your user name in the top left-hand corner of the page.

You will then be directed to a new tab displaying your Account Summary.

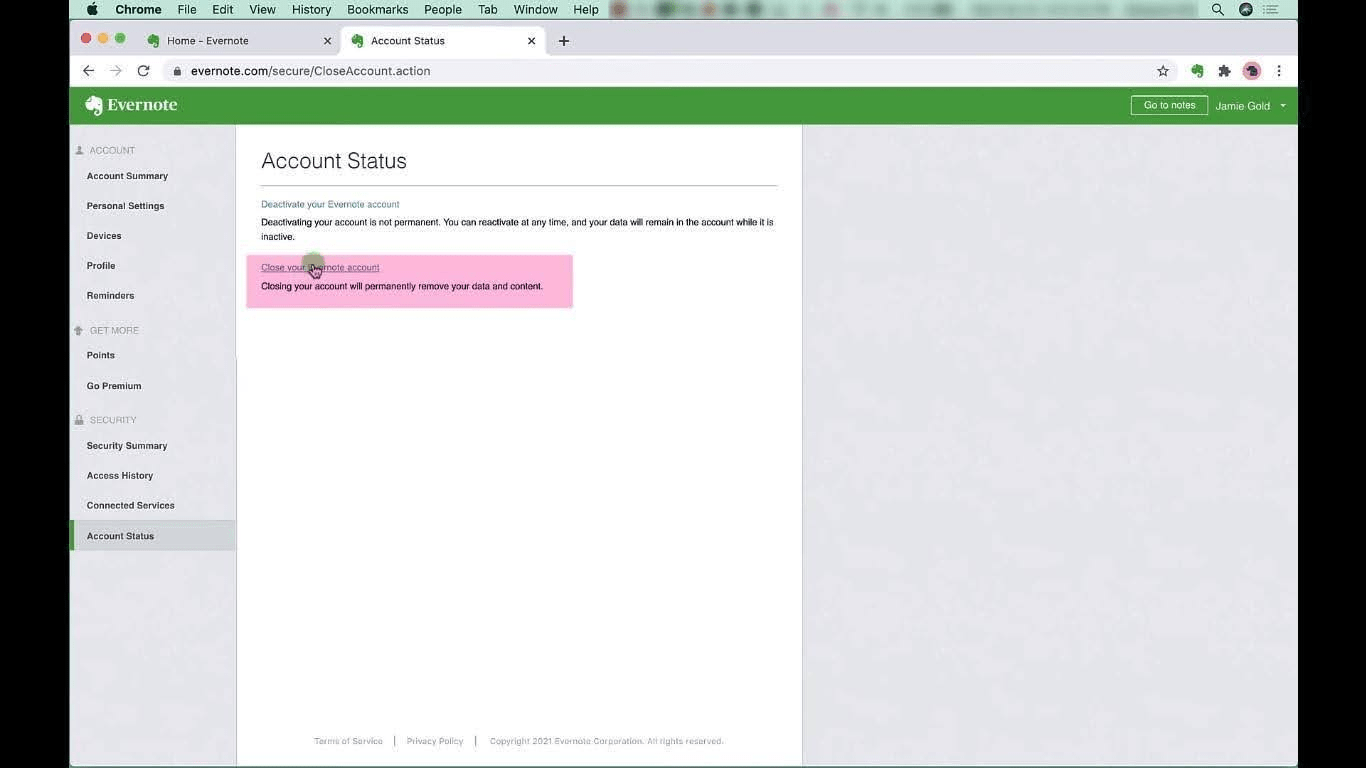
Once on the ‘Account Summary’ page, navigate to the ‘Account Status’ menu item on the left navigation menu and click on it. Once you do, you will be asked to enter your password again.
This page will give you two options: deactivate or permanently delete your Evernote account.

Once you click on the ‘Close your Evernote account’ option, you will be shown a popup to double-check if you are willing to close your Evernote account permanently. Click on ‘Continue’.

Once you click on continue, a second dialog box will be displayed asking you to verify your subscription status and if you want to export your existing notes with a link to additional information on how to do so.

Once you hit continue here, you will be directed to the final dialog box asking why you are leaving Evernote. Click on the check box to confirm, and you will be asked to verify your password again.

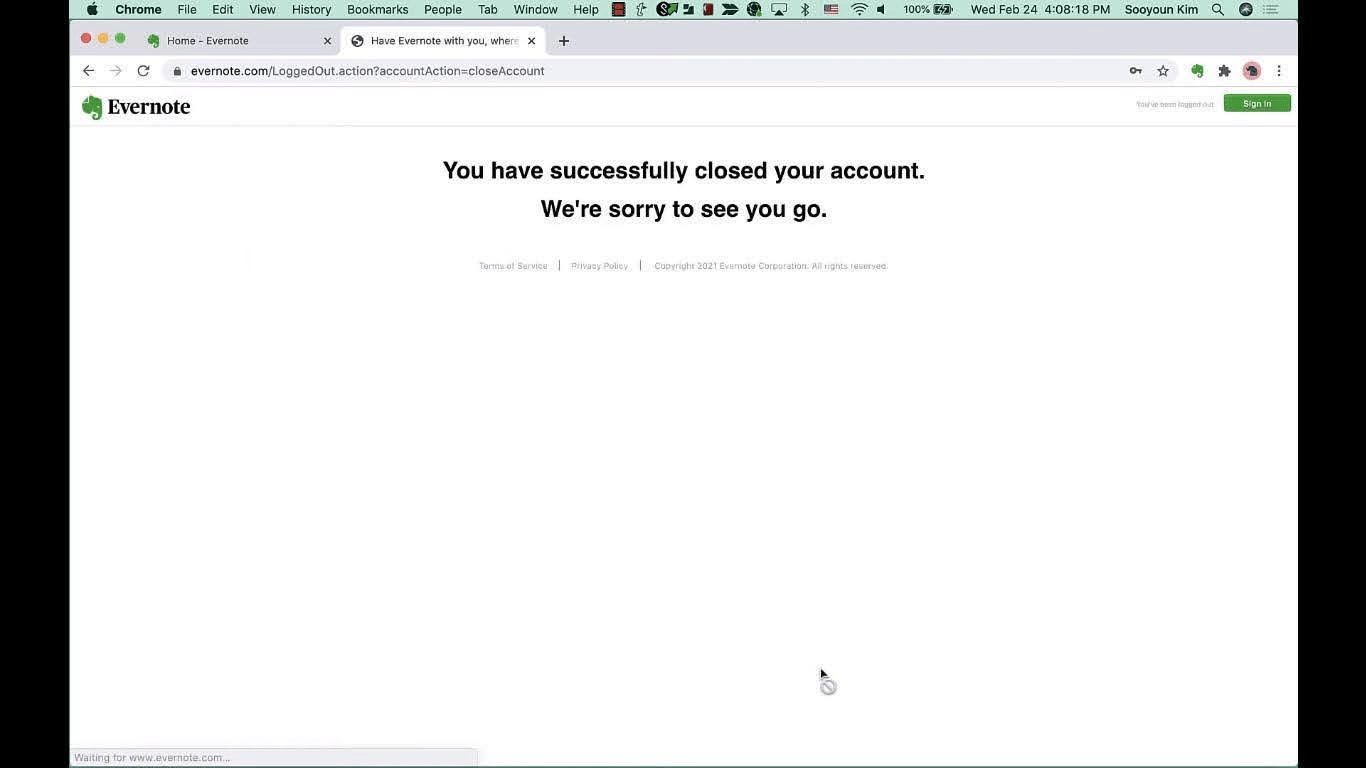
You can click the close account button and be directed to a confirmation page below.

Note: If you are on a paid subscription, you must cancel your subscription first before you delete your Evernote account.
Several factors prompt users to delete their Evernote accounts and migrate to better alternatives. Key among them are:
ClickUp is a powerful productivity platform that lets you manage your projects, tasks, and notes in one place. So why is ClickUp a superior alternative to Evernote? Let’s find out.
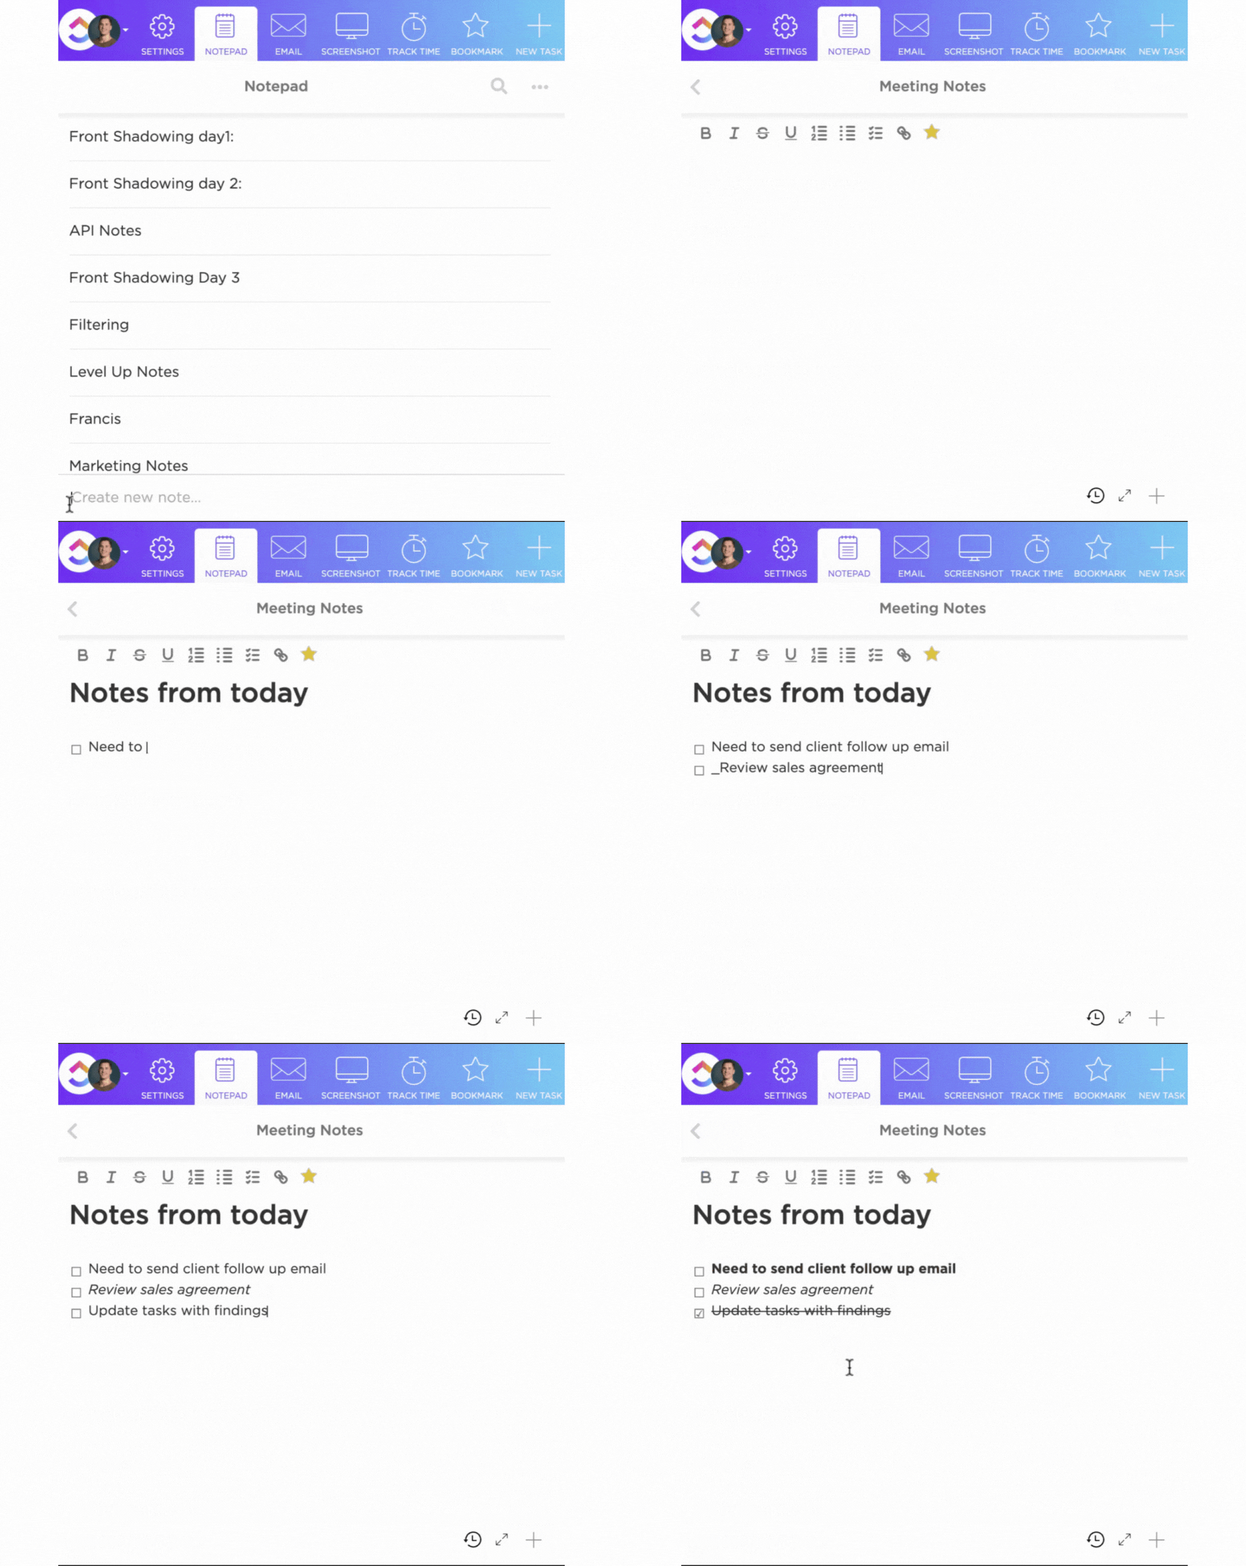
Since we are talking about Evernote alternatives, the first feature we must look at is ClickUp’s Notepad. Like Evernote, this feature allows you to create rich text notes effortlessly to jot down your thoughts or take detailed meeting notes.
However, ClickUp’s Notepad has several advantages over Evernote. You can integrate the notes you create with ClickUp with any tasks, projects, or relevant documents in your workspace.

Unlike Evernote, in ClickUp, you can add features such as images, videos, emojis, checklists, code blocks, and more to your notes. Finally, Clickup also boasts numerous AI-powered tools that aid in improving your productivity levels. Another useful feature that this platform offers is called ClickUp Docs. This feature allows you to create collaborative documents stored within any space, folder, or list within the ClickUp ecosystem.

You can use this feature to create and organize your knowledge base, SOPs, reports, and even meeting notes (with several meeting note templates to choose from).
Moreover, ClickUp allows you to share your docs with anyone by generating a public or private link or inviting them to your ClickUp workspace. This feature also supports version history and lets you keep track of any changes made to your docs.
So, there you have all the information you need on how to delete your Evernote account and why ClickUp should be your first choice among all the other Evernote alternatives on the market. Opting for ClickUp will allow you to take notes more effectively, and its host of AI assistance and collaborative tools will also help you take your productivity levels to new highs.
Ready for the change? Sign up for a free trial today and discover a world of possibilities beyond note-taking.
You can delete your Evernote account permanently by following the steps below:
Follow the below steps to unlike your Evernote account from any device:
Log into your ‘Evernote Account’ and navigate to the ‘Applications Menu’. (This view will show you a list of all the devices that can currently access your Evernote account)
Click on the ‘Revoke Access’ option next to the device on which you want to unlink your Evernote account.
To cancel your Evernote subscription:
© 2025 ClickUp