How to Create a Web Design Workflow in 6 Steps (With Templates)

Sorry, there were no results found for “”
Sorry, there were no results found for “”
Sorry, there were no results found for “”
Web design is a crucial facet of any online business. It is essential to create a website that is user-friendly, visually appealing, and informative. However, designing a website can be daunting, especially if you’re new to the field.
This is where a workflow comes in.
And in this blog, we will discuss what is a workflow, why it’s crucial for web designers, and outline six simple steps to help you create an efficient web design workflow.

Web design refers to the process of conceptualizing and creating websites. It involves several components, including page layout, content production, and visual elements.
Web design determines how users will interact with a website and determines a website’s overall appeal and effectiveness.
In recent years, web design has become increasingly important as more people use the internet to access information. The popularity of mobile devices has also made it necessary for designers to create websites that are compatible with these devices.

A workflow helps designers to streamline their processes and more efficiently complete their projects. Although designers have different preparation rituals, most usually follow a similar planning process.
We know what you’re probably thinking:
“A workflow? Isn’t that a bit regimented? Graphic design is supposed to be creative!”
While that’s true, it doesn’t negate the fact that having a web design workflow can make your life and the entire process a lot easier when tackling web design projects.
Here are some of the advantages of having a defined workflow:
Workflows help a web designer or a web design team to be organized and efficient. A well-designed workflow will save time and ensure that all the necessary steps are followed to complete a design project.
Another advantage of having a workflow is that it ensures consistency. By following the same steps each time you work on a website project, you can be sure that you will always cover all the bases and produce a high-quality result.
Following a workflow also helps to improve the quality of your work. You’re less likely to make mistakes when you have a set creation process to follow.
Finally, having a workflow means that you can optimize your time and energy. This way, you can work on more projects and produce better results.
While there is no one-size-fits-all solution for creating a workflow, there are some general phases that most designers go through to ensure they create a well-designed website. By understanding these steps, you can create a web design workflow that works best for you and your work.
The first step in the planning phase to executing an effective web design workflow, as it is for any strategy, is to define the goals it should achieve.
Before designing a new website, you’ll need to ask yourself the following questions as part of the research process:
Jotting these design ideas down and collaborating with peers is a great way to start thinking about how you want your new website to look and feel. You can do it in person, on paper, over the phone, or even in a shared Doc.
No matter how you do it, getting these answers is a critical first step.
Once you have a better idea of what you’re looking to create, you’ll be in an excellent position to begin conceptualizing ideas using a wireframe, which is also part of the planning phase.
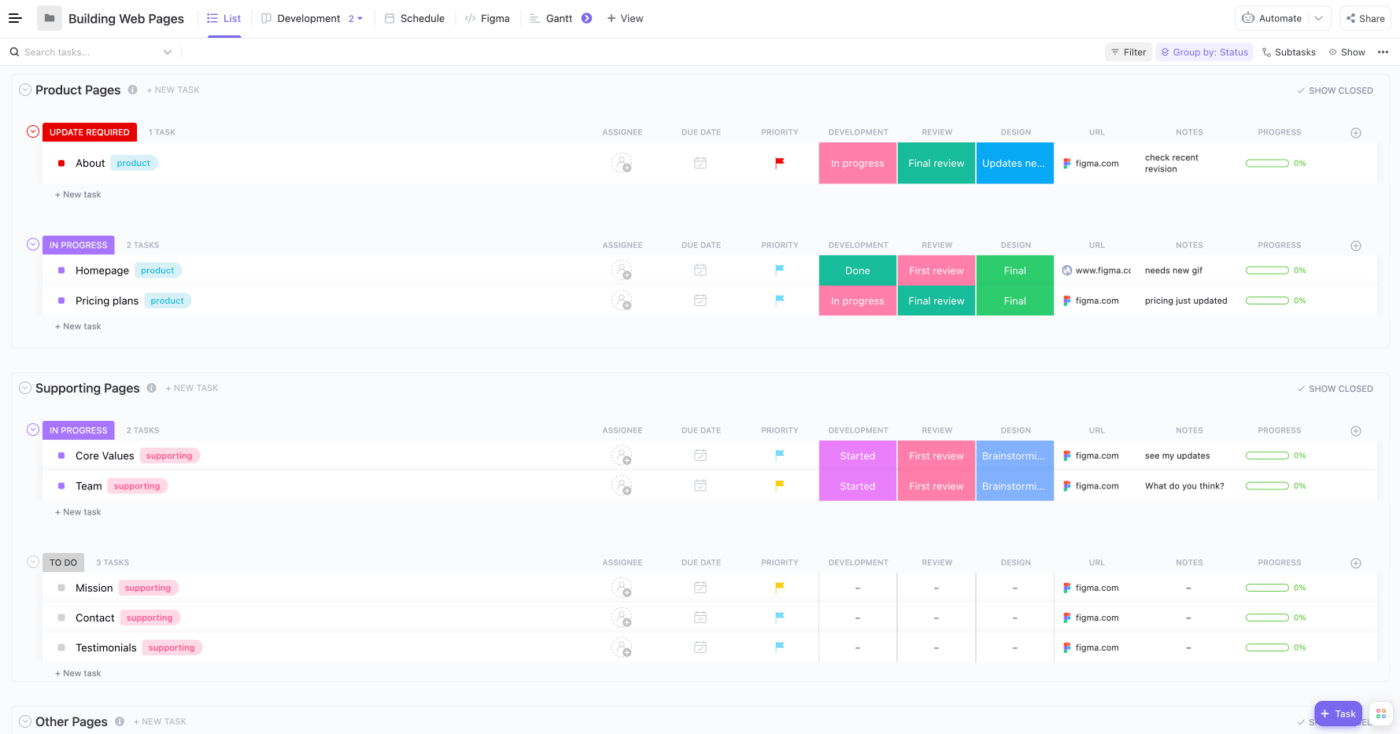
This can be done on paper but is more effective and efficient through dynamic tools like ClickUp, which offers templates such as the ClickUp Building Web Pages Template to help give you a starting point and framework to support and manage the webpage creation process.
Wireframes are an essential piece of the puzzle in the web design process, as they allow you to visualize and tinker with your project’s possibilities.
When creating one, you’ll begin to build the basic structure of your project in the form of a skeletal outline. A wireframe will help you determine what kind of content and features are necessary and how they’ll fit together.
Here are a couple of key considerations to make when designing a wireframe:
Barring the specific content of your page, what does it need to look like? How will users navigate it? How do you want to position interactive elements on the page, and what interactions will users have with them? These are the kinds of considerations you’ll need to make when creating the basis of a wireframe.
Your wireframe should also consider each site page’s specific features and content. This could include carousels and forms, videos, and social media embeds.
Images are crucial design elements of any web design workflow, so it’s important to prioritize them in your creation. Not only should they be high-quality and relevant to your site, but they should also help tell your story in a way that engages users.
If you’re unsure where to look, try Envato Elements. It’s an excellent resource for finding high-quality, royalty-free images for your projects.
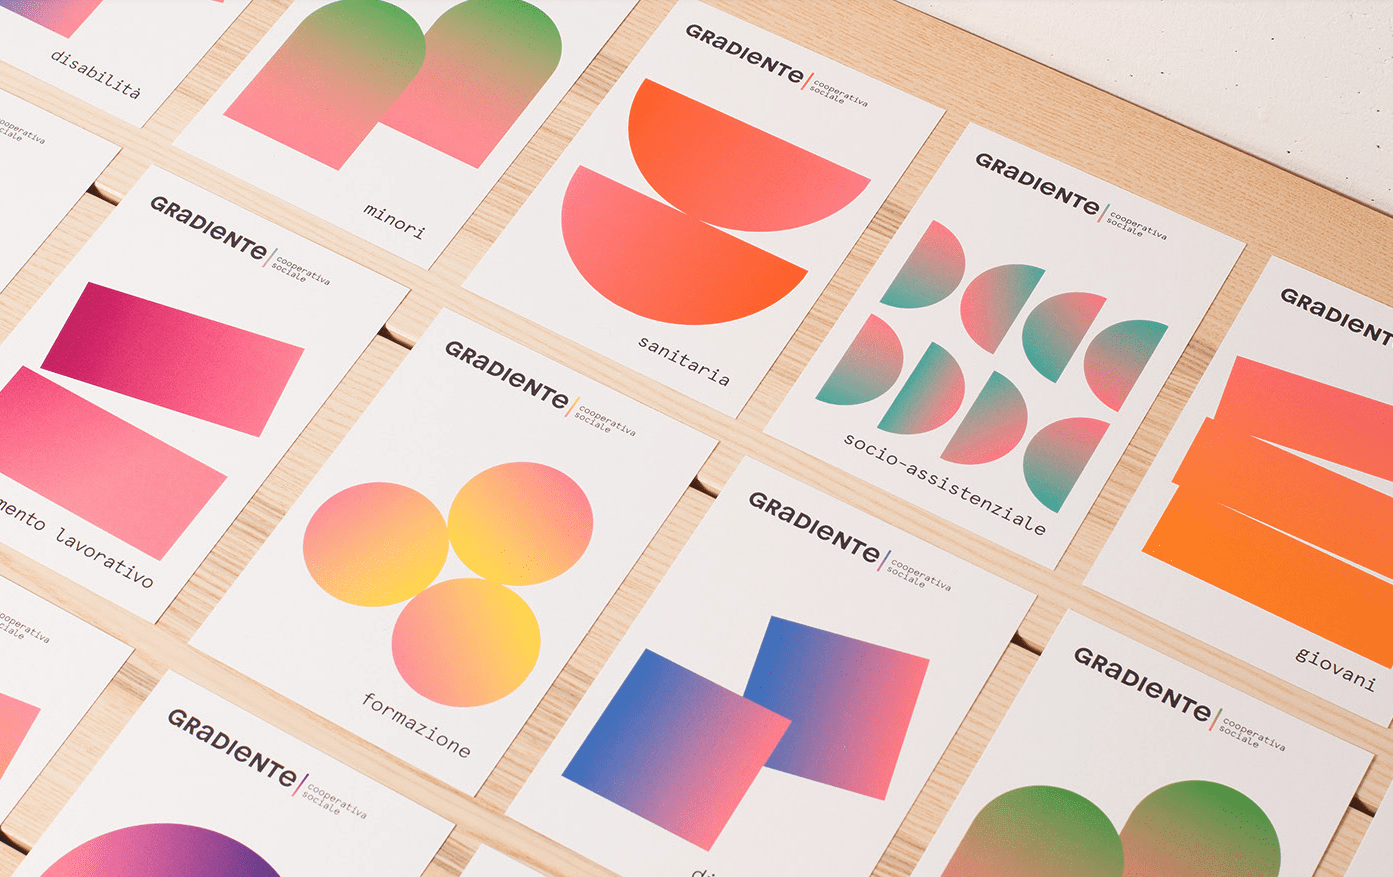
Choosing the right color scheme for your site is essential, as different colors evoke different emotions.
Be sure to integrate brand colors to set the overall tone of your site. For example, if you’re designing a website for a travel company, you might want to use brighter, more vibrant colors to convey a sense of adventure.
Similarly, typography is an essential element of design, although many designers tend to overlook it. The font you choose can change the entire tone of your site, so be sure to choose one that is legible, eye-catching, and in line with the rest of your framework.
If you’re still looking for the perfect font, Envato Elements has you covered with its vast library of unique fonts available for unlimited download.

Now onto the nitty gritty! It’s time to bring your wireframe to fruition and turn it into a fully functioning website. There are a few key considerations a web designer needs to make during the implementation phase stage of website development, which we’ll touch on below.
The back end of your site is what allows it to function correctly– think of it as the skeleton upon which you’ll build everything else. You’ll be working with code to create the site architecture and functionality.
If you don’t have technical knowledge because you’re not a coding expert, you’ll likely be working with a developer during this step of the website design process to help you with technical specifications and bring your vision to life.
Now it’s time to refer back to your wireframe, gather all the copy and collateral you’ve crafted for your web page’s content, and transfer it to the site.
This is where you’ll add images, videos, and other forms of media to break up the text and add visual interest to your site. Remember when we said using a digital tool like ClickUp will come in handy? This is one of those times.
It’s essential to keep track of all the content you’re adding to your site, where it’s going, and what stage of website development it’s in. ClickUp will help you to avoid duplication, ensure all your content is high-quality, and make the web design process much smoother.
While functional and visual aspects of the web design workflow are pivotal, it’s also important to consider SEO and content creation.
After all, what’s the point of putting all this effort into your site if no one can find it? SEO, or search engine optimization, is the process of optimizing your site to rank highly in search engines. You can do this by using SEO tools to help you find relevant keywords in your copy, optimizing your site structure and code, adding relevant internal links, and building backlinks.
Conversely, content is about creating and distributing valuable content to attract attention and generate leads. Content can come in the form of blog posts, infographics, whitepapers, ebooks, or even just helpful articles.
Both SEO and content marketing are essential for getting your site seen by the right people, so be sure to factor them into your development process.
After all your hard work, it’s finally time to launch your site! But before you do, getting feedback from others and doing a quality assessment of the actual website is vital to ensure everything is working as it should.
You’ll first need to run the final product by your client or project manager for approval. Ideally, they love what you’ve done up to this point and give you their blessing to publish when ready. Consider asking colleagues for feedback as well.
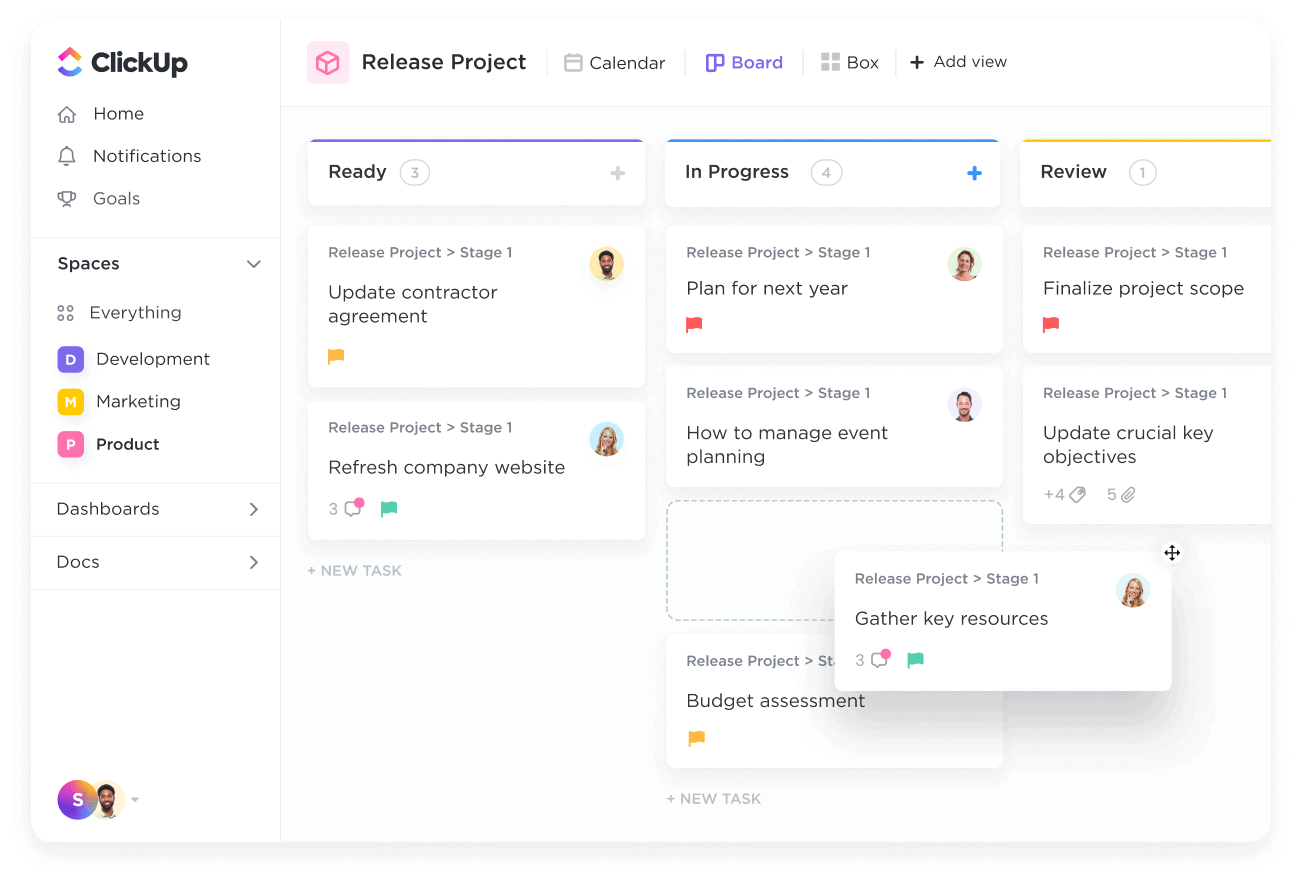
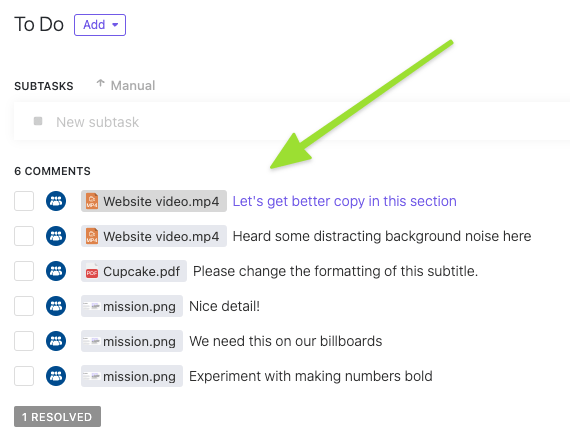
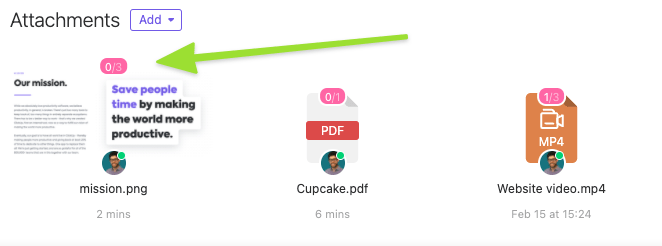
And if you’re using ClickUp, they’ll be able to leave comments within your Tasks and Docs and expedite the approval process with its Proofing feature that lets you assign comments directly on task attachments.
Before publishing your project, you’ll also want to test critical aspects of the site to ensure they’re up to par with the goals you set at the beginning of the creation process.
There are tons of ways to do this, but some of the most relevant include:
This testing ensures your site is functioning correctly and is easy to use. Technical tests will assess whether your site loads quickly, ensure pages work properly, and check whether there are any broken links.
On the other hand, usability tests focus on whether your site is easy to navigate and understand. These tests include testing the user interface and flow, assessing the overall website’s design, and making your content easy to read and digest.
A/B testing compares two web page versions to see user interaction and determine which one performs better. A/B testing is usually done by showing half of your site’s visitors one version and another the other half. A/B testing can test pretty much anything, from the copy on your CTA buttons to the color of your site’s background.
Funnel testing also involves comparing web pages. It assesses which version gets more people to complete a specific goal or task. This could be anything from signing up for a newsletter to purchasing.
UX software testing, or user experience testing, assesses how easy it is for people to use your site. This testing is usually done through surveys and interviews with the target audience, who you can ask to complete specific tasks on a page.
UX testing can provide user feedback on a design’s potential deficiencies and shed light on users’ navigational preferences.
Once you’ve conducted user testing, it’s time to make changes based on the results.
If something isn’t working as well as you’d hoped, don’t be afraid to go back and make changes. The goal is to have a site that’s functioning correctly, easy to use, and provides a good experience for your users.

Congrats! You’ve progressed through the above stages and are ready to move on to the last phase of the web design workflow: the website launch and performance monitoring.
The launch phase will involve:
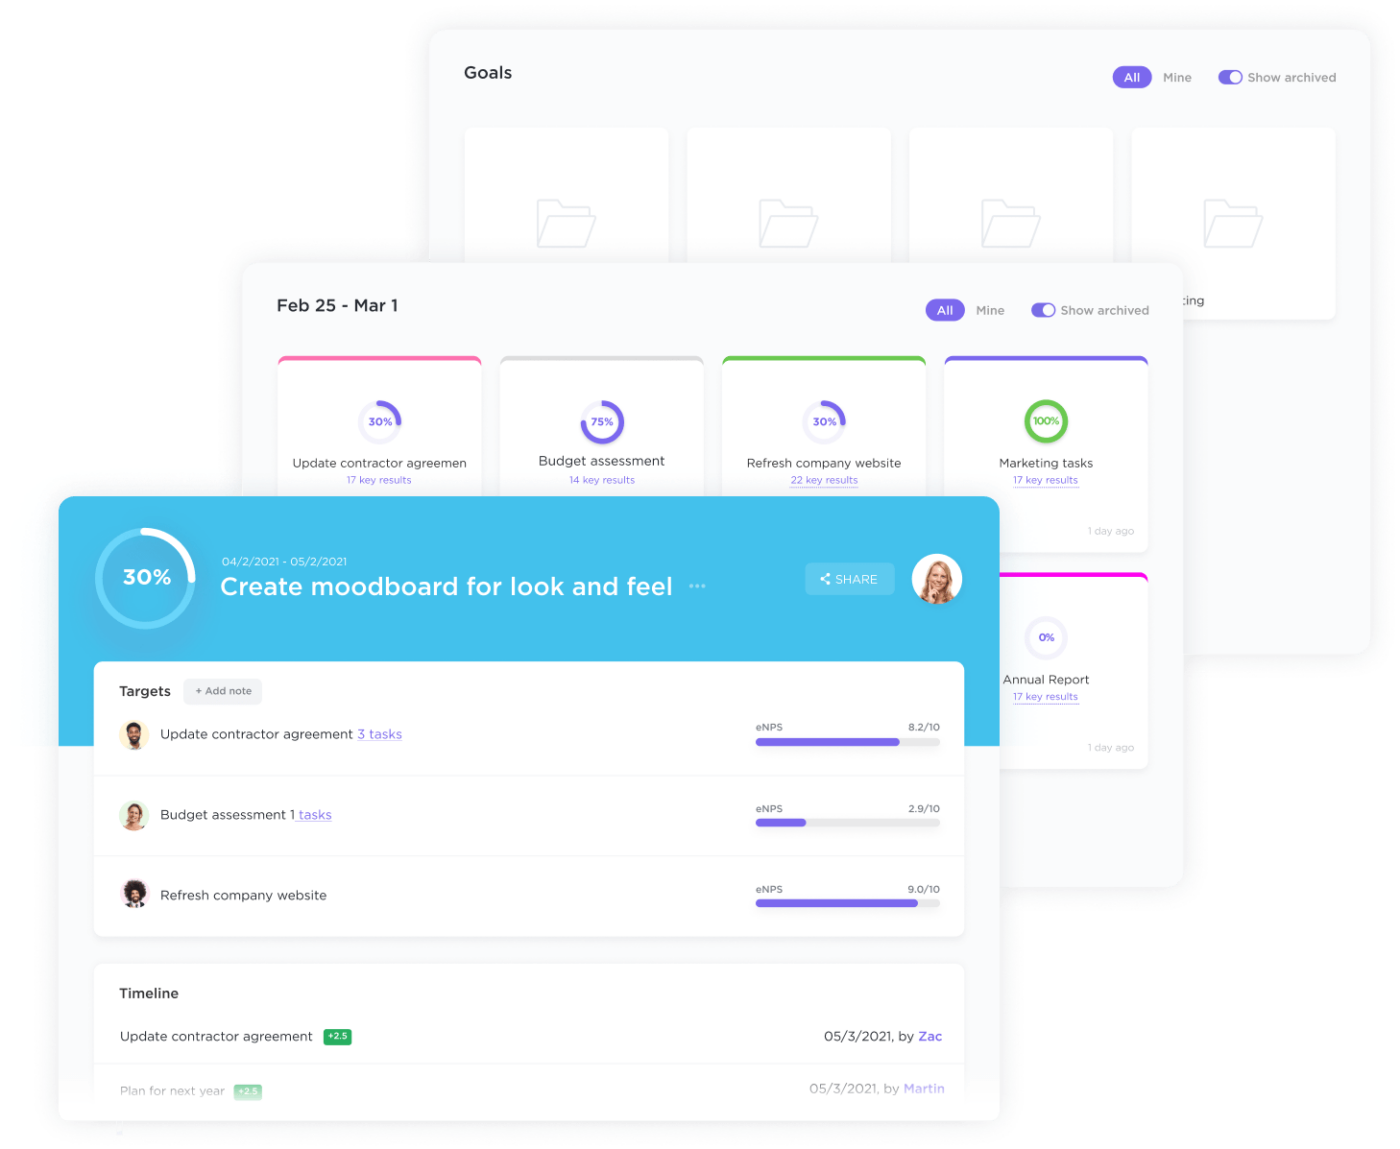
The first step is ensuring you have a plan to monitor your site’s performance, including setting up goals and KPIs (key performance indicators) to track. Some typical web design KPIs include website traffic, conversion rate, bounce rate, and time on site.
ClickUp Goals allow you to list and track goals while keeping track of your projects.
Once you’ve set up monitoring, it’s time to hit publish and make your site live.
If you’re using a content management system (CMS) like WordPress, this should be a relatively straightforward process.
You’ll need to upload your site’s files to a web server if you’re not using a content management system. Once they’re live, anyone with an internet connection can access your site.
Post-launch, it’s crucial to monitor its performance and ensure everything is working. It’s vital to regularly check your site’s speed, uptime, and security and look for further improvements.
Creating a workflow for your web design projects is integral to running a successful web-design business.
By following the steps outlined in this post and utilizing tools like ClickUp for planning and organization, you can ensure that you complete each project efficiently and effectively.
Need some help getting started? Check out the Web Development Template by ClickUp. It includes all the processes and functionalities required to run an organized and efficient web design project. Get started for free and access hundreds of features and templates to help you manage and deliver your next web design project.
And once you have your workflow set up, be sure to also check out productivity hacks to get more work done in less time. It includes tips and tricks for staying on top of your work, keeping team members and tasks organized, and more.
Happy designing!
Guest Writer:

The Envato team

Praburam Srinivasan
Max 22min read
Praburam Srinivasan
Max 24min read

Manasi Nair
Max 18min read

© 2026 ClickUp


