

Frustrated by poor audio or grainy video during important meetings?
It’s time to fix that for good. A few simple adjustments can transform your video conferencing setup, ensuring clear communication and making your meeting or event feel more professional.
In today’s remote work environment, a reliable setup isn’t just convenient; it’s essential for effective collaboration and smooth meetings.
Let’s explore some practical tips to enhance your video conferencing experience and make every meeting more engaging and productive.🎥
How to Improve Your Video Conferencing Setup
- Creating the Ultimate Video Conferencing Setup
- Essential components of a video conferencing setup
- Hardware considerations for a video conferencing setup
- Setting up video conferencing on various platforms
- Additional video conferencing tips and tricks
- Video conferencing setup for different budgets
- Video conferencing setup for home and office
- Understanding and using video conferencing tools
- Optimize Video Conferencing with ClickUp
Creating the Ultimate Video Conferencing Setup
With the popularity of remote work, high-quality video conferencing capabilities are vital for effective communication. Investing in the right tools not only fosters collaboration but also ensures that every meeting is engaging and professional.
Essential components of a video conferencing setup
To achieve the best video conferencing setup, it’s crucial to understand the key components that contribute to successful video conferences:
1. A good microphone
One of the most crucial factors is having a good microphone. It’s important to note that ‘good’ doesn’t always mean expensive. 💵
Remember, proximity to the mic is critical—a $1000 microphone positioned 20 feet away from the speaker may perform worse than a simple stock Apple headset placed closer.
- A microphone with a cardioid or shotgun polar pattern is ideal for those sitting at a computer, especially if the speaker is a few feet back with a presentation
- A mic with an omnidirectional polar pattern might be more suitable in a conference room setting with multiple people
- Unidirectional mics are also a great choice as they focus on sound from the front, minimizing background noise
The quality of a computer’s stock microphone is generally poor, though newer models, such as the M1 MacBooks, have received positive reviews for their built-in mics.
💡Pro Tip: Compare two recordings: one using the computer’s stock microphone and one using a standard headset, such as an Apple headset. This comparison should be done in an environment that mirrors typical video conference conditions, including air conditioning noise.
Wireless earphones like AirPods might lack those pesky wires, but wired headphones often offer more satisfactory microphone quality and are worth considering, too.
2. A high-quality webcam
Although built-in cameras offer convenience and maintain the appearance of eye contact, they might not always provide the best image quality.
In contrast, external webcams often offer better resolution, frame rates, and flexibility, making them a preferred choice for those who want to look at their professional best during video conference calls.
When selecting a webcam, consider factors such as resolution, frame rate, and cable length to find the best fit for your needs.
- The Logitech Brio, priced at $135, is a top choice. It offers high-quality performance that is suitable for most users
- For a more budget-friendly option without compromising quality, consider the Logitech C920, available for around $65-$70
3. Reliable remote desktop software
The right remote collaboration tools can make all the difference in your video conferencing experience.
With so many software options available, comparing features, user-friendliness, and compatibility with your devices is important.
Beyond video calls, adding digital whiteboarding tools can boost collaboration by allowing real-time interactions and file sharing, making meetings more dynamic.
4. A stable internet connection
One key element to a successful video call is a stable internet connection, which guarantees smooth audio and video transmission.
Consider switching to a wired connection, upgrading your internet plan, or tweaking your network settings to optimize performance.
Bonus: Discover the 10 Best Online Meeting Tools for Teams, both free and paid—that can take your meetings to the next level!
Hardware considerations for a video conferencing setup
Devices like the MacBook Pro and iPad Pro are popular for their reliable performance and impressive built-in cameras, making them ideal for both work and personal calls.
The MacBook Pro’s processing power and retina display ensure your video looks sharp and smooth.
At the same time, the iPad Pro’s portability and high-quality front camera are perfect for quick and flexible setups, especially during virtual event planning.
Both devices are compatible with various conference calling software, making joining meetings easy with a single click.
Connecting peripherals and enhancing your setup often comes down to having the right ports. USB-C and USB ports are essential for connecting external webcams, microphones, and other accessories that elevate your video quality.
USB-C, in particular, offers faster data transfer and more reliable connection. This is very important if you use advanced hardware like a Digital Single-Lens Reflex (DSLR) camera for your calls.
A DSLR can significantly boost your video quality, giving you sharp, professional visuals that stand out. Some of the advantages include:
- Superior image quality: DSLRs offer high-resolution video, capturing details that standard webcams miss
- Better low-light performance: They perform well in various lighting conditions, ensuring you are clearly visible in dim rooms
- Lens versatility: With DSLRs, you can choose lenses that suit your space and aesthetic needs
Minimizing lag is another critical factor in creating a seamless video conferencing experience. Although often associated with video games, lag can severely impact real-time interactions during meetings, making conversations feel disjointed.
Using hardware that minimizes lag, such as devices with high processing power and stable internet connections, ensures that you can keep up with the flow of discussion without awkward delays.
Combining this with good virtual meeting etiquette—like turning off unnecessary background notifications and taking the meeting from a well-lit room—helps maintain a professional, polished presence throughout your calls.
Setting up video conferencing on various platforms
Video conferencing platforms like Zoom, Google Meet, and Webex have become household names, especially for remote work and virtual meetings.
Among these, Microsoft Teams stands out as one of the most widely used platforms, particularly in business. It’s a robust alternative to Google Meet, offering deeper integration with Microsoft 365 apps, making it a top choice for organizations that rely on Office tools.
Setting up a video conference on Teams is straightforward, even if you’re new to the platform. Here’s a quick guide to get you started:
- Download and install Teams: First, download Microsoft Teams from the official website and install it on your device. You can also use the web version, but the app provides a more seamless experience
- Sign in: Use your Microsoft account to sign in. This can be a work, school, or personal account, depending on your needs
- Set up your meeting: Click on the ‘Calendar’ tab on the left sidebar, then select ‘New Meeting.’ Fill in the meeting details, including title, date, time, and attendees
- Choose audio and video settings: Before starting or joining a meeting, click on the device settings icon to select your preferred microphone, speakers, and camera
- Send invites: Add the email addresses of your participants and send out the invites. Teams automatically sync the meeting to the recipients’ calendars
- Start the meeting: Once the scheduled time arrives, click ‘Join’ from the calendar or the meeting link. Check your audio and video one last time before starting
While setting up Teams is user-friendly, it comes with its own challenges that can disrupt your meeting flow.
- Audio or video not working: A frequent issue is when Teams doesn’t detect your microphone or camera. To fix this, check your device’s privacy settings to ensure Teams has permission to access your hardware
- Blurry or laggy video: Poor video quality is often caused by a slow internet connection. Switching to a wired ethernet connection, upgrading your internet plan, or closing other bandwidth-heavy apps can help
- Echo or audio feedback: This problem usually happens when multiple devices are too close or someone’s audio settings are incorrect. Ask participants to use headsets or mute their microphones when not speaking
- Missing meeting invites: If meeting invites don’t appear in your calendar, it’s typically a sync issue. Restarting Teams or re-logging into your account can usually resolve this glitch
Additional video conferencing tips and tricks
Creating the best video conferencing setup goes beyond just having the right software; it’s about optimizing your environment to make every call as professional and engaging as possible:
1. Optimize your lighting
Poor lighting can cast your face in shadow, make you look washed out, and make it hard for other attendees to see you. This distracts from your message.
Here’s how to achieve optimal lighting:
- Position yourself facing a window to use natural light, which provides balanced and high-clarity illumination
- Sitting with a bright light source behind you can create harsh shadows and make you appear as a silhouette, so avoid that
- For indoor setups, ring lights or adjustable desk lamps with soft white bulbs can provide even lighting, mimicking natural daylight
2. Pay attention to camera angles
Positioning your camera correctly can help ensure that your face is clearly visible (so other attendees can draw facial queues from you). The right camera angle makes you look more engaged and professional. Here are the best practices:
- Place your camera at eye level to create a natural, direct line of sight. This angle simulates face-to-face interaction and helps maintain engagement
- Avoid positioning your camera too low, as this can create unflattering angles and make you appear disconnected
- Aim to keep your head and shoulders centered within the frame, with a bit of space above your head to avoid a crowded look
3. Create a distraction-free background
A cluttered or distracting background can detract from the message you’re trying to convey. Here’s how to maintain a good backdrop:
- Choose a neutral or plain background to keep the focus on you. Avoid overly bright or busy patterns in the background or too many moving people
- Many conferencing tools offer virtual background options that can be used if your physical space is not ideal
- Ensure your background is well-lit to avoid dark spots that can create a contrast against your well-lit face
4. Leverage digital whiteboards
Tools like digital whiteboards can make a video meeting more interactive and engaging, especially for brainstorming sessions or presentations.
They allow you to collaborate in real time, sharing ideas visually rather than verbally.
5. Test your setup before meetings
Pre-meeting checks are essential to avoid last-minute hiccups. A quick test ensures your audio, video, and internet connection function correctly.
Most platforms offer test call features where you can check your mic and camera settings before joining a meeting. Additionally, ensure your internet connection is stable and fast enough to support video calls without lags.
6. Set up video conferencing rooms
If your business is transitioning to or already operates in a hybrid work environment, you’ll likely have huddle rooms and boardrooms that require video conferencing setups.
A video conference room will be essential for daily online meetings, training sessions, webinars, and presentations.
The type of video conferencing equipment you need will depend on the number and size of the rooms. Generally, you’ll require at least a screen and a multidirectional microphone with features such as noise filtering and automatic gain control.
Bonus Tip: Looking to streamline your meetings and stay on track? Dive into these 16 meeting agenda examples and grab some free templates to get started!
Video conferencing setup for different budgets
Here’s a breakdown of video conferencing setups that can help you achieve a professional look, no matter how much you want to spend.
Level 1: Basic setup
For those on a budget, it’s still possible to create a decent video conferencing setup without breaking the bank.
Here’s how to optimize your setup on a budget:
- External webcam: A dedicated webcam like the Logitech C922 Pro Stream can significantly enhance sharpness, color, and low-light performance compared to built-in laptop cameras
- Basic USB mic: An external USB microphone, such as the Samson Meteor, boosts audio quality and has easy plug-and-play functionality
- Headphones: Using headphones reduces echo during calls, and over-ear models offer superior sound. Earbuds are also less noticeable on video
Level 2: Intermediate setup
For those looking to enhance their video conferencing experience without spending a lot on professional equipment, a mid-range setup offers excellent improvements in audio and video quality:
- Dedicated camera with HDMI-to-USB interface: Convert consumer cameras into high-quality webcams using HDMI-to-USB interfaces like the Elgato Cam Link 4K or similar alternatives for seamless video quality enhancement
- Wired lav mic: A simple wired Lavalier mic, such as the Rode Lavalier GO, improves audio clarity and can be connected directly to your computer
- Effective lighting: Basic lighting kits or Philips Hue lights can dramatically improve video quality by positioning lights correctly to control brightness and temperature
Level 3: Advanced setup
This is ideal for those seeking a more refined, professional look:
- Interchangeable lens camera: Use cameras with interchangeable lenses to create a defocused background for a cinematic look, enhancing the overall video appeal
- Wireless lav mic: Upgrade to wireless lav mics like the RODE Wireless GO for greater mobility and flexibility in your audio setup
- In-ear monitors: Invest in in-ear monitors, such as Shure broadcast-style or Bluetooth options like Apple’s AirPods Pro, for discreet audio monitoring
- 3-Point lighting: Set up a three-point lighting system with lights like the Elgato Key Light Air to optimize video lighting, ideal for professional videoconferencing or webinars
Level 4: Professional setup
A high-end setup offers the best video and audio quality for professionals who frequently conduct virtual meetings, webinars, or live streams:
- HDMI broadcast switcher deck: The Blackmagic ATEM Mini switcher deck offers advanced video options, including multi-camera support, on-screen graphics, and professional broadcast features
- Broadcast-quality shotgun mic: For superior audio, use broadcast-level mics like the Rode NTG3, mounted strategically out of frame for clear, professional sound
- Accent lighting: Enhance your setup with Philips Hue Smart LED Light Bars for creative lighting effects that add depth and professionalism to your video environment
Video conferencing setup for home and office
Setting up video conferencing at home differs significantly from the office environment, each presenting unique challenges and considerations.
Setting up video conferencing at home typically involves more than just turning on your laptop.
- You need to find a quiet, distraction-free space, with adequate lighting
- You may need to invest in additional equipment like a high-quality webcam, noise-canceling headset, and even a dedicated microphone for clear audio
These elements help you create a seamless and polished experience for both you and your audience.
In contrast, offices often have:
- The advantage of dedicated conference rooms equipped with pre-installed, high-quality video conferencing systems, offering a more controlled and professional environment
However, home setups provide a unique edge—greater flexibility and convenience, allowing remote workers to adapt their space to their needs for maximum comfort and efficiency. With the right tools and adjustments, a home setup can rival or surpass traditional office spaces’ functionality.
Here are several tips for enhancing home office setups to make them more conducive to video conferencing:
- Ergonomics matter, especially during long meetings. Choose a chair that supports good posture to keep you comfortable and attentive
- Dual monitors allow you to have your video feed on one screen while viewing documents or presentations on another, making multitasking smoother
- Use a dedicated USB microphone, like the Blue Yeti, for clear and reliable sound
- Leverage a laptop stand or stack of books to elevate your camera to eye level
- Use cable organizers and tidy up your background
- Position yourself against a plain wall or a clean, uncluttered background to maintain focus on your face during calls
- Use a good video adapter that can handle high resolutions, such as the USB-C to HDMI adapters
- Install acoustic panels if needed to improve sound quality and reduce distractions during meetings
💡Pro Tip: Ready to turn your home office into a productivity powerhouse? Check out these 15 practical tips to supercharge your remote work game!
Understanding and using video conferencing tools
The most obvious software you will need for successful virtual communication is dedicated video conferencing software. Popular options include Microsoft Teams, Zoom, Google Meet, and Skype, each offering unique features tailored to different business needs. However, each platform has challenges, from connectivity issues to complex meeting navigation.
What if you had an option that could simplify not only your video conferencing but also offer project management capabilities? ClickUp comes into the picture here!
ClickUp is a project management software that offers a suite of features tailored to improve the overall meeting experience and can function as an efficient video conferencing platform.
As an all-in-one platform, ClickUp helps you manage meeting minutes, collaborate more effectively, and organize your conference agendas without needing multiple tools.
Here are some ClickUp features that can help make video conferencing easy for you:
1. ClickUp Meetings

The ClickUp Meetings feature enhances team engagement with features that allow you to:
- Schedule meetings directly from Tasks: Create a meeting directly from a relevant task, ensuring a clear connection between the meeting and the project goal
- Share asynchronous video messages: Record and share video messages for those who can’t attend a live meeting, promoting inclusivity and flexibility
- Leverage whiteboard integration: Use ClickUp’s Whiteboard feature to brainstorm, visualize ideas, and document key points during meetings
- Access attendance tracking: Automatically track meeting attendance and send follow-up reminders to those who missed the meeting
These features help keep meetings structured and productive, ensuring your team remains aligned and efficient.
2. ClickUp Clips
Unlike traditional conferencing tools that require separate software for video recording, ClickUp’s Clips feature lets you record and share video messages directly within the platform.

This built-in screen recording tool allows you to communicate effectively by sharing screen recordings, reducing the need for lengthy email exchanges or in-person meetings. It’s ideal for demonstrating processes, explaining tasks, and highlighting specific issues.
Combining Clips with ClickUp Brain, ClickUp’s built-in AI assistant, enhances this process by enabling you to:
- Transcribe recordings
- Search through transcripts
- Extract snippets for other uses
- Convert Clip descriptions into actionable to-do lists
- Jump to specific timestamps
This integration simplifies reviewing and referencing key points without watching the entire video.
3. ClickUp Chat
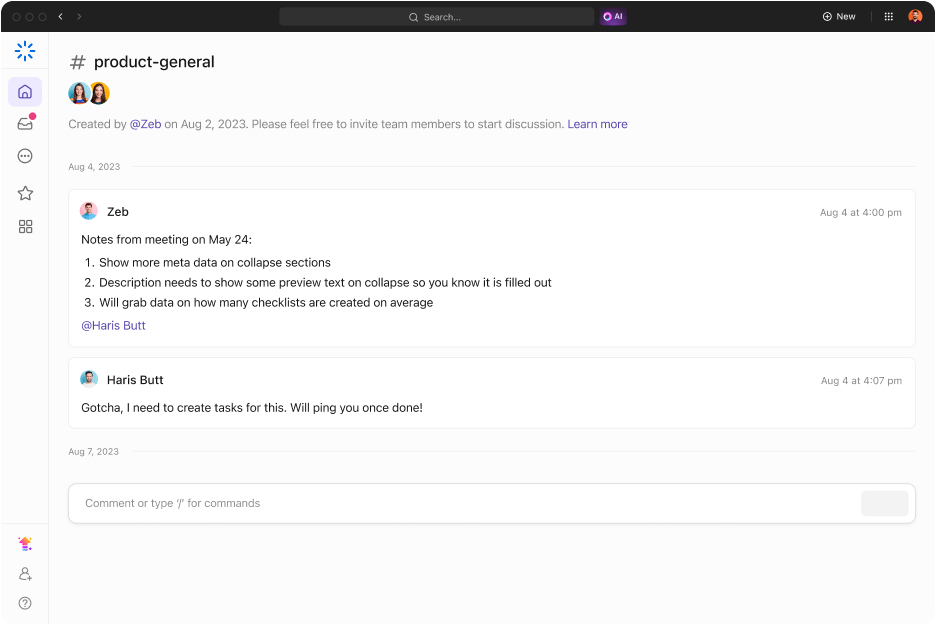
For a more interactive approach to communication alongside your screen recordings, ClickUp integrates seamlessly with ClickUp Chat. This integration eliminates the hassle of searching for messages, allowing you to review and respond to them at your convenience.
Additionally, you can use conference agenda templates to enhance the engagement, productivity, and overall effectiveness of your meetings.
Here’s one such template that can transform your meetings:
4. ClickUp Conference Management Template
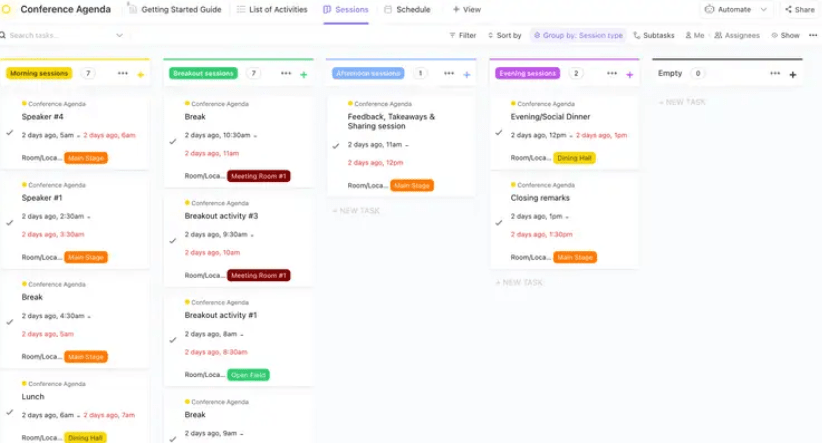
If you’re planning to launch a large-scale conference with several attendees, check out ClickUp’s Conference Management Template. It provides a centralized platform for planning and organizing your conference, ensuring you and your team are set up for success.
With this template, you can view all action items and to-dos at a glance, including task assignments, due dates, and current statuses. Each task can be categorized to track progress efficiently, and you can monitor the allocated budget for each item.
The completion rate bar offers a quick visual of ongoing progress, helping you identify roadblocks and gauge overall status.
This template simplifies event management, allowing you to lead your team effectively from start to finish and ensure every detail is handled on time and within budget.
Optimize Video Conferencing with ClickUp
A reliable, professional video conferencing setup is essential for successful remote collaboration. Simple tweaks, like enhancing your lighting, upgrading your equipment, or organizing your workspace, can make your meetings more engaging and productive.
ClickUp makes you a pro at creating the perfect video conference setup. Its suite of tools is designed to simplify meeting organization, planning, management, and follow-through. From customizable templates to real-time collaboration and task management, ClickUp helps you plan and track video conferences with ease.
Sign up to ClickUp today and elevate your team’s meeting experience!

Everything you need to stay organized and get work done.
