

There are over 2 million professional content creators—you may even know one. But if you’ve ever tried to become a part-time or even full-time creator, you know the creator economy is a competitive space that requires focus, at least some business know-how, and plenty of self-management skills.
Maybe you’re one of the millions of people around the world that consider themselves part of the new industry of small business owners making a living creating content, writing a newsletter, independently releasing their own music, or selling branded merch online.
However, it’s not just fun and games for creative entrepreneurs. There are still business tasks to take care of! Taxes still need to be paid, you need to keep up with current content trends, and housekeeping tasks like creating a content calendar to ensure your business grows sustainably are a must.
Thankfully, there are productivity tools, like ClickUp, to help you organize your work, plan your content, and manage any brand partnerships. As a fellow creator, here’s how I use ClickUp’s best features to run my own business.
Feel free to steal my best ideas!
This Article Contains:
What is the Creator Economy?
The creator economy is an umbrella term given to an industry that includes everything from content creators to digital course creators, influencers, and even community builders.
If you’re part of the creator economy, you might run a successful newsletter, create YouTube videos, or have a growing following on TikTok with brand partnerships. In other words, if you’re able to monetize your creativity with the use of the internet, chances are you’re a part of the creator economy. Cool, right?
Except, succeeding in the creator economy takes treating it like a business rather than just a creative hobby—and that’s where ClickUp comes in. Its fully customizable platform allows you to create the workflow of your dreams and help you organize everything you need to succeed in the creator economy.
How to Use ClickUp Features to Manage Your Workflow
1. Create recurring tasks
Quarterly tax payments, invoices, and project deadlines are only some of the things creators have to tackle on a weekly and monthly basis. ClickUp’s recurring task feature ensures you never forget recurring deadlines on longer timelines. I like to think of it as a set-it-and-forget-it personal assistant feature.
I don’t know about you, but if I don’t delegate a task as soon as I can, it disappears into thin air—forgotten, without a chance of being completed. Using ClickUp, I’ve started a habit of creating monthly tasks that I always keep track of in calendar view for to-do’s like:
- Paying off my business credit card in full each month
- Sending out client invoices
- Receiving and paying contractor invoices
- Weekly recurring coaching calls
Now, every time I start the week, I can use ClickUp’s keyboard shortcuts to see what recurring tasks I have coming up for the week. It’s as simple as clicking “M” for a month-at-a-glance overview. Any time I want to navigate back to the current week’s task, I tap on “W.” Easy, right?
📌 Pro tip: Take a few minutes to learn your favorite ClickUp keyboard shortcuts. They’re time savers and put you in the driver’s seat when navigating your dashboard.
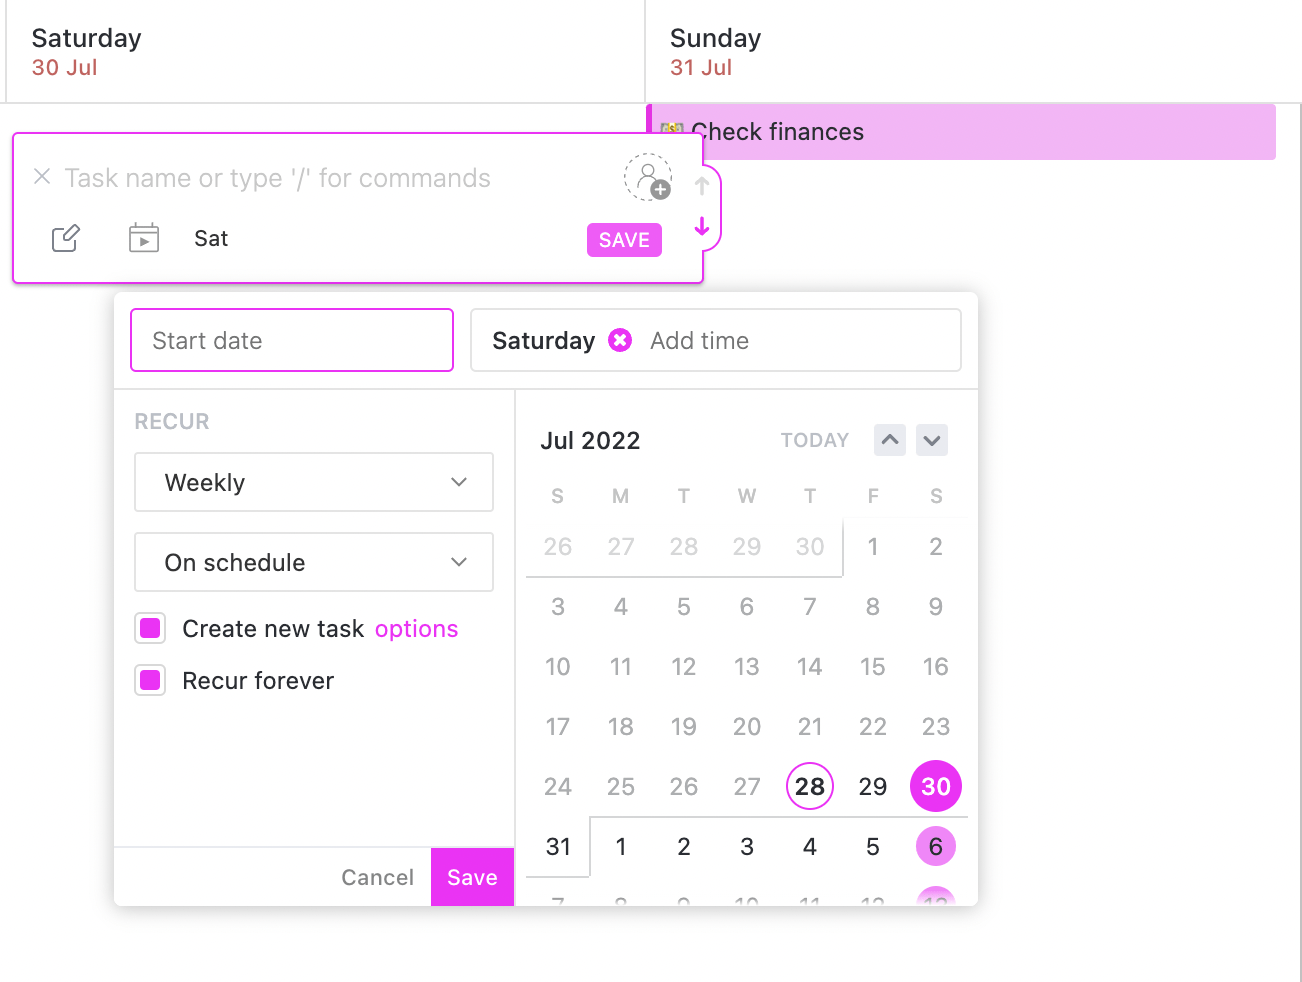
Now, here’s how to set up recurring monthly tasks that auto-populate according to your settings:
- Create a task in ClickUp and fill in all your task fields
- Set a start date
- Select whether you want the task to recur weekly, monthly, yearly, or on a custom timeline
- Select on schedule to ensure the task shows up on the designated date
- Select recur forever to have the task recur indefinitely
- Click Save, and you’re all done
That’s it! Now, you can schedule recurring daily, weekly, or monthly tasks year-round.
📌 BONUS: 10 Effective Ideation Techniques for Your Team (With Templates!) 💡
2. Set up reminders on the spot
You don’t have to worry anymore about forgetting to do a particular task. Easily set up reminders ahead of time so that you can focus on other important work.
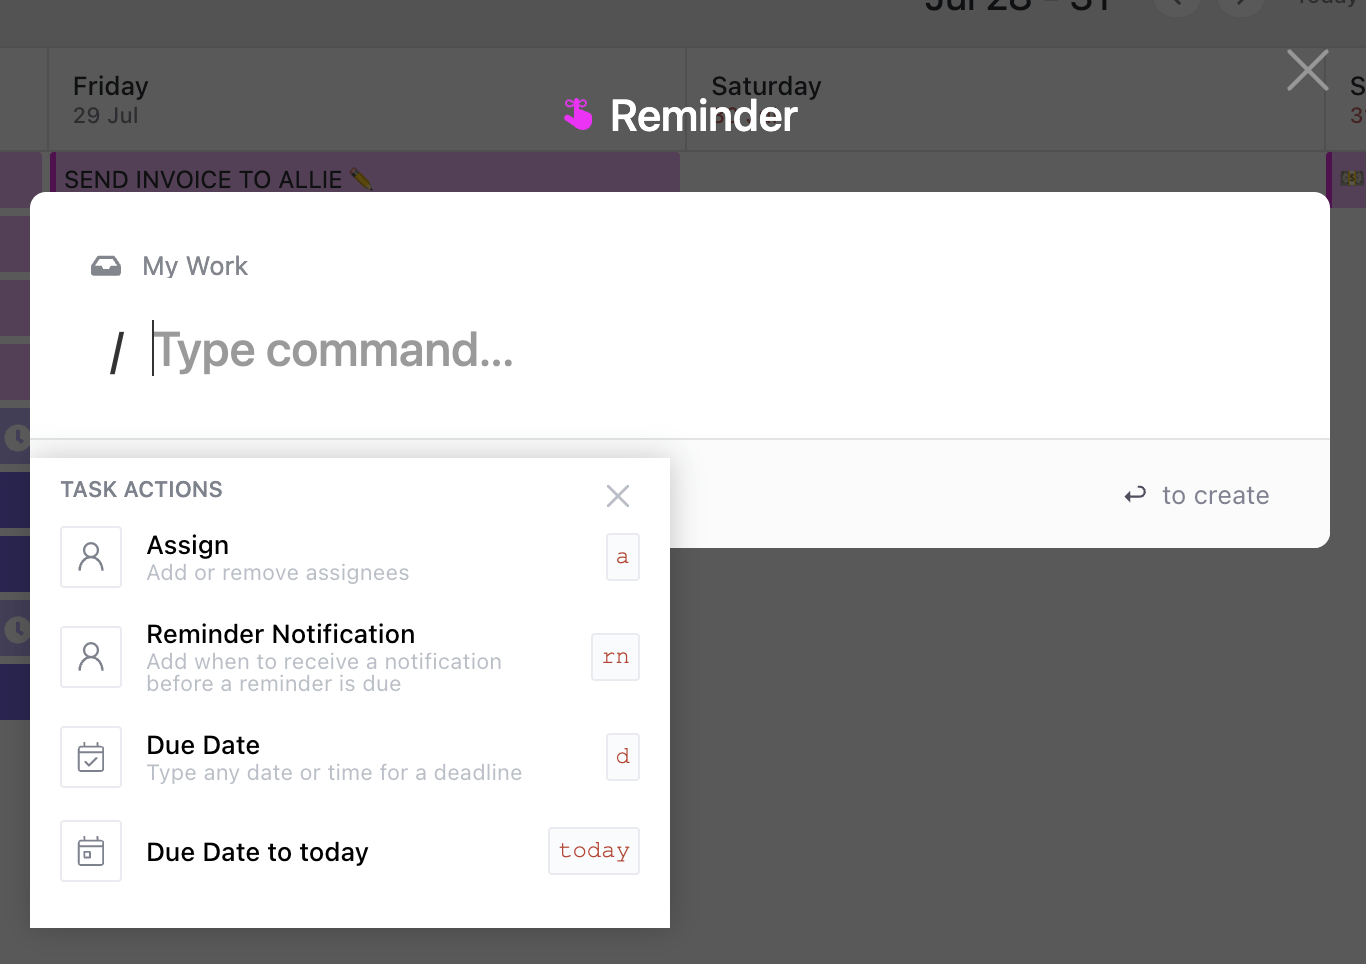
Easily set up reminders with ClickUp’s “R” command.
Here’s how you can set and customize your reminders:
- In your ClickUp dashboard, tap “R” to open the reminder window.
- Type “/” into the common field to add your due date, any assignees you want to add to the reminder, and when you want to get the reminder before it’s due.
- Once you’re finished, click on “Save.”
Want to take it a step further? Download the ClickUp mobile app to get your most important reminders and notifications even when you aren’t near your laptop. 💻
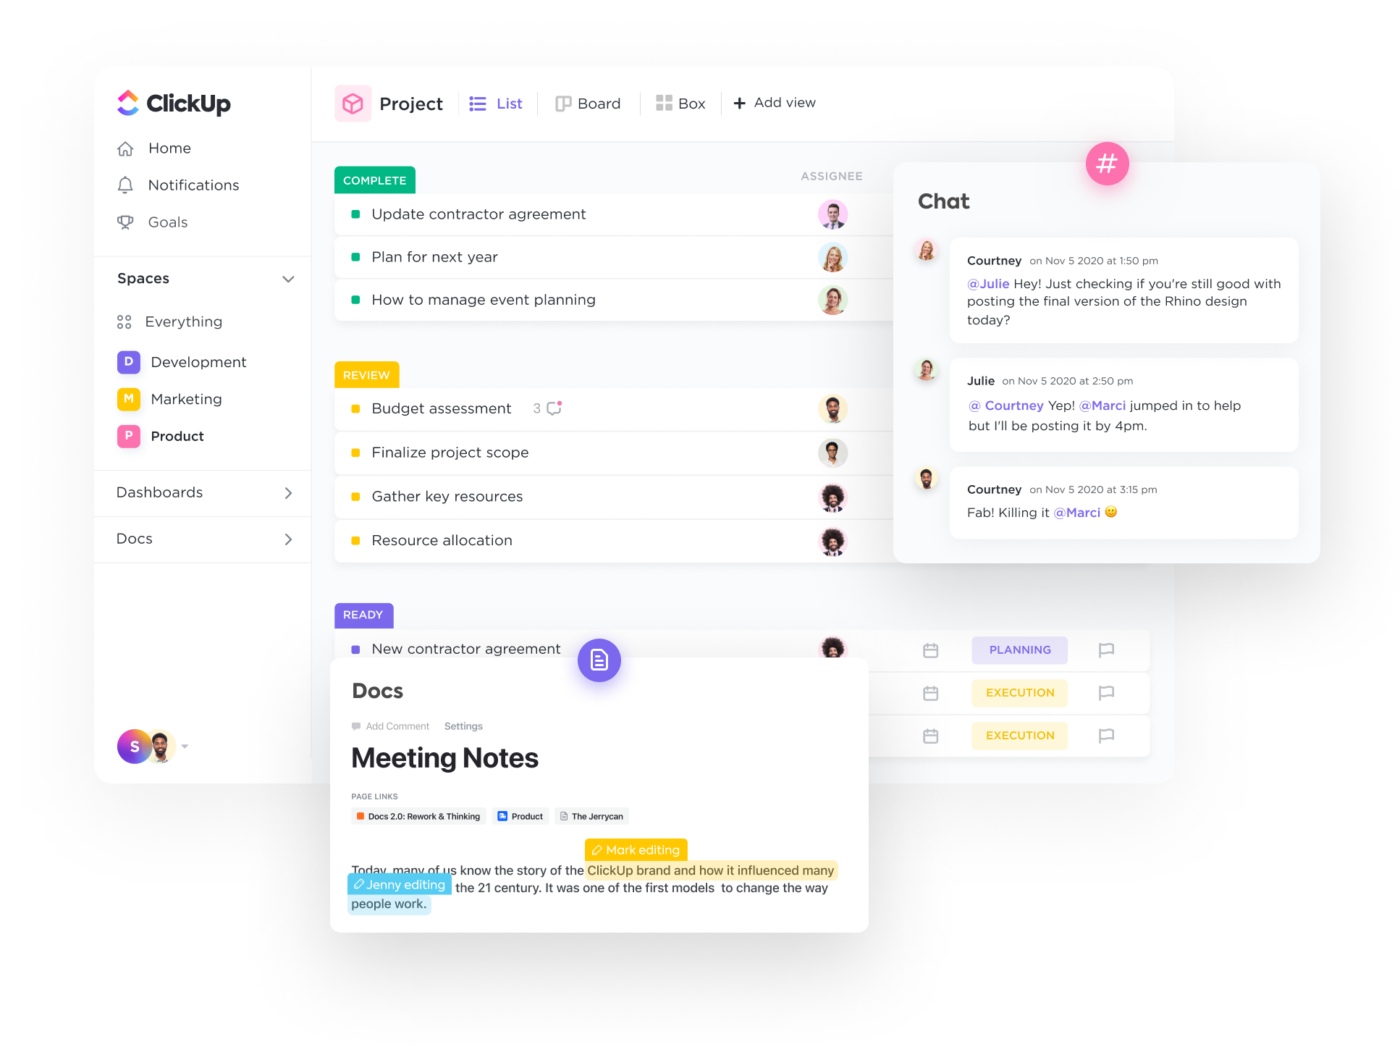
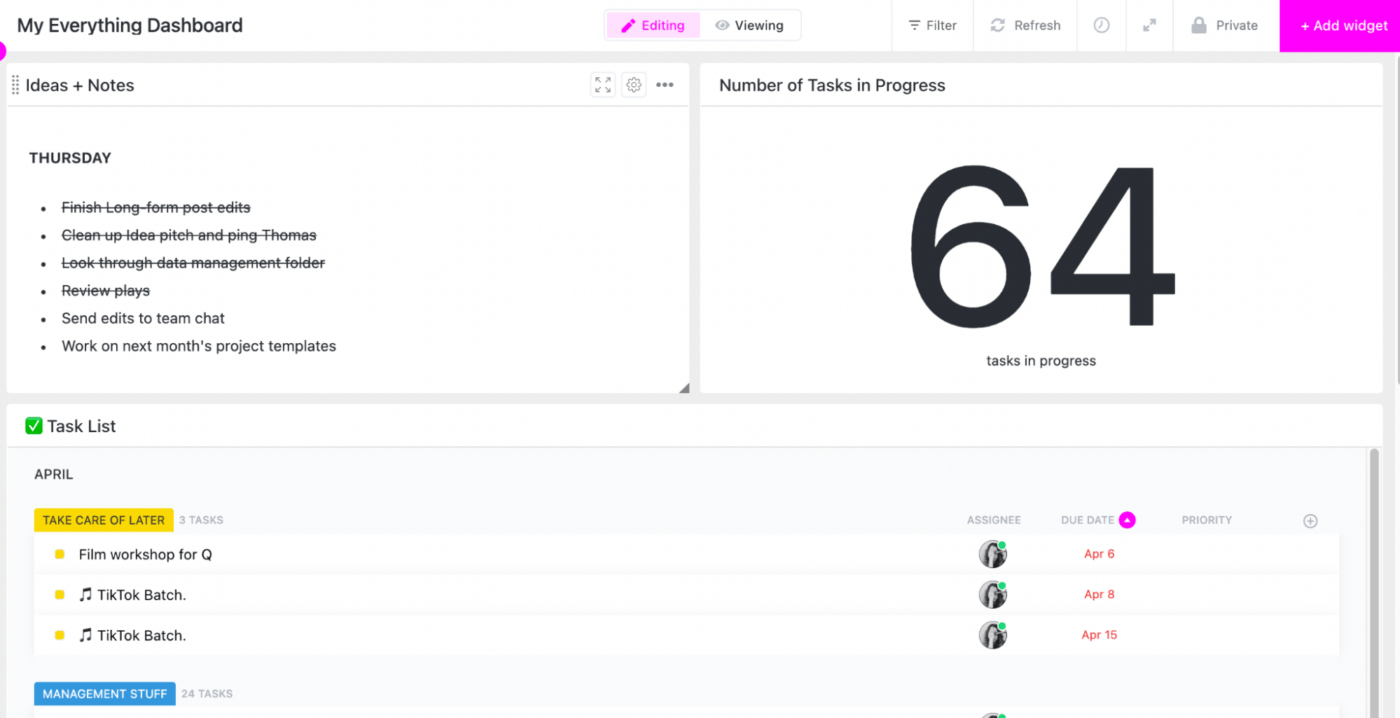
3. Build a dashboard
You don’t have to be a genius in an evil lair to start your morning with a dashboard that fills you in on your progress and tasks for the day.
Dashboards are awesome because they give you a glimpse of the most important things on your plate. You can keep track of project progress, your latest chat messages, to-do lists, and your task list of choice.
Here are some tips to think through as you build your own:
- Less is more (only include the necessary widgets)
- Set up your dashboard as your homepage on Google Chrome for easy access every morning
- Take advantage of all the visual widgets, tables and even the embed feature to get a glimpse of your workload
Here’s how to create your own high-level view with a ClickUp Dashboard:
- From your ClickUp sidebar, click the Dashboards icon/
- Click the plus icon next to My Dashboards in the pullout menu to add a new Dashboard.
- From the Create a Dashboard modal, click Use Template or Start from Scratch.
📌 Get inspired: A Beginner’s Guide to Dashboards in ClickUp (With 15 Use Case Examples)
4. Use ClickUp’s integration to centralize and sync your calendars
You’re a creator, which means personal and business tasks can easily blur into one another. ClickUp lets you connect multiple Google Calendars into one centralized ClickUp calendar so you can get an overview of all your separate schedules and avoid overlapping appointments.
Cool. But how do you do this? 📅
- From your Profile avatar menu, click My Settings and then click Calendar located under the My Apps section
- Tap on +Add Account
- Select your Google account or select connect account to authorize access
- Tap on Sync events to ClickUp
- Click Next, then click Got it! Give your Google Calendar a few minutes to sync to your ClickUp account
Centralizing all my calendars in ClickUp streamlines my whole calendar process. Especially because there isn’t a limit on how many calendars you can sync.
For example, if you’re still establishing yourself as a creator and still have a day job, you can sync your work calendar, your personal calendar, and your business calendar within the same Google dashboard.
📌 Pro tip: Tame your content calendar with ClickUp’s done-for-you content calendar template.
5. Create custom status and color-code your tasks
Being a creator means mixing business and fun. That’s why I like to do little things like color code my list statuses with my favorite colors. It keeps my task list visually appealing and adds a hint of organization. Now, there are many ways to change the status color on ClickUp.

Color code custom ClickUp statuses within lists.
Here’s how I do it:
- Click the ellipses next to the list of your choice
- From the Settings menu, select Statuses.
- Then click the ellipses to the right of the status.
- From the menu select Change Color to set the color of your choice
- Click Save.
- Do this for as many statuses as you want.
📌 Read on: 7 Creative Brainstorming Techniques To Find Your Best Ideas 🧠
6. Use the Notepad Chrome extension from anywhere
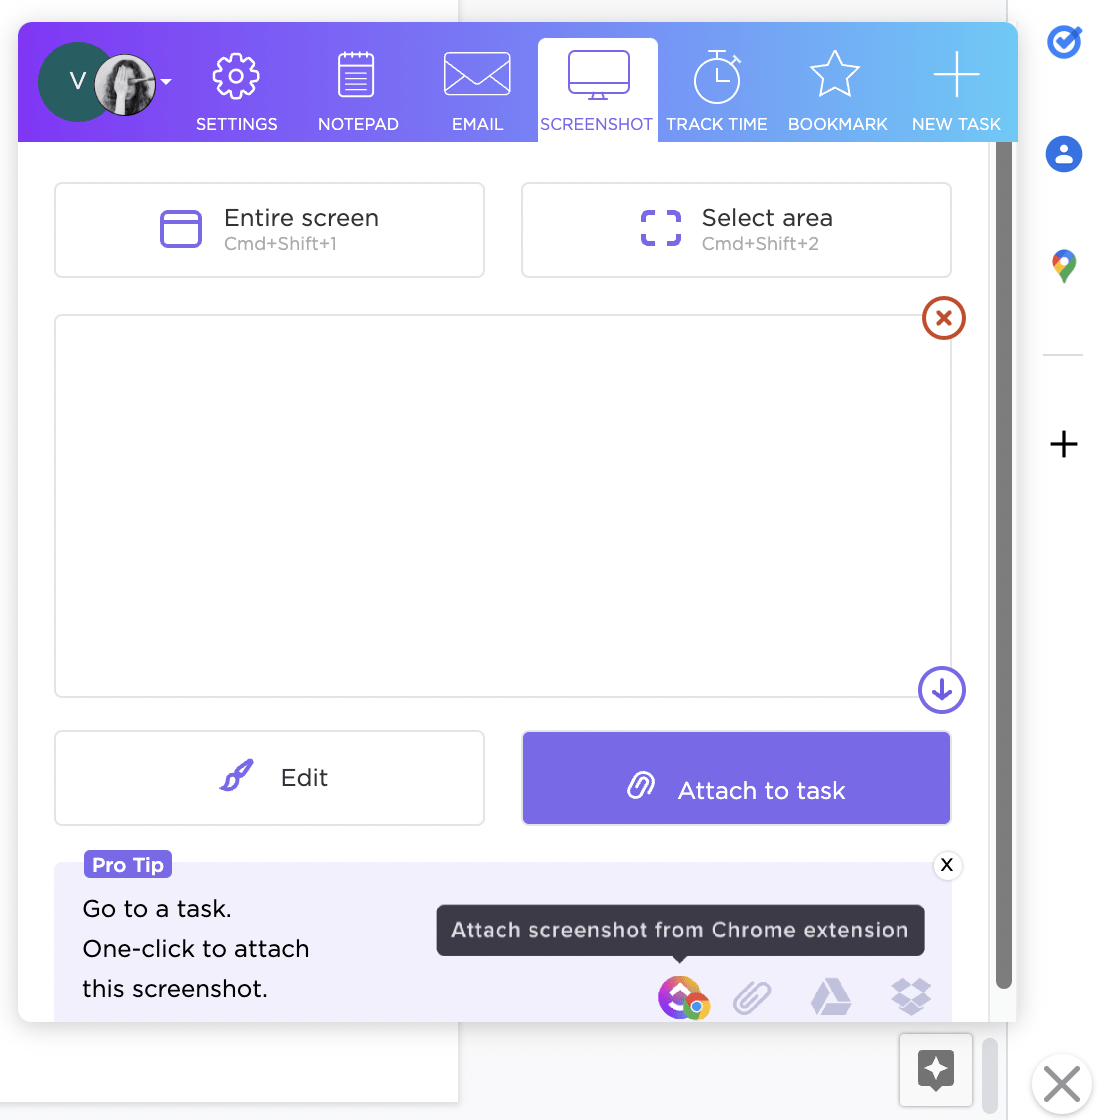
I saved the best for last.
ClickUp’s Notepad Chrome Extension feature probably makes it in the top three of my favorite things about ClickUp. Who am I kidding? It’s my favorite feature.
Why? Because I’m creative at heart! I like to capture bits of text, images, and ideas as I make it through my day as easily as possible. You can download ClickUp’s Chrome extension and activate it, so it’s always floating in the corner of your browser.
Anytime you need to jot down a quick note, take a screenshot, or even track time for a project, it’s all within one click. And yes, it’s connected to your ClickUp Dashboard, so any screenshots or notes you take can be stored in your favorite Lists and Folders.
Ah, the convenience of taking notes without tab switching. It’s a beautiful thing. 💃
📌 Take it further: Use this simple task management template by ClickUp to organize your daily tasks.
Handle Everything In One Place with ClickUp
Community builders, content creators, and multi-passionate small business owners also need a way to tame their workload. ClickUp helps creators stay on top of business tasks so they can focus their time on the creative side of work.
Hopefully, this post gave you some ideas on arranging your productivity workflow by incorporating the best of ClickUp into a system that works for you. Once you have the business tasks down, it’s easier to keep those creator ideas flowing!
Do more with ClickUp and start handling every part of your work in one place!


Everything you need to stay organized and get work done.

Recent Articles
How to Use the ClickUp Desktop App for Maximum Productivity 
How to Use the ClickUp Desktop App for Maximum Productivity

