

On a Macintosh computer circa 1997, Kevan J. Atteberry created the first Microsoft-branded office assistant: Clippy.
No matter how many times I tried to get it right, Clippy was there to tell me I still wasn’t good enough. Popping out of nowhere to offer “help” because my work was sub-par. 😵💫
Fast-forward to today, and the vast library of knowledge via technology and the Internet is at our beck and call. And thankfully, for me, Clippy has retired.
According to some sources, Office 365 is used by over a million companies worldwide, so it’s safe to say knowing how to use Microsoft Office is a resume must-have.
Fillable forms are a resource almost everyone in their career has either created or completed—and they’re not going away! Forms collect data, provide communication paths, and save time in workflows. ✨
By the end of this article, you’ll be able to:
- Use the Microsoft Word Developer Tab controls like a pro
- Create a fillable Word document
- Customize a fillable Word document
- Protect, save, and share a fillable form in Word
Ready when you are!
This Article Contains:
What Is a Fillable Form?
A fillable form is a digital form for users to fill out and send back. Of course, you can also print a form, but we’re not in 1997 anymore—let’s go paperless! 👩💻
Organizations create forms to collect meaningful data from employees and customers. Along with the sustainable and environmental benefits, it improves accuracy and productivity. (Not to mention a user-friendly experience for users!)
The level of customization depends on how simple or complex you want your fillable form to be.
You might have used a few basic controls to write cover letters to reports. However, when using Microsoft Word to create fillable forms, there are quite a few more controls to learn, so hike up those sleeves.
Developer Tab Controls in Microsoft Word
Before diving into a step-by-step tutorial, let’s unpack this intimidating term—the Developer tab.
OK, it’s not that intimidating once you get the hang of it. To achieve the type of form you want to build, getting acquainted with the controls section will help save time while creating your form.
These form controls (when used correctly) provide an interactive form for users to quickly understand what’s expected of them.
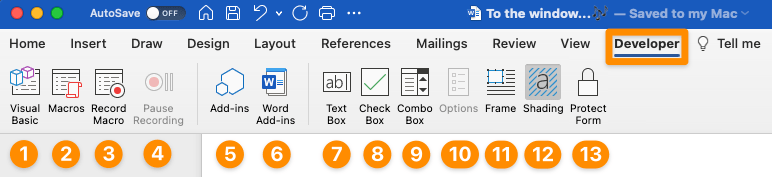
🔶The Developer Tab
Created in Microsoft Word
- Visual Basic: record, create, and edit macros that can automate tasks in Office applications
- Macros: a series of actions grouped as a single command to accomplish a task automatically
- Record Macros: small programs that record your keystrokes as you perform a task
- Pause Recording: pauses the macro recording
- Add-ins: custom commands or features for extra functionality
- Word Add-ins: a program that can be attached to Word to give it additional functionality
- Text Box: an object to place and type text anywhere in the document
- Check Box: an object to place and click to check anywhere in the document
- Combo Box: a text box with a list box attached
- Options: editing Text Box, Check Box, and Combo Box customization
- Frame: acontainer for text and objects
- Shading: a background colorthat updates when switching to a different document theme
- Protect Form: prevents others from modifying the form
Bonus: How to Create a Fillable Form in Google Docs!
🔷Form Field Options
🖋 Plain Text Content Control
Text Boxes are most useful for a wide range of possible responses. These fields can be used to capture names, email addresses—just about anything! If you need a date field, use the date picker content control and customize it.

Created in Microsoft Word
- Type: Regular Text, Number, Date, Current Date, Current Time, Calculation options
- Default Text: instructions for users
- Maximum length: total character count allotted
- Text format: Uppercase, Lowercase, First capital, Title case options
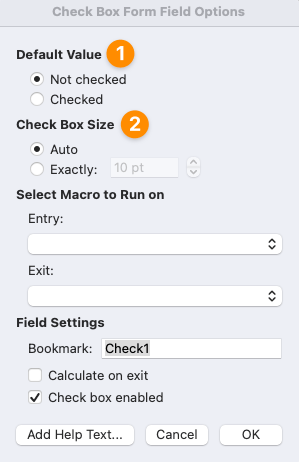
✔️ Check Box Content Control
Check Boxes are suitable for yes-no questions or to select one or more options from a set of choices.
Created in Microsoft Word
- Default Value: boxes can be pre-checked if desired
- Check Box Size: increase or decrease options
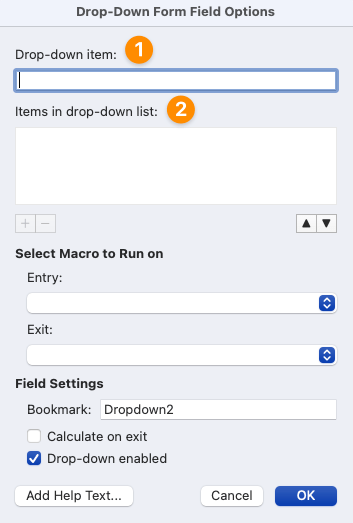
📦 Combo Box Content Control
With the Combo Box, users can only select one option from a set of choices.
Created in Microsoft Word
- Drop-down item: type the list and click the + to add or – to delete
- Items in drop-down list: add, delete, and re-order list items
Looking for more information on form building tools? Check out our Jotform alternatives guide! ⭐️
How to Create a Fillable Form in Word
In this tutorial, I am using Microsoft Word for Mac Version 16.54. The steps and features may look different if you’re on a different platform or version. However, the end game is the same, so these tips can be applied with what you have!
Step 1: Building the Fillable Form
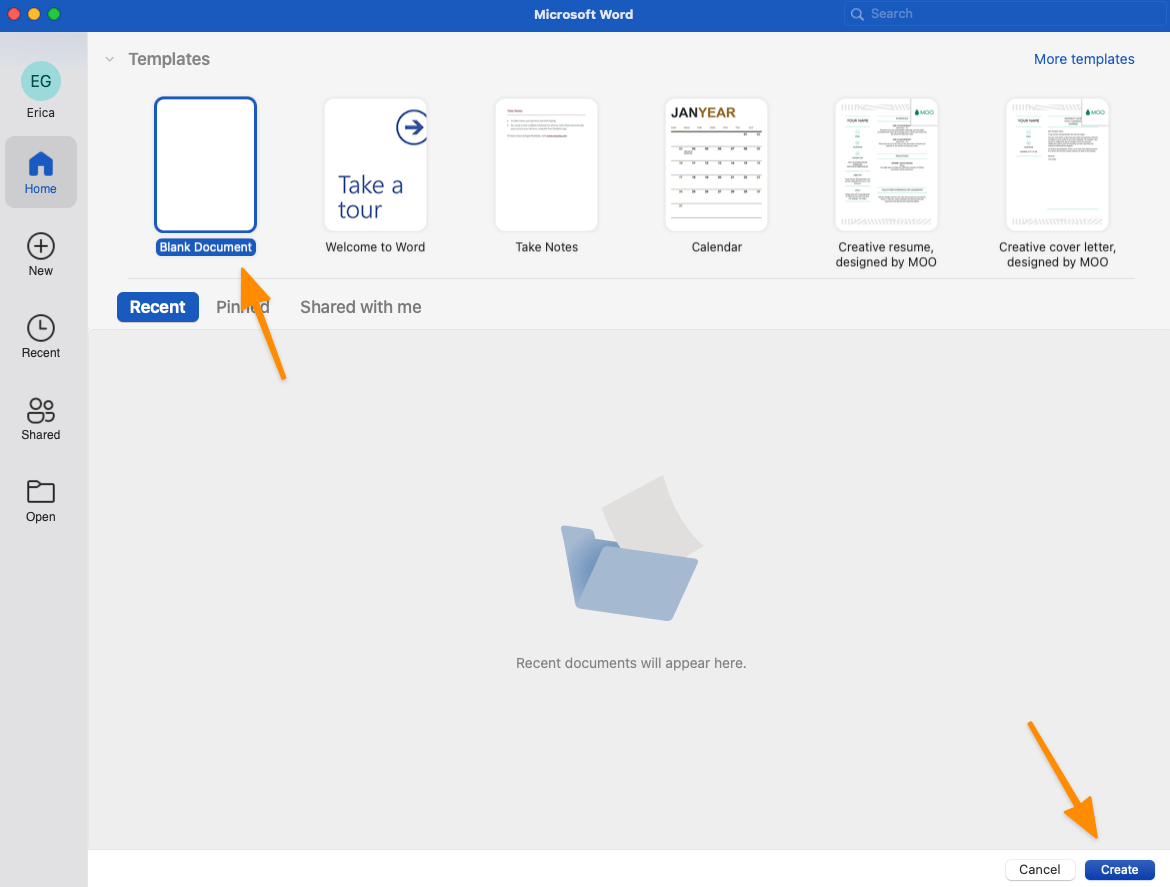
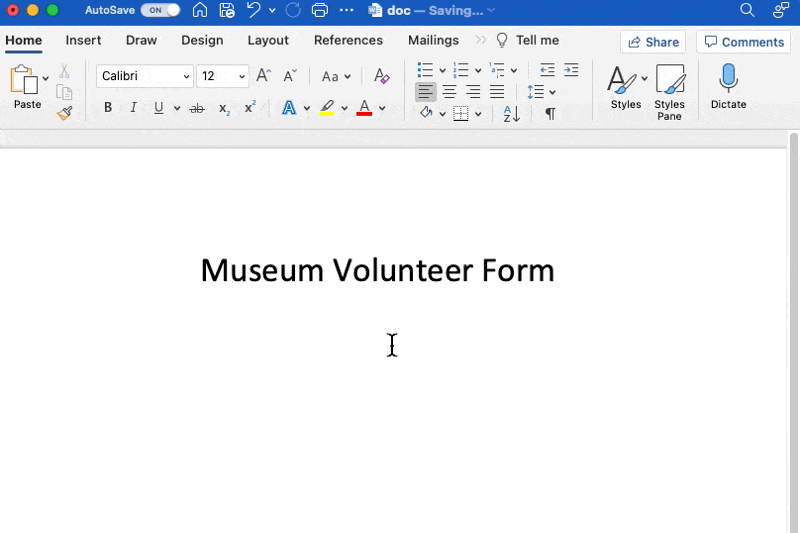
1️⃣ Create a new document
- Launch Microsoft Word
- Select Blank Document > Create
Created in Microsoft Word
2️⃣ Add the Developer Tab to the Ribbon
On the Word menu, select Preferences > Ribbon & Toolbar > check Developer > click Save.
Created in Microsoft Word
3️⃣ Organize the content into sections
If you take only one thing away from here, it should be this: organize your content before you start formatting.
You’ll save time and frustration if all your content is written and organized. I am so humbled today because of the hours I wasted starting over again because I didn’t know what I needed.
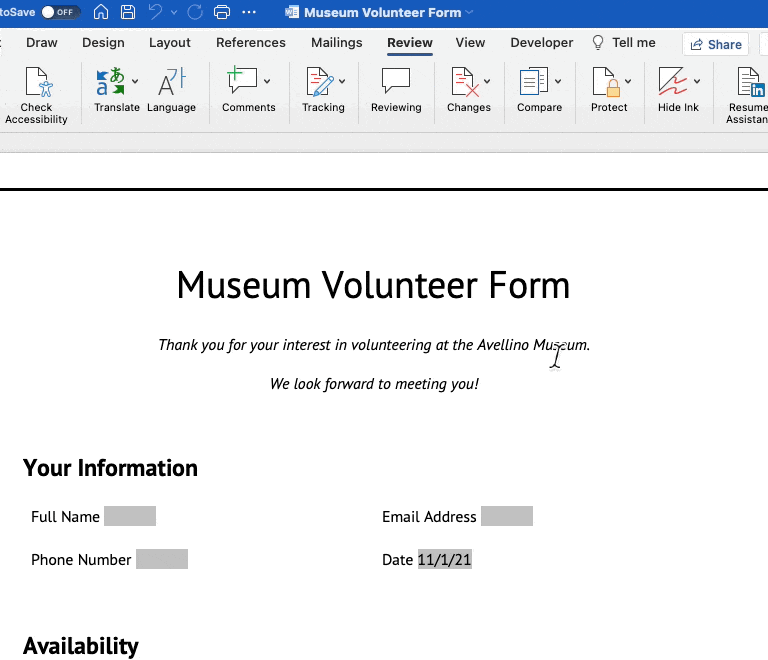
Let’s put this into practice. I want to create a museum volunteer form. Here’s my content planned out:
- Title: Museum Volunteer Form
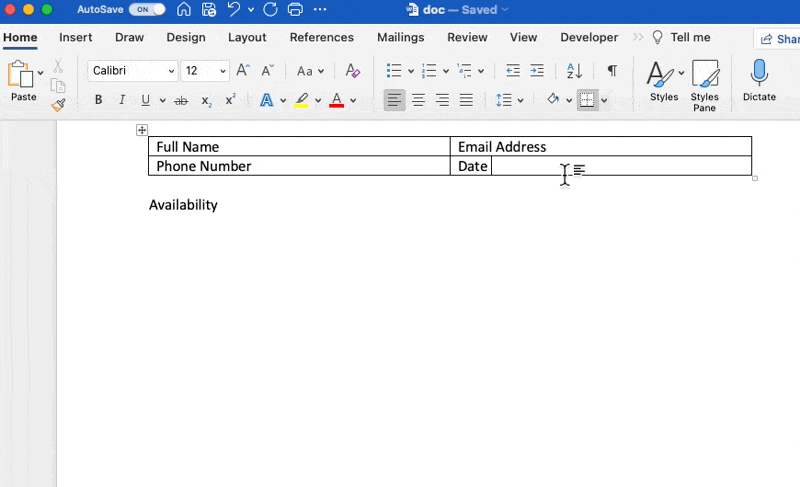
- Section 1: Contact Information
- Section 2: Availability (Days and times)
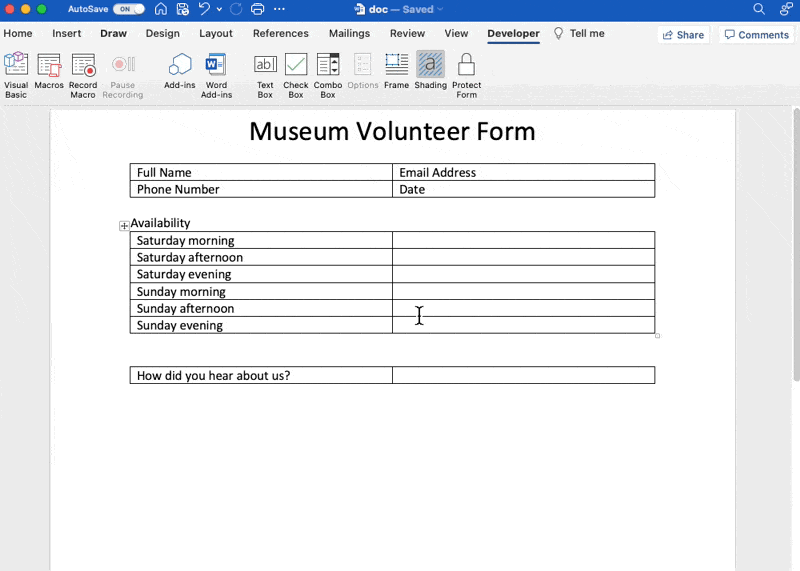
- Section 3: Survey (How did you hear about us?)
Not a bad start, but we can do better:
Version 2:
| Section | Content | Fill Type |
|---|---|---|
| Contact Information | Full Name Email address Phone Number Date | Text Box |
| Availability | Saturday morning Saturday afternoon Saturday night Sunday morning Sunday afternoon Sunday night | Check Box |
| Survey | How did you hear about us? Word of mouth Social media Company website Search engine | Combo Box |
Can you spot the difference?
In version 2, I know exactly:
- The number of fields I need for each section (Full Name, Email address, Phone Number, and Date equals four)
- The fill type to help visualize the form as I build
The hard part is over. Now let’s format!
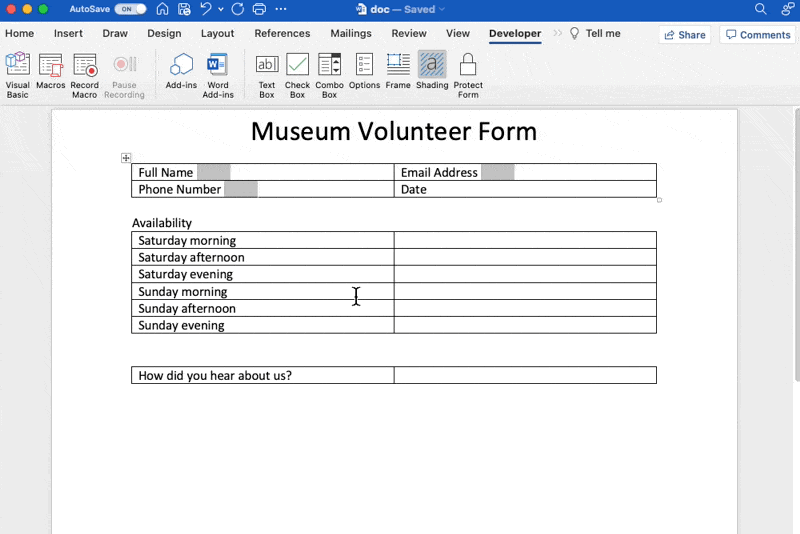
4️⃣ Add tables
Section 1: Contact Information
- Place your cursor at the desired location
- On the Insert tab, select Table
- Hover over a 2×2 table and click to populate
- Enter text
Created in Microsoft Word
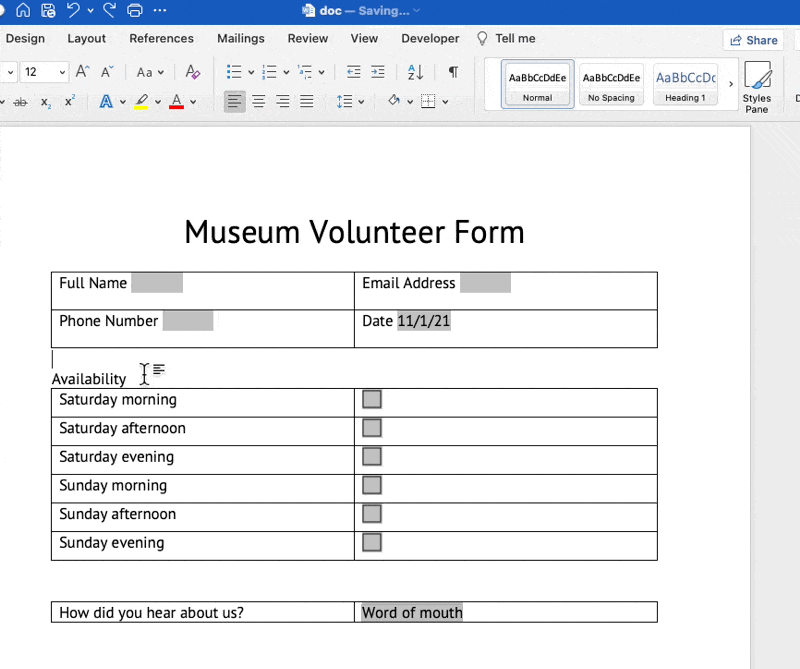
Section 2: Availability
- Place your cursor at the desired location
- On the Insert tab, select Table
- Hover over a 2×6 table and click to populate
- Enter text
Created in Microsoft Word
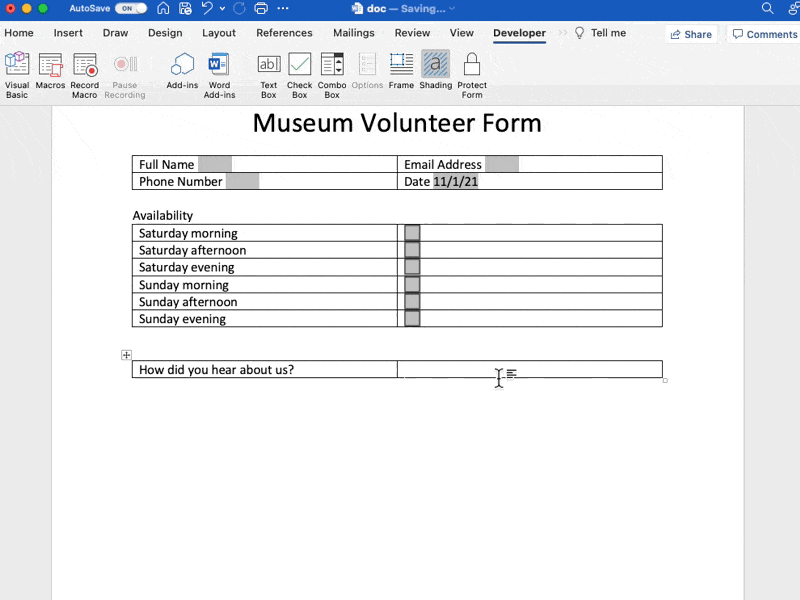
Sections 3: Survey
- Place your cursor at the desired location
- On the Insert tab, select Table
- Hover over a 2×1 table and click to populate
- Enter text (we will add the options later when we add Content Controls!)

Created in Microsoft Word
5️⃣ Set Content Controls: Text Box
Text Box with Regular Text
- Place your cursor at the desired location
- On the Developer Tab, select Text Box
- Double click the Text Box to review format > click OK
Tip: copy the Text Box and paste it into other text fields for a faster build
Created in Microsoft Word
Text Box with Current Date
- Place your cursor at the desired location
- On the Developer Tab, select Text Box
- Double click the Text Box
- Change Type to Current date
- Change Date format to M/d/yy > click OK
Created in Microsoft Word
6️⃣ Set Content Controls: Check Box
- Place your cursor at the desired location
- On the Developer Tab, select Check Box
- Double click the Check Box to review format > click OK
Tip: copy the Check Box and paste it into other checkbox fields for a faster build
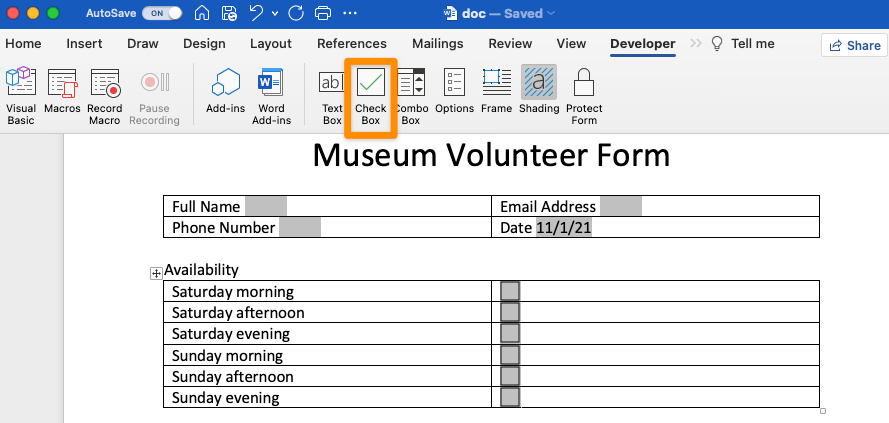
Created in Microsoft Word
7️⃣ Set Content Controls: Combo Box
- Place your cursor at the desired location
- On the Developer Tab, select Combo Box
- Double click the Combo Box
- Add text to Drop-down item > click OK
Created in Microsoft Word
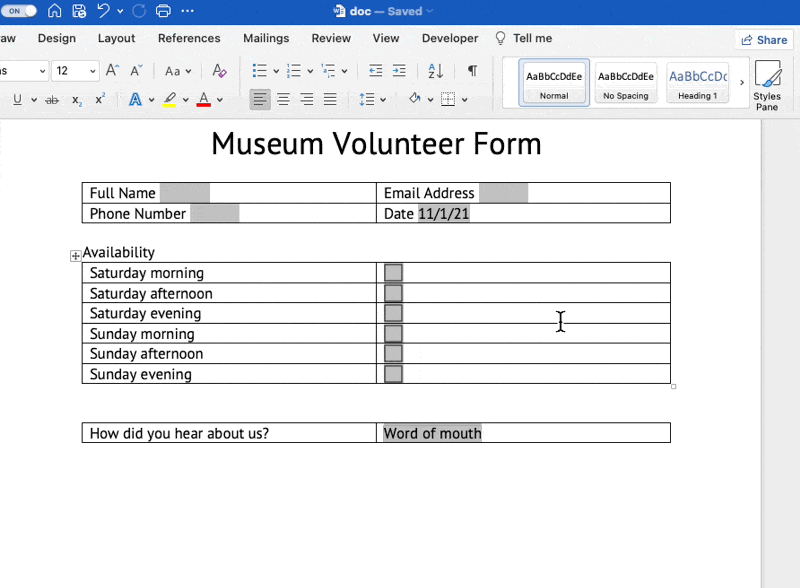
Here’s a preview of the Combo Boxes after your form is protected. ⬇️
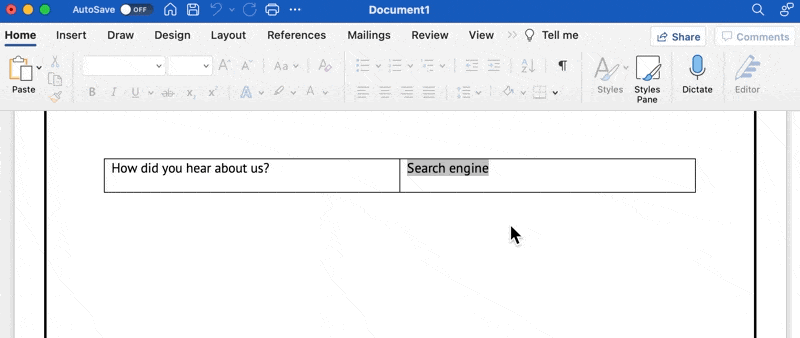
Created in Microsoft Word
Step 2: Customizing the Fillable Form
Have fun with this section! Change the font, add page borders, apply MS Word themes—whatever your heart desires!
Here are recommendations to make your form user-friendly:
1️⃣ Change the line height
- Highlight the entire table
- On the Layout tab, click the up arrow to increase line-height
Created in Microsoft Word
2️⃣ Align text inside the table
- Highlight the entire table
- On the Layout tab, select the left-center option
Created in Microsoft Word
3️⃣ Format tables
- Click and drag the column line left to move the checkboxes
- Highlight the entire table
- Under Table Design tab, select No border

Created in Microsoft Word
Step 3: Protecting the Fillable Form
- Under the Developer tab, select Protect Form
- From the Review tab, select Protect > Protect Document
- Select Protect document for > Forms > click OK
Created in Microsoft Word
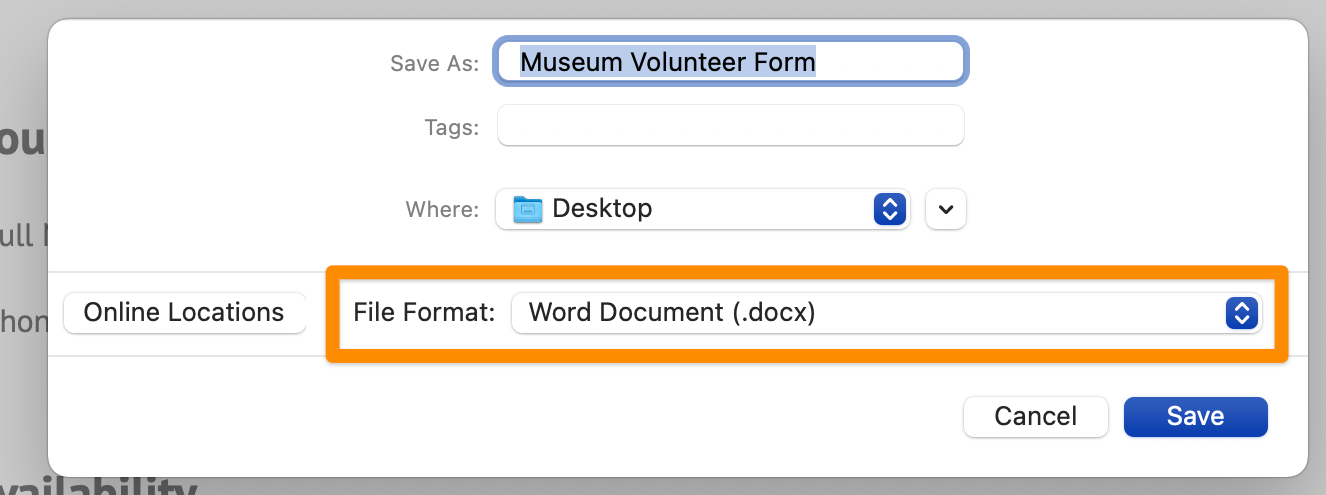
Step 4: Saving the Fillable Form as a Form Template
- Under File menu, select Save as Template
- Name your form template > click Save

Created in Microsoft Word
Step 5: Sharing the Fillable Form
Now that you have a saved template sending a form to users will prompt them to save their completed form under a new name and as a .docx.
Created in Microsoft Word
Success! You now know how to create a fillable form in Word! Great job! 🥳
Limitations of Fillable Forms in MS Word
While you can now add Microsoft Word fillable forms to your resume, it’s not the best software to create and send forms and you might need an MS Word alternative. Here are a few reasons:
- There’s a necessary learning curve if you’re not familiar with Microsoft Word
- It takes up a lot of time manually creating and formatting all sections
- It’s not user-friendly to people inexperienced with Word (there’s also a time commitment on their end if the document is formatted poorly)
- Many features of Word forms don’t translate to other apps causing your formatting to break
- You must use MS Office tools or workarounds to extract the data
- Recipient forms are sent back via email, which is unreliable and also a time commitment to sift through
The form responses start coming in. What do you do? 🤔
It’s a complicated process that includes Microsoft Excel to extract the data from MS Word form responses. You built this form to save time, so let’s not work backward!
Related Resources:
- How To Create A Project Timeline In Excel (2022 Guide)
- How to Make a Timeline in Word
- How to Make A Calendar in Word
- How to Make a Timeline in Google Docs
- How to Make a Mind Map in Word
- How to Create a Gantt Chart in Word
- How to Make a Flowchart in Word
- How to Make a Gantt Chart in PowerPoint
The Best Fillable Form in Word Alternative
ClickUp Forms are the future. The good news? You can start using them today!
And because ClickUp works across devices, users can easily complete and return a form all from a link—and on the go! 📲🌐
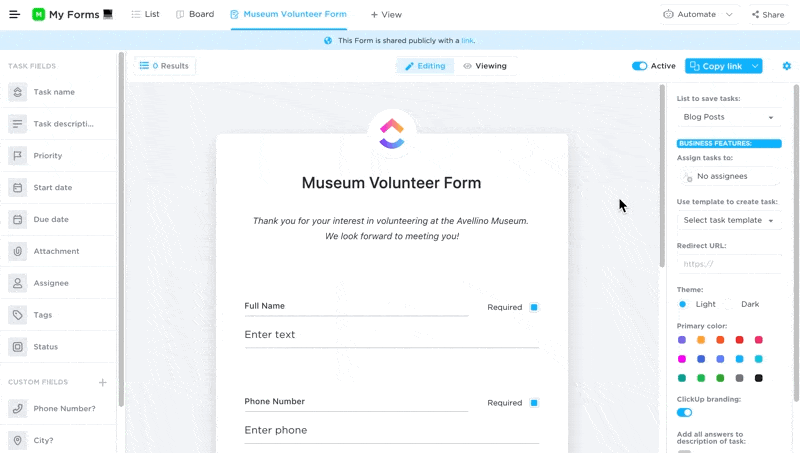
Quickly switch between editing and viewing your ClickUp Form
While various online form building software exists, only ClickUp Forms allow you to turn collected responses into actionable tasks.
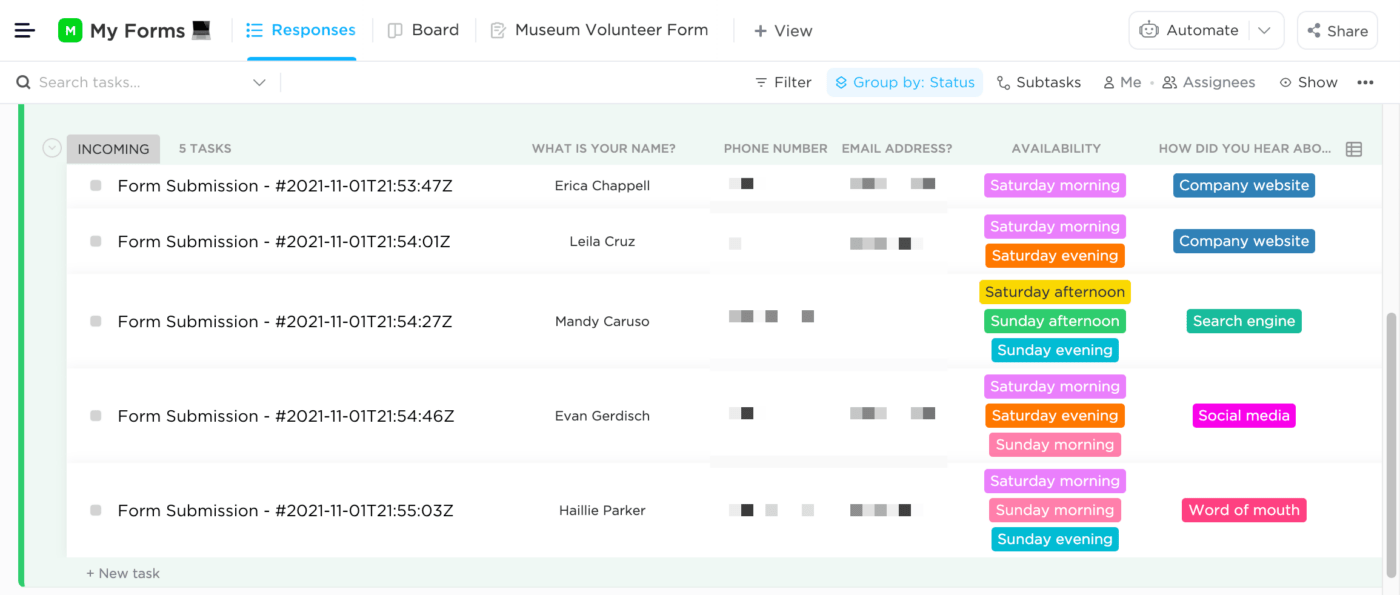
Review submissions and make quick decisions in a ClickUp List view
ClickUp Forms are easy to build, customize, protect, and share in ClickUp. Additionally, there’s more than one way you can share a link:
- Expire links: set a time for the link to deactivate (available on the Enterprise Plan)
- Share links: allow this link to be indexed by search engines
- Embed code: embed in any website by pasting the code (into your website builder or CMS)


Everything you need to stay organized and get work done.

Recent Articles
Best Client Onboarding Software in [Year]: 8 Tools Matched to Where Onboarding Breaks 
Best Client Onboarding Software in [Year]: 8 Tools Matched to Where Onboarding Breaks
The 8 Best Organization Apps to Get Your Life in Order [Year] 
The 8 Best Organization Apps to Get Your Life in Order [Year]
8 Best Mural Alternatives (Pros, Cons, and Reviews) 2026
8 Best Mural Alternatives (Pros, Cons, and Reviews) 2026
