How to Create an Expense Report in Excel: Free Template

Sorry, there were no results found for “”
Sorry, there were no results found for “”
Sorry, there were no results found for “”

Financial transparency is critical when managing department and project budgets across company spending. From marketing campaigns to software to travel and beyond, costs add up quickly. Without consistent oversight, it gets challenging to justify value.
A streamlined expense tracking system is essential for clear financial reporting. Tailored documentation provides granular visibility into where money flows across project, department, and team-level spending. Tighter forecasts and proof of ROI become possible for initiatives big and small. 🏆
Through step-by-step instructions, you’ll learn how to build expense management reports in Excel. Use this guide as a launch pad to fuel conversations on optimizing your company’s spending policy enforcement!
So what exactly is a business expense report? Let’s examine some key features of high-impact expense reports.
A business expense report is a document that tracks company spending on products, services, wages, and other costs. The document contains rows and columns that log the listed expenses’ date, description, supplier, amount, category, and other details.
Excel tabs within a spreadsheet are used to separate expenses by department, projects, individuals, or other types. Formulas calculate spending totals by week, month, quarter, or any specified date range.
With tracked expenses, managers can answer essential questions affecting project work and resource allocation: Do project budgets align with actual costs? Are expenses hitting the correct GL codes? What costs are rising fast?
The benefits of using Excel to organize expense sheets include:
We hope you achieve a healthy level of organized data so you’re not surprised by last-minute budget changes and have the most accurate financial picture. This brings us to the main event: Setting up expense management!
Keeping business expenses organized in Excel can be a hassle. ClickUp’s free Business Expense and Report Template makes tracking and reporting expenses simple and efficient with built-in calculators and easy-to-use categories. Try it today!
Before we begin, let’s cover the core components needed:
With your essentials gathered, we have all the ingredients to customize an expense report template in Excel. Let’s jump right into the step-by-step guide!
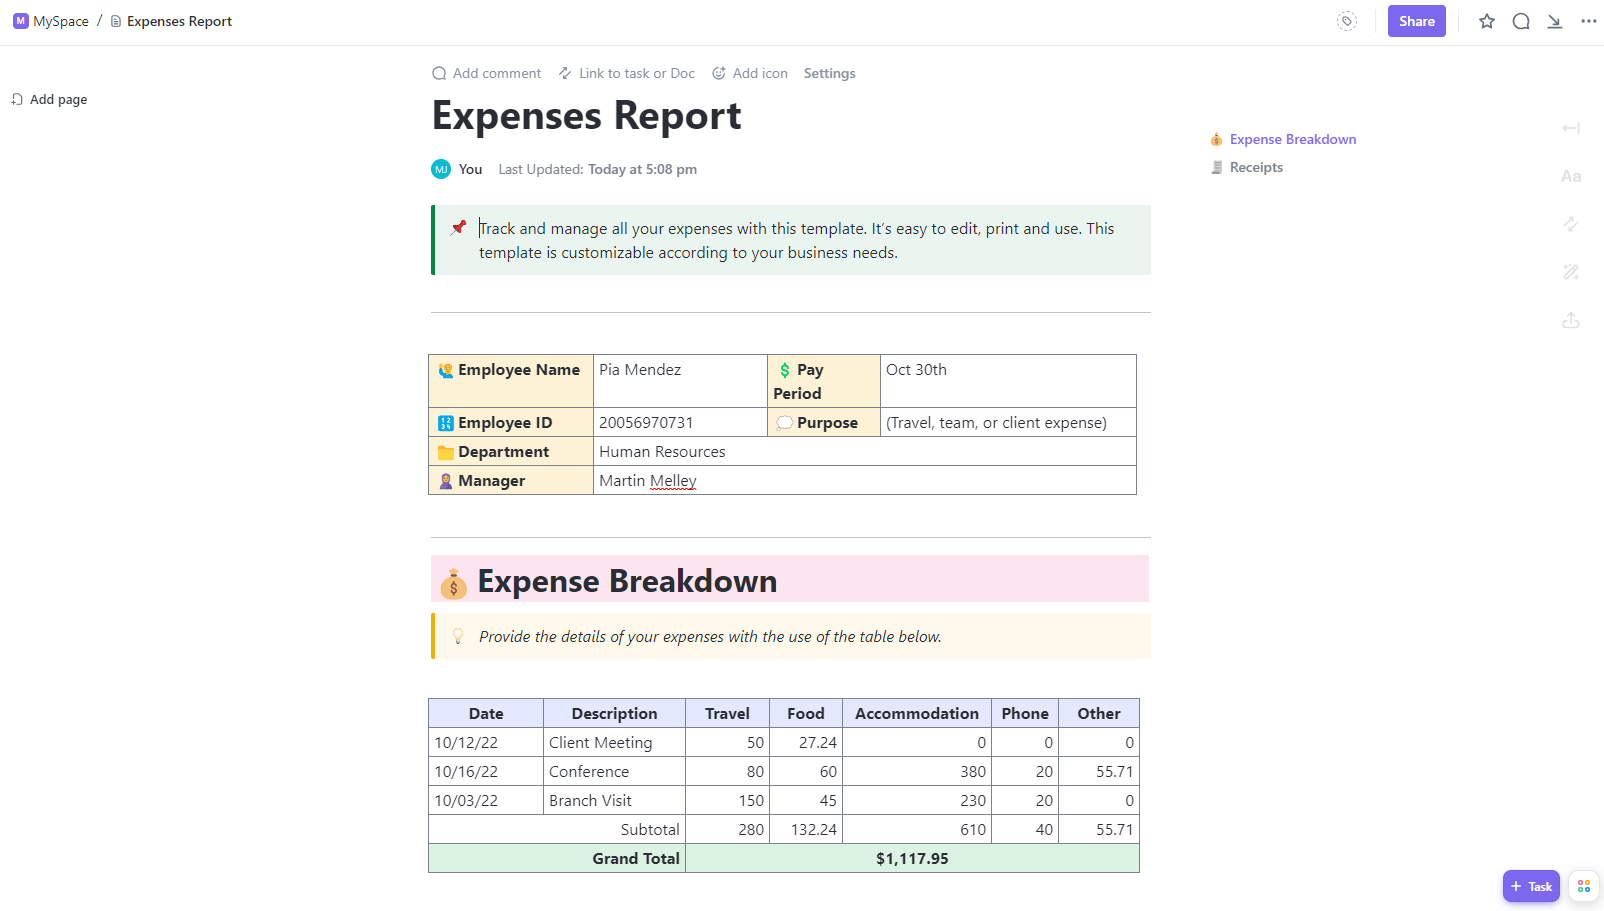
Rather than building an expense tracker from scratch, use our free Excel expense report template as a head start. It already contains the standard tracking fields for dates/vendors/amounts and pre-built formulas to automatically sum totals by category. Overwrite the dummy data with your business expenses while keeping the built-in formulas. 🧪
Simply open the download file to follow along with the steps below!

Across the top, enter key details to identify the report:

📮ClickUp Insight: 92% of workers use inconsistent methods to track action items, which results in missed decisions and delayed execution.
Whether you’re sending follow-up notes or using spreadsheets, the process is often scattered and inefficient. ClickUp’s Task Management Solution ensures seamless conversion of conversations into tasks—so your team can act fast and stay aligned.
The drop-down lists within the expenses spreadsheet template aren’t included to gloss over Excel’s, how do we say it, “bare” aesthetics.
It serves a much-needed purpose of clean categorization and consistency across all company-wide transactions.
This extends to data entry too. Dropdowns are a failsafe for error-free data processing and streamlined analysis. One misspelled expense type or cost code could throw everything out of balance. ⚖️
Here’s how to lock in your categories via dropdowns:

Bonus: Check out these daily report templates in Excel!
Finally, add each individual business expense as its own row. It’s all in the details, so include as much context as possible for clear financial documentation.
You’ll notice we added a total of 7 payment status options. Your vendors don’t know your diligent finance friends as well as you do, so these nuanced stages of the reimbursement process create transparency in timelines around expenses incurred. The extra context helps project managers navigate conversations with vendors awaiting payment. 💬
Small but significant customization choices turn your expense spreadsheet into a financial insight engine. These documents will live in your company records, so more attributes add analytical value.

Highlighted cells have prebuilt formulas to provide totals for each expense category. This allows for each tracking of spending distribution.

Good news: No math is required on your part! 🤩
Bad news: There’s a hitch. 👀
We’re stalling right now because the next step requires Jedi levels of patience. So far, you have all your line items in your expense sheet. Next, you’ll need to attach receipts and other source documents.
💡Pro Tip: Use AI to automate the tedious bits of expense reports. Learn how! 👇🏼
We wish we could tell you this process is easy in Excel, but attaching files gets clunky fast. First, you’ll have to convert each receipt into a separate PDF instead of a JPEG. Then, name them in a proper format that Excel can store easily.
To add files, you need Excel’s advanced Objects and/or Object Linking and Embedding (OLE) functionalities. Performing what should be a basic task becomes tedious. For example, non-Microsoft files have a complicated upload process. Functions on the Menu Toolbar that should be clickable are inactive, so it takes some trial and error.
If you’re already using a Microsoft Excel spreadsheet on the web, the best and most efficient approach would be to use Microsoft’s OneDrive. This would solve a few problems teams will likely encounter with Excel applications:
Even the most advanced users must use the same hoops to connect external files.
But if you want to be on the Dark Side of the Force, a productivity platform that goes beyond a simple expense report template is where the strategic alliances and partnerships happen.
Say hello to ClickUp! 👋

While Excel has long been the legacy program for tracking expenses, its limitations around collaboration, flexibility, and functionality make the case for migrating essential financial documentation like expense reports to dedicated productivity platforms like ClickUp instead.
With customizable automated workflows for approvals, drag-and-drop editing, role-based permissions, AI functionality, expense forms, and spending trend visualizations, your business can drive informed decisions faster. 📊
We’ve shortlisted three expense templates in ClickUp to show how ClickUp’s user-friendly tools push-start accounting documentation capabilities compared to static Excel sheets plagued by versioning problems.
Note: No more bad news from here!
Best for: Replacing compliance struggles with actionable solutions
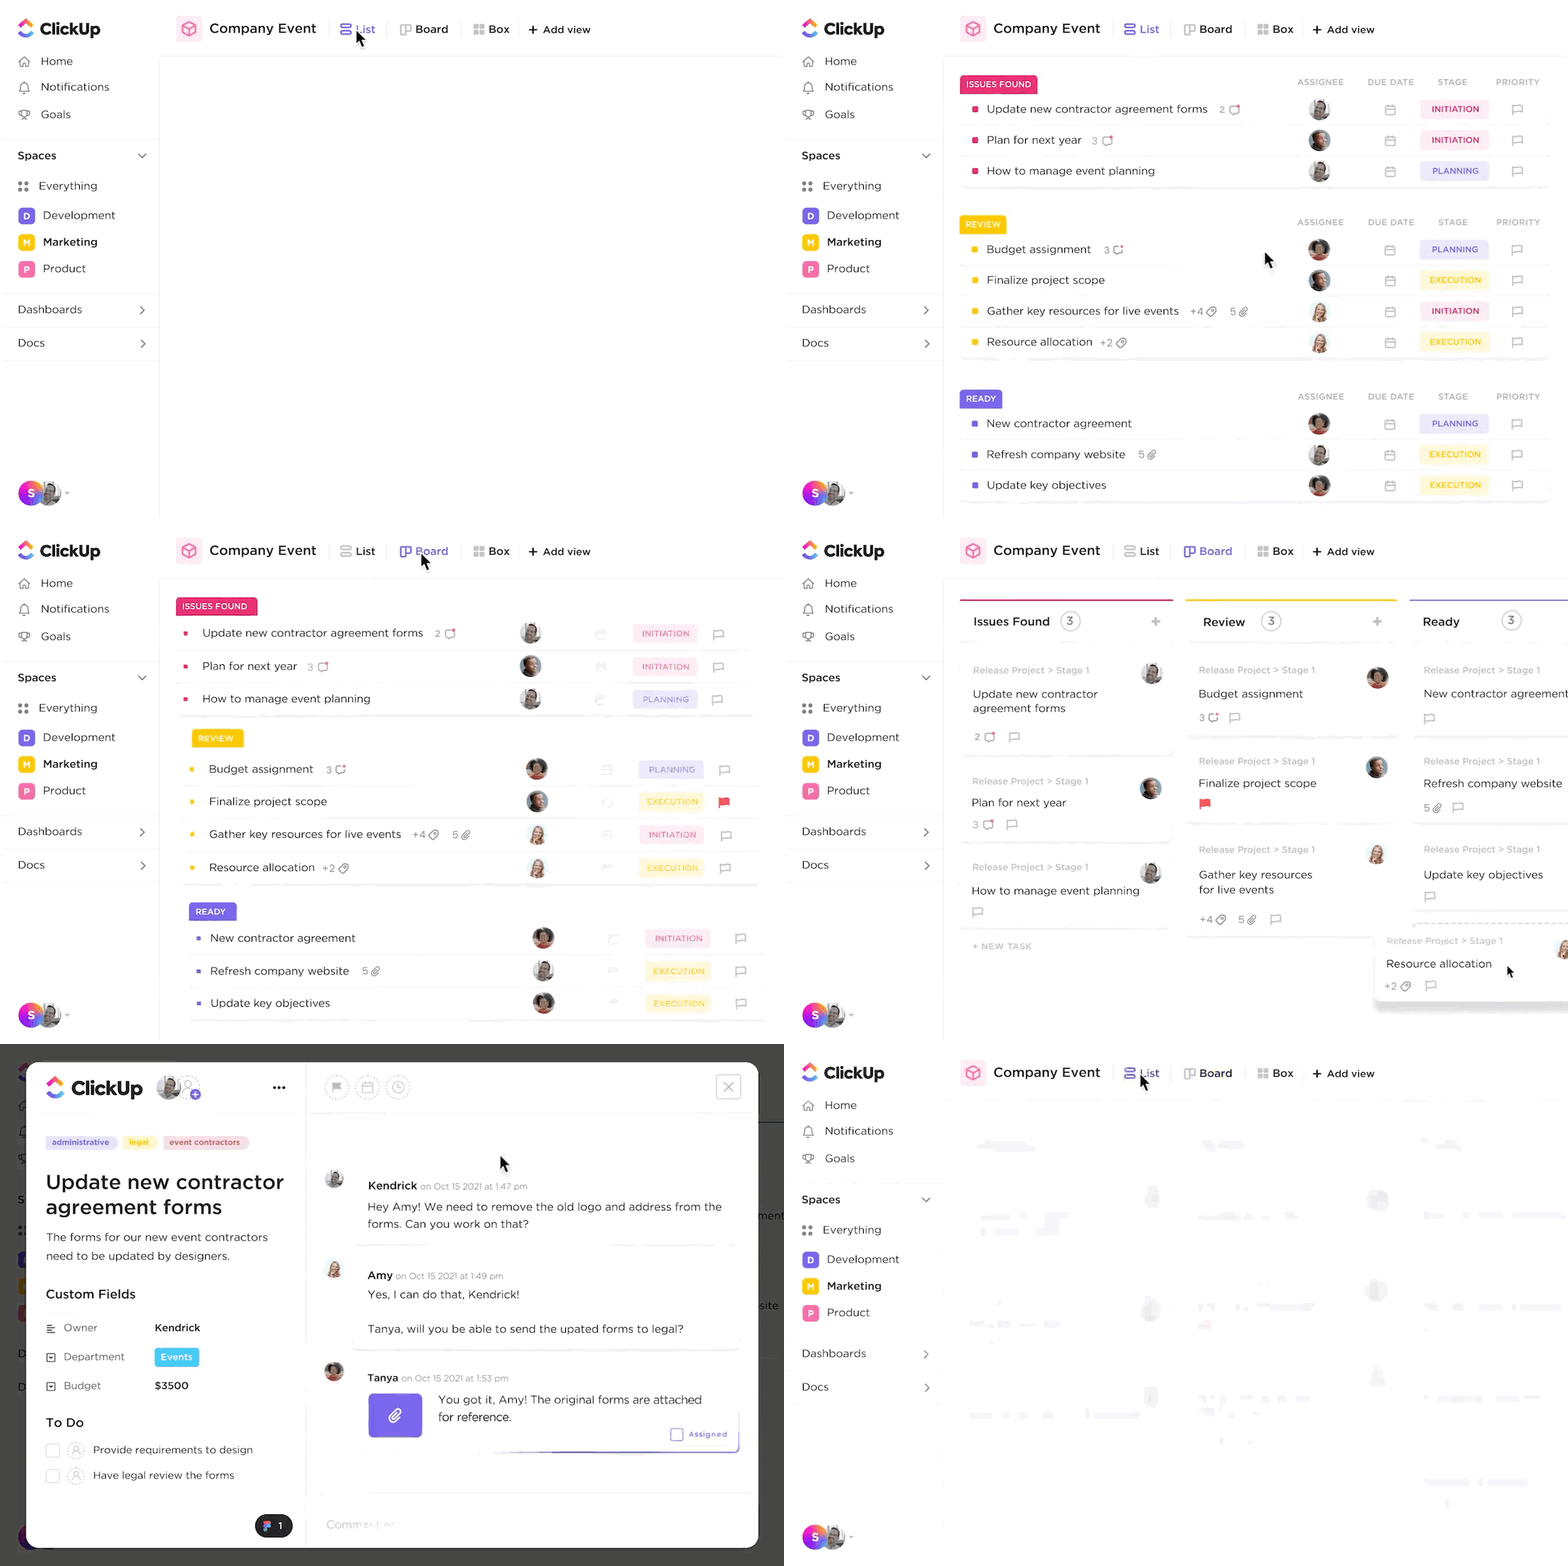
The ClickUp Business Expense and Report Template and all ClickUp templates include customizable views to optimize configurations for reports, approvals, tags, and more.
If you’re not familiar with views in project management software, think of it as different folders or dividers in a single filing cabinet. Each view groups curated information together but display it differently to match specific criteria based on what’s most important to the person or purpose.
The depth of customization of this template opens the door to team-wide collaboration within the ClickUp platform. Accounting, Finance, and other departments don’t have to build extra reports or chase information via email. 📥
Instead, ClickUp cuts down on double work by making it easier for all Workspace members to access shared information in one place. Better context means productive conversations when it’s time to reconcile expense reports.
Situations like policy violations or changing budgets become faster to spot. As a result, project managers have greater visibility into spending patterns, savings opportunities, and inconsistencies.
Pair this template with the ClickUp Tax Preparation Template to improve tax preparation with time-tracking capabilities, tags, dependency warnings, emails, and more!
Best for: Managing vendor housekeeping and payment tasks
Reporting simplification is just the surface-level benefit of the ClickUp Small Business Expense Report Template. Align project management and accounting under one roof. Integrated timelines connect expenses to deliverables, clients, and invoices so you’ll maximize financial and operational efficiency.
Designed for business owners and small teams, this template helps manage vendor housekeeping, so asking for payments and regulatory requirements doesn’t get overlooked. 🔍
All your tools are within reach inside the platform:
With these features and hundreds of other collaboration tools and integrations in ClickUp, small businesses can coordinate internal and external partnerships effortlessly.
Pair this template with bookkeeping templates to keep track of your business’s assets, liabilities, and equity!
Best for: Taking control of company spending
Established businesses and cost-conscious agencies should use the ClickUp Expenses Report Template to deliver strategic financial insights fast. Gain the big picture and line item views required to optimize growth spend. ⚡️
Try the built-in tools to predict future budget and resource needs based on past performance. Integrations connect client work to the expenses while reporting tools and workflows save project managers time tracking down charges flagged by accounting.
With tools to simplify expense oversight and carry out necessary job duties, including flexible fields to organize payees and amounts, managers have the ability to tailor expense tracking to fit their workflows.
Pair this template with the ClickUp Payment Form Template to build easy-to-use online forms!
While this guide focuses on creating your own expense report, Excel can support other business needs—when implemented properly.
Given the things we’ve unveiled that ClickUp brings to businesses, we have more resources, tips, and templates to add to your Excel knowledge. Check out these additional guides and best practices for when Excel needs to shine! ✨
Learn how to build Excel calendars, timesheets, schedules, and more to plan your days and track work.
Make your Excel data impactful with these in-depth tutorials to transform your spreadsheet information into sleek visuals!
Create burndown charts, Gantt charts, Kanban boards, and more in Excel to plan and manage workflows.
Arrange company and employee information with organizational tools in Excel.
Bonus: Check out expense report templates by Microsoft Excel!
Ultimately, the key is to guarantee transparency, accessibility, and accuracy with expense reporting so money moves exactly as intended.
We hope this guide has introduced possibilities for upgrading expense management workflows. Expense reporting is truly a team effort, and teams looking to meet oversight needs and preferences shouldn’t be limited by Excel. 🧑💻
Whether you opt for tried-and-true spreadsheets or newer centralized hubs, we say, “Why not both?” Start a free Workspace in ClickUp or import your spreadsheets into a ClickUp Table view!
© 2026 ClickUp