


Still downloading templates?
There’s an easier way. Try a free AI Agent in ClickUp that actually does the work for you—set up in minutes, save hours every week.
Sorry, there were no results found for “”
Sorry, there were no results found for “”
Sorry, there were no results found for “”
Google Docs is a favorite tool for many, and it’s easy to see why.
Whether you’re a student, a professional, or someone who loves a simple, easy (and free) setup, Google Docs has something for everyone. We love Google Docs because it is easy to access, organize, and use!
Fact Check: Google Docs has over 1 billion active users monthly, making it one of the most popular writing tools.
Despite the near ubiquity of Google Docs, not everyone knows about its options to customize or personalize your documents. Read on to learn about Google Docs hacks for customization!
Here’s a detailed and simple guide to customize Google Docs to make them look well-organized and polished.
Google Docs templates save time and maintain consistency across documents. Whether you’re crafting a report, proposal, or a knowledge base template, Google Docs templates make your job easier.
Use an existing template:

Create your template:
Customizing text is key to making your document visually appealing and easy to read. Here are some essential tips to help you optimize your plain text for maximum impact.
Let’s start with the basics. Choosing the right font can set the tone for your entire document.
To change the font style:

💡Pro Tip: Add custom fonts by clicking More Fonts at the top of the dropdown box. This opens a window to browse through a larger collection of fonts. Once added, these fonts will appear in your regular font dropdown for future use.
Font size plays a critical role in both readability and emphasis.
To adjust the font size in Google Docs:
This method allows you to fine-tune the size to make titles stand out or ensure body text is easy to read.
Bold, italic, underline, and strikethrough formatting options effectively highlight crucial information or add emphasis to your Google Docs document. You can apply bold, italic, and underline from the menu directly.

You can also use the following shortcuts:
For Strikethrough, you’ll have to go a bit deeper—click Format > Text > Strikethrough.

To make specific sections of your text pop, you can change the text or background color:
Text color: Select the text you want to change, then click the Text color icon in the toolbar. A color palette will appear, letting you choose a color from preset options or add a custom color by clicking the plus icon.

Text highlight: Select the text and click the Highlight color icon next to the text color option. Choose a color from the palette to highlight the text.

💡Pro Tip: To maintain readability, ensure the text color contrasts well with the background. Dark text on a light background or vice versa usually works best.
If you’ve applied a certain style to one part of your document and want to replicate it in other sections, you can save time using the Paint format tool. This tool copies the formatting from one part of the document and applies it to another.

💡Pro Tip: Double-click the Paint format icon to keep it active. This allows you to apply the same formatting to multiple sections without reselecting it each time.
Proper spacing and alignment are key to enhancing the readability and structure of your document.
Choosing the right alignment for different document sections ensures a professional and organized layout.
Lists help break down complex information and present it in a clear, organized way. To create a list:

💡Pro Tip: Use the shortcuts Ctrl+Shift+8 for bullets and Ctrl+Shift+7 for numbered lists (use Command instead of Ctrl on Mac).
Headings are essential for organizing content into easily digestible sections. To apply headings:

Once you’ve applied headings, you can quickly update their formatting by selecting one heading, right-clicking, and choosing Select matching text. This selects all headings of the same level, letting you change the font, size, color, or another formatting element in one go.
A Table of Contents helps readers navigate longer documents. To insert one:

Once inserted, the TOC will link to the respective sections, allowing for easy navigation.
💡Pro Tip: If you add or change headings, you must update the TOC by clicking on it and selecting ‘Update table of contents.’
Navigating sections when working with long documents can become cumbersome. Google Docs automatically generates an outline based on the headings, allowing easy navigation.
Access the outline by clicking View > Show Outline.

This outline helps you quickly jump between sections, making long documents much more manageable.
You can easily insert and manipulate images directly within Google Docs without switching to external applications.

To further customize, click the Border weight icon to adjust width, or use the Border dash icon to switch to a dotted or dashed line style
Google Docs supports a wide range of add-ons to extend functionality. Whether adding flowcharts to a process document, creating dynamic surveys, or automating workflows, you can find or create custom tools.
To install add-ons—click on Extensions > Add-ons > Get add-ons to browse the available options, from adding signatures to documents to integrating third-party apps like document collaboration software.

For more advanced users, you can create your own tools using Google Apps Script to automate processes or integrate with other platforms.
Visualizing data is critical for making complex information understandable. In Google Docs, you can insert charts and graphs directly from Google Sheets:
Click Insert > Chart > From Sheets to link your data from a spreadsheet.

When your Google Sheets data updates, the chart in your document can update with just a click, ensuring accuracy across your documentation.
Additionally, you can utilize Google Drawings to create custom flowcharts and diagrams directly within your document. This is particularly useful for representing workflows or concepts visually.
Also Read: How to Find a Word in Google Docs
For organizations that operate globally, Google Docs allows you to translate entire documents with just a few clicks.
Select Tools > Translate Document

Choose the language you want to translate into, and a new copy will open.

Why settle for a plain white background when you can customize the color of your pages? Changing the background color can enhance your document’s appearance and align it with your brand.
Bonus: How to See Edit History in Google Docs!
Go to File > Page setup

In the Page color section, choose a color from the options provided. For a custom color, use the color dropper or enter a specific hex code.

To make this color the default for all future documents, click Set as default.
If you need to adjust the margins in your Google Docs to better fit your content, follow these steps. By default, margins are set to one inch on all sides, but you can customize them as needed.
First, change margins using the Page Setup menu. Click File and select Page Setup from the dropdown box. Then, enter your preferred margin widths for Top, Bottom, Left, and Right.

Click OK to apply your new margin settings. Adjust margins using the ruler:

For more control over document layout, consider using page breaks or section breaks instead of adjusting margins alone.
💡Pro Tip: The rectangle above the left triangle adjusts indentation, not margins. To modify the page height, hover over the top of the vertical ruler until a down-facing arrow appears, then drag up or down.
Bonus: How to Make a Family Tree on Google Docs!
Google Docs has transformed document work by operating entirely online and storing files in the cloud. This allows you to draft, edit, and access documents from any device, with real-time collaboration making teamwork seamless. However, despite its benefits, Google Docs has some limitations. Here are a few key constraints to be aware of.
Google Docs has a character limit of 512,000 characters per document. While this is more than enough for most needs, it can be a constraint for very lengthy or complex documents. It doesn’t matter how many new pages you add to your Google Doc; you must work within this character limit.
Google Docs provides the essentials for formatting but falls short of the advanced tools available in some traditional word processors. This limitation can be problematic for more complex documents. Other document editing software often has more advanced formatting features for intricate layouts and designs.
Here’s what a disgruntled Reddit user had to say:
I dislike Google Docs because the formatting is never right when they print (or at least never check it), so you don’t have to convince me.
While Google Docs is fantastic for real-time editing, its offline capabilities are limited. You need to enable offline mode in advance, and even then, certain features might not work as smoothly without an internet connection. You may have to search for Google Docs alternatives for better offline editing capabilities to work without being online.
Google Docs doesn’t integrate as seamlessly with other software as some users might hope. Although it works well with Google’s ecosystem, it can be a bit restrictive if you use different tools and platforms.
Google Docs is great for collaboration, especially with a small group of people. But when it’s shared more widely, it can get a bit chaotic.
The unease can get worse when you see quirky anonymous avatars that Google assigns to users who open a Doc without signing in, like anteater, wombat, or quokka (yes, they’re as strange as they sound).
You’re minding your own business, trying to write a proposal [in Google Docs] … when the mood shifts. A small circle materializes near the top of the screen. The avatar belongs to a colleague, or worse, your boss … The cursor starts flashing. Questions abound: What are this person’s intentions? Will they scroll down far enough to see the garbled notes at the bottom that you haven’t deleted? Why on earth are they online at 1 a.m. on a Saturday
Additionally, without advanced management tools, tracking edits and contributions becomes stressful. Document collaboration software, like ClickUp, offers more advanced features for managing real-time edits and collaboration.
Bonus: Google Docs Business Plan Templates!
ClickUp is a top-rated project management and document collaboration software trusted by teams in both small startups and large companies.
Whether it’s providing unique project templates or tracking time spent on tasks, ClickUp stands out as the ultimate project management solution. It’s also one of the best alternatives to Google Docs, offering far more functionality for organizing and managing your work.
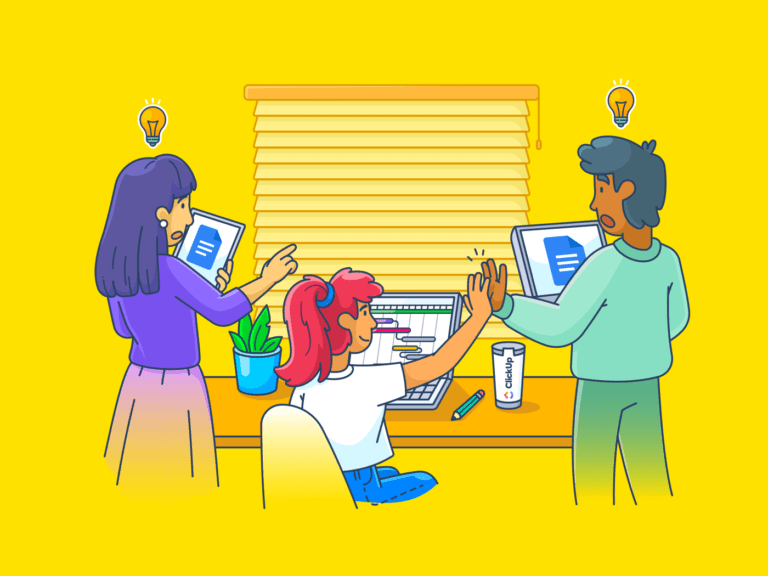
ClickUp Docs goes beyond basic note-taking—it’s a powerful collaborative tool. It allows teams to work together in real time, facilitating smooth brainstorming sessions and collaboration. Team members can tag each other in comments, assign action items, and edit simultaneously, ensuring that everyone stays on the same page.
Here’s how you can easily create a new document in ClickUp:
In the left-hand sidebar of your ClickUp Workspace, you’ll see the ‘Docs’ option.

Click the ‘+ Create Doc’ button in the Docs section to start a fresh document.

A new document will instantly open, ready for you to add your content, format text, or even link tasks directly.

ClickUp Docs’ Relationships enable you to access the right information quickly. By linking tasks and documents through connected pages, you no longer need to search through endless wiki pages. Simply tag your Documents for quick reference, making everything easily searchable and organized in one central location.

You can also create up to five levels of nested pages within your Docs, which can be effortlessly reorganized using drag-and-drop. This is ideal for keeping all your project documentation structured and easy to navigate.
Looking for a specific project documentation template? ClickUp has exactly what you need and more!
Templates can speed up your workflow and create consistent, structured documents. With ClickUp, you can access over 1,000 ready-to-use templates catering to every project and team need.
Another excellent option is the ClickUp Process Plan Document Template, which provides a streamlined approach to managing your processes:
Whether you’re working on a knowledge base, project plan, meeting minutes, or SOPs, ClickUp has the right template to help you get started quickly. This saves you the hassle of building from scratch, allowing you to concentrate on the crucial aspects of your work.
Use ClickUp Collaboration Detection to collaborate with multiple team members in a document. With its advanced features, you can track when your teammates view or edit tasks and documents, receive instant updates automatically on status changes, and stay in the loop with real-time comments. This ensures smooth, overlap-free teamwork, quick feedback, and efficient communication.

Here’s how ClickUp supports your collaboration needs:

ClickUp’s Chat further integrates communication directly into your workflow, letting you streamline team discussions and manage action items effortlessly. You can create dedicated chat channels for different teams or projects, control access, and stay updated with your Notifications feed.

This ensures that all conversations are organized and directly integrated within your work, eliminating the need for scattered emails and improving overall efficiency.
ClickUp puts forward comprehensive permission settings. You can control who has access to specific elements like Folders, Lists, tasks, views, Docs, Dashboards, and Goals. Permissions can be tailored for individual guests, members, or teams, ensuring your Workspace remains secure.
Whether sharing items with your Workspace members or inviting new collaborators, ClickUp offers several secure options:
💡Pro Tip: You can also enhance security with the ‘Protect this page’ feature, which lets you specify who can view, comment on, or edit the document. This ensures that sensitive information remains secure.
We’ve all been there—juggling multiple screens and switching between apps to get things done. It’s exhausting, right?
ClickUp Integrations simplify this by integrating with over 1,000 platforms so you can keep everything in one place. Whether you’re using Slack, GitHub, Zoom, or Everhour, ClickUp has you covered. Plus, it syncs seamlessly with Google Drive and Docs, so your files are always within reach.
And if you can’t find a specific integration? No worries—ClickUp’s API lets you build custom connections, ensuring you have everything you need in one place.
Creating detailed documents doesn’t have to be a time-consuming task. With advancements in AI, managing and generating content has become more efficient and effective. AI tools can significantly streamline your document creation process, making it quicker and more accurate.

Summarize your notes and reports with ClickUp Brain to streamline workflow
ClickUp offers ClickUp Brain, an AI writing assistant designed to streamline your writing process. It provides customizable prompts for writers to create anything from project briefs to marketing case studies.
With ClickUp Brain, you can:
It also offers a variety of built-in features to make content creation even easier. You can automatically check for spelling in your Docs and tasks without needing plugins or extensions. Plus, you can use AI to craft messages with the perfect tone.
ClickUp Docs offers a versatile suite of features to enhance your document management. You can link to workflows by adding widgets to update tasks, track project statuses, and manage assignments directly within the document editor. The Docs Hub is another key feature, providing a centralized space where you can effortlessly search, sort, and filter through verified wikis, templates, and other assets.
For added functionality, you can use Attachments to embed screenshots, PDFs, and other files directly into your Docs. This allows for quick reference and ensures all related materials are in one place.
Furthermore, you can use color-coded banners to organize and highlight important information, making navigating and emphasizing key points easier. You can also create and format tables to efficiently manage and visualize large datasets.
Google Docs is widely praised for its simplicity and accessibility. It’s helpful for straightforward document creation and real-time collaboration. Easy sharing and commenting and seamless integration with other Google Workspace tools are among its most valuable features. Its user-friendly interface and cloud-based convenience make it a solid personal and team use option.
However, if you want something more advanced, ClickUp might be better.
With its extensive workflow integration, customizable templates, and advanced permission settings, ClickUp provides a robust platform that offers more than basic document management. It is ideal for teams needing comprehensive project and task management capabilities. Sign up for ClickUp today to elevate your workflow!

© 2026 ClickUp

There’s an easier way. Try a free AI Agent in ClickUp that actually does the work for you—set up in minutes, save hours every week.