

Being a graphic designer isn't just about creating eye-catching visuals; it's about managing projects and keeping clients in the loop. That's where ClickUp's Graphic Designers Project Status Report Template comes in handy!
This template empowers graphic designers to:
- Document and communicate project progress, objectives, and design decisions
- Keep track of timelines and budgets to ensure projects stay on track
- Collaborate effectively with clients and team members for successful project completion
Whether you're working on a client project or your own creative ventures, this template will streamline your project management and reporting process so you can focus on what you do best—creating stunning designs!
Benefits of Graphic Designers Project Status Report Template
Keeping track of your graphic design projects is crucial for staying organized and delivering outstanding results. The Graphic Designers Project Status Report template helps you do just that by:
- Providing a comprehensive overview of project progress, objectives, and timelines
- Ensuring effective communication and collaboration with clients and team members
- Tracking design decisions and revisions to maintain consistency and quality
- Monitoring project budget and resource allocation for better financial management
- Streamlining project documentation and archiving for future reference
Main Elements of Graphic Designers Project Status Report Template
Whether you're managing a team of graphic designers or working as a freelance designer, ClickUp's Graphic Designers Project Status Report template has got you covered!
This template includes:
- Statuses: Track the progress of your design projects with custom statuses such as In Progress, On Hold, and Completed.
- Custom Fields: Add specific details to each project, such as Client Name, Project Due Date, Design Type, and more, to ensure all important information is captured in one place.
- Different Views: Use different views to visualize and manage your projects. Whether it's the Board View for a Kanban-style workflow, the Calendar View for tracking deadlines, or the Gantt Chart View for visualizing project timelines, ClickUp has the perfect view for your needs.
With ClickUp's Graphic Designers Project Status Report template, you can streamline your design projects and stay organized from start to finish.
How to Use Project Status Report Template for Graphic Designers
Creating a social media content calendar can be overwhelming, but with the help of ClickUp's Content Calendar Template, you can streamline the process and stay organized. Follow these {{Steps_Random #}} steps to effectively use the Content Calendar Template:
1. Define your content goals and strategy
Before you start planning your social media content, it's important to establish clear goals and a strategy. Determine what you want to achieve with your social media presence, whether it's to increase brand awareness, drive website traffic, or generate leads. This will help guide your content creation and ensure that it aligns with your overall marketing objectives.
Use the Goals feature in ClickUp to set specific, measurable, attainable, relevant, and time-bound (SMART) goals for your social media content.
2. Identify your target audience
Understanding your target audience is crucial for creating content that resonates with them. Research their demographics, interests, pain points, and preferences. This will help you tailor your content to their needs and preferences, increasing engagement and driving results.
Use the Custom Fields feature in ClickUp to track and categorize your target audience segments.
3. Plan your content themes and topics
Once you know your goals and target audience, brainstorm content themes and topics that align with your brand and resonate with your audience. These could include educational posts, behind-the-scenes content, user-generated content, or industry news. Plan out a mix of content types to keep your social media feed diverse and engaging.
Use the Board view in ClickUp to organize and visualize your content themes and topics.
4. Create a content calendar
With your goals, target audience, and content themes in mind, it's time to create a content calendar. Use ClickUp's Calendar view to map out your content schedule, including the dates, times, and platforms for each post. This will help you maintain a consistent posting schedule and ensure that your content is well-balanced and aligned with your strategy.
Use the Calendar view in ClickUp to schedule and manage your social media content.
5. Create and schedule your content
Once your content calendar is set, it's time to start creating your social media posts. Use ClickUp's Docs feature to draft your captions, design your visuals, and gather any necessary hashtags or links. Collaborate with your team members to ensure that the content is reviewed, approved, and scheduled for posting at the right time.
Use the Docs feature in ClickUp to create and collaborate on your social media content.
By following these steps and utilizing ClickUp's Content Calendar Template, you can effectively plan and execute your social media content strategy, saving time and improving your overall social media presence.
Get Started with ClickUp’s Graphic Designers Project Status Report Template
Graphic designers can use the Project Status Report Template to keep track of their progress, timelines, and design decisions throughout a project.
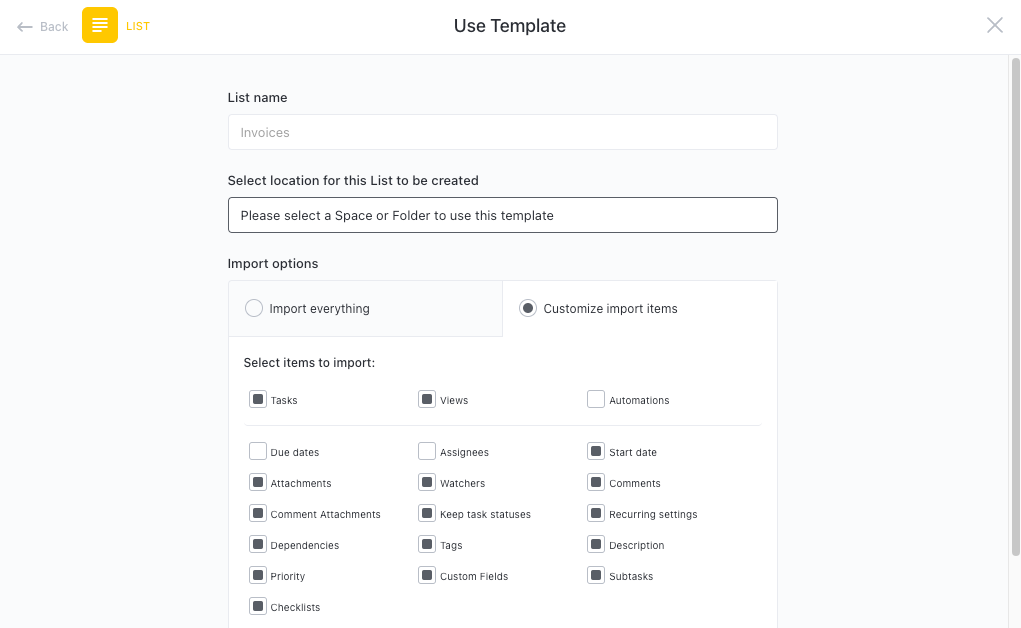
First, hit “Add Template” to sign up for ClickUp and add the template to your Workspace. Make sure you designate which Space or location in your Workspace you’d like this template applied.
Next, invite relevant members or guests to your Workspace to start collaborating.
Now you can take advantage of the full potential of this template to create stunning designs:
- Use the Timeline View to plan out project milestones and deadlines
- The Budget View will help you track project expenses and stay on budget
- Use the Design Decisions View to document and communicate design choices and rationale
- The Communication Log View will ensure effective collaboration and keep stakeholders informed
- Organize tasks into different statuses to keep track of progress
- Update statuses as you complete design phases and deliverables
- Monitor and analyze tasks to ensure maximum productivity


