Playbook

4 Steps to Optimize Your Agency Workspace for Client Success


Improve service delivery and client satisfaction with a strategically configured ClickUp Workspace.

Introduction

When agencies clearly understand their processes, operational planning becomes simpler, and project tools align better.

So, how can you organize a ClickUp Workspace that meets the needs of your specialized teams and clients?

Christopher Day, the founder of Upficient, shares his top-down approach to building agency-optimized Workspaces.

His tactics will help you understand your agency's setup demands and design an environment that simplifies workflows.

You'll learn how to:

  • Visualize organizational roles, reporting, and workflow structure
  • Design the back-end and front-end of your ClickUp Workspace
  • Set up a functional Space to build team and client confidence
  • Increase user engagement in ClickUp with training resources
Chris Day

Christopher DayFounder of Upficient

Organizational efficiency is achieved when the right people are doing the right things, the right way, at the right time. Culture breeds success so it's important to foster the right environment from the beginning.

Upficient Logo 165 x 40

Phase 1: Map your agency's structure

The first step is to create an organizational chart that reflects your agency's core services, workflows, and relationships.

Organizational Chart

This chart will be the foundation for your ClickUp Workspace, assuring it accommodates all team members and improves service delivery.

Consider the following factors:

  • Team composition and roles (e.g., ClickUp Architects, Integration Specialists, Virtual Assistants)
  • Current operational challenges (e.g., collaboration across time zones, workload management)
  • Existing tech stack and potential ClickUp integrations (e.g., chat communication, time tracking)
Chris Day

Christopher DayFounder of Upficient

There should not be a cookie-cutter approach to ClickUp Workspace architecture; every build is supposed to be a technical and creative discovery. It is the unfolding of a unique system for the use case at hand.

Upficient Logo 165 x 40

To create a visual representation of your chart, here's a brainstorming exercise:

Step 1

Review your core services to guide team structure and workflow design

Step 2

List all your team roles, highlighting reporting lines and collaborations

Step 3

Identify key software used across your agency to map information flow

Knowing your organizational structure, team roles, and integration needs, you can now configure ClickUp to meet your specific team and workflow demands.

Phase 2: Design your Workspace setup

Christopher introduces the concept of "back-end" and "front-end" architecture in ClickUp:

  • The back end uses a combination of hierarchical organization and various ways to manage information. It includes features that automatically assign data and initiate workflows based on certain triggers
  • The front end enhances the user's interaction and data display. It provides users quick access to valuable insights and key information, eliminating the need for extensive searching
Workspace Architecture - Chris Day

Balancing these two elements is crucial for a functional and user-friendly setup.

Chris Day

Christopher DayFounder of Upficient

If the organizational chart isn't strategically configured, the Workspace will become confusing. But if done effectively, it results in a logical, intuitive sidebar. Always ask, 'Does this List belong here?'

Upficient Logo 165 x 40

To create a full picture of your ClickUp Workspace, build from your brainstorming exercise to consider the following back-end and front-end elements:

The Back-end: Structural Elements


Spaces for departments/functions, Folders for activities/projects, Lists for processes/services

Custom Fields for Estimated Hours, Budget, Assignee, Business Unit, Services

Automations for AI Progress Updates, Custom Field updates, Task creation

The Front-end: User Interaction Design


Organized Sidebar for a logical vertical scroll and intuitive workspace navigation

Dashboards for at-a-glance project insights and team workload capacities

Custom and default views for role-specific task management

There's a sense of clarity that comes with a well-designed setup. This guide gives you a place for everything and puts everything in its place.

Phase 3: Build your Spaces

The next phase is to build your optimal Workspace setup based on your chart and Workspace design.

Christopher initiates the rollout with the Client Fulfillment Space because the team is most familiar with the workflows.

Build Spaces - Chris Day

After setting up the first functional Space, the team understands ClickUp better, and it's easier to build the remaining Spaces.

An effective Space setup provides:

  • Efficient workflow management that reduces complexity and improves resource allocation
  • Reduced manual effort through Automations and streamlined task management
  • Valuable insights and a clear project overview with Dashboards
Chris Day

Christopher DayFounder of Upficient

The first Space showcases ClickUp's power, demonstrating Hierarchy, views, Custom Fields, and local Automations. This initial setup helps clients grasp ClickUp, fostering better collaboration in projects.

Upficient Logo 165 x 40

To build a ClickUp Space for client fulfillment, follow these steps:

Step 1

Create a Space labeled Client Fulfillment and add a Folder for each client

Step 2

Create Lists within the Folders for different project stages or services

Step 3

Add task statuses that reflect every step in the workflow

Step 4

Set up Custom Fields in the Lists for critical information at a glance

Step 5

Create Automations to support insightful views and reports

Step 6

Invite clients and grant access to relevant tasks, Lists, or Docs

This setup offers various views of your agency's work, allowing users to filter and group tasks by specific criteria, simplifying task management and prioritization.

Phase 4: Create onboarding resources

Even the best-designed Workspace is only as effective as the people using it. So let's turn your team and clients into ClickUp champions with evergreen training materials.

Onboarding Resources - Chris Day

Key elements of effective onboarding include:

  • Targeted video demonstrations: Create short videos for each unique List or workflow in your Workspace
  • Gradual feature introduction: Walk through new features to enhance collaboration without overwhelming users
  • Interactive training sessions: Conduct focused initial and ongoing live training to build and reinforce skills
Chris Day

Christopher DayFounder of Upficient

Very seldomly do our clients ask for written documentation but if they do it's easy with ClickUp clips to get the transcripts of these recordings.

Upficient Logo 165 x 40

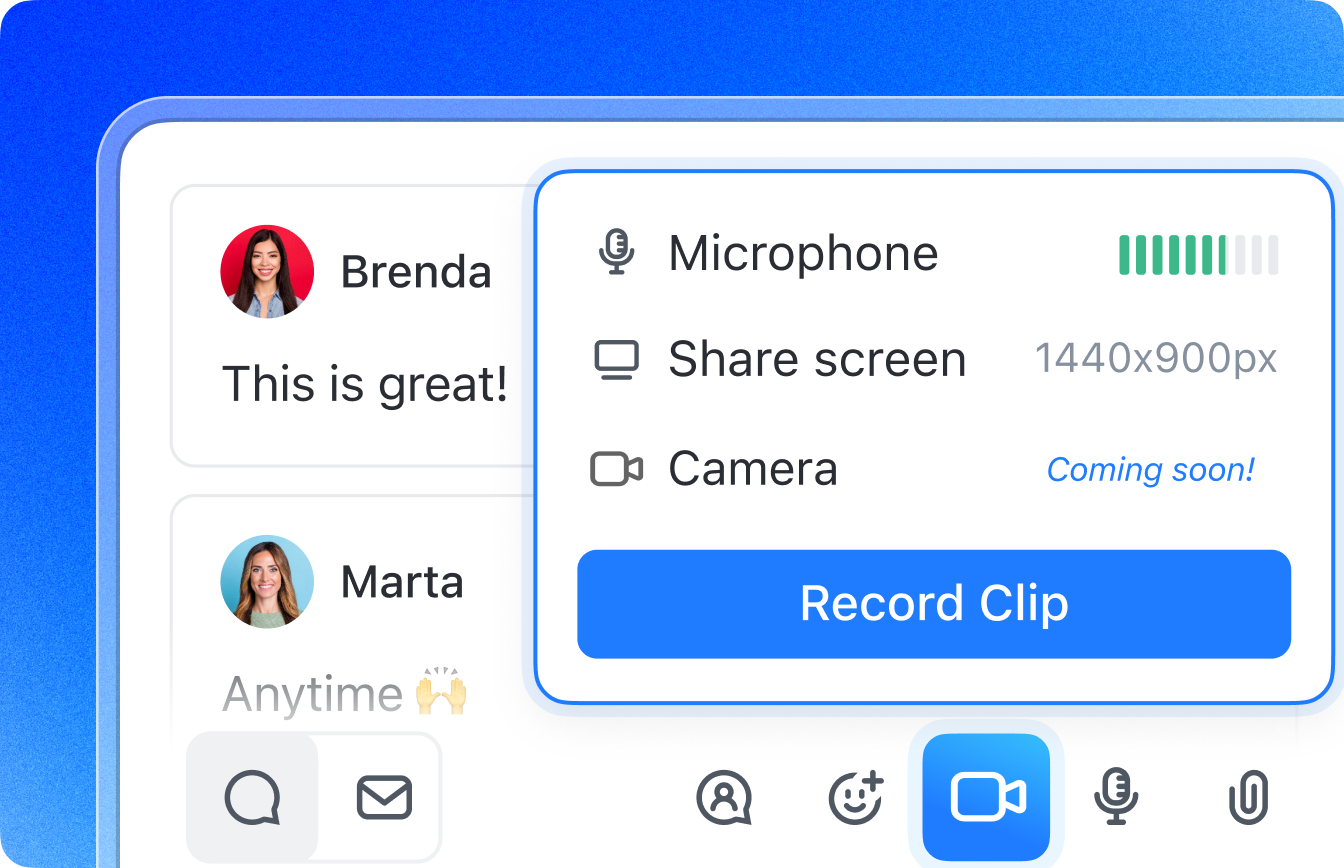
To train your team and clients effectively, follow Christopher's simple approach with ClickUp's recording tool:

Create a Clip in any convo

Step 1

Record a Clip to show how to navigate the Workspace

Transcribe Clips

Step 2

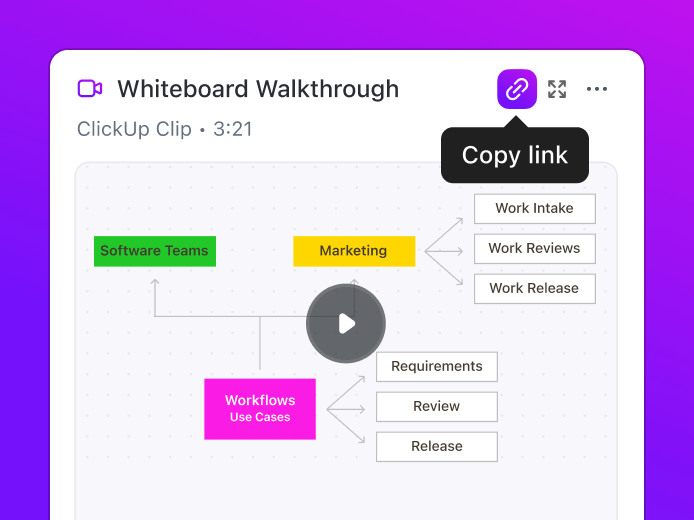
Transcribe Clips with AI to embed snippets and timestamps in SOPs

Share Clips

Step 3

Manage all recordings in the Clips Hub to stay organized

Christopher and his team at Upficient have found video demonstrations to be the most engaging and effective way to document and share ClickUp setups. Their philosophy is simple: it's easier to show than tell.

Final takeaways

The better you understand your agency's setup requirements, the more effectively you can build a custom ClickUp Workspace that drives team performance and client satisfaction.

To optimize your setup for peak efficiency and effectiveness, use Christopher Day's operational planning approach:

  • Visualize the hierarchy of roles, responsibilities, and relationships within your agency
  • Design a detailed setup that balances your Workspace layout with an intuitive user interface
  • Create Spaces, Lists, and Automations that align with your team's workflows and project
  • Provide recorded training materials with ClickUp's native tools for ongoing support

When you properly organize your processes and workflows, you're not just making surface-level changes; you're upgrading your agency's operations to deliver exceptional client service.

Chris Day

Christopher DayFounder of Upficient

We present these systems and principles as rules of the road, to be adopted for more effective ClickUp architecture. After all, the more users in the system, the more productive the world.

Upficient Logo 165 x 40

Next steps

List view Hierarchy

1. Download the Agency Management Template

Manage your agency's entire workflow, from sales to project delivery, with this fully customizable Workspace.

Join the ClickUp Showcase

2. Get Your Questions Answered at a ClickUp AMA

This is a group setting event, so be as active as you want—without the awkward sales call.

Book a Demo image

3. Book a Personalized Demo

Get a personalized session to see ClickUp in action and get your questions answered.

Playbooks Center Thumbnail

4. Read More Playbooks

Dive into our full library of resources, created to support you in tackling productivity hurdles—big and small.