تعد جدولة المشروع جانبًا متطلبًا ومحوريًا في إدارة المشروع. إنها بمثابة خريطة بحار تسترشد بنجم الشمال، وتقودك في طريقك إلى إنجاز مشروعك بشكل كبير.
على الرغم من وضوحها، إلا أن صياغة جدول زمني للمشروع يمكن أن يتطلب جهدًا استثنائيًا إدارة الوقت وتكون مهمة ضخمة، ولكن يمكن لمدير مشروع ماهر مثلك التعامل معها! 💪
سنقوم في هذا الدليل بشرح ماهية الجدول الزمني للمشروع وفوائد تطبيقه. كما سنوضح أيضًا كيفية إنشاء جداول المشروع في ست خطوات سهلة ومشاركة كيفية برنامج إدارة المشاريع من ClickUp يمكن أن يساعدك في التنقل في كل مهمة بسهولة.
ما هو جدول المشروع؟
جدول المشروع هو خريطة طريق مبسطة للأنشطة والموارد وتواريخ الاستحقاق التي تساعد فريقك على تحقيق الهدف النهائي. وهو يقسم من، وماذا، ومتى، وكيف لمشروعك. وتتضمن العملية جمع المعلومات الأساسية، بما في ذلك أعضاء الفريق الذين سيكونون مسؤولين عن المهام، وتحديد المواعيد النهائية التي يجب الوفاء بها.
بمجرد إنشائه، يعمل الجدول الزمني للمشروع كجدول زمني ومصدر مرجعي لجميع أعضاء الفريق. جميع المشاركين في خطة المشروع يجب أن تكون قادرًا على معرفة أين تقف كل مهمة، وتواريخ بدايتها ونهايتها، وما إذا كانت حالة المشروع تفي بالموعد النهائي المحدد. ⏳

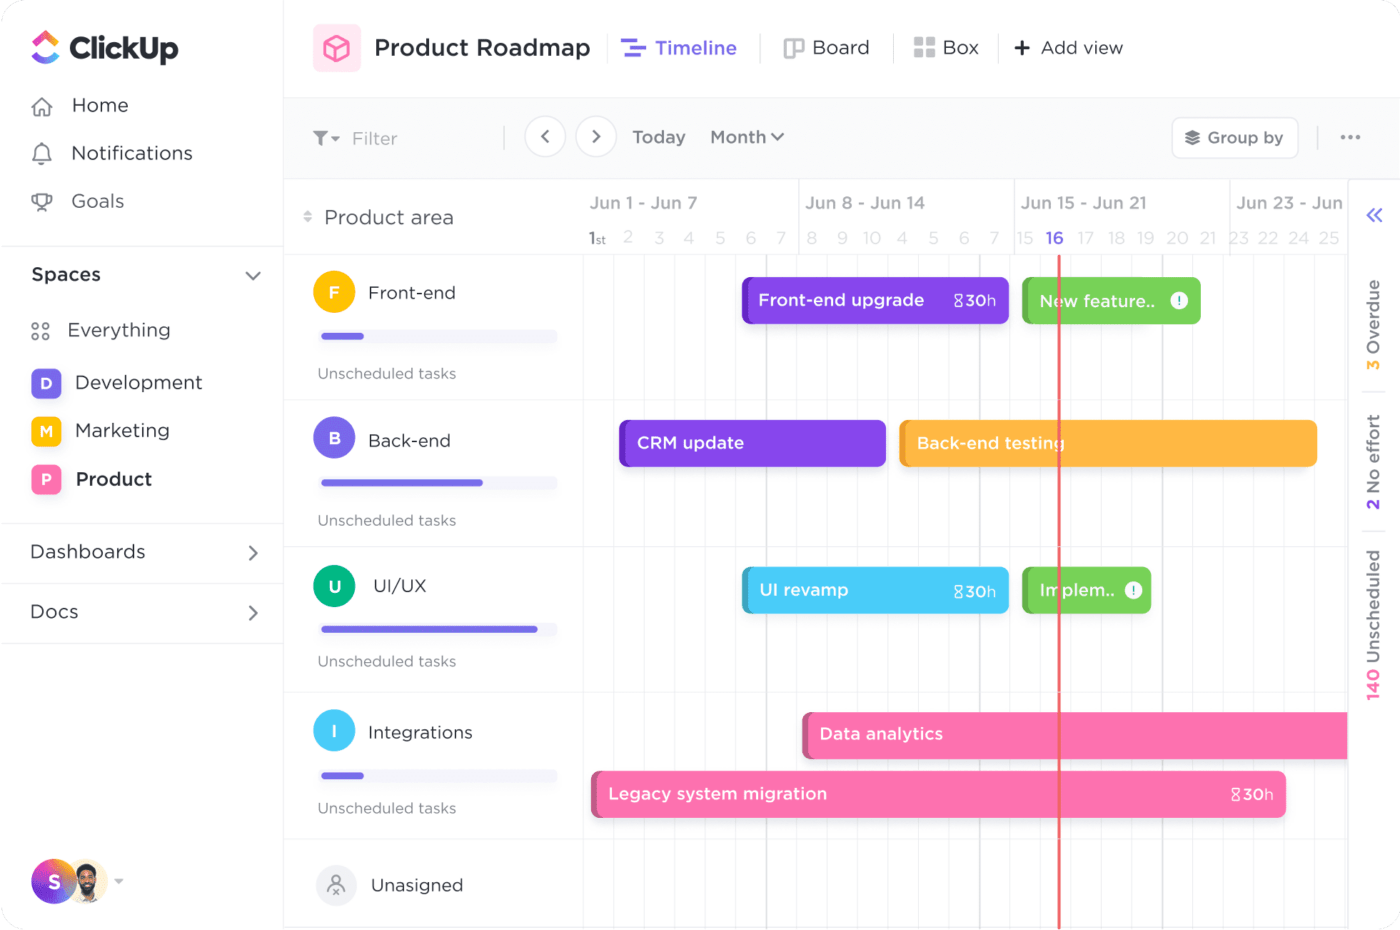
جدولة مشاريع متعددة، وإدارة التبعيات، وترتيب أولويات كل شيء في مشروعك المخصص الجدول الزمني للمشروع مع عرض الخط الزمني في ClickUp
يبدو ذلك كثيراً. لكن جدولة المشروع هي جانب حاسم لمديري المشاريع ودورهم. فهو يتطلب مهارات ممتازة في إدارة الوقت ومستوى عالٍ من التنظيم لمعرفة الجوانب الهامة لدورة حياة المشروع والتبعيات الإجمالية للمهام في كل مرحلة.
ولكن ليس عليك القيام بكل ذلك بمفردك.
هناك نماذج لجدول المشروع وأدوات برمجية يمكن أن تساعدك على إنجاز المهمة في وقت أقل. تابع القراءة لمعرفة المزيد عن فوائد الجدول الزمني للمشروع ونصائح حول كيفية إنشاء جدول زمني للمشروع باستخدام قوالب من ClickUp.
فوائد الجدول الزمني الفعال للمشروع
يوفر برنامج جدولة المشروع العديد من الفوائد، من بينها الحفاظ على التنظيم. بصفتك مدير مشروع، فأنت تعرف مدى سرعة خروج المشروع بأكمله عن نطاق السيطرة - فكر في الأمر: زحف النطاق وعدم الالتزام بالمواعيد النهائية والإنفاق الزائد - دون رقابة مناسبة أو اهتمام بالتفاصيل.
مع وجود جدول زمني للمشروع، يمكنك تتبع ما وصلت إليه الأمور، والاستعداد للتكيف في حالة ظهور مشاكل، و إدارة الفريق من خلال إبقاء الجميع على نفس الصفحة.
فيما يلي بعض فوائد الجدول الزمني الفعال للمشروع:
- يجعل تتبع تقدم المشروع وإعداد التقارير ومشاركة التقدم المحرز في المشروع مع جميع أعضاء الفريق أسهل
- يحدد توقعات واضحة للمهام والمسؤوليات وتواريخ البدء والانتهاء والمواعيد النهائية
- تحديد الاختناقات المحتملة، مثل نقص النطاق الترددي لبعض أعضاء الفريق أو صعوبة تخصيص الموارد
- يتيح لك رؤية المشكلات فور ظهورها باستخداممراقبة المشروع في الوقت الفعليحتى تتمكن من معالجتها قبل أن تؤثر على المخرجات
- يشجع على مساءلة الموظفين. يعرف كل عضو من أعضاء الفريق ما هو متوقع منه بالضبط ويكون على دراية بالمواعيد النهائية التي تؤثر على عملية جدولة المشروع
- يدعم الأداء المالي الأفضل من خلال تحديد الموارد اللازمة بوضوح والحفاظ على الغطاء على النفقات غير المتوقعة
- يضمن جودة أفضل نظرًا لأن أعضاء الفريق يضعون الخطوط العريضة للمشروع من البداية إلى النهاية ويكونون قادرين على جدولة الاختبار وتجنب التغييرات في اللحظة الأخيرة - مما يساعد مديري المشروع في نفس الوقت
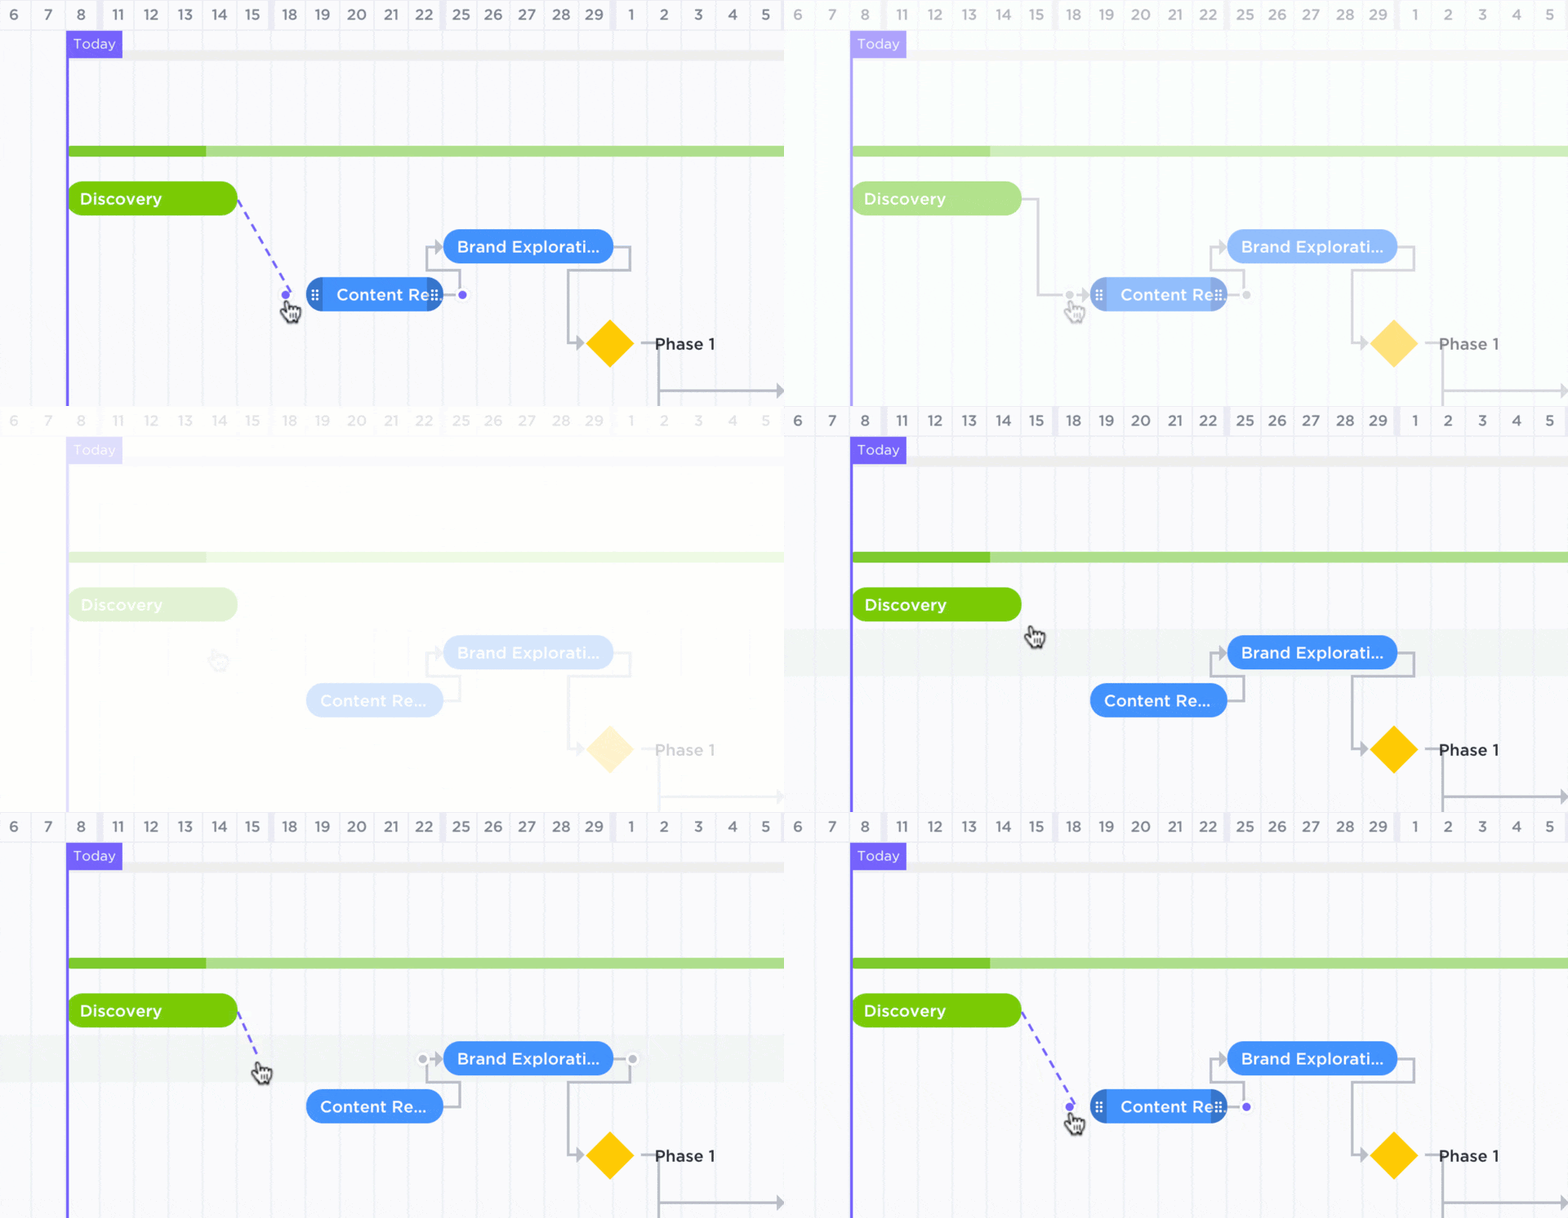
- يحدد تبعيات المهام وعلاقاتها بحيث يمكنك بسهولة معرفة المهام التي تعتمد على إنجاز المهام الأخرى أولاً. هذا يجعل من السهل تحديد أي عوائق محتملة ومجالات قد يتأخر فيها المشروع بأكمله

إظهار العلاقات بين المهام والمهام المتطلبة في طريقة عرض جانت في ClickUp
كيفية إنشاء جدول مشروع لفريقك ## كيفية إنشاء جدول مشروع لفريقك
هل أنت مستعد لإنشاء جدول مشروع لفريقك؟ نحن هنا لمساعدتك في هذا الدليل المفصل خطوة بخطوة. 🌻
1. حدد نطاق المشروع

قم بتخصيص قالب السبورة البيضاء لنطاق المشروع بسهولة عن طريق إضافة المستندات والمهام والمزيد
أول شيء عليك القيام به هو تحديد نطاق المشروع بأكمله . من هم أصحاب المصلحة الرئيسيون وأعضاء الفريق الذين سيشاركون؟ ما الذي سيكونون مسؤولين عنه؟ متى تريد أن يكتمل المشروع بأكمله؟ أجب عن هذه الأسئلة لتحديد نطاق المشروع .
وبمجرد الانتهاء من وضع ذلك، حدد السياسات والإجراءات و التسليمات للمشروع. هل هناك إجراءات تم وضعها من قبل الجهات العليا أو الإدارة التي يجب اتباعها؟ هل ستحتاج إلى تأمين موارد من منظمات خارجية؟ كيف تحدد نجاح المشروع؟ فكر في هذه الأنواع من الأشياء عند تحديد الإجراءات التي يجب اتباعها أثناء المشروع.
هل تحتاج إلى مساعدة في خطوة تخطيط المشروع هذه؟ استخدم قالب السبورة البيضاء لنطاق المشروع من ClickUp حيث يمكنك رسم ملخص للأنشطة والموارد اللازمة بالإضافة إلى تقدير تواريخ الاستحقاق والتسليمات.
2. تحديد مهام ومسؤوليات المشروع

إضافة عدة مكلفين، وتفويض التعليقات، وإنشاء عمليات حسابية باستخدام الحقول المخصصة، كل ذلك من مهام ClickUp الخاصة بك
الآن بعد أن عرفت ما يستلزمه المشروع، حان الوقت لبدء تحديد المهام والمسؤوليات. ضع في اعتبارك جميع أعضاء الفريق الذين سيلعبون دوراً في المشروع. حدد أنشطة المشروع والمهام التي سيحتاجون إلى التعامل معها.
يمكنك إقران ذلك مع هيكل تقسيم العمل (WBS) - مثل قالب لوحة تقسيم العمل من ClickUp -الذي يحدد جميع المهام المحددة والمهام الفرعية المطلوبة لكل شخص لإكمال الجزء الخاص به من المشروع. هذا أيضًا هو الوقت الذي ستحدد فيه أي معالم رئيسية للمشروع. ✅
3. تعيين تسلسل المهام

تعيين المهام لحظر أو انتظار بعضها البعض لإنشاء تبعية في ClickUp
بعد ذلك، حان الوقت لتقييم تبعيات المهام. وهذا يعني مراجعة قائمة المهام الخاصة بك لمعرفة تسلسل الأحداث التي يجب أن تحدث لتحقيق أهداف مشروعك.
هل تحتاج إحدى مهامك المحددة مسبقاً إلى أن تكتمل بالكامل قبل أن تبدأ مهمة أخرى؟ إذا كانت الإجابة بنعم، فستحتاج إلى التأكد من أنك تحديد أولويات جدولك الزمني والجهد نحو تلك المهام أولاً.
هل يمكن تداخل المهام الأخرى أو العمل عليها في نفس الوقت؟ عظيم! ستحتاج إلى التخطيط لجدولة تلك المهام في وقت واحد لتقليل وقت المشروع.
هل تعلم أنه يمكنك استخدام ClickUp لتعيين تبعيات المهمة الخاصة بك ? استخدم الأداة البرمجية لتحديد أي مهام تنتظر إكمال مهام أخرى، والمهام التي يتم حظرها، والمهام التي لا يتم إعاقتها.
4. حدد الموارد التي تحتاجها

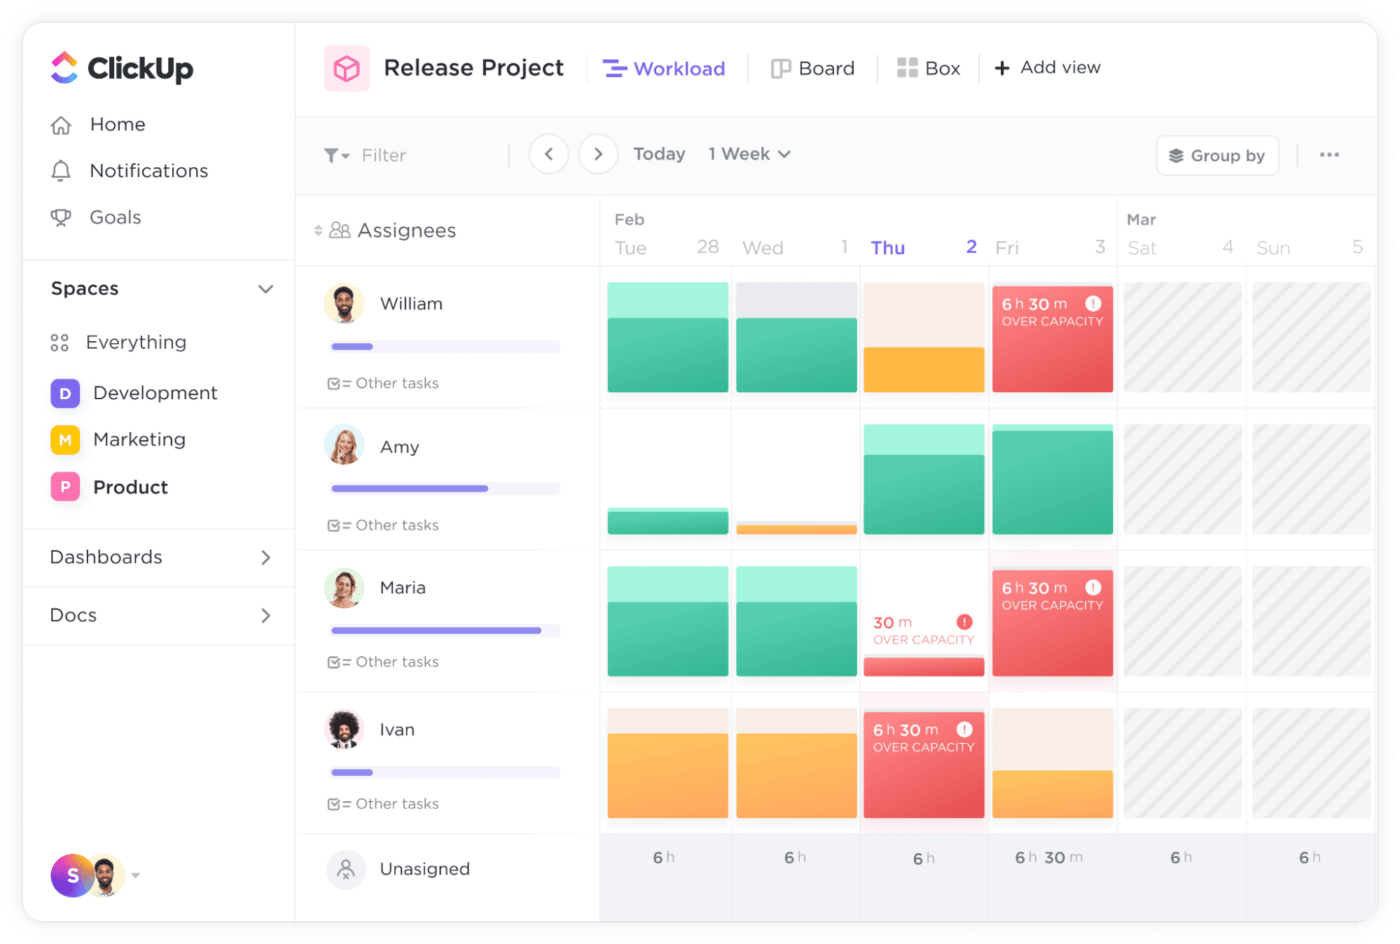
باستخدام طريقة عرض عبء العمل في ClickUp، يمكنك عرض سعة عمل كل عضو في الفريق بسرعة
إدارة الموارد جزء كبير من أي مشروع ناجح. عندما تكون لديك الموارد المناسبة عندما تحتاج إليها، يمكنك التحرك بسرعة الضوء. وعندما لا يكون لديك الموارد المناسبة، يبدأ المشروع في الانهيار، مما يتسبب في التأخير تلو الآخر.
ادعم فرق مشروعك من خلال تحديد الموارد التي تحتاجها لإنجاز المشروع. وهذا يشمل النظر في العمالة والموارد المالية والموارد المادية والأصول. عرض عبء العمل في ClickUp يتيح لك معرفة من هو المتأخر ومن هو المتقدم ومن هو على المسار الصحيح. وبهذه الطريقة يمكنك تعديل الجدول الزمني لمشروعك لتعويض أي نقص. مع لوحات معلومات ClickUp يمكنك إنشاء مخططات جانت ولوحات كانبان لتصور الموارد وترتيب المشروع بسرعة.
5. تعيين جدول زمني للمهام

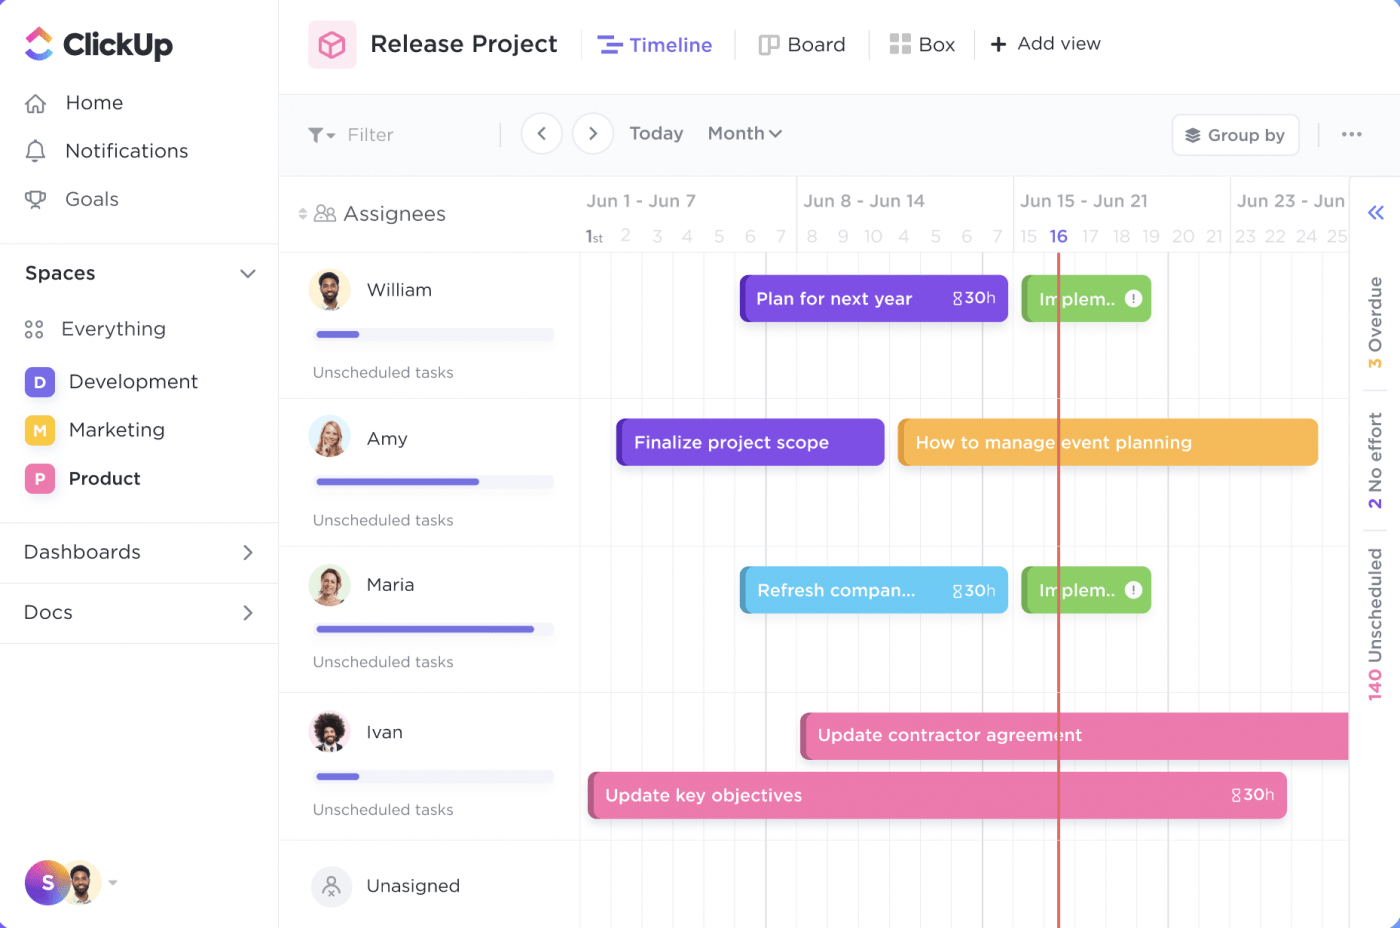
توفر طريقة عرض الجدول الزمني في ClickUp نظرة شاملة لمواردك ومهامك
لا يكتمل أي جدول زمني للمشروع بدون جدول زمني. ابدأ بتقدير الجدول الزمني للمشروع والمدة التي سيستغرقها إكمال كل مهمة. قم ببناء تقويم المشروع الخاص بك من هناك عن طريق إضافة تواريخ البدء والانتهاء للمهام الفرعية والمراحل الرئيسية. استخدم قوالب الجدول الزمني للمشروع في ClickUp و Excel وأدوات أخرى لإنشاء تقويم للمشروع وتتبع تقدم المشروع. 🗓️
إذا كان لديك خطة عمل مع ClickUp، يمكنك استخدام عرض الجدول الزمني للحصول على عرض خطي لمهام المشروع والجدول الزمني. قم بتخصيص طريقة العرض لإظهار المعلومات الأكثر صلة بك أو حدد عامل التصفية "تجميع حسب" لرؤية الجدول الزمني للموظفين الفرديين أو علامات الأولوية.
جرّب هذه
_/مرجع/ مدونة؟ p=66443_66443 أدوات جدولة الإنشاءات *%! : لا يكتمل أي جدول زمني للمشروع بدون تقويم يمنح جميع أعضاء الفريق نظرة عامة على ما يحدث ومتى يحدث. عزز التعاون وتابع جميع مشاريع الفريق في مساحة واحدة سهلة العرض.
- أدوات إدارة المخاطر : تتمحور إدارة المشروع حول تحديد وقت ظهور المشكلات حتى تتمكن من معالجتها على الفور. يجب أن تمكّن أدوات جدولة مشروعك أعضاء الفريق من تحديد المخاطر وتتبعها ومعالجتها.
- دعم إدارة المهام: لا شيء يبطئ العمليات مثل نسيان تعيين مهام المشروع أو تفويضها. من خلال اختيار أداة لجدولة المشروع معإدارة المهام يمكنك ضمان إسناد كل شيء إلى أعضاء الفريق المناسبين. ستحتوي الأداة الرائعة أيضًا على مهام فرعية وتخصيص لتواريخ الاستحقاق والمعالم الرئيسية لتتبع الجدول الزمني للمشروع.
كيف تستخدم الفرق أداة ClickUp لجدولة المشروع
هناك العديد من الطرق المختلفة للفرق لاستخدام ClickUp لجدولة المشاريع. من القوالب التي تجعل إدارة الجدول الزمني للمشروع أسهل إلى إدارة المهام المبسطة لتتبع التقدم المحرز، ClickUp يجعل الأمر بسيطاً. أفضل جزء هو أن ClickUp يتيح لك القيام بكل شيء في مكان واحد.
ولكن لا تصدق كلامنا! دعنا نلقي نظرة على ما يقوله عميل حقيقي لـ ClickUp حول استخدام أدواتنا لجعل إدارة المشروع أكثر بساطة. ✨
اعتادت جيس ماسون، مؤسسة The Yarnpreneur Society + Academy على استخدام 20 لوحة Trello، وملاحظات ما بعد الملصقات، ومجموعة من تقنيات وأدوات جدولة المشاريع المنفصلة لإدارة أعمالها. وقد وجدت أن الأمور قد تفلت من بين يديها وأن التعامل مع كل هذه المشاريع المختلفة لإدارة المشاريع "كان أكبر مضيعة للوقت"
ثم اتجهت إلى ClickUp. وباعتبارها شخصًا يحب التخطيط وكتابة كل شيء وجدولة كل شيء تنفيذ المشروع على طريقتها الخاصة، كان ClickUp منقذًا لها. إن قابلية تخصيص قوالب ClickUp ولوحات معلومات الجدول الزمني للمشروع تعني أنها "ليست عالقة مع هيكلية شخص آخر" وأنها "قادرة على المضي قدمًا في المشاريع بشكل أسهل بكثير"
إذن كيف تستخدم جيس ClickUp مع فريقها؟
تنقسم الأقسام الأربعة - العمليات والتسويق والاحتفاظ بالعملاء وإنشاء محتوى الدورة التدريبية - إلى أربعة مساحات مختلفة. وتتميز كل مساحة بحالات مخصصة تعكس دورات حياة المشروع ومستوى التفاصيل التي يحتاجها كل قسم. بالنسبة لجميع المساحات الخاصة بها، تستخدم جيس وفريقها تواريخ الاستحقاق والأولويات والعلامات لتسليط الضوء على ما هو مهم أثناء تبسيط تبعيات المهام.
المكافأة: جرّب استخدام تطبيق المخطط الرقمي لجدول مشروعك!
الاستفادة من ClickUp لتلبية احتياجات جدول مشروعك الخاص
الآن بعد أن تعرفت على كيفية إنشاء جدول زمني للمشروع، فأنت في طريقك إلى تنفيذ مشروع ناجح من البداية إلى النهاية. اتبع الدليل المكون من ست خطوات أعلاه لضمان عدم تفويت أي خطوة!
من تحديد نطاق المشروع لجدول مشروعك الزمني إلى تحديد المهام ووضع جدول زمني، ستجد أن أفضل الخيارات هي تلك التي تتيح للفرق العمل في بيئة تعاونية. باستخدام القوالب الصحيحة وأدوات جدولة المشروع الصحيحة، سيكون لديك كل شيء لإنشاء جدول زمني فعال للمشروع. جرّب ClickUp اليوم لتتحكم في عملية جدولة مشروعك ليس فقط لتحقيق أهدافك، بل لتحطيمها! من لوحات المعلومات والعروض المختلفة لجعل تتبع التقدم المحرز في جدول مشروعك أسهل، سيكون لديك ما تحتاجه لإتمام خطة المشروع. 🤩

